


 本文通过一个Vue案例展示了如何创建动态选项卡切换功能。首先,构建静态UI结构和样式,然后重构为Vue模板语法,利用数据驱动实现事件绑定和逻辑控制。最后,通过声明式编程实现基于Vue的数据绑定和条件渲染,实现选项卡内容的切换。代码中包括了HTML结构、CSS样式以及Vue实例,详细说明了每个部分的作用。
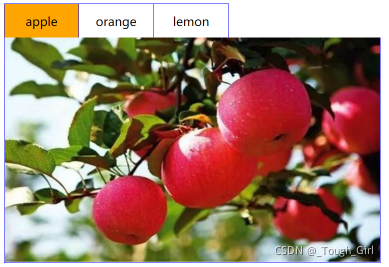
Vue案例:Tab选项卡
效果: 可以实现切换功能。
实现步骤:
(1)实现静态 UI 效果
- 用传统的方式实现标签结构和样式。
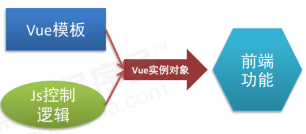
(2)基于数据重构 UI 效果
- 将静态的结构和样式重构为基于 Vue 模板语法的形式。
- 处理事件绑定和 js 控制逻辑。
(3)声明式编程
- 模板的结构和最终显示的效果基本一致。
代码:
<!DOCTYPE html>
<html lang="en">

<head>
    <meta charset="UTF-8">
    <title>选项卡案例</title>
    <style>
        .tab ul {
            overflow: hidden;
            padding: 0;
            margin: 0;
        }

        .tab ul li {
            box-sizing: border-box;
            padding: 0;
            float: left;
            width: 100px;
            height: 45px;
            line-height: 45px;
            list-style: none;
            text-align: center;
            border-top: 1px solid blue;
            border-right: 1px solid blue;
            cursor: pointer;
        }

        .tab ul li:first-child {
            border-left: 1px solid blue;
        }

        .tab ul li.active {
            background-color: orange;
        }

        .tab div {
            width: 500px;
            height: 300px;
            display: none;
            text-align: center;
            font-size: 30px;
            line-height: 300px;
            border: 1px solid blue;
            border-top: 0px;
        }

        .tab div.current {
            display: block;
        }
    </style>
</head>

<body>
    <div id="app">
        <div class="tab">
            <ul>
                <li v-on:click='change(index)' :class='currentIndex == index ? "active" : ""' :key='item.id'
                    v-for='(item, index) in list'>
                    {{item.title}}
                 </li>
            </ul>
            <div v-bind:class='currentIndex == index ? "current" : ""' v-bind:key='item.id'
                v-for='(item, index) in list'>
                <img v-bind:src="item.path" alt="">
            </div>
        </div>
    </div>

    <script src="js/vue.js"></script>
    <script>
        var vm = new Vue({
            el: '#app',
            data: {
                // 选项卡当前的索引
                currentIndex: 0,
                list: [{
                    id: 1,
                    title: 'apple',
                    path: 'img/apple.png'
                }, {
                    id: 2,
                    title: 'orange',
                    path: 'img/orange.png'
                }, {
                    id: 3,
                    title: 'lemon',
                    path: 'img/lemon.png'
                }]
            },
            methods: {
                change: function (index) {
                    // 在这里实现选项卡切换操作:本质就是操作类名
                    // 如何操作类名?就是通过currentIndex
                    this.currentIndex = index;
                }
            }
        });
    </script>
</body>

</html>


 被折叠的 条评论
为什么被折叠?
被折叠的 条评论
为什么被折叠?
 到【灌水乐园】发言


