


 本文详细介绍了React Native中SectionList组件的使用方法,通过实例展示了如何实现数据分组及刷新控制,适合初学者掌握SectionList的基本操作。
自学React-native (第五天)-- SectionList 学习
1.前言
SectionList组件使用方式和FlatList十分相似,不同点仅仅是实现了分组的功能:
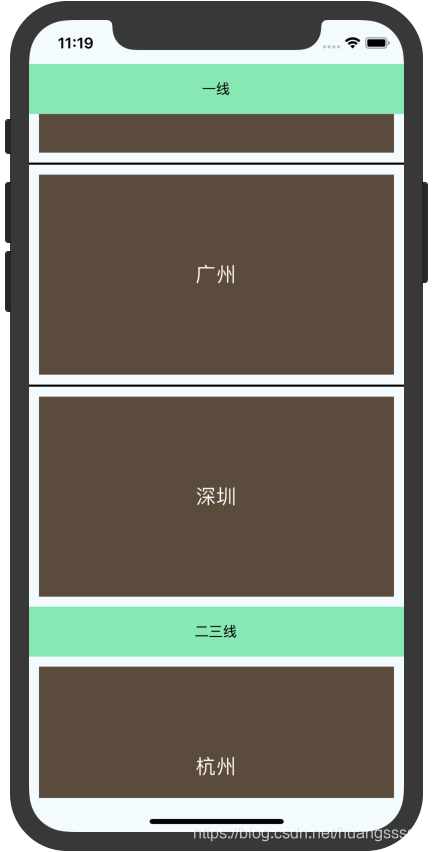
如上图所示,城市名处于不同的分组中,分组栏的标题在上滑到顶端时将会粘附在顶端直到下一个标题被划到顶部为止。
2. 代码阅读
/**
 * Sample React Native App
 * https://github.com/facebook/react-native
 *
 * @format
 * @flow
 * @lint-ignore-every XPLATJSCOPYRIGHT1
 */

import React, { Component } from 'react';
import { Platform, StyleSheet, Text, View, SectionList, RefreshControl, SafeAreaView } from 'react-native';


const CITY_NAMES = [{ data: ["北京", "上海", "广州", "深圳"], title: "一线" }, { data: ["杭州", "苏州", "成都", "武汉", "郑州"], title: "二三线" }];
export default class App extends Component {
  constructor(props) {
    super(props);
    this.state = {
      isLoading: false
    };
  }

  _renderItem = (data) => {
    return (
      <View style={styles.item}>
        <Text style={styles.text}>{data.item}</Text>
      </View>
    );
  }

  _renderSectionHeader = ({ section }) => {
    return <View style={styles.sectionHeader}><Text>{section.title}</Text></View>
  }

  _keyExtractor = (item, index) => item;

  loadData = () => {
    this.setState({
      isLoading: true
    });
    setTimeout(() => {
      this.setState({
        isLoading: false
      });
    }, 2000);
  }

  render() {
    return (
      <View style={styles.container}>
        <SafeAreaView>
          <SectionList
            sections={CITY_NAMES}
            renderItem={(data) => this._renderItem(data)}
            renderSectionHeader={(data) => this._renderSectionHeader(data)}
            keyExtractor={this._keyExtractor}
            ItemSeparatorComponent={() => <View style={styles.separator}></View>}

            refreshControl={
              <RefreshControl
                colors={["red", "green"]}
                refreshing={this.state.isLoading}
                onRefresh={() => {
                  this.loadData();
                }}
              >
              </RefreshControl>
            }
          >


          </SectionList>
        </SafeAreaView>
      </View>
    );
  }
}

const styles = StyleSheet.create({
  container: {
    flex: 1,
    // justifyContent: 'center',
    // alignItems: 'center',
    backgroundColor: '#F5FCFF',
  },
  text: {
    color: "#ffffff",
    fontSize: 20
  },
  item: {
    flex: 1,
    backgroundColor: "#654",
    alignItems: "center",
    justifyContent: "center",
    // padding:10,
    margin: 10,
    height: 200
  },
  sectionHeader: {
    height: 50,
    backgroundColor: "#93ebbc",
    justifyContent: "center",
    alignItems: "center"
  },
  welcome: {
    fontSize: 20,
    textAlign: 'center',
    margin: 10,
  },
  instructions: {
    textAlign: 'center',
    color: '#333333',
    marginBottom: 5,
  },
  separator: {
    flex: 1,
    backgroundColor: "black",
    height: 2
  }
});
- 这里可以看见sections就是该组建的数据源,数据源需要按照[{title:“xxx”,data:[xxx,xxx]}]这样的格式编写才能被识别。
- SafeAreaView的使用保证了在全面屏下显示的正常(否则标题会被刘海遮挡:()。
3.结语
SectionLIst是很FlatList非常相似的组件,在使用的时候请分清楚使用的场景不要用错造成效率上的损失。


 3118
3118

 被折叠的 条评论
为什么被折叠?
被折叠的 条评论
为什么被折叠?
 到【灌水乐园】发言


