


1 下载与安装
进入https://maven.apache.org/download.cgi
选择xxx-bin.zip包下载。下载完成后解压到指定目录。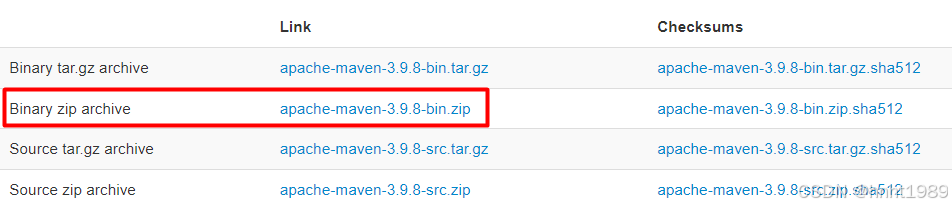
2 配置环境变量
2.1 windows
1)右下角搜索“环境变量“,选择”编辑系统环境变量“
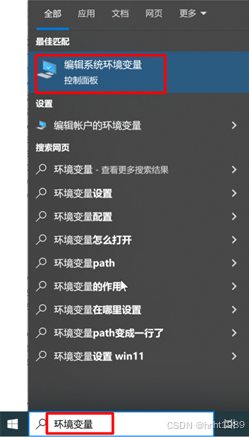
2)点击”环境变量“
3)系统变量中新建一个M2_HOME的变量,值为maven安装目录,到bin的上一级目录即可。
4)选择Path变量并点击编辑,新建,添加 %M2_HOME%\bin
5)打开命令行窗口,输入:mvn --version,查看是否正常返回版本号信息(若不生效,则尝试重启一下机器)
3 配置settings.xml
进入${安装目录}/conf,打开settings.xml文件。替换为如下内容:
<?xml version="1.0" encoding="UTF-8"?>
<settings xmlns="http://maven.apache.org/SETTINGS/1.0.0"
xmlns:xsi="http://www.w3.org/2001/XMLSchema-instance"
xsi:schemaLocation="http://maven.apache.org/SETTINGS/1.0.0 http://maven.apache.org/xsd/settings-1.0.0.xsd"><!-- 本地仓库地址(从服务下载的数据会放此本地目录) -->
<localRepository>D:/Repository</localRepository>
<mirrors>
<!-- 配置阿里镜像仓库 -->
<mirror>
<id>alimaven</id>
<name>aliyun maven</name>
<url>http://maven.aliyun.com/nexus/content/groups/public/</url>
<mirrorOf>central</mirrorOf>
</mirror>
</mirrors>
</settings>
4 多环境打包配置
在开发过程中,往往需要区分不同的环境,不同的环境需要的启动参数不尽相同。在spring boot项目中,启动文件放在工程的resource目录,针对不同的环境建立不同的文件:
- 开发环境:application-dev.properties
- 测试环境:application-test.properties
- 集成测试:application-sit.properties
- 验收环境:application-uat.properties
- 生产环境:application-prod.properties
打包时需要指定环境类型,只将指定的properties文件打包。maven提供了profile的能力,通过在打包时加上-P命令指定profile,如:mvn -Ptest clean install。具体配置步骤如下:
1)配置profile
在父pom中配置<profiles>节点,当-P参数指定如下的id值时,该profile将被执行。
<profiles>
<!-- 开发环境 -->
<profile>
<id>dev</id>
<!-- 不指定profile时默认取dev -->
<activation> <activeByDefault>true</activeByDefault> </activation>
<!-- 定义一个叫environment的属性,在打包的时候使用 -->
<properties> <environment>-dev</environment> </properties>
</profile>
<!-- 测试环境 -->
<profile>
<id>test</id>
<properties> <environment>-test</environment> </properties>
</profile>
<!-- 集成测试环境 -->
<profile>
<id>sit</id>
<properties> <environment>-sit</environment> </properties>
</profile>
<!-- 用户验收环境 -->
<profile>
<id>uat</id>
<properties> <environment>-uat</environment> </properties>
</profile>
<!-- 生产环境 -->
<profile>
<id>prod</id>
<properties> <environment>-prod</environment> </properties>
</profile>
</profiles>
2)构建打包配置
在父pom中的<build>节点下配置resources,先将所有application-*.properties排除掉,然后再根据profile中的environment属性将指定的properties文件包含进来。
<sourceDirectory>src/main/java</sourceDirectory>
<testSourceDirectory>src/test/java</testSourceDirectory>
<resources>
<resource>
<directory>src/main/resources</directory>
<excludes>
<exclude>application-*.properties</exclude>
</excludes>
<includes>
<include>/</include>
</includes>
</resource>
<resource>
<directory>src/main/resources</directory>
<includes>
<!-- 取在profile中定义的environment属性值 -->
<include>application${environment}.properties</include>
</includes>
</resource>
</resources>
<testResources>
<testResource>
<directory>src/test/resources</directory>
</testResource>
</testResources>


 25万+
25万+

 被折叠的 条评论
为什么被折叠?
被折叠的 条评论
为什么被折叠?
 到【灌水乐园】发言


