


1、参考
2、实践、截图
2.1、Node.js 中,我们可以通过 http 模块创建一个简单的路由,如下实例:
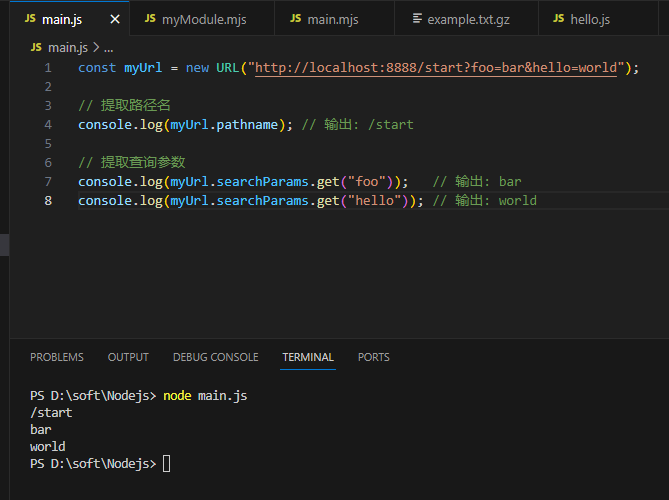
const http = require('http');

// 创建服务器并定义路由
const server = http.createServer((req, res) => {
  const { url, method } = req;

  if (url === '/' && method === 'GET') {
    res.writeHead(200, { 'Content-Type': 'text/plain' });
    res.end('Home Page');
  } else if (url === '/about' && method === 'GET') {
    res.writeHead(200, { 'Content-Type': 'text/plain' });
    res.end('About Page');
  } else {
    res.writeHead(404, { 'Content-Type': 'text/plain' });
    res.end('404 Not Found');
  }
});

server.listen(3000, () => {
  console.log('Server is running on http://localhost:3000');
});


2.2、请求参数
2.3、例子
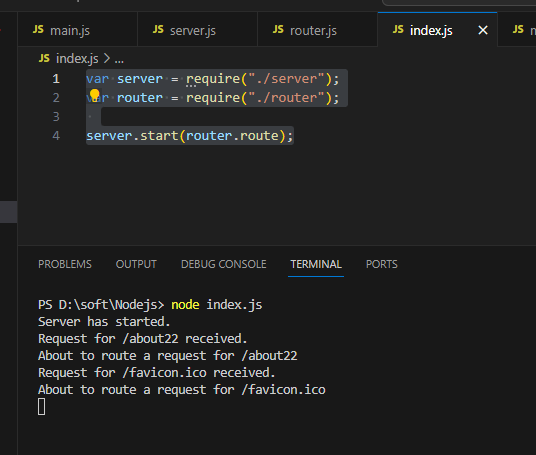
现在我们可以来编写路由了,建立一个名为 router.js 的文件,添加以下内容:
function route(pathname) {
    console.log("About to route a request for " + pathname);
  }

  // 导出了 route 函数
  exports.route = route;
现在我们来给 http 模块的 onRequest() 函数加上一些逻辑,用来找出浏览器请求的 URL 路径:
// server.js
const http = require("http"); // 引入 Node.js 的 http 模块,用于创建服务器
const { URL } = require("url"); // 从 url 模块引入 URL 构造函数

// 定义并导出 start 函数,用于启动服务器
function start(route) {
  // 定义 onRequest 函数,处理每个请求
  function onRequest(request, response) {
    // 使用 URL 构造函数解析请求路径
    const pathname = new URL(request.url, `http://${request.headers.host}`).pathname;
    console.log(`Request for ${pathname} received.`); // 打印请求路径

    route(pathname); // 调用路由函数处理路径

    // 设置响应头和响应内容
    response.writeHead(200, { "Content-Type": "text/plain" });
    response.write("Hello World");
    response.end();
  }

  // 创建服务器并监听指定端口
  http.createServer(onRequest).listen(8888);
  console.log("Server has started.");
}

// 导出 start 函数供其他模块使用
module.exports.start = start;
同时,我们会相应扩展 index.js,使得路由函数可以被注入到服务器中:
var server = require("./server");
var router = require("./router");

server.start(router.route);
现在启动应用(node index.js,始终记得这个命令行),随后请求一个URL,你将会看到应用输出相应的信息,这表明我们的 HTTP 服务器已经在使用路由模块了,并会将请求的路径传递给路由:
![]()
然后在浏览器地址栏输入http://localhost:8888/about22
浏览器中显示

VS Code中显示:
2.4、使用 Express 进行路由
基本路由
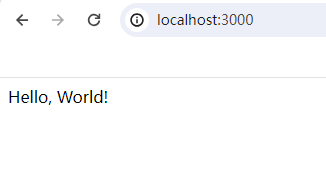
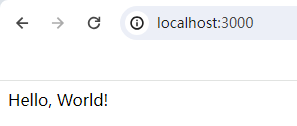
以下是一个简单的 Express 应用程序,展示了如何设置基本的路由,这个文件index.js:
const express = require('express');
const app = express();
const port = 3000;
// 定义一个 GET 路由
app.get('/', (req, res) => {
res.send('Hello, World!');
});
// 定义一个 POST 路由
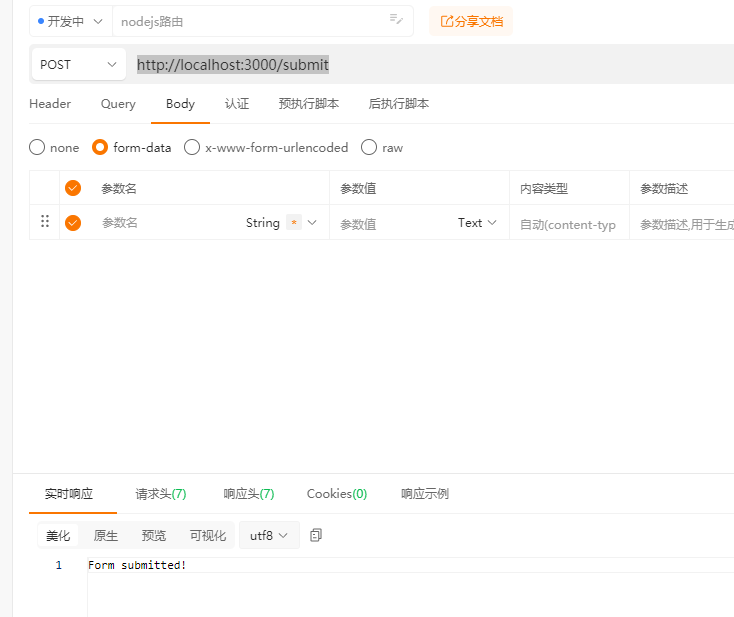
app.post('/submit', (req, res) => {
res.send('Form submitted!');
});
// 启动服务器
app.listen(port, () => {
console.log(`Server is running on http://localhost:${port}`);
});使用node index.js启动
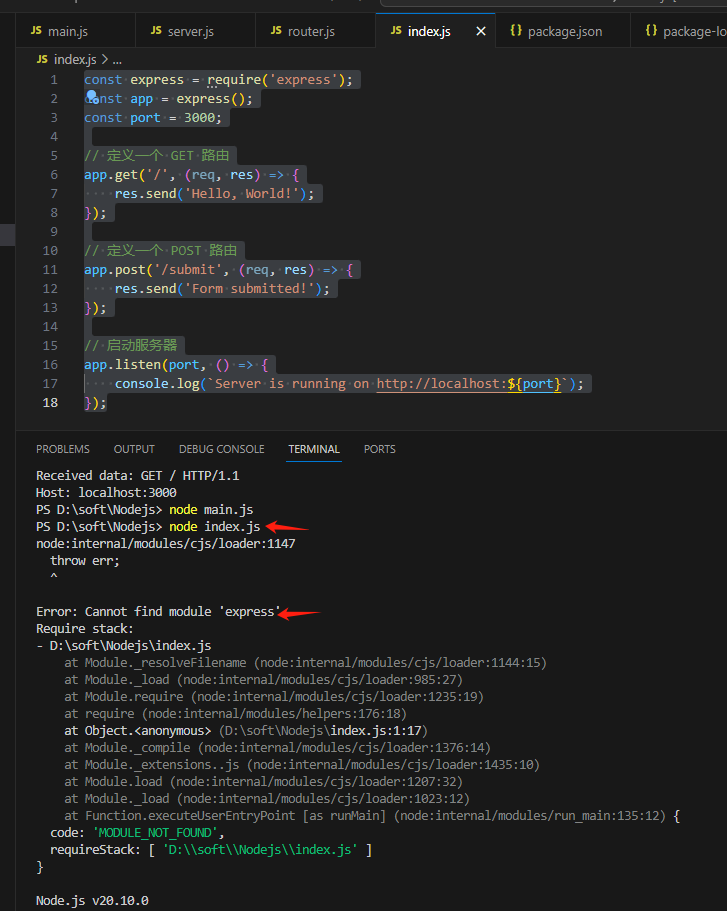
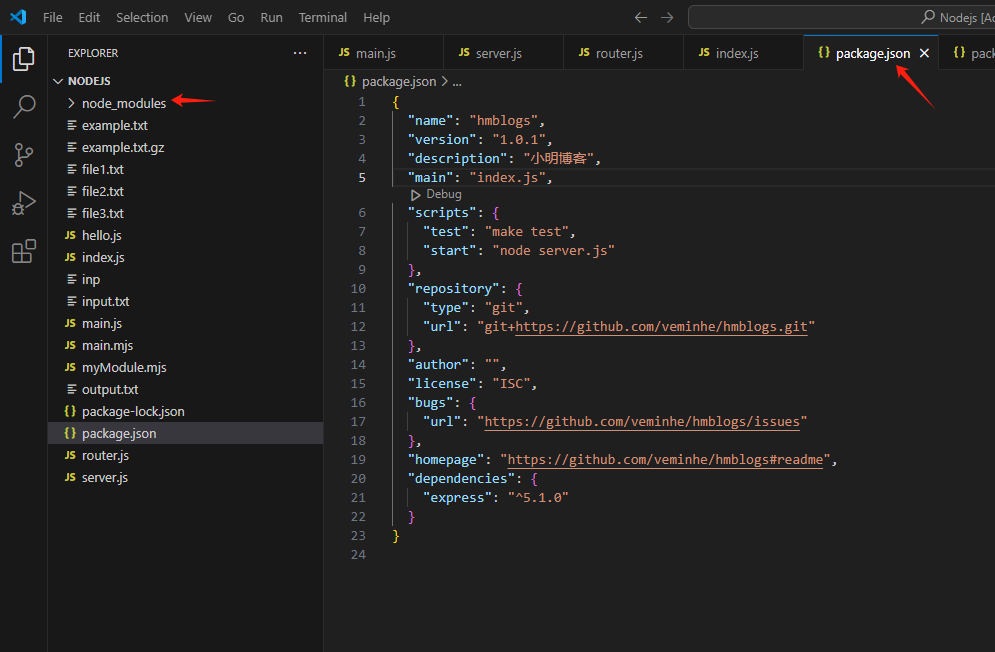
要先安装express,执行
npm install express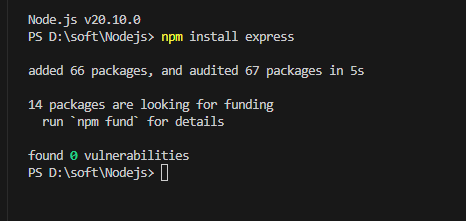
可以发现此时package.json文件增加了内容,多了node_modules目录
使用node index.js启动后,浏览器访问http://localhost:3000/
使用Post方式,访问http://localhost:3000/submit
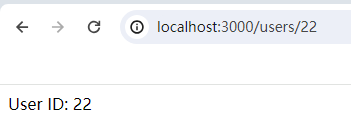
动态路由
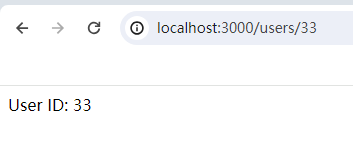
动态路由允许你使用参数化的 URL。
例如,你可以定义一个路由来处理 /users/:id,其中 :id 是一个动态参数。
app.get('/users/:id', (req, res) => {
    const userId = req.params.id;
    res.send(`User ID: ${userId}`);
});
路由参数
Express 允许你从 URL 中提取参数,并通过 req.params 对象访问这些参数。
app.get('/users/:id', (req, res) => {
    const userId = req.params.id;
    res.send(`User ID: ${userId}`);
});

app.get('/search/:query', (req, res) => {
    const query = req.params.query;
    res.send(`Search query: ${query}`);
});
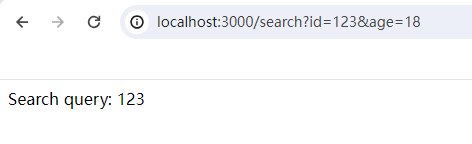
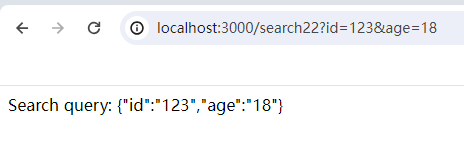
查询参数
查询参数是 URL 中的键值对,通常用于传递额外的信息。你可以通过 req.query 对象访问查询参数。
const express = require('express');
const app = express();
const port = 3000;

app.get('/search', (req, res) => {
    const query = req.query.id;
    res.send(`Search query: ${query}`);
});

app.get('/search22', (req, res) => {
    const query = req.query;
    res.send(`Search query: ${JSON.stringify(query)}`);
});

// 启动服务器
app.listen(port, () => {
    console.log(`Server is running on http://localhost:${port}`);
});
路由中间件
路由中间件是在处理请求之前或之后执行的函数。你可以使用中间件来处理诸如身份验证、日志记录等任务。
const express = require('express');
const app = express();
const port = 3000;

// 日志记录中间件
const logger = (req, res, next) => {
    console.log(`Request Type: ${req.method} ${req.url}`);
    next();
};

// 使用中间件
app.use(logger);

app.get('/', (req, res) => {
    res.send('Hello, World!');
});

// 启动服务器
app.listen(port, () => {
    console.log(`Server is running on http://localhost:${port}`);
});

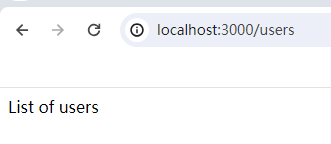
路由分组
为了更好地组织代码,你可以使用路由分组。Express 提供了 express.Router 对象,可以用来创建模块化的、可挂载的路由处理程序。
const express = require('express');
const app = express();
const port = 3000;

// 创建一个路由器实例
const userRouter = express.Router();

// 定义用户相关的路由
userRouter.get('/', (req, res) => {
    res.send('List of users');
});

userRouter.get('/:id', (req, res) => {
    const userId = req.params.id;
    res.send(`User ID: ${userId}`);
});

// 挂载用户路由器
app.use('/users', userRouter);

// 启动服务器
app.listen(port, () => {
    console.log(`Server is running on http://localhost:${port}`);
});


 496
496

 被折叠的 条评论
为什么被折叠?
被折叠的 条评论
为什么被折叠?
 到【灌水乐园】发言


