


应用场景:
一个测试类中有多个测试方法,想执行其中的几个测试方法,比如执行其中的p0级别的case,或者资金相关的case,可以通过设置测试分组来实现
实现步骤:
1,对测试方法分组
通过@Test注解的group属性来实现分组,可以设置1个或多个值
格式:@Test(groups = {"P0","Cash"})
package com.course.testng;
import org.testng.annotations.AfterClass;
import org.testng.annotations.BeforeClass;
import org.testng.annotations.Test;
public class group {
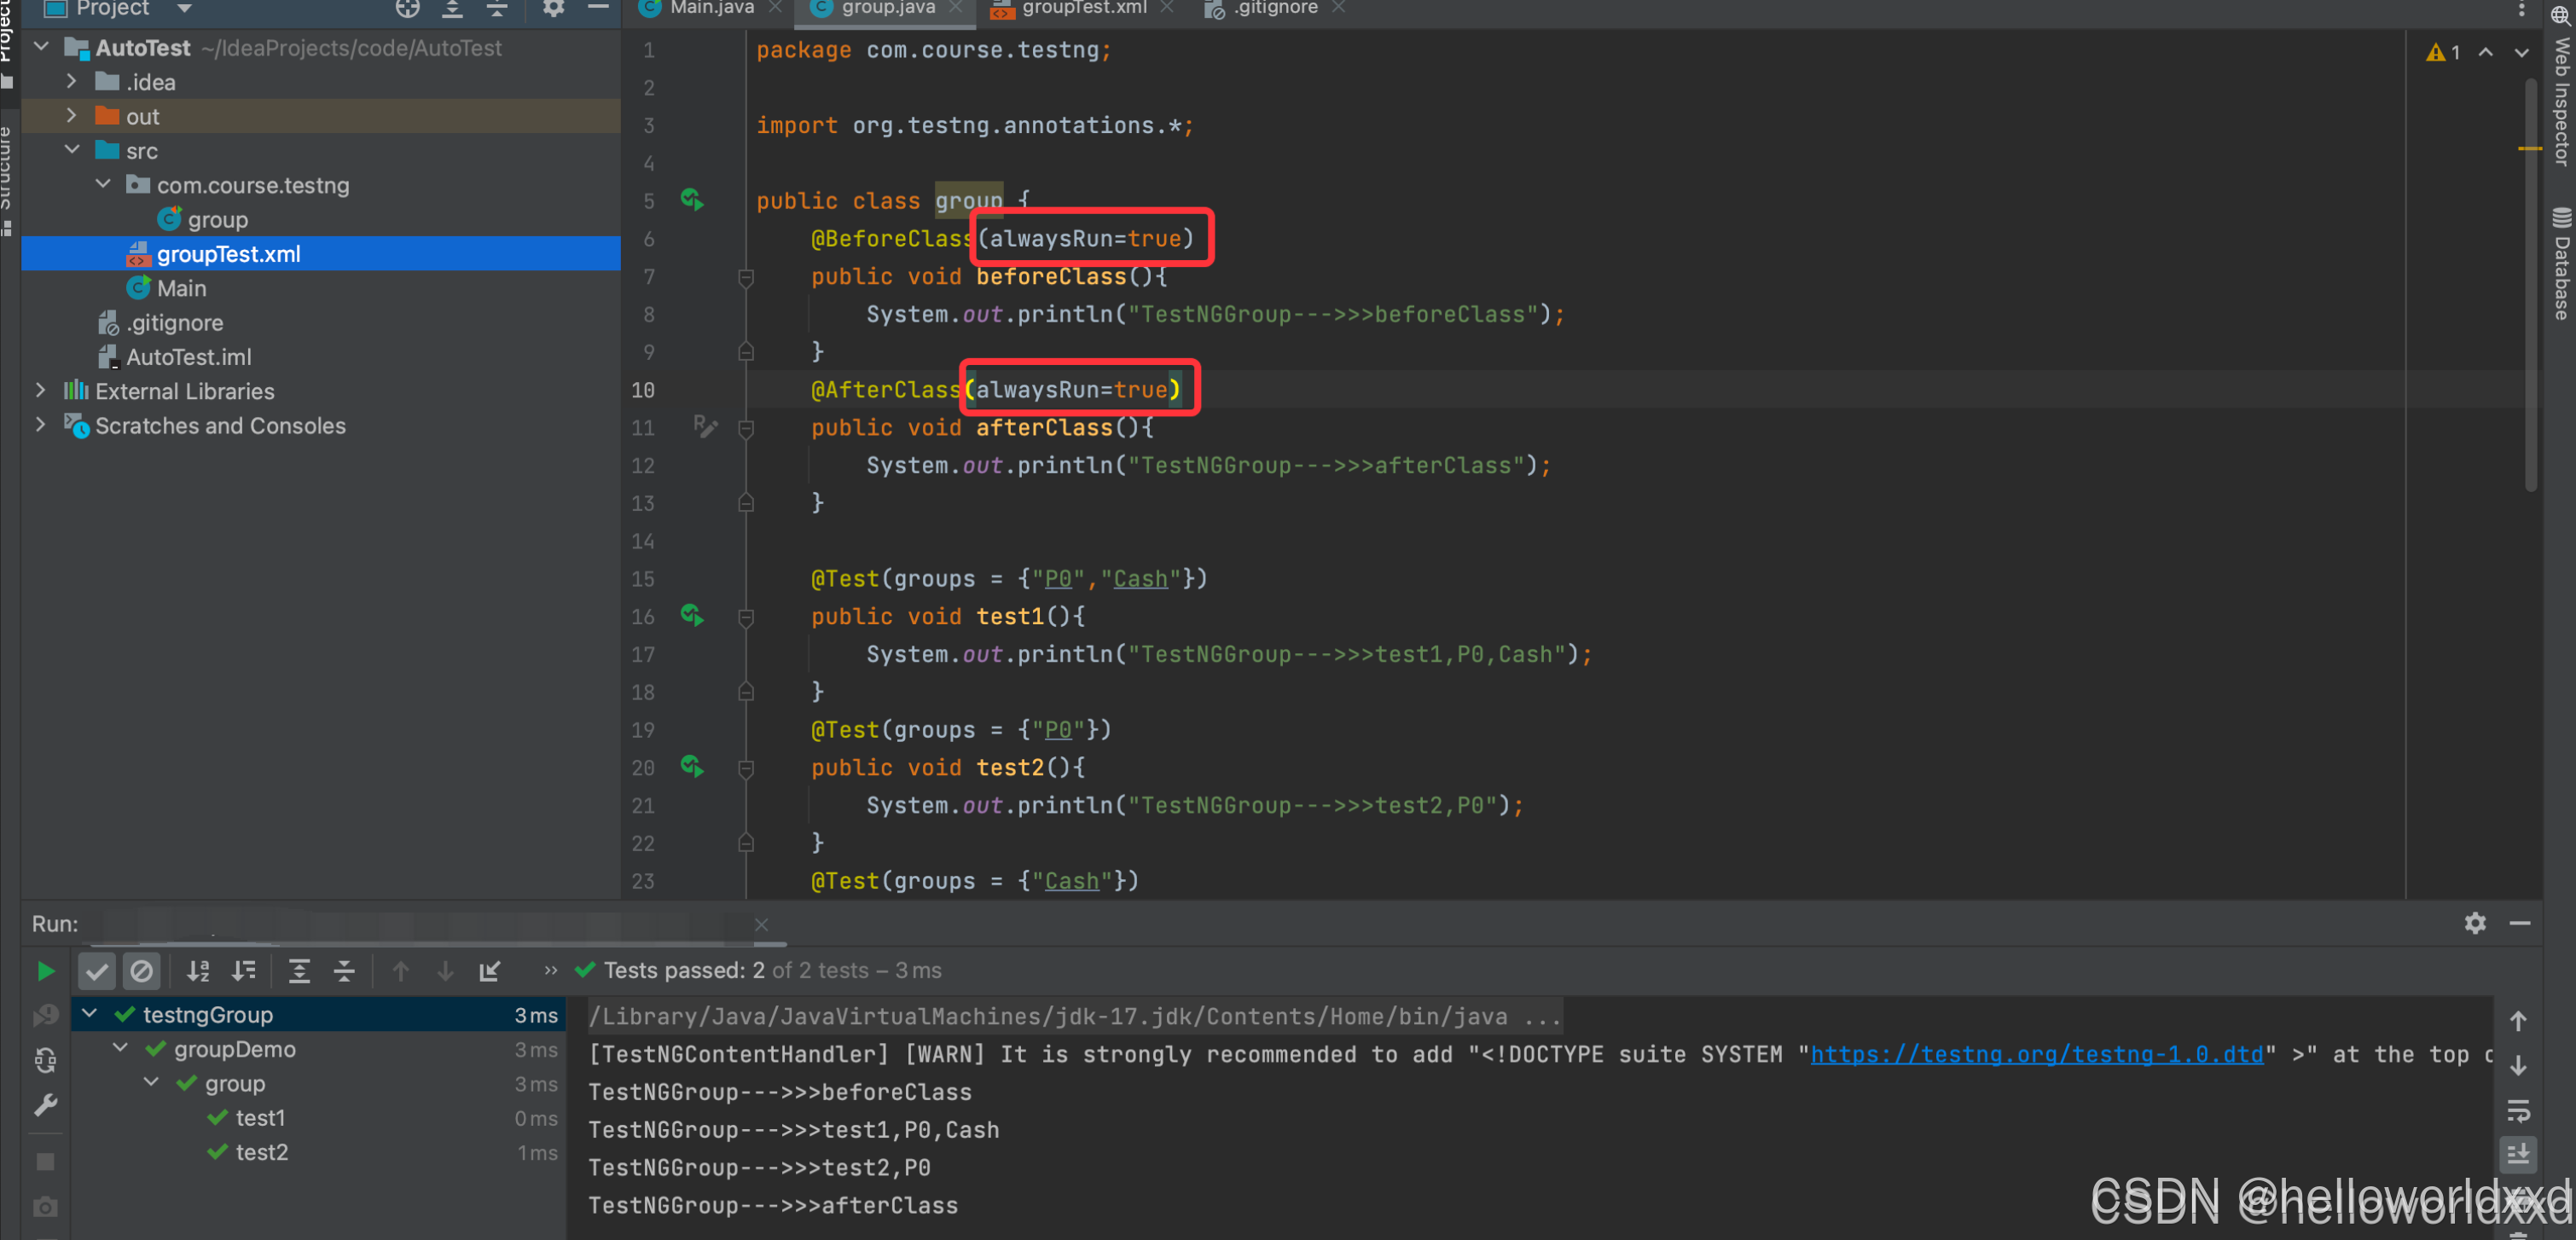
@BeforeClass
public void beforeClass(){
System.out.println("TestNGGroup--->>>beforeClass");
}
@AfterClass
public void afterClass(){
System.out.println("TestNGGroup--->>>afterClass");
}
@Test(groups = {"P0","Cash"})
public void test1(){
System.out.println("TestNGGroup--->>>test1,P0,Cash");
}
@Test(groups = {"P0"})
public void test2(){
System.out.println("TestNGGroup--->>>test2,P0");
}
@Test(groups = {"Cash"})
public void test3(){
System.out.println("TestNGGroup--->>>test3,Cash");
}
@Test(groups = {"P1"})
public void test4(){
System.out.println("TestNGGroup--->>>test4,P1");
}
}
2,执行分组后的测试方法
通过xml文件进行配置管理
<groups> <run><include>3个标签嵌套,<include>标签name属性说明需要分组测试的分组名
<classes>标签name属性说明需要执行的测试类
如果执行整个包下的类,可以用<packages>标签,name属性值为包路径.*
<?xml version="1.0" encoding="UTF-8" ?>
<suite name="testngGroup">
    <test name="groupDemo">
        <groups>
            <run>
                <include name="P0"></include>
            </run>
        </groups>
<!--        <classes>-->
<!--            <class name="com.course.testng.group"></class>-->
<!--        </classes>-->
        <packages>
            <package name="com.course.testng.*"></package>
        </packages>
    </test>
</suite>
右键执行该xml文件,执行结果如下:
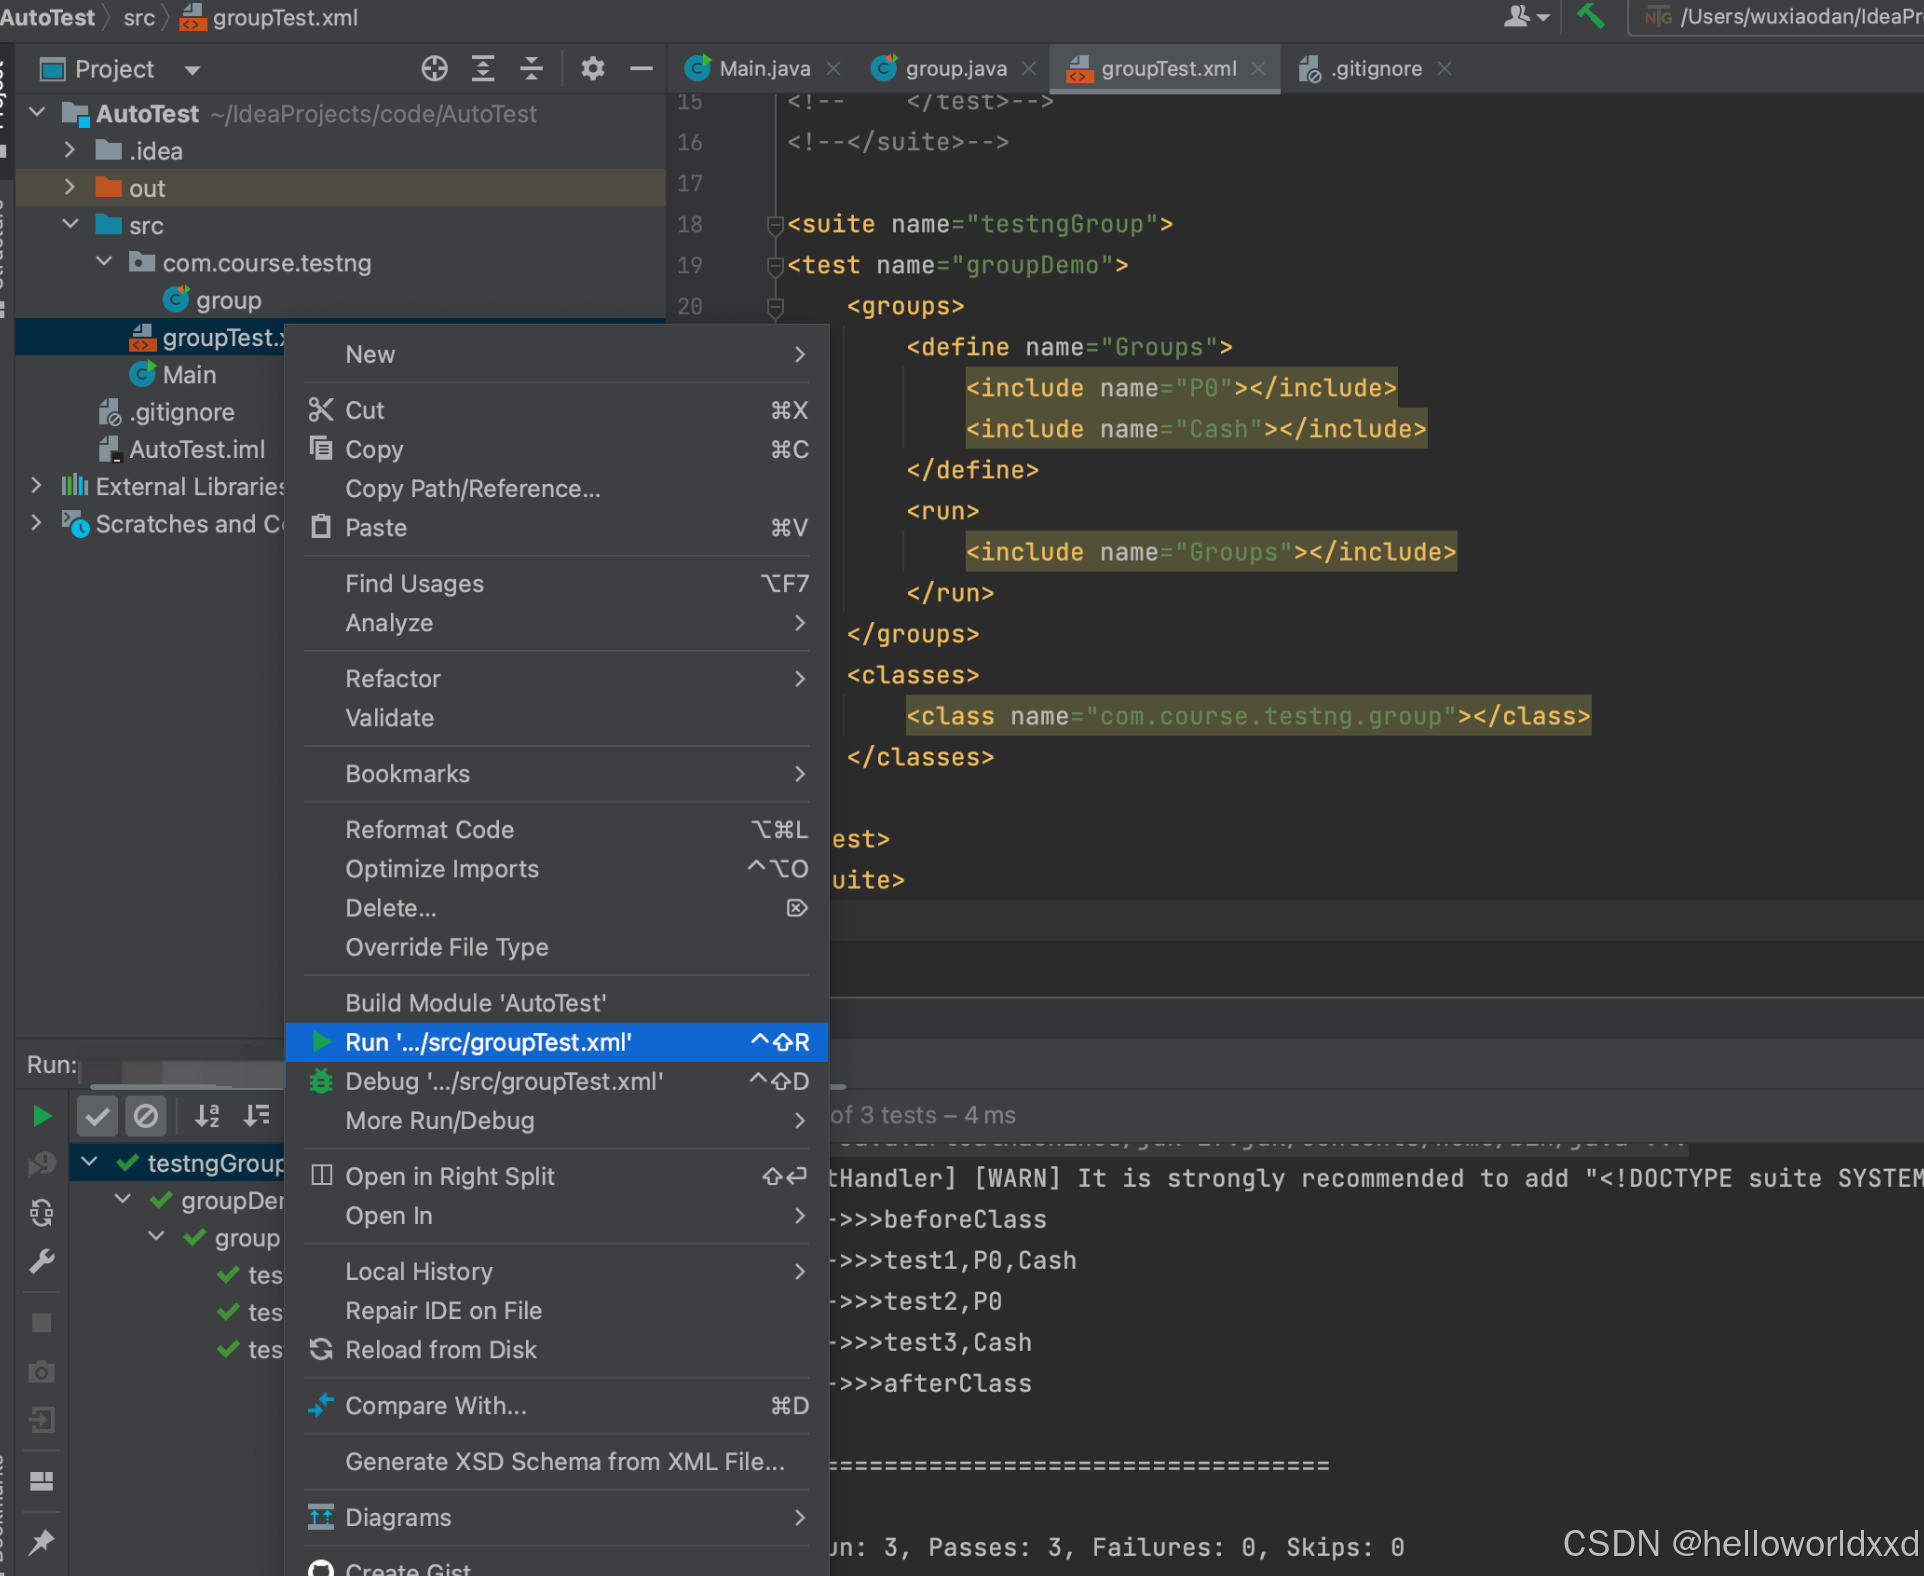

从以上结果可以看出:
<groups>name属性包含了P0的测试方法都被执行到了;
@BeforeClass和@AfterClass注解的方法未表明分组,未被执行到,如果需要执行的话可以加上属性alwaysRun=true,格式:@BeforeClass(alwaysRun=true)
运行结果如下:
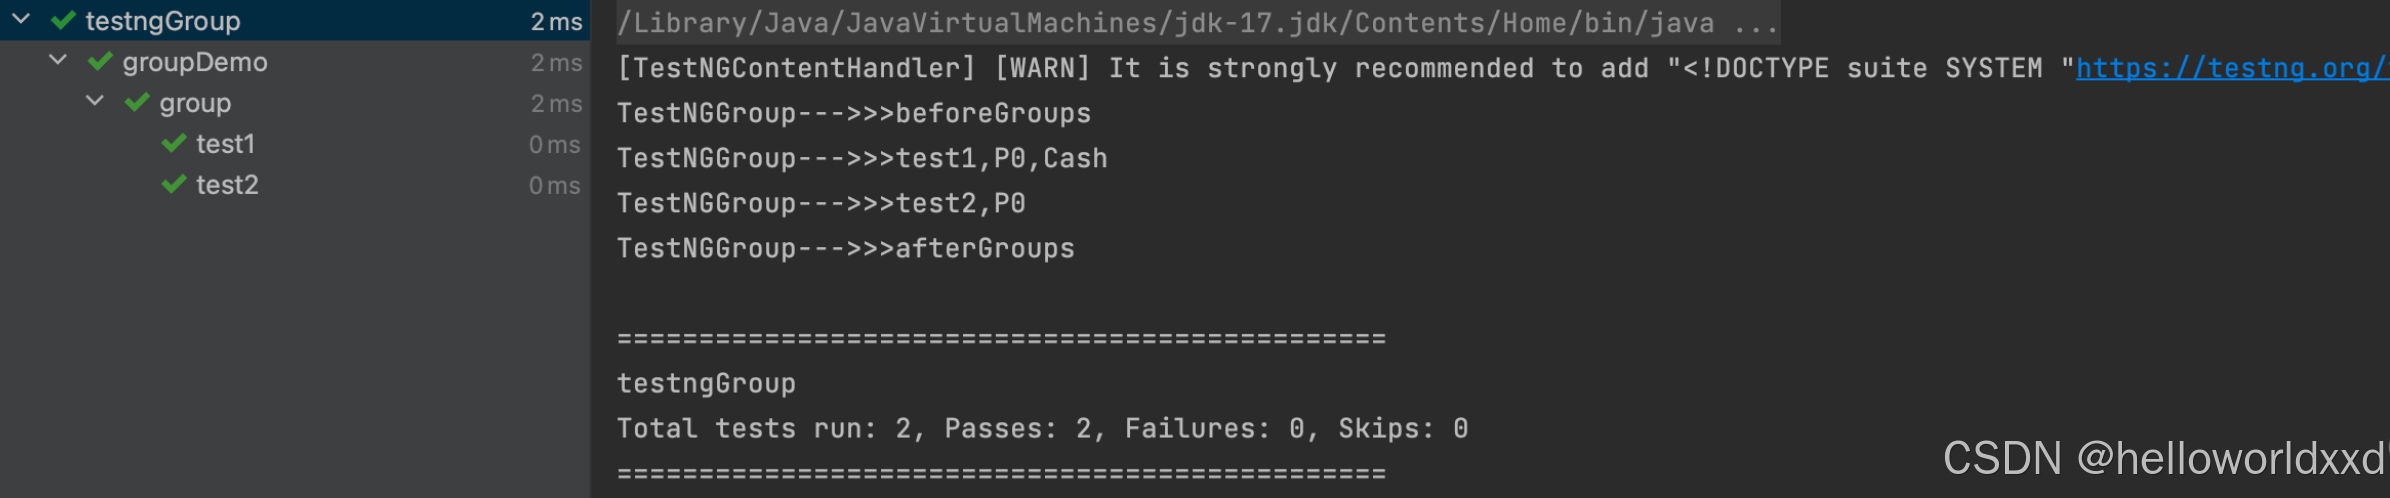
3,执行多个分组
<define> <include>标签嵌套使用,用法如下
<?xml version="1.0" encoding="UTF-8" ?>
<suite name="testngGroup">
<test name="groupDemo">
    <groups>
        <define name="Groups">
            <include name="P0"></include>
            <include name="Cash"></include>
        </define>
        <run>
            <include name="Groups"></include>
        </run>
    </groups>
    <classes>
        <class name="com.course.testng.group"></class>
    </classes>

</test>
</suite>
执行结果如下:

以上结果执行了分组是“P0”和“Cash”相关的测试方法
4,@BeforeGroup和@AfterGroup标签
如果在特定的分组执行前后运行某方法,可以用@BeforeGroup和@BeforeGroup标签,格式:@BeforeGroup("分组名")
package com.course.testng;

import org.testng.annotations.*;

public class group {

    @Test(groups = {"P0","Cash"})
    public void test1(){
        System.out.println("TestNGGroup--->>>test1,P0,Cash");
    }
    @Test(groups = {"P0"})
    public void test2(){
        System.out.println("TestNGGroup--->>>test2,P0");
    }
    @Test(groups = {"Cash"})
    public void test3(){
        System.out.println("TestNGGroup--->>>test3,Cash");
    }
    @Test(groups = {"P1"})
    public void test4(){
        System.out.println("TestNGGroup--->>>test4,P1");
    }
    @BeforeGroups("P0")
    public void beforeGroups(){
        System.out.println("TestNGGroup--->>>beforeGroups");
    }
    @AfterGroups("P0")
    public void afterGroups(){
        System.out.println("TestNGGroup--->>>afterGroups");
    }
}
遇到的问题
过程中发现项目右键没有添加xml文件的选择;
添加方法如下:
setting—》File and Code Templates,点击添加按钮
Name:写入XML File;
Extension:写入xml
下面输入框:写入<?xml version="1.0" encoding="UTF-8" ?>
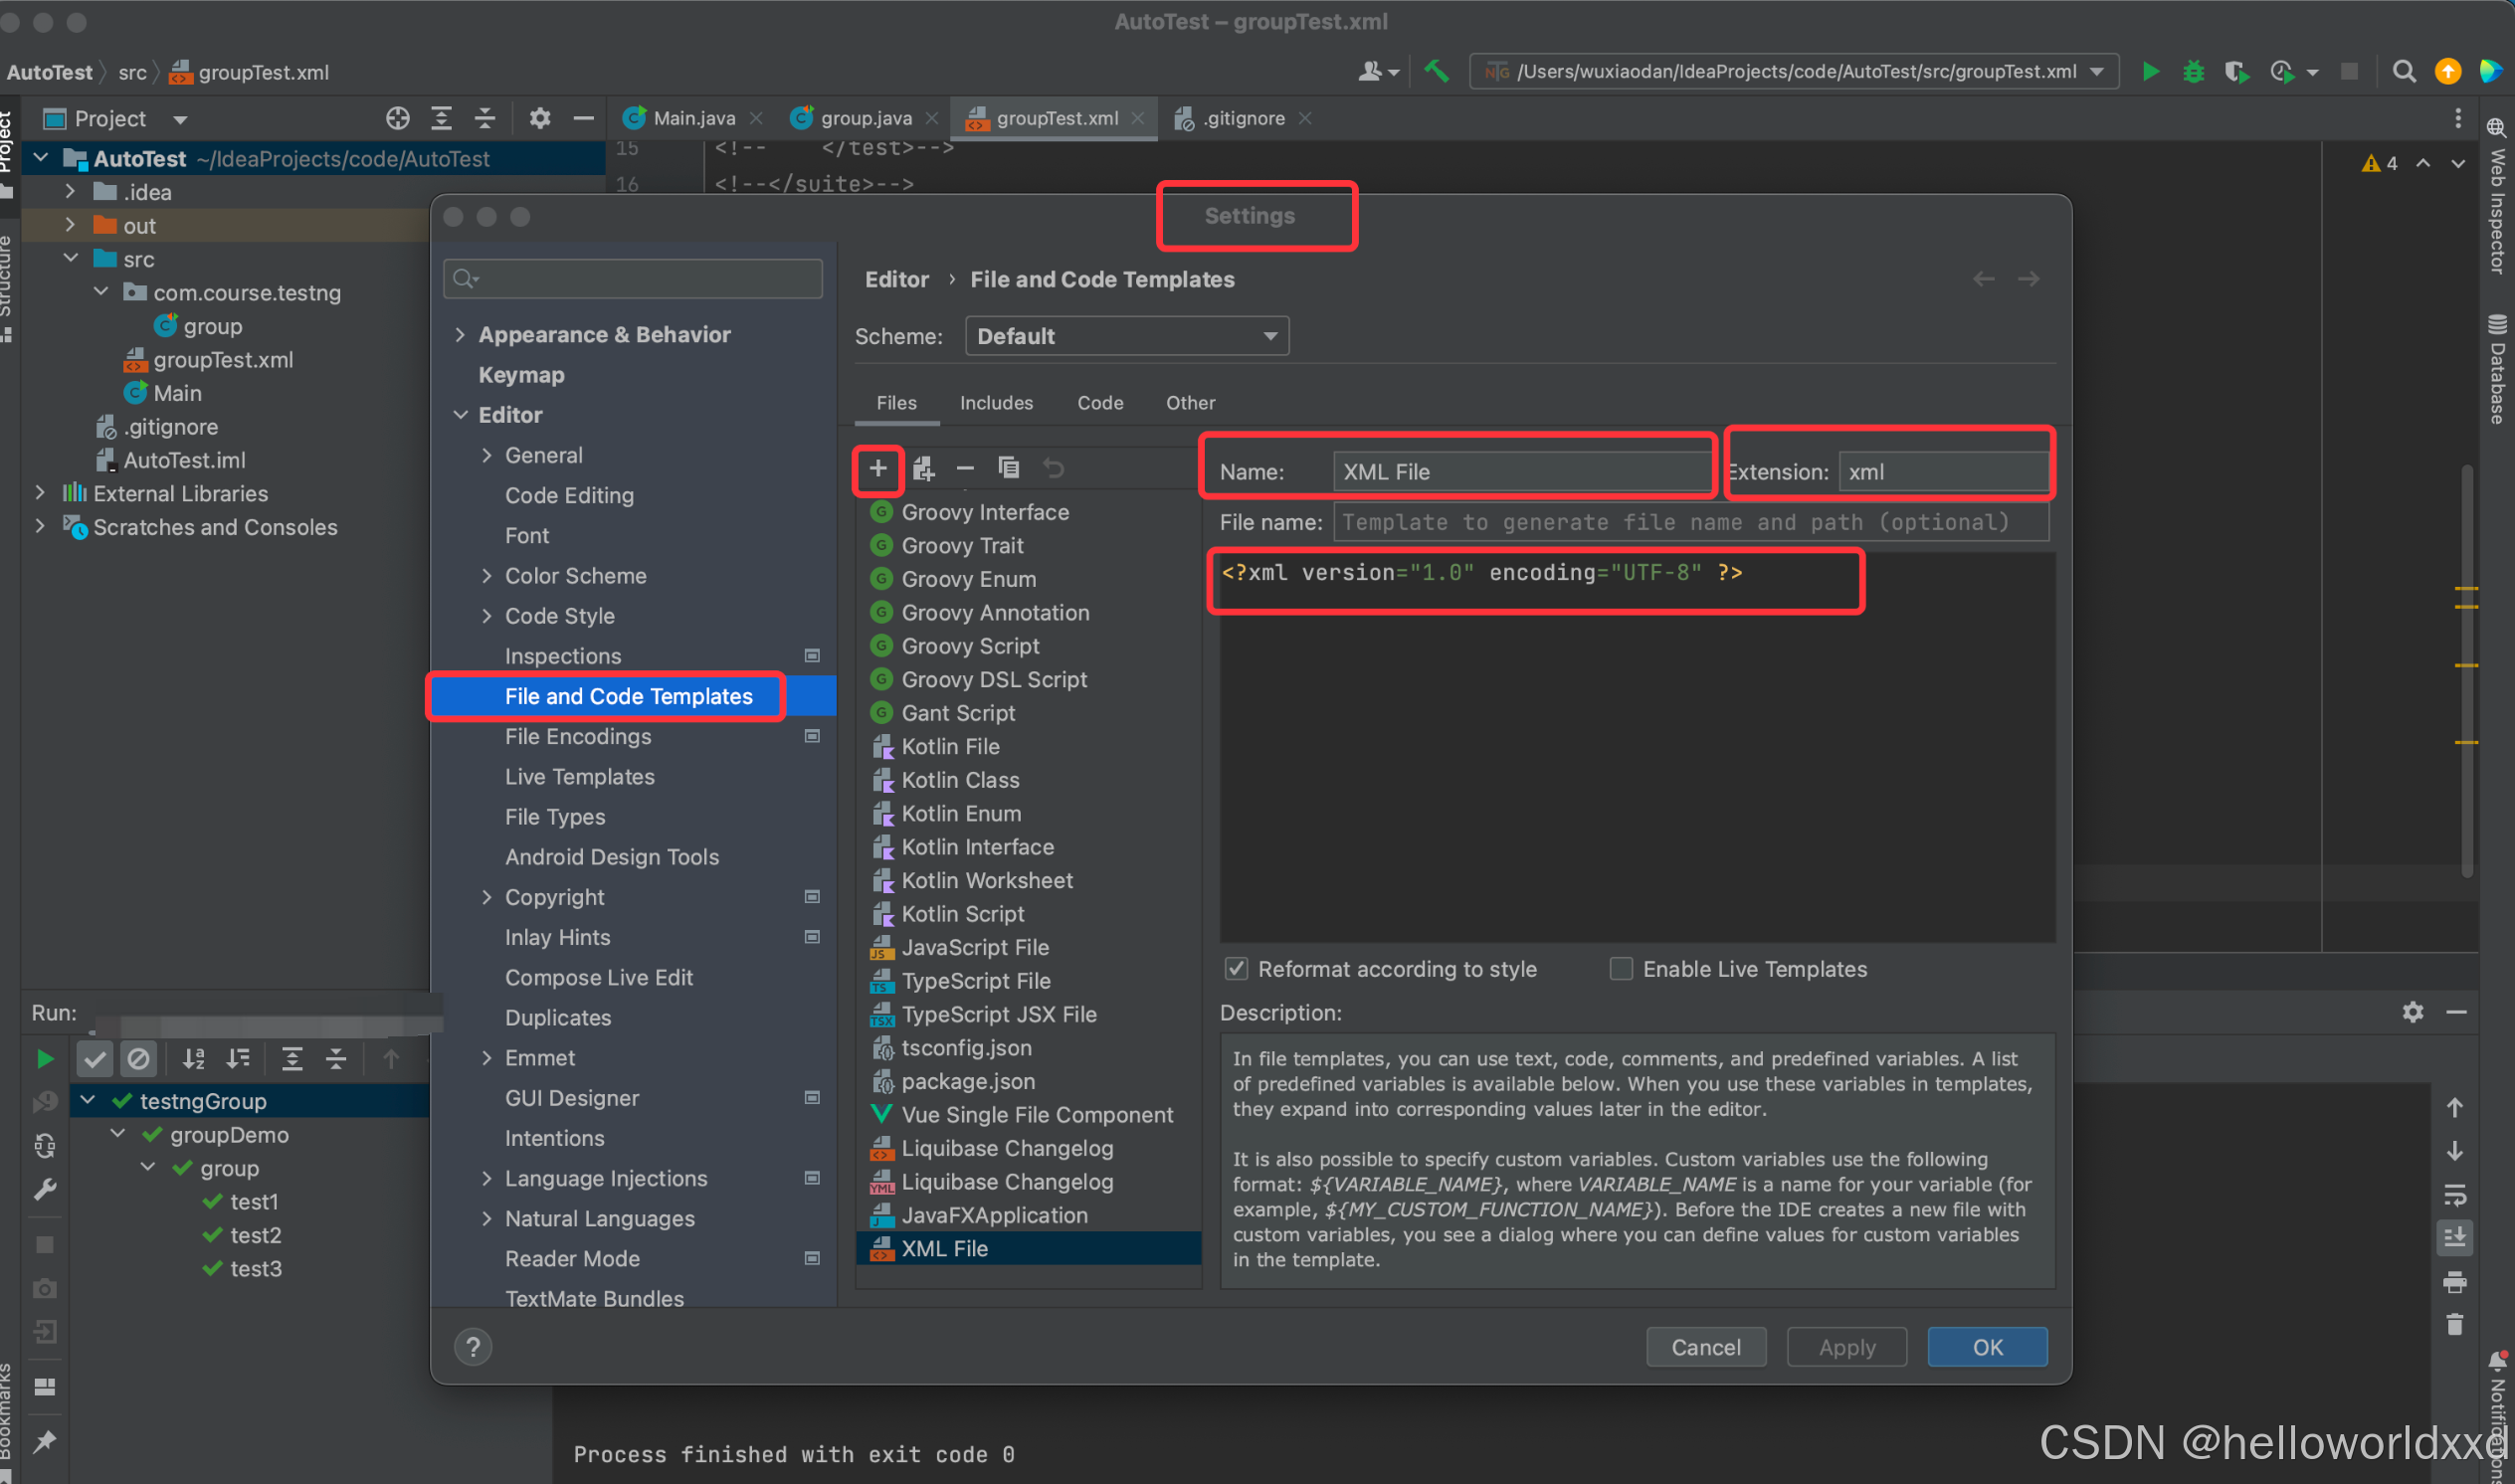
以上操作后,右键添加就有xml file了


 497
497

 被折叠的 条评论
为什么被折叠?
被折叠的 条评论
为什么被折叠?
 到【灌水乐园】发言


