


 本文介绍如何使用Travis CI、Codecov和Maven自动收集并上传测试覆盖率报告。通过配置pom.xml中的jacoco插件和.travis.yml中的Codecov上传指令,实现每次构建后自动更新Codecov上的覆盖率信息。
首先贴一下官网的快速开始
Getting Started
Basic Usage
-
Sign up on codecov.io and link either your GitHub, GitLab, or Bitbucket account.
-
Once linked, Codecov will automatically sync all the repositories to which you have access.
-
You can click on an organization from your dashboard to access its repositories, or navigate directly to a specific repository using:
https://codecov.io/<repo-provider>/<account-name>/<repo-name>. Example:https://codecov.io/gh/scrapy/scrapy.
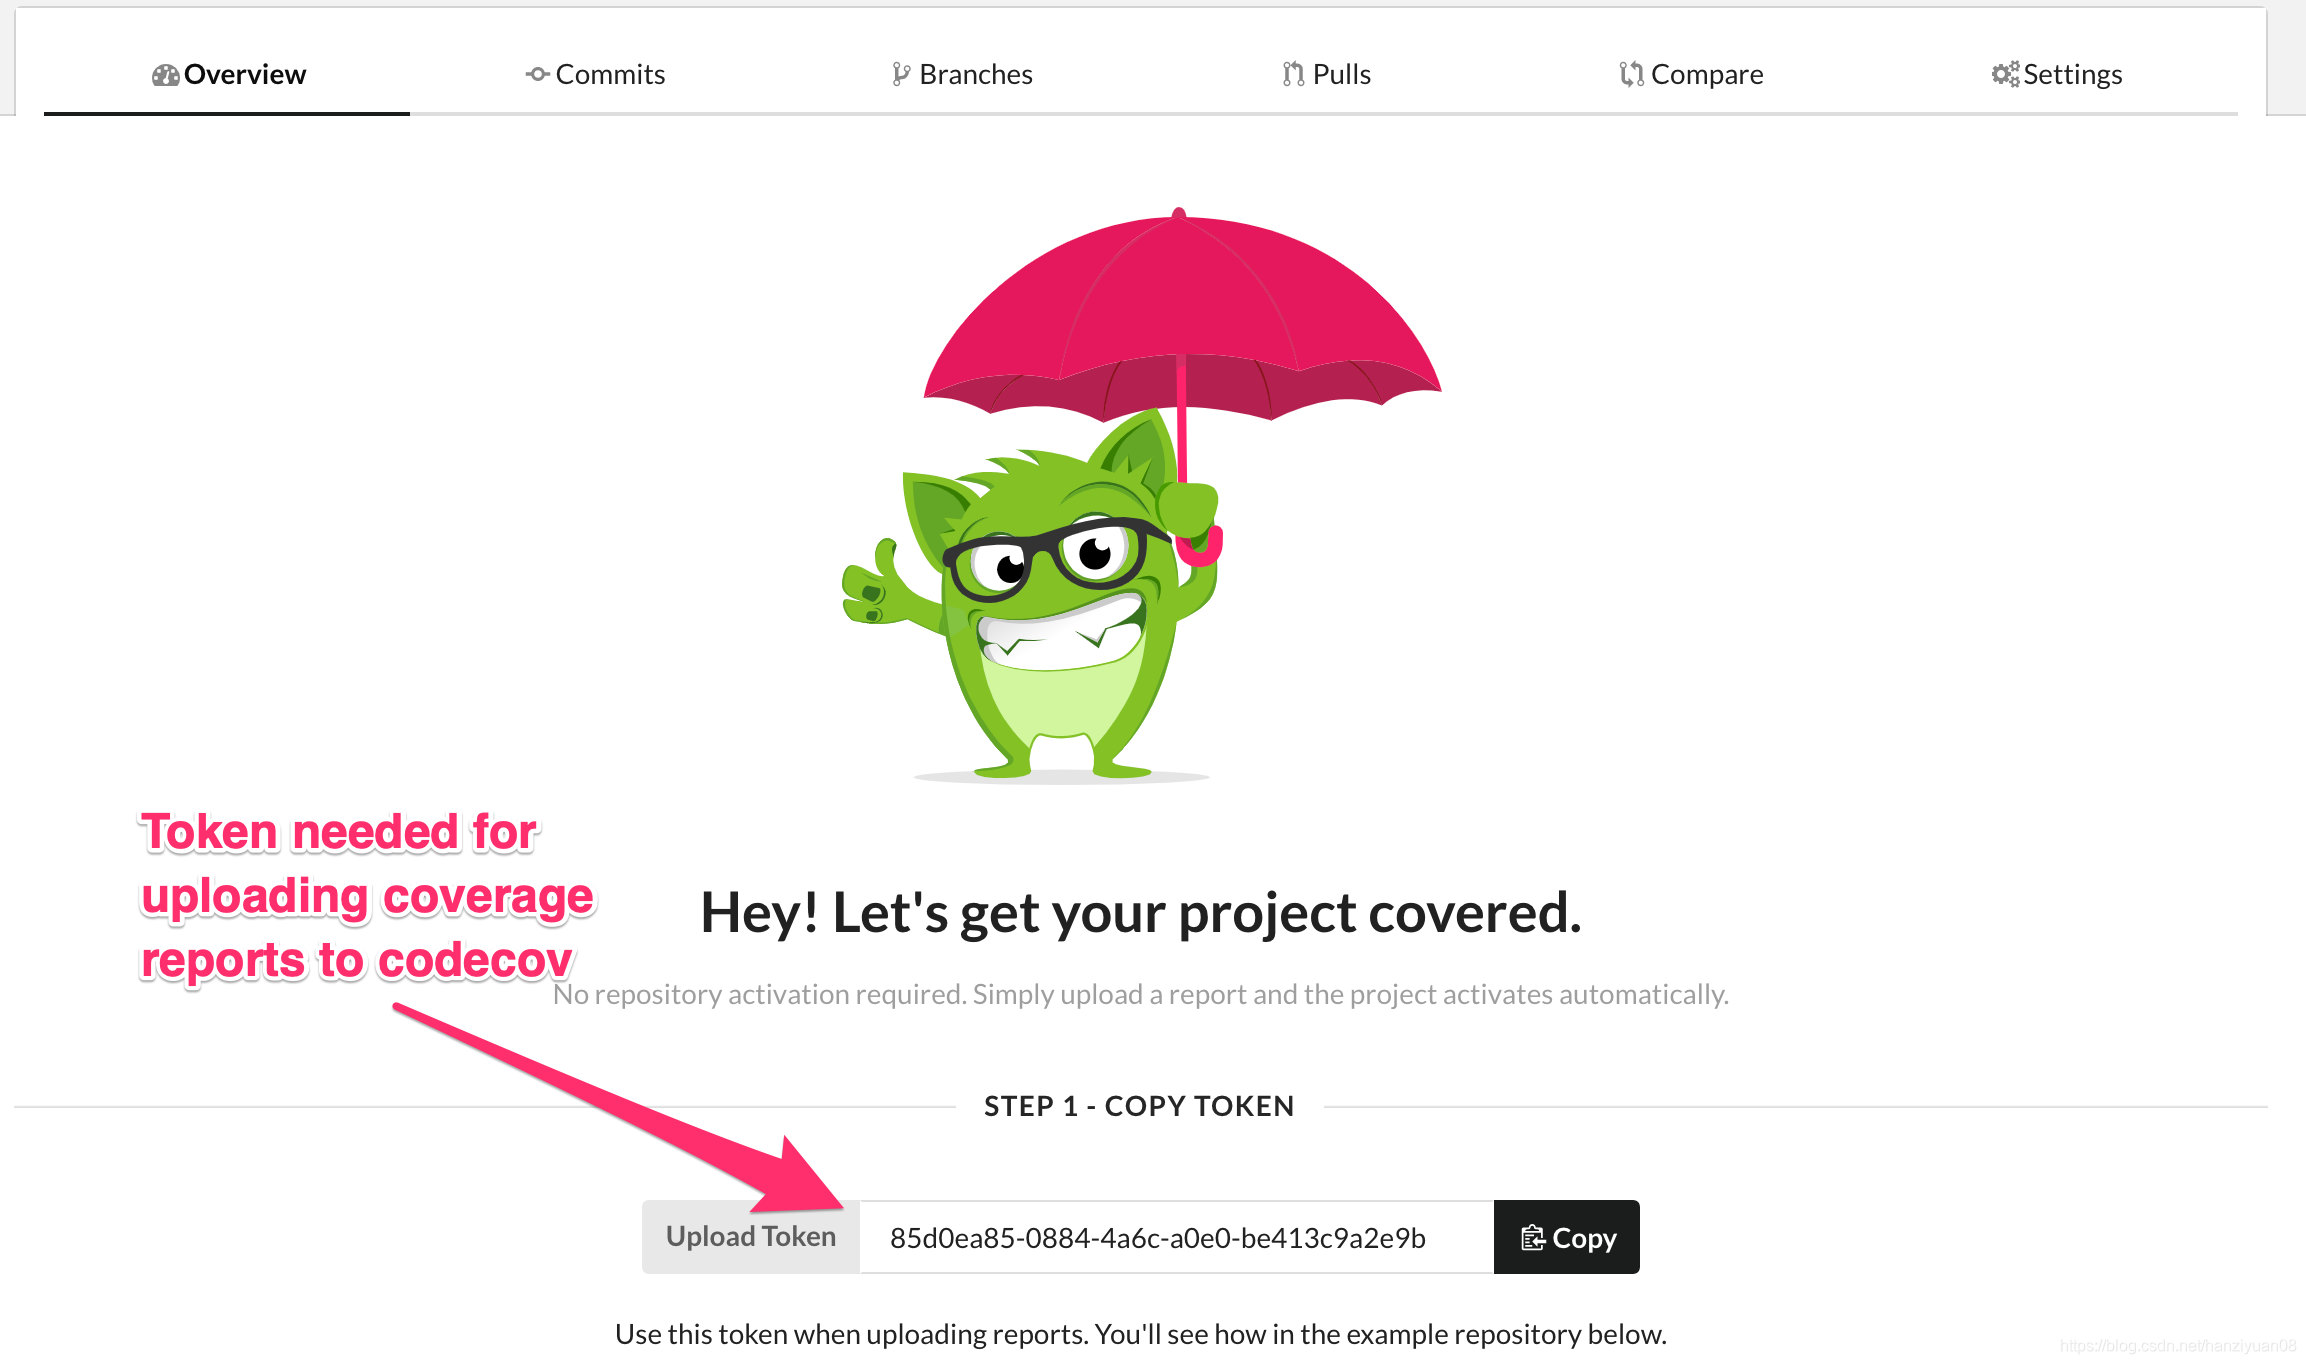
A repository that has no coverage reports uploaded to codecov. Note that the repository upload token is displayed here.
A repository that has no coverage reports uploaded to codecov. Note that the repository upload token is displayed here.
-
Use the bash uploader and a repository upload token, to upload a coverage report to Codecov.
-
Navigate back to the repository on Codecov, and you should see coverage information.
可以看见原理很简单,主动把测试覆盖率的报告通过Codecov提供的脚本(bash uploader)上传就行了(bash <(curl -s https://codecov.io/bash)),如果是私有仓库,则上传的时候需要添加上图中的token。
下面说说Travis + Codecov + Maven
这里需要利用到一个覆盖率的包jacoco:
- pom.xml添加jacoco的maven插件:
<plugin>
    <groupId>org.jacoco</groupId>
    <artifactId>jacoco-maven-plugin</artifactId>
    <version>0.7.9</version>
    <executions>
        <execution>
            <goals>
                <goal>prepare-agent</goal>
            </goals>
        </execution>
        <execution>
            <id>report</id>
            <phase>test</phase>
            <goals>
                <goal>report</goal>
            </goals>
        </execution>
    </executions>
</plugin>
.travis.yml增加codecov的上传配置:
language: java
after_success:
  - bash <(curl -s https://codecov.io/bash)
- 提交代码


 718
718

 被折叠的 条评论
为什么被折叠?
被折叠的 条评论
为什么被折叠?
 到【灌水乐园】发言


