


prometheus+consul 服务自动发现监控
搭建prometheus监控平台请参考:https://blog.youkuaiyun.com/han949417140/article/details/112345172
一、 简介
prometheus配置文件 prometheus.yml 里配置需要监听的服务时,是按服务名写死的,如果后面增加了节点或者组件信息,就得手动修改此配置,并重启 promethues;那么能否动态的监听微服务呢?Prometheus 提供了多种动态服务发现的功能,这里以 consul 为例。
二、引入 consul 的好处
在没有使用 consul 服务自动发现的时候,我们需要频繁对 Prometheus 配置文件进行修改,无疑给运维人员带来很大的负担。引入consul之后,只需要在consul中维护监控组件配置,prometheus就能够动态发现配置了。
三、Prometheus 支持的多种服务发现机制
#Prometheus数据源的配置主要分为静态配置和动态发现, 常用的为以下几类:
1)static_configs: #静态服务发现
2)file_sd_configs: #文件服务发现
3)dns_sd_configs: DNS #服务发现
4)kubernetes_sd_configs: #Kubernetes 服务发现
5)consul_sd_configs: Consul #服务发现
...

#在监控kubernetes的应用场景中,频繁更新的pod,svc,等等资源配置应该是最能体现Prometheus监控目标自动发现服务的好处
四、docker、docker-compose安装(已安装的可以忽略)
4.1 docker安装
# 阿里云 docker hub 镜像
export REGISTRY_MIRROR=https://registry.cn-hangzhou.aliyuncs.com
 # 卸载旧版本
yum remove -y docker \
docker-client \
docker-client-latest \
docker-ce-cli \
docker-common \
docker-latest \
docker-latest-logrotate \
docker-logrotate \
docker-selinux \
docker-engine-selinux \
docker-engine

# 设置 yum repository
yum install -y yum-utils \
device-mapper-persistent-data \
lvm2
yum-config-manager --add-repo http://mirrors.aliyun.com/docker-ce/linux/centos/docker-ce.repo

# 安装并启动 docker
yum install -y docker-ce-19.03.11 docker-ce-cli-19.03.11 containerd.io-1.2.13

mkdir /etc/docker || true

cat > /etc/docker/daemon.json <<EOF
{
  "registry-mirrors": ["${REGISTRY_MIRROR}"],
  "exec-opts": ["native.cgroupdriver=systemd"],
  "log-driver": "json-file",
  "log-opts": {
    "max-size": "100m"
  },
  "storage-driver": "overlay2",
  "storage-opts": [
    "overlay2.override_kernel_check=true"
  ]
}
EOF

mkdir -p /etc/systemd/system/docker.service.d

# Restart Docker
systemctl daemon-reload
systemctl enable docker
systemctl restart docker
4.2 docker-compose安装
- 下载docker-compose包并上传到linux下:
下载地址:https://download.youkuaiyun.com/download/han949417140/14801125 - 目录转移,权限
mv docker-compose-Linux-x86_64 /usr/local/bin/docker-compose
chomd -R 777 /usr/local/bin/docker-compose
五、基于 docker 的 consul 集群
- 这里使用 docker-compose 方式部署 consul 集群
cat > /data0/consul/docker-compose.yaml << \EOF
version: '2'
networks:
  byfn:

services:
  consul1:
    image: consul
    container_name: node1
    volumes:
      - /data0/consul/conf_with_acl:/consul/config
    command: agent -server -bootstrap-expect=3 -node=node1 -bind=0.0.0.0 -client=0.0.0.0 -config-dir=/consul/config
    networks:
      - byfn

  consul2:
    image: consul
    container_name: node2
    volumes:
      - /data0/consul/conf_with_acl:/consul/config
    command: agent -server -retry-join=node1 -node=node2 -bind=0.0.0.0 -client=0.0.0.0 -config-dir=/consul/config
    ports:
       - 8500:8500
    depends_on:
        - consul1
    networks:
      - byfn

  consul3:
    image: consul
    volumes:
      - /data0/consul/conf_with_acl:/consul/config
    container_name: node3
    command: agent -server -retry-join=node1 -node=node3 -bind=0.0.0.0 -client=0.0.0.0 -config-dir=/consul/config
    depends_on:
        - consul1
    networks:
      - byfn

  consul4:
    image: consul
    container_name: node4
    volumes:
      - /data0/consul/conf_with_acl:/consul/config
    command: agent -retry-join=node1 -node=ndoe4 -bind=0.0.0.0 -client=0.0.0.0 -ui -config-dir=/consul/config
    ports:
      - 8501:8500
    depends_on:
        - consul2
        - consul3
    networks:
      - byfn

  consul5:
    image: consul
    container_name: node5
    volumes:
      - /data0/consul/conf_without_acl:/consul/config
    command: agent -retry-join=node1 -node=ndoe5 -bind=0.0.0.0 -client=0.0.0.0 -ui -config-dir=/consul/config
    ports:
      - 8502:8500
    depends_on:
        - consul2
        - consul3
    networks:
      - byfn
EOF
- docker-compose启动consul服务
cd /data0/consul/
docker-compose up -d
- 浏览器访问consul webui
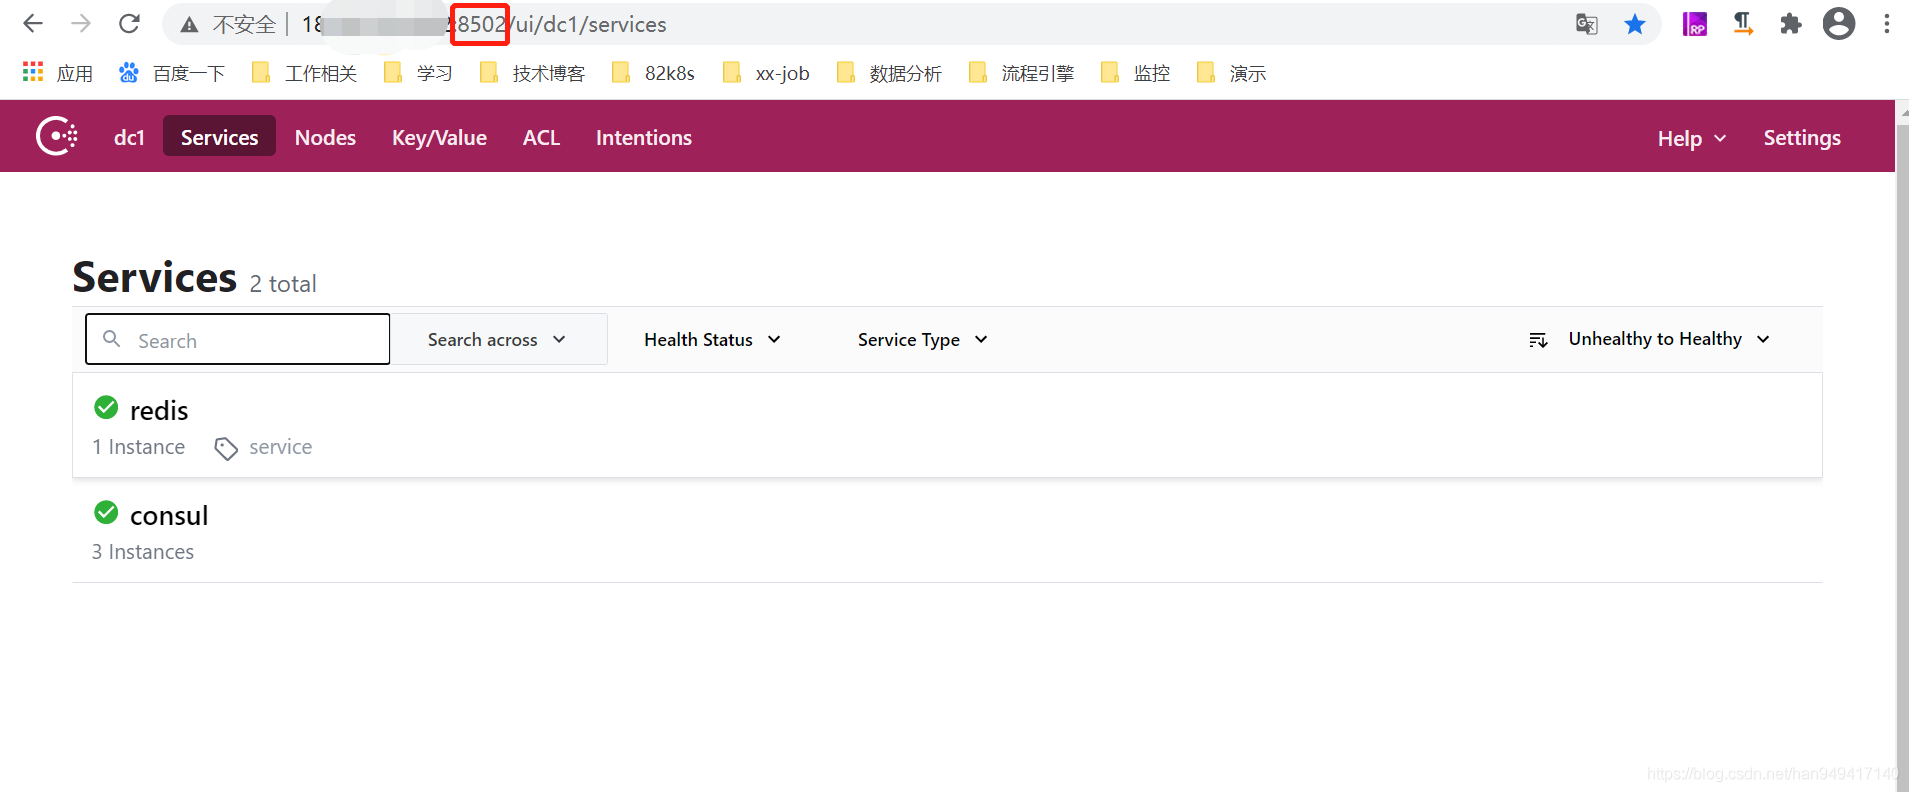
六、使用接口注册服务
# 注册服务
curl -X PUT -d '{"id": "redis","name": "redis","address": "182.92.219.202","port": 9121,"tags": ["service"],"checks": [{"http": "http://182.92.219.202:9121/","interval": "5s"}]}' http://182.92.219.202:8502/v1/agent/service/register

# 查询指定节点以及指定的服务信息
[root@iZ2zejaz33icbod2k4cvy6Z ~]# curl http://182.92.219.202:8500/v1/catalog/service/redis
[{"ID":"9d76becb-c557-e605-de13-a906ef32497c","Node":"ndoe5","Address":"172.20.0.6","Datacenter":"dc1","TaggedAddresses":{"lan":"172.20.0.6","lan_ipv4":"172.20.0.6","wan":"172.20.0.6","wan_ipv4":"172.20.0.6"},"NodeMeta":{"consul-network-segment":""},"ServiceKind":"","ServiceID":"redis","ServiceName":"redis","ServiceTags":["service"],"ServiceAddress":"182.92.219.202","ServiceTaggedAddresses":{"lan_ipv4":{"Address":"182.92.219.202","Port":9121},"wan_ipv4":{"Address":"182.92.219.202","Port":9121}},"ServiceWeights":{"Passing":1,"Warning":1},"ServiceMeta":{},"ServicePort":9121,"ServiceEnableTagOverride":false,"ServiceProxy":{"MeshGateway":{},"Expose":{}},"ServiceConnect":{},"CreateIndex":458,"ModifyIndex":458}][root@iZ2zejaz33icbod2k4cvy6Z ~]#


#删除指定服务 redis为要删除服务的id
curl -X PUT  http://182.92.219.202:8502/v1/agent/service/deregister/redis
七、修改 prometheus 使用 consul 服务发现
- prometheus添加consul监控
vi prometheus.yml
-----------------------------------------------------------------------------------------------------
	#新增如下配置
   - job_name: 'consul-prometheus'
     consul_sd_configs:
       - server: '182.92.219.202:8502'
         services: []
--------------------------------------------------------------------------------------------------------------
- 重启prometheus服务
#重启prometheus
 nohup /usr/local/Prometheus/prometheus --config.file=/usr/local/Prometheus/prometheus.yml &
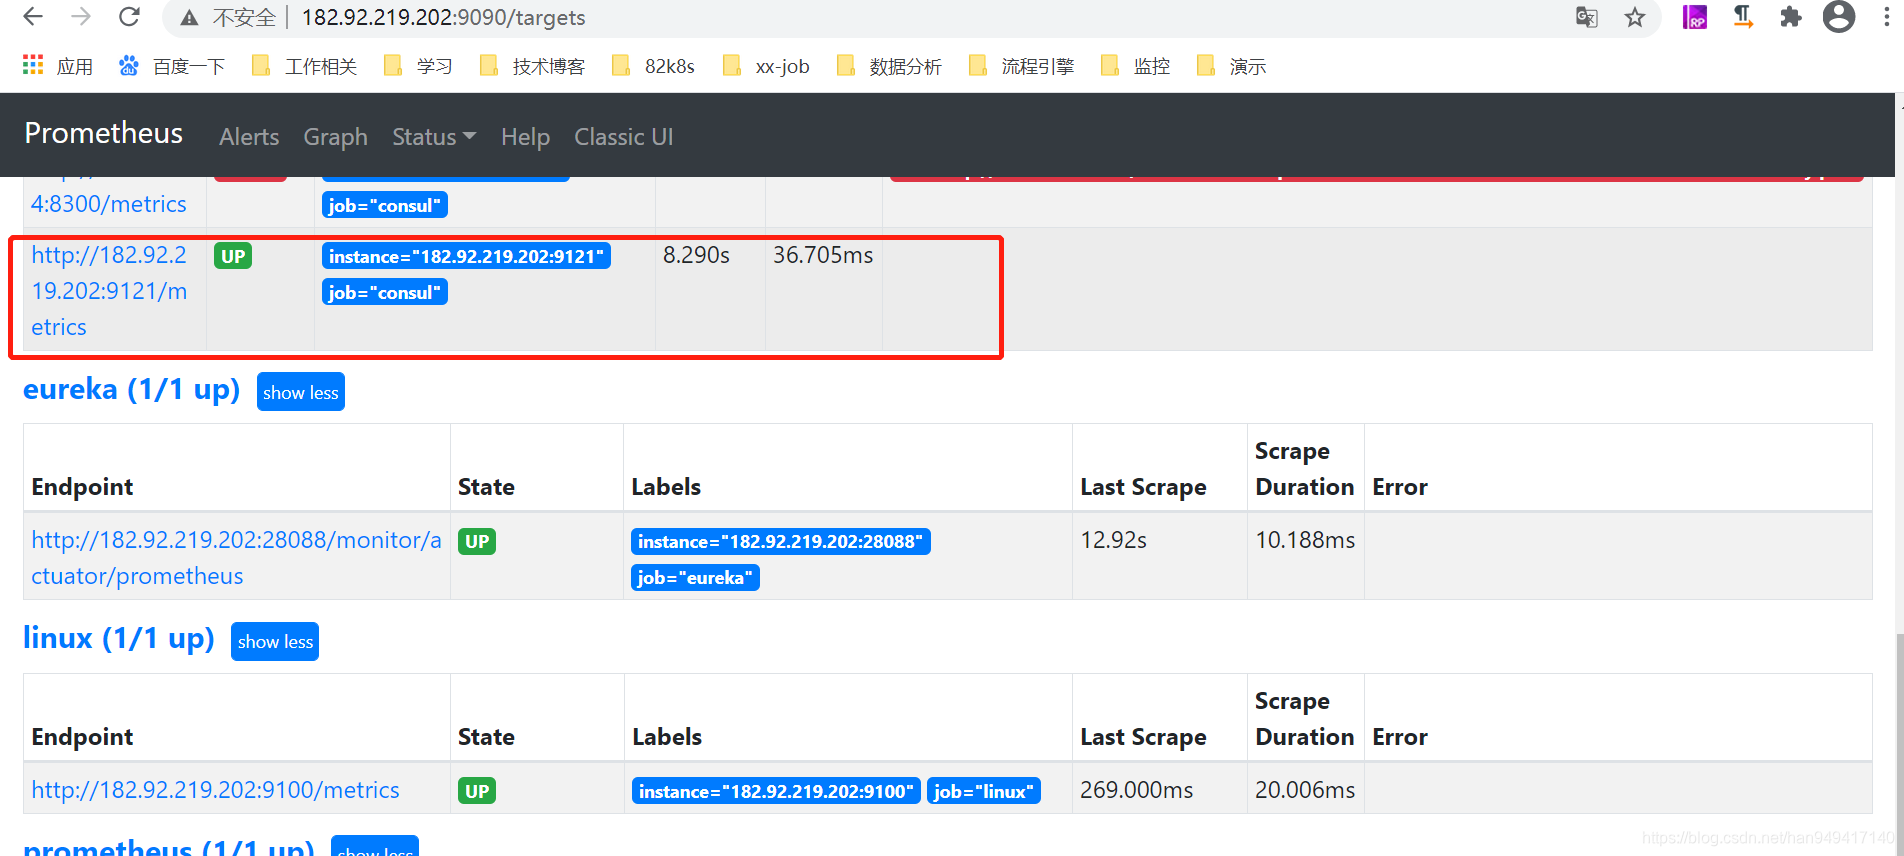
八、验证
- 查看prometheus监控targets
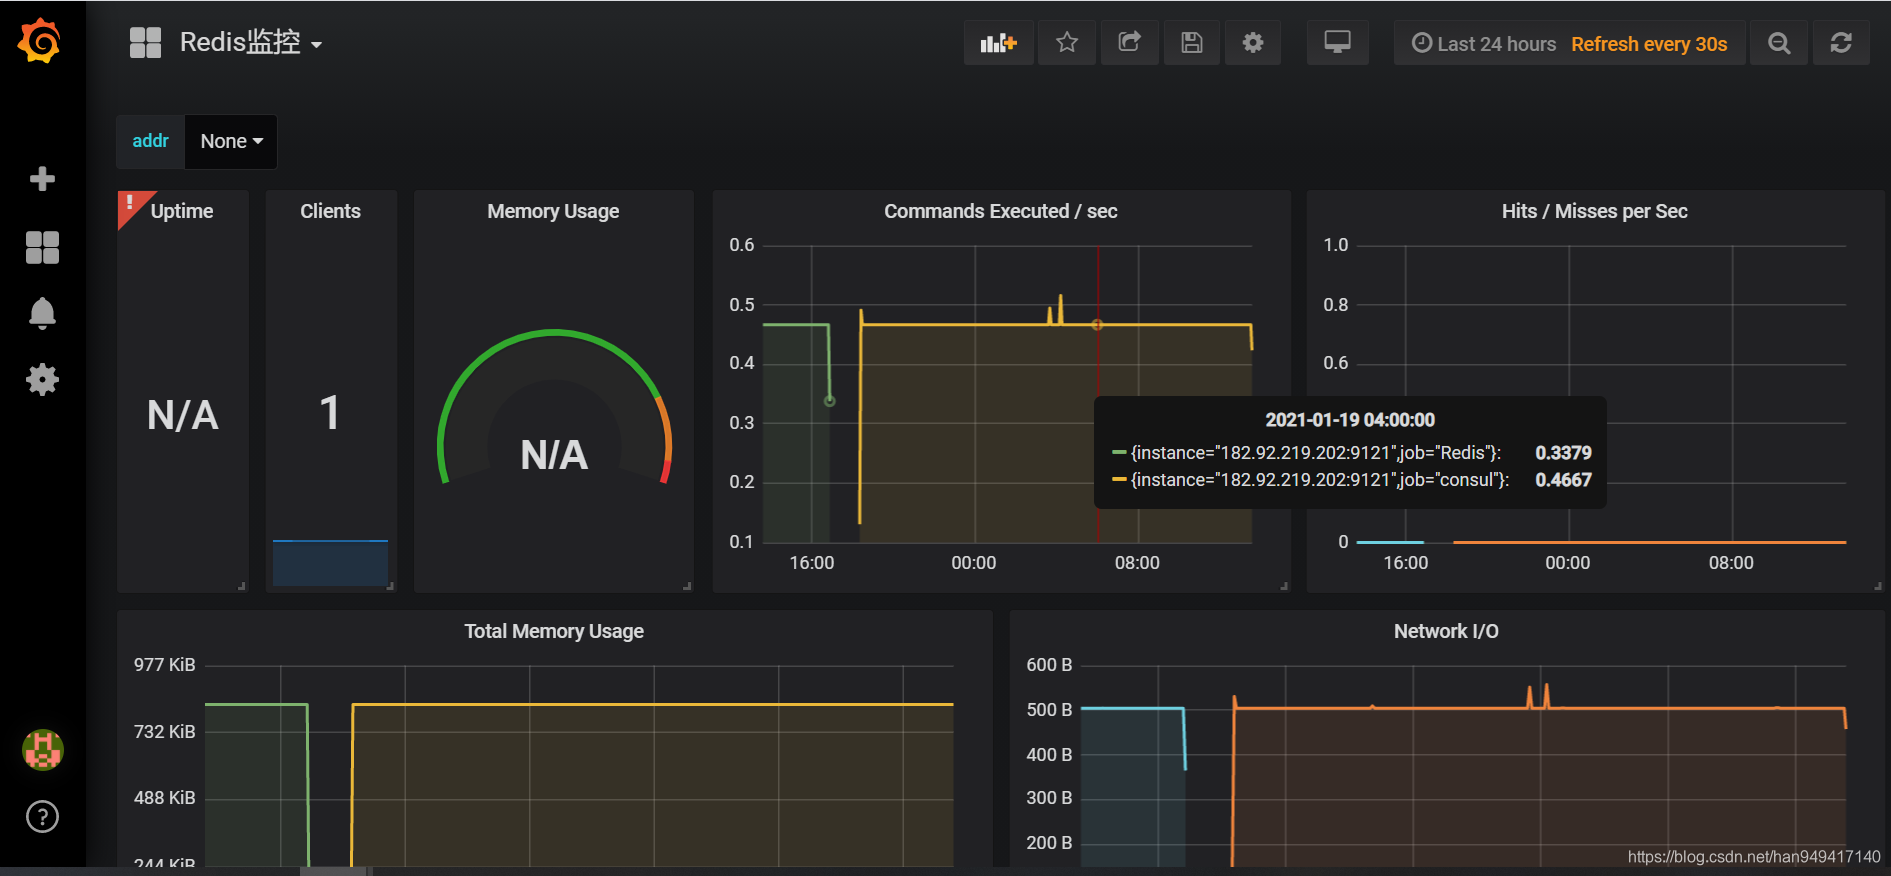
- 查看grafana对应redis监控图表


 1060
1060

 被折叠的 条评论
为什么被折叠?
被折叠的 条评论
为什么被折叠?
 到【灌水乐园】发言


