


没有特别的幸运,那么就特别的努力!!!
既然没有优人的天赋,那就拼吧!
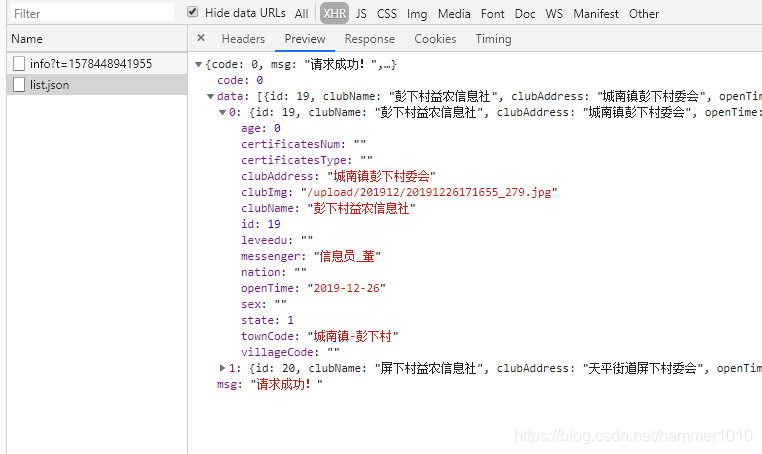
先看下效果:
----------------------------------------------------------------------------------------------------------------------------------------------------------------------2020.11.1----------------------------------------------------------------------------------------------------------------------------------------------------
环境条件前提:
首先检查环境 node,npm,vue-cli(vue -V)

//如果想用最新版vue-cli,自己环境下装的是vue-cli2版本,请先卸载再装
yarn global remove @vue/cli
npm install -g @vue/cli   //安装3,4最新版

直接命令行
vue create 项目名
1.安装些插件,便于vue打包项目优化
npm install --save-dev axios qs hard-source-webpack-plugin compression-webpack-plugin element-ui
2.项目创建完成后
新建一个vue.config.js文件和 package.json平级
// gzip压缩插件
const CompressionWebpackPlugin = require('compression-webpack-plugin')
// 打包提速文件
const HardSourceWebpackPlugin = require('hard-source-webpack-plugin')
const path = require('path')

const config = require('./config')

// 是否为生产环境
const isProduction = process.env.NODE_ENV !== 'development'

// 本地环境是否需要使用cdn
const devNeedCdn = false

// cdn链接
const cdn = {
  // cdn:模块名称和模块作用域命名(对应window里面挂载的变量名称)
  externals: {
    vue: 'Vue',
    vuex: 'Vuex',
    'vue-router': 'VueRouter',
    axios: 'axios'
  },
  // cdn的css链接
  css: [],
  // cdn的js链接
  js: [
    'https://cdn.jsdelivr.net/npm/vue@2.6.11/dist/vue.min.js',
    'https://cdn.jsdelivr.net/npm/vue-router@3.3.4/dist/vue-router.min.js',
    'https://cdn.jsdelivr.net/npm/vuex@3.5.1/dist/vuex.min.js',
    'https://cdn.jsdelivr.net/npm/axios@0.19.2/dist/axios.min.js'
  ]
}

module.exports = {
  // 基本路径(开发路径和打包路径)
  publicPath: process.env.NODE_ENV === 'production' ? './' : '/',
  // 输出文件目录
  outputDir: 'dist',
  // eslint-loader 是否在保存的时候检查
  lintOnSave: true,
  assetsDir: 'static',
  // use the full build with in-browser compiler?
  // see https://github.com/vuejs/vue-cli/blob/dev/docs/webpack.md
  chainWebpack: config => {
    // ============注入cdn start============
    config.plugin('html').tap(args => {
      // 生产环境或本地需要cdn时,才注入cdn
      if (isProduction || devNeedCdn) args[0].cdn = cdn
      return args
    })
    // ============注入cdn end============
  }, //  将接收ChainableConfig由webpack-chain提供支持的实例的函数。
  configureWebpack: config => {
    // 配置去console和Gzip压缩
    const plugins = [
      new CompressionWebpackPlugin({
        // 开启gzip
        filename: '[path].gz[query]',
        algorithm: 'gzip',
        test: new RegExp('\\.(' + ['js', 'css'].join('|') + ')$'),
        threshold: 10240,
        minRatio: 0.8
      }),
      new HardSourceWebpackPlugin()
    ]
    if (process.env.NODE_ENV !== 'development') {
      config.plugins = [...config.plugins, ...plugins]
    }
  },
  // 生产环境是否生成 sourceMap 文件
  productionSourceMap: false,
  // css相关配置
  css: {
    // 是否使用css分离插件 ExtractTextPlugin
    extract: process.env.NODE_ENV === 'production',
    // 开启 CSS source maps?
    sourceMap: false,
    // css预设器配置项
    loaderOptions: {
      css: {}
    }
    // 启用 CSS modules for all css / pre-processor files.
    // requireModuleExtension: false
  },
  // use thread-loader for babel & TS in production build
  // enabled by default if the machine has more than 1 cores
  parallel: require('os').cpus().length > 1,
  // PWA 插件相关配置
  // see https://github.com/vuejs/vue-cli/tree/dev/packages/%40vue/cli-plugin-pwa
  // webpack-dev-server 相关配置
  devServer: {
    // open: process.platform === 'darwin',
    open: true,
    host: config.host ? config.host : '0.0.0.0',
    port: 7500,
    https: false,
    hotOnly: true,
    before: () => {},
    proxy: {
      // 设置代理
      '/api': {
        target: config.baseUrl,
        ws: true, //
        changeOrigin: true, // 是否跨域
        pathRewrite: {
          '^/api': '' // 本身的接口地址没有 '/api' 这种通用前缀,所以要去掉
        }
      }
    }
  },
  // 第三方插件配置
  pluginOptions: {
    'style-resources-loader': {
      preProcessor: 'scss',
      patterns: [path.resolve(__dirname, './src/assets/theme/base.scss')]
    }
  },
  transpileDependencies: []
}
3.创建一个config文件
config文件下面建立一个子文件index.js
// 开发环境
const baseUrl = 'http://api-dev.chui.com/api'
// 测试环境
// const baseUrl = 'http://api-test.chui.com/api'
// 正式环境
// const baseUrl = 'http://api-w.chui.com/api'

const routerIntercept = [] // 路由拦截 请写入需要拦截的路由路径

module.exports = {
  baseUrl: baseUrl,
  routerIntercept: routerIntercept
}
4.src里面创建一个api文件
api文件下面子文件api.js
import axios from './axios'

export default {
  getInfo () {
    return axios.get('/static/domian.json', { baseURL: '' })
  },
  getDicList (data, opt = {}) {
    return axios.get('common/v2/dictList', { params: data })
  },
  saveChatEvaluation (data, opt = {}) {
    return axios.post('chatlog/evaluation', data, opt)
  }
}
api文件下面子文件axios,js
/**
 * axios 配置
 */

// axios abort 待添加

import axios from 'axios'
import qs from 'qs'
// import router from '../router'
// import store from '../store'

axios.defaults.baseURL = '/api'
//   process.env.NODE_ENV !== 'production' ? '/api' : config.baseUrl

axios.defaults.withCredentials = true
axios.defaults.timeout = 30000 // 设置30秒超时时间

// http request 拦截器
axios.interceptors.request.use(
  config => {
    if (config.headers['Content-Type'] && config.headers['Content-Type'].indexOf('www') > -1) {
      config.data = qs.stringify(config.data)
    }

	// // 这里进行 request 拦截
    // if (store.state.auth.token) {
    //   config.headers.Authorization = store.state.auth.token
    //   if (store.state.auth.nextTime <= Date.now() && !store.state.auth.isRefresh) {
    //     store.dispatch('refreshAuth') // 刷新Token
    //   }
    // } // 请求附带 Token

    return config
  },
  err => {
    return Promise.reject(err)
  }
)

// http response 拦截器
axios.interceptors.response.use(
  response => {
    // 这里进行 response 拦截
    // if (response.status === 401) router.replace('/login') // 401 无权限 打回登录页

    // if (response.status === 500) router.replace('/error')

    return response
  },
  error => {
  	// router.replace('/login')
    //  请求错误处理
    return Promise.reject(error) // 返回接口返回的错误信息
  }
)

export default axios
5.main.js文件配置
import Vue from 'vue'
import App from './App.vue'
import './registerServiceWorker'
import router from './router'
import store from './store'

Vue.config.productionTip = false

import Api from './api/api'
Vue.prototype.Api = Api

new Vue({
  router,
  store,
  render: h => h(App)
}).$mount('#app')
6.页面文件调用接口
<template>
  <div class="lawIndex">

  </div>
</template>

<script>
import { Message } from 'element-ui'

export default {
  // import引入的组件需要注入到对象中才能使用
  name: 'lawIndex',
  components: {},
  data () {
    // 这里存放数据
    return {}
  },
  // 监听属性 类似于data概念
  computed: {},
  // 监控data中的数据变化
  watch: {},
  // 方法集合
  methods: {
    getDic (type) {
      this.Api.getDicList({ type: type }).then(res => {
        console.log(res)
        if (res.data.code === 0) this[type] = res.data.list
      })
    },

  },
  // 生命周期 - 创建完成(可以访问当前this实例)
  created () {
    this.getDic('lawyerAdvice_status')
    this.getDic('satisfaction_stuats')
  },
  // 生命周期 - 挂载完成(可以访问DOM元素)
  mounted () {},
  beforeCreate () {}, // 生命周期 - 创建之前
  beforeMount () {}, // 生命周期 - 挂载之前
  beforeUpdate () {}, // 生命周期 - 更新之前
  updated () {}, // 生命周期 - 更新之后
  beforeDestroy () {}, // 生命周期 - 销毁之前
  destroyed () {}, // 生命周期 - 销毁完成
  activated () {}
}
</script>
<style lang="scss" scoped>

</style>
---------------------------------------------------------之前版本(简洁版)-----------------------------------------------------------------
接口封装:
第一步:解决跨域
接口请求,一般都会碰到跨域问题,在vue项目中,我们采用页面代理的方法解决跨域问题:
文件config——index.js文件
index.js
//版本1---简洁版 vue-cli3,4   vue.config.js文件
module.exports = {
	assetsDir: 'static',  //放置静态文件目录
    devServer: {
    // 设置主机地址
    host: 'localhost',
    // 设置默认端口
    port: 8080,
    // 设置代理
    proxy: {
        '/api': {
            target:'https://www.baidu.com/api', // 请求的第三方接口  或 后端,线上接口
            changeOrigin:true, // 在本地会创建一个虚拟服务端,然后发送请求的数据,并同时接收请求的数据,这样服务端和服务端进行数据的交互就不会有跨域问题
            secure: true,  //true是https     false是http
            pathRewrite:{  // 路径重写,
                '^/api': ''  // 替换target中的请求地址,也就是说以后你在请求http://api.douban.com/v2/XXXXX这个地址的时候直接写成/api即可。
            }
        },
     }
    }
   }


//版本2 vue2.0   config----index.js
'use strict'
// Template version: 1.3.1
// see http://vuejs-templates.github.io/webpack for documentation.

const path = require('path')

// const ipLoc = 'http://192.168.14.20:8085'  //本地
// const ipLoc = 'http://192.168.14.56:8197/test'  //测试地址
const ipLoc = 'https://www.baidu.com/jcrh'  //线上

module.exports = {
  dev: {

    // Paths
    assetsSubDirectory: 'static',
    assetsPublicPath: '/',
    proxyTable: {
      '/api': {
        target:ipLoc, // 请求的第三方接口  或 后端,线上接口
        // target:'http://localhost:8081/api', //      本地
        changeOrigin:true, // 在本地会创建一个虚拟服务端,然后发送请求的数据,并同时接收请求的数据,这样服务端和服务端进行数据的交互就不会有跨域问题
        secure: true,  //true是https     false是http
        pathRewrite:{  // 路径重写,
          '^/api': ''  // 替换target中的请求地址,也就是说以后你在请求http://api.douban.com/v2/XXXXX这个地址的时候直接写成/api即可。
        }
      },

    },

    // Various Dev Server settings
    host: 'localhost', // can be overwritten by process.env.HOST
    port: 8080, // can be overwritten by process.env.PORT, if port is in use, a free one will be determined
    autoOpenBrowser: false,
    errorOverlay: true,
    notifyOnErrors: true,
    poll: false, // https://webpack.js.org/configuration/dev-server/#devserver-watchoptions-


    /**
     * Source Maps
     */

    // https://webpack.js.org/configuration/devtool/#development
    devtool: 'cheap-module-eval-source-map',

    // If you have problems debugging vue-files in devtools,
    // set this to false - it *may* help
    // https://vue-loader.vuejs.org/en/options.html#cachebusting
    cacheBusting: true,

    cssSourceMap: true
  },

  build: {
    // Template for index.html
    index: path.resolve(__dirname, '../dist/index.html'),

    // Paths
    assetsRoot: path.resolve(__dirname, '../dist'),
    assetsSubDirectory: 'static',
    assetsPublicPath: './',

    /**
     * Source Maps
     */

    productionSourceMap: true,
    // https://webpack.js.org/configuration/devtool/#production
    devtool: '#source-map',

    // Gzip off by default as many popular static hosts such as
    // Surge or Netlify already gzip all static assets for you.
    // Before setting to `true`, make sure to:
    // npm install --save-dev compression-webpack-plugin
    productionGzip: false,
    productionGzipExtensions: ['js', 'css'],

    // Run the build command with an extra argument to
    // View the bundle analyzer report after build finishes:
    // `npm run build --report`
    // Set to `true` or `false` to always turn it on or off
    bundleAnalyzerReport: process.env.npm_config_report
  }
}
第二步:接口封装
我们约定俗成 一般会在src文件下建立一个api文件
这个api文件,就相当于一个管理接口的仓库
api——index.js
安装
npm install vue-axios --save
npm install qs.js --save
import axios from 'axios'
import qs from 'qs'

//立即支付
export const paycode = params => {
     return axios.post('recharge/payCode.do',qs.stringify(params)).then(res=>res.data)
}
//地区接口
export const  list = params => {
     return axios.get('/api/wechat/club/list.json',qs.stringify(params)).then(res => res.data).catch((response)=>{
          console.log(response);
      })
}
第三步:接口运用
index.vue
<template>
  <div class="container"></div>
</template>

<script>
import { list } from '../../../src/api';

export default {
  data() {
    return {
        value1: 0,
        }
  },
   created() {
     this.test()
   },
  methods: {
	//接口测试
    test(){
      var param = {"areaCodeParent":"331081000000"}
      list(param).then(res => {
        console.log(res)
      })
    }
  },

}
</script>
希望能帮助到大家,同时祝愿大家在开发旅途中愉快!!!


 566
566

 被折叠的 条评论
为什么被折叠?
被折叠的 条评论
为什么被折叠?
 到【灌水乐园】发言


