


SpringMVC
1.MVC概念
MVC设计模式的任务是将包含业务数据的模块与显示模块的视图解耦。SpringMVC是在Spring框架的基础上做的
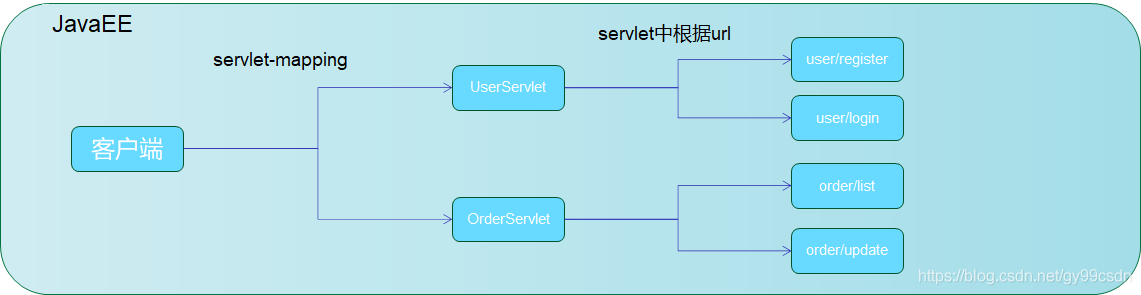
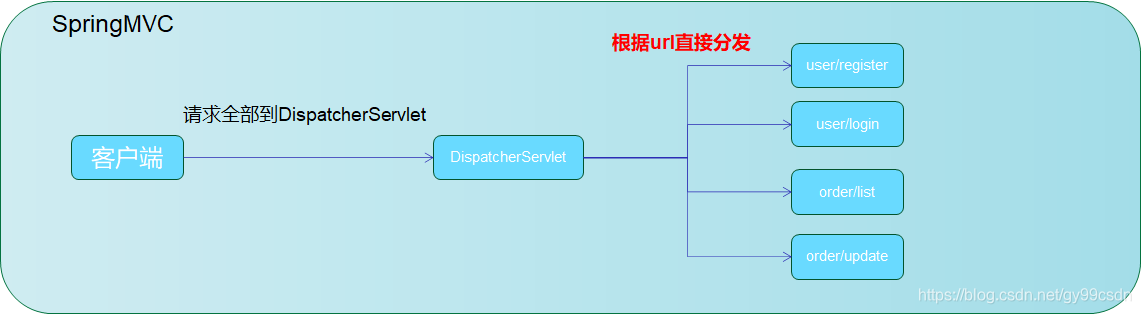
2.SpringMVC和JavaEE的比较
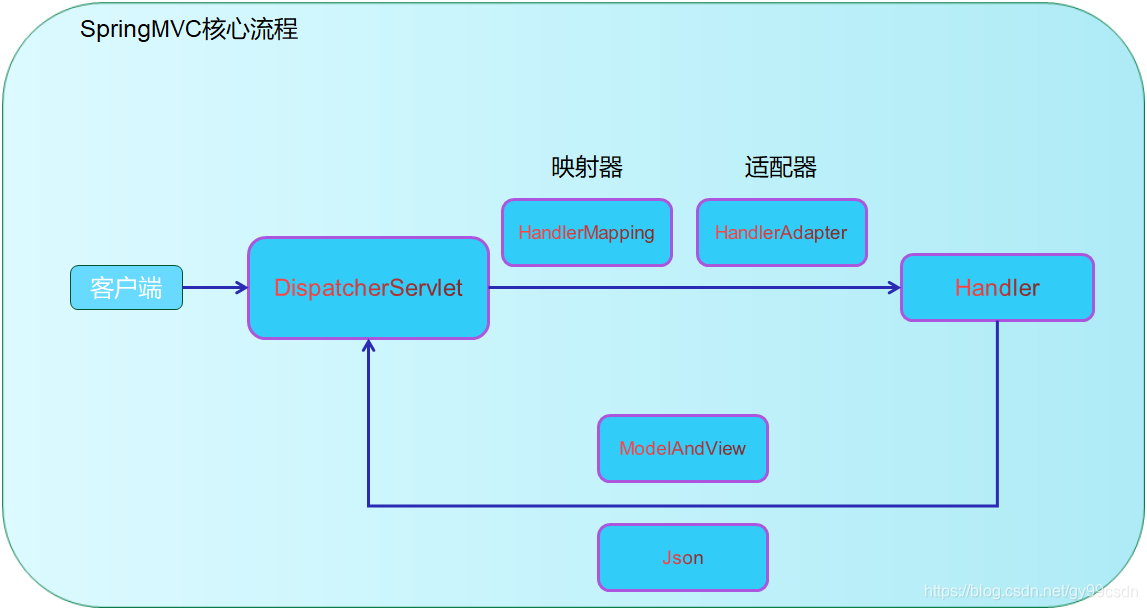
3.SpringMVC的核心流程
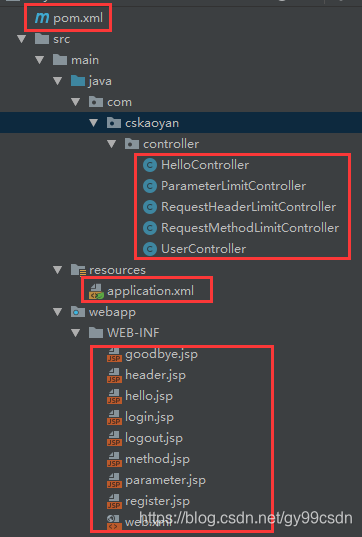
4.入门案例1
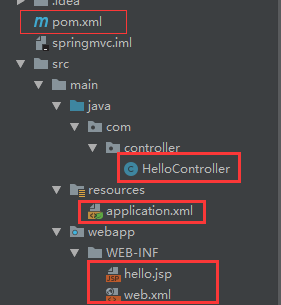
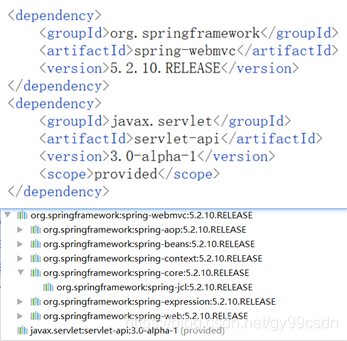
pom.xml
引入对应的依赖:
<?xml version="1.0" encoding="UTF-8"?>
<project xmlns="http://maven.apache.org/POM/4.0.0"
         xmlns:xsi="http://www.w3.org/2001/XMLSchema-instance"
         xsi:schemaLocation="http://maven.apache.org/POM/4.0.0 http://maven.apache.org/xsd/maven-4.0.0.xsd">
    <modelVersion>4.0.0</modelVersion>

    <groupId>gy.com</groupId>
    <artifactId>springmvc</artifactId>
    <version>1.0-SNAPSHOT</version>
    <packaging>war</packaging>
    <build>
        <plugins>
            <plugin>
                <groupId>org.apache.maven.plugins</groupId>
                <artifactId>maven-compiler-plugin</artifactId>
                <configuration>
                    <source>6</source>
                    <target>6</target>
                </configuration>
            </plugin>
        </plugins>
    </build>


    <dependencies>
        <dependency>
            <groupId>org.springframework</groupId>
            <artifactId>spring-webmvc</artifactId>
            <version>5.2.10.RELEASE</version>
        </dependency>
        <dependency>
            <groupId>javax.servlet</groupId>
            <artifactId>servlet-api</artifactId>
            <version>3.0-alpha-1</version>
            <scope>provided</scope>
        </dependency>
    </dependencies>

</project>
HelloController
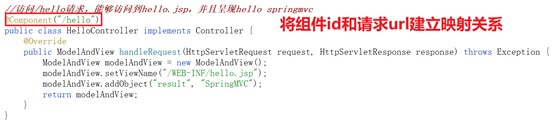
//访问/hello请求,能够访问到hello.jsp,并且呈现hello springmvc
@Component("/hello")
public class HelloController implements Controller {
@Override
    public ModelAndView handleRequest(HttpServletRequest httpServletRequest, HttpServletResponse httpServletResponse) throws Exception {
    ModelAndView modelAndView = new ModelAndView();
    modelAndView.setViewName("/WEB-INF/hello.jsp");
    modelAndView.addObject("result","SpringMVC");


    return modelAndView;
    }
}
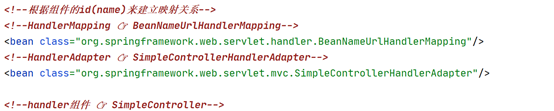
application.xml
- HandlerMapping组件 👉 BeanNameUrlHandlerMapping
- HandlerAdapter组件 👉 SimpleControllerHandlerAdapter
- handler组件 👉 SimpleController
<?xml version="1.0" encoding="UTF-8"?>
<beans xmlns="http://www.springframework.org/schema/beans"
       xmlns:xsi="http://www.w3.org/2001/XMLSchema-instance"
       xmlns:context="http://www.springframework.org/schema/context"
       xmlns:aop="http://www.springframework.org/schema/aop"

       xsi:schemaLocation="
        http://www.springframework.org/schema/beans https://www.springframework.org/schema/beans/spring-beans.xsd
        http://www.springframework.org/schema/context https://www.springframework.org/schema/context/spring-context.xsd
    http://www.springframework.org/schema/aop https://www.springframework.org/schema/aop/spring-aop.xsd">


    <!-- bean definitions here -->
    <!--扫描该包目录以及所有子包:如果发现了组件注册功能的注解-->
    <context:component-scan base-package="com.controller"/>
    <!--根据组件的id(name)来建立映射关系-->
    <!--HandlerMapping 👉 BeanNameUrlHandlerMapping-->
<bean class="org.springframework.web.servlet.handler.BeanNameUrlHandlerMapping"/>
    <!--HandlerAdapter 👉 SimpleControllerHandlerAdapter-->
<bean class="org.springframework.web.servlet.mvc.SimpleControllerHandlerAdapter"/>

    <!--handler组件 👉 SimpleController-->


    <!-- bean definitions here -->
    <!--通过bean标签完成组件的注册-->
    <!--
        id:组件在容器中的唯一标识
        name:组件名称,通常省略不写,以id作为name
        class:类的全类名
    -->
    <!--<bean id="xxxx" class="xxxx"/>-->
</beans>
hello.jsp
<%@ page contentType="text/html;charset=UTF-8" language="java" %>
<html>
<head>
    <title>Title</title>
</head>
<body>
<h1>hello ${result}</h1>
</body>
</html>
web.xml
通过DispatcherServlet初始化WebApplicationContext(Spring容器),需要提供contextConfigLocation的值,提供xml配置文件的位置

<?xml version="1.0" encoding="UTF-8"?>
<web-app xmlns="http://xmlns.jcp.org/xml/ns/javaee"
         xmlns:xsi="http://www.w3.org/2001/XMLSchema-instance"
         xsi:schemaLocation="http://xmlns.jcp.org/xml/ns/javaee http://xmlns.jcp.org/xml/ns/javaee/web-app_4_0.xsd"
         version="4.0">
<servlet>
    <servlet-name>dispatcherServlet</servlet-name>
    <servlet-class>org.springframework.web.servlet.DispatcherServlet</servlet-class>
<init-param>
    <param-name>contextConfigLocation</param-name>
    <param-value>classpath:application.xml</param-value>
</init-param>
</servlet>
    <servlet-mapping>
        <servlet-name>dispatcherServlet</servlet-name>
        <!--除了web资源根路径下的jsp文件,其余所有都经过dispatcherServlet-->
        <url-pattern>/</url-pattern>
    </servlet-mapping>
</web-app>
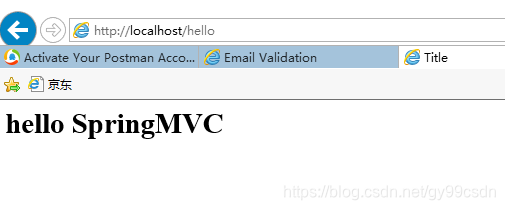
结果:
5.入门案例2(requestmapping-请求url和方法建立映射关系)
方法:Handler组件中的方法(HandlerMethod 👉 handler方法)

<.mvc:annotation-driven/>
5.1 Handler方法(@RequestMapping)

pom.xml(不变)
HelloController
//handler组件
@Controller
public class HelloController {
/*@Autowired
UserService userService;*/
//handlerMethod
@RequestMapping("/hello")
public ModelAndView hello(){
ModelAndView modelAndView = new ModelAndView();
modelAndView.setViewName("/WEB-INF/hello.jsp");
modelAndView.addObject("result", "SpringMVC2");
return modelAndView;
}
@Autowired
ApplicationContext applicationContext;
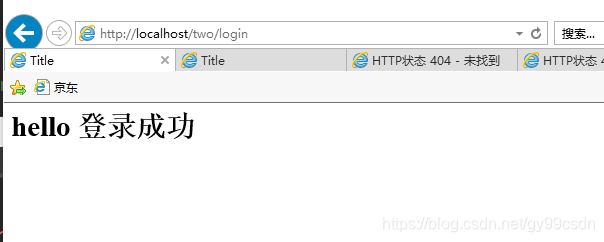
@RequestMapping("login")
public ModelAndView login(){
ModelAndView modelAndView = new ModelAndView("/WEB-INF/hello.jsp");
modelAndView.addObject("result", "景甜,登录成功");
String[] beanDefinitionNames = applicationContext.getBeanDefinitionNames();
// System.out.println(Arrays.asList(beanDefinitionNames));
for (String beanDefinitionName : beanDefinitionNames) {
System.out.println(beanDefinitionName);
}
return modelAndView;
}
}
application.xml

<?xml version="1.0" encoding="UTF-8"?>
<beans xmlns="http://www.springframework.org/schema/beans"
       xmlns:xsi="http://www.w3.org/2001/XMLSchema-instance"
       xmlns:context="http://www.springframework.org/schema/context"
       xmlns:aop="http://www.springframework.org/schema/aop"
       xmlns:mvc="http://www.springframework.org/schema/mvc"
       xsi:schemaLocation="
        http://www.springframework.org/schema/beans https://www.springframework.org/schema/beans/spring-beans.xsd
        http://www.springframework.org/schema/context https://www.springframework.org/schema/context/spring-context.xsd
        http://www.springframework.org/schema/mvc https://www.springframework.org/schema/mvc/spring-mvc.xsd
        http://www.springframework.org/schema/aop https://www.springframework.org/schema/aop/spring-aop.xsd">

    <!-- bean definitions here -->
    <context:component-scan base-package="com.cskaoyan"/>
    <!--RequestMappingHandlerMapping-->
    <!--RequestMappingHandlerAdapter-->
    <!--该标签也帮我们注册了HandlerMapping和HandlerAdapter-->
    <mvc:annotation-driven/>

    <!--缺少包含handlerMethod的handler组件-->

</beans>
hello.jsp不变)
web.xml(不变)
结果:

6.入门案例3(requestmapping-usage)
pom.xml(不变)
application.xml
<?xml version="1.0" encoding="UTF-8"?>
<beans xmlns="http://www.springframework.org/schema/beans"
       xmlns:xsi="http://www.w3.org/2001/XMLSchema-instance"
       xmlns:context="http://www.springframework.org/schema/context"
       xmlns:aop="http://www.springframework.org/schema/aop"
       xmlns:mvc="http://www.springframework.org/schema/mvc"
       xsi:schemaLocation="
        http://www.springframework.org/schema/beans https://www.springframework.org/schema/beans/spring-beans.xsd
        http://www.springframework.org/schema/context https://www.springframework.org/schema/context/spring-context.xsd
        http://www.springframework.org/schema/mvc https://www.springframework.org/schema/mvc/spring-mvc.xsd
        http://www.springframework.org/schema/aop https://www.springframework.org/schema/aop/spring-aop.xsd">

    <context:component-scan base-package="com.cskaoyan"/>
    <mvc:annotation-driven/>
</beans>
6.1 url路径映射,多个url映射到一个handler方法上
建立请求url和handler方法之间的映射关系
//value属性:String[] 👉 多个url映射到一个handler方法上
HelloController
@Controller
public class HelloController {
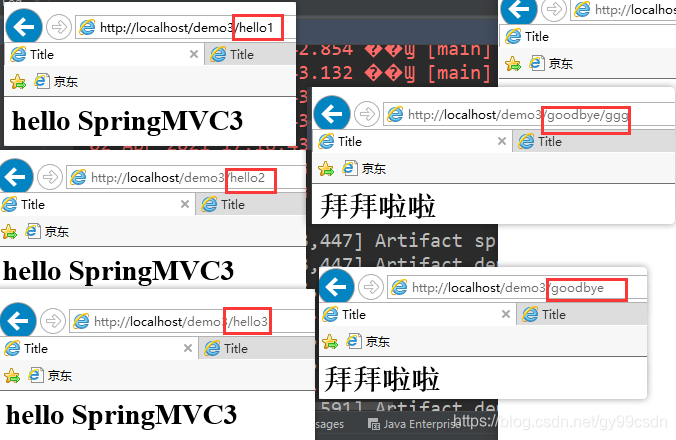
//value属性:String[] 👉 多个url映射到一个handler方法上
@RequestMapping({"hello1","hello2","hello3"})
public ModelAndView hello1(){
ModelAndView modelAndView = new ModelAndView("/WEB-INF/hello.jsp");
modelAndView.addObject("result", "SpringMVC3");
return modelAndView;
}
@RequestMapping({"goodbye*","goodbye/*"})
public ModelAndView goodBye(){
return new ModelAndView("/WEB-INF/goodbye.jsp");
}
}
hello
<%@ page contentType="text/html;charset=UTF-8" language="java" %>
<html>
<head>
    <title>Title</title>
</head>
<body>
    <h1>hello ${result}</h1>
</body>
</html>
goodbye
<%@ page contentType="text/html;charset=UTF-8" language="java" %>
<html>
<head>
    <title>Title</title>
</head>
<body>

<h1>拜拜啦啦</h1>
</body>
</html>
结果:
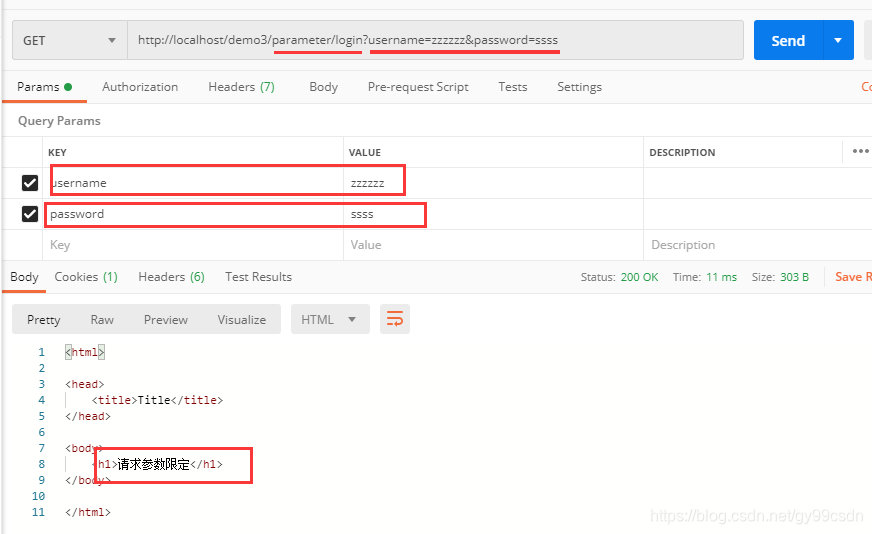
6.2 请求参数限定
//请求参数限定
@Controller
@RequestMapping("parameter")
public class ParameterLimitController {

    //localhost:8080/parameter/login?username=jingtian&password=niupi
    //@RequestMapping(value = "login",params = "username")//限定请求参数一定要携带username
    //@RequestMapping(value = "login",params = "password")//限定请求参数一定要携带password
    //@RequestMapping(value = "login",params = {"username","password"})//限定请求参数一定要携带username and password
    @RequestMapping(value = "login",params = {"username!=jingtian","password"})//限定请求参数一定要携带username and password,并且username不能是jingtian
    public ModelAndView login(){
        return new ModelAndView("/WEB-INF/parameter.jsp");
    }
}
parameter
<%@ page contentType="text/html;charset=UTF-8" language="java" %>
<html>
<head>
    <title>Title</title>
</head>
<body>
    <h1>请求参数限定</h1>
</body>
</html>
结果:
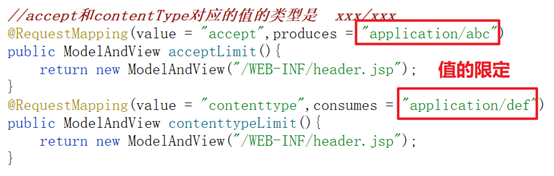
6.3 求头限定RequestHeader
consumes 👉 ContentType(请求头)
produces 👉 Accept(请求头)
accept和contentType对应的值的类型是 xxx/xxx
RequestHeaderLimitController
@Controller
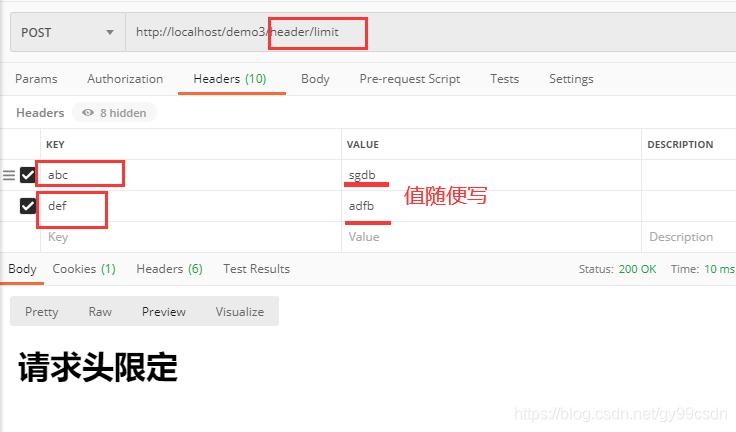
@RequestMapping("header")
public class RequestHeaderLimitController {
@RequestMapping(value = "limit",headers = {"abc","def"})//and
public ModelAndView headerLimit(){
return new ModelAndView("/WEB-INF/header.jsp");
}
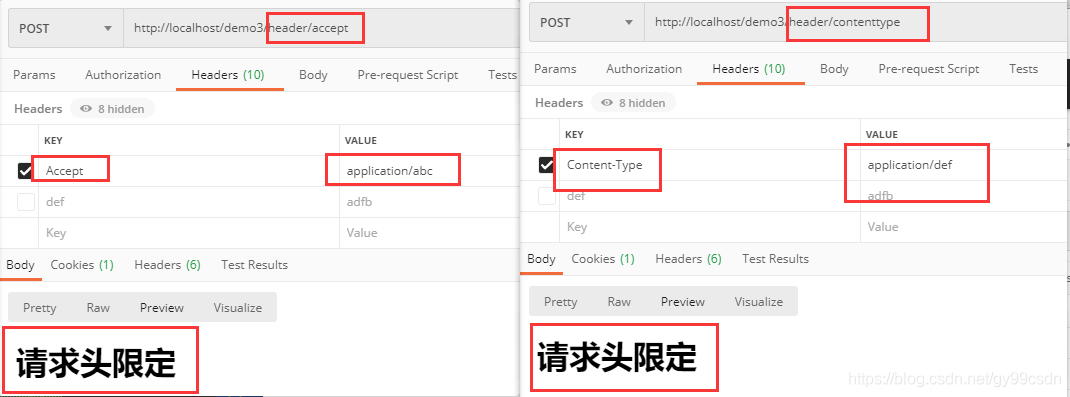
//accept和contentType对应的值的类型是 xxx/xxx
@RequestMapping(value = "accept",produces = "application/abc")
public ModelAndView acceptLimit(){
return new ModelAndView("/WEB-INF/header.jsp");
}
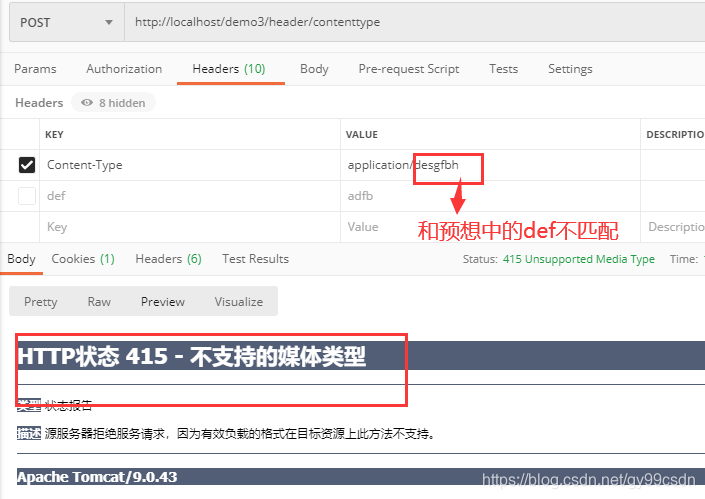
@RequestMapping(value = "contenttype",consumes = "application/def")
public ModelAndView contenttypeLimit(){
return new ModelAndView("/WEB-INF/header.jsp");
}
}
header.jsp
<%@ page contentType="text/html;charset=UTF-8" language="java" %>
<html>
<head>
    <title>Title</title>
</head>
<body>
<h1>请求头限定</h1>
</body>
</html>
6.4 窄化请求
- 把请求url从handler方法上的@RequestMapping注解的value属性值中提取出去
- 提取到类上 @RequestMapping
- Handler方法映射的url = 类上的RequestMapping的value属性值 + 方法上的ReqestuMapping的value属性值
- 原格式/user/login
/user/register
/user/logout
注意:
方法上的@RequestMapping注解的value属性值,最左边的”/”可以省略,SpringMVC会自行拼接
UserController
@Controller
@RequestMapping("user")
public class UserController {
    @RequestMapping("login")
    public ModelAndView login(){
        return new ModelAndView("/WEB-INF/login.jsp");
    }
    @RequestMapping("register")
    public ModelAndView register(){
        return new ModelAndView("/WEB-INF/register.jsp");
    }
    @RequestMapping("logout")
    public ModelAndView logout(){
        return new ModelAndView("/WEB-INF/logout.jsp");
    }

    //@RequestMapping("modify")
    //@RequestMapping("delete")
}
login.jsp
<%@ page contentType="text/html;charset=UTF-8" language="java" %>
<html>
<head>
    <title>Title</title>
</head>
<body>
    <h1>登录</h1>
</body>
</html>
logout.jsp
<%@ page contentType="text/html;charset=UTF-8" language="java" %>
<html>
<head>
    <title>Title</title>
</head>
<body>
    <h1>退出</h1>
</body>
</html>
register.jsp
<%@ page contentType="text/html;charset=UTF-8" language="java" %>
<html>
<head>
    <title>Title</title>
</head>
<body>
    <h1>注册</h1>
</body>
</html>

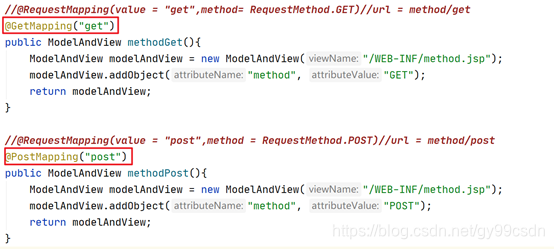
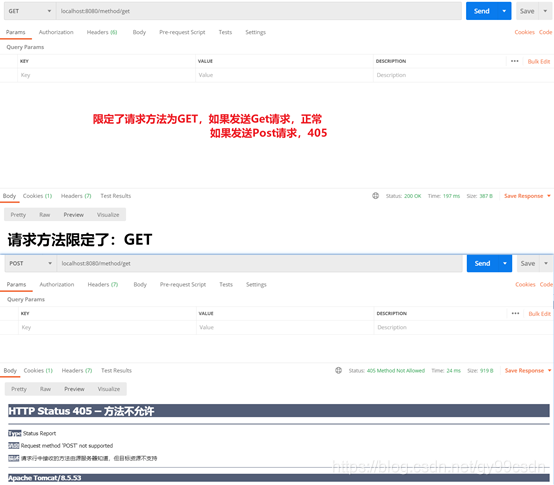
6.5 请求方法限定
6.5.1注解说明
@GetMapping
@PostMapping
其实就是限定了请求方法的RequestMapping
RequestMethodLimitController
@Controller
@RequestMapping("method") //窄化请求
public class RequestMethodLimitController {
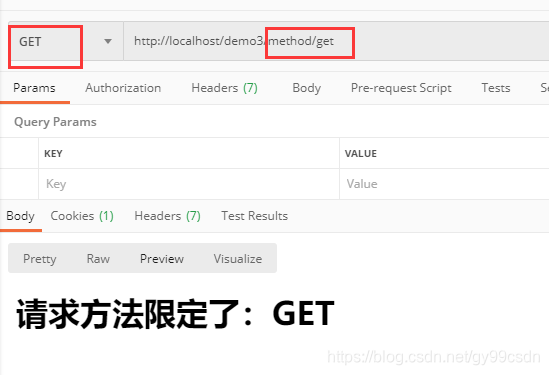
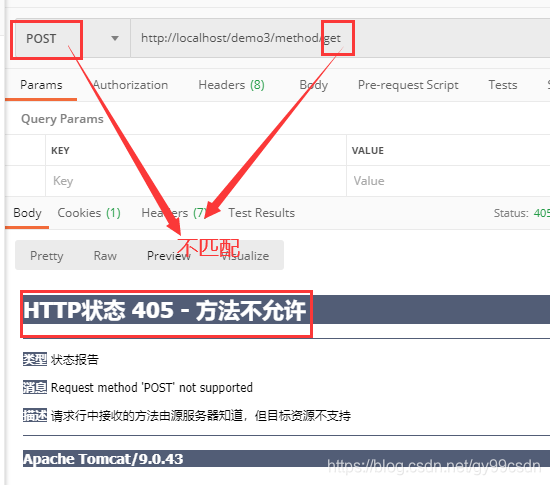
//@RequestMapping(value = "get",method= RequestMethod.GET)//url = method/get
@GetMapping("get")
public ModelAndView methodGet(){
ModelAndView modelAndView = new ModelAndView("/WEB-INF/method.jsp");
modelAndView.addObject("method", "GET");
return modelAndView;
}
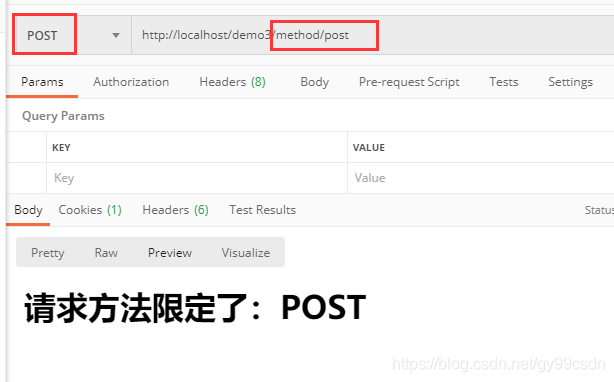
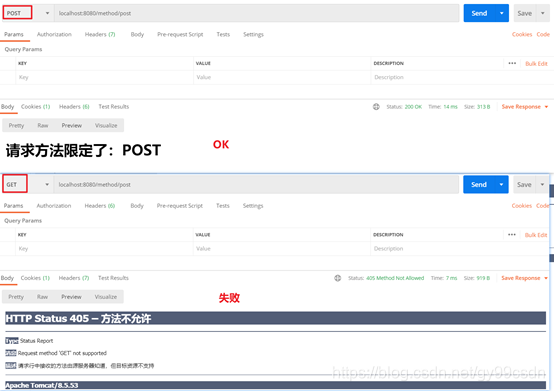
//@RequestMapping(value = "post",method = RequestMethod.POST)//url = method/post
@PostMapping("post")
public ModelAndView methodPost(){
ModelAndView modelAndView = new ModelAndView("/WEB-INF/method.jsp");
modelAndView.addObject("method", "POST");
return modelAndView;
}
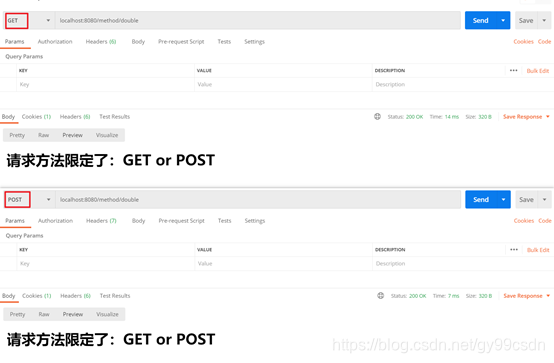
//请求方法之间的关系是 or
@RequestMapping(value = "double",method = {RequestMethod.GET,RequestMethod.POST})
public ModelAndView methodDouble(){
ModelAndView modelAndView = new ModelAndView("/WEB-INF/method.jsp");
modelAndView.addObject("method", "GET or POST");
return modelAndView;
}
}
method.jsp
<%@ page contentType="text/html;charset=UTF-8" language="java" %>
<html>
<head>
    <title>Title</title>
</head>
<body>
    <h1>请求方法限定了:${method}</h1>
</body>
</html>
7.入门案例4(return-value)
pom.xml
<?xml version="1.0" encoding="UTF-8"?>
<project xmlns="http://maven.apache.org/POM/4.0.0"
         xmlns:xsi="http://www.w3.org/2001/XMLSchema-instance"
         xsi:schemaLocation="http://maven.apache.org/POM/4.0.0 http://maven.apache.org/xsd/maven-4.0.0.xsd">
    <modelVersion>4.0.0</modelVersion>

    <groupId>gy.com</groupId>
    <artifactId>springmvc</artifactId>
    <version>1.0-SNAPSHOT</version>
    <packaging>war</packaging>
    <build>
        <plugins>
            <plugin>
                <groupId>org.apache.maven.plugins</groupId>
                <artifactId>maven-compiler-plugin</artifactId>
                <configuration>
                    <source>6</source>
                    <target>6</target>
                </configuration>
            </plugin>
        </plugins>
    </build>


    <dependencies>
        <dependency>
            <groupId>org.springframework</groupId>
            <artifactId>spring-webmvc</artifactId>
            <version>5.2.10.RELEASE</version>
        </dependency>
        <dependency>
            <groupId>javax.servlet</groupId>
            <artifactId>servlet-api</artifactId>
            <version>3.0-alpha-1</version>
            <scope>provided</scope>
        </dependency>
        <dependency>
            <groupId>com.fasterxml.jackson.core</groupId>
            <artifactId>jackson-databind</artifactId>
            <version>2.11.3</version>
        </dependency>
    </dependencies>
</project>
application.xml
<?xml version="1.0" encoding="UTF-8"?>
<beans xmlns="http://www.springframework.org/schema/beans"
       xmlns:xsi="http://www.w3.org/2001/XMLSchema-instance"
       xmlns:context="http://www.springframework.org/schema/context"
       xmlns:aop="http://www.springframework.org/schema/aop"
       xmlns:mvc="http://www.springframework.org/schema/mvc"
       xsi:schemaLocation="
        http://www.springframework.org/schema/beans https://www.springframework.org/schema/beans/spring-beans.xsd
        http://www.springframework.org/schema/context https://www.springframework.org/schema/context/spring-context.xsd
        http://www.springframework.org/schema/mvc https://www.springframework.org/schema/mvc/spring-mvc.xsd
        http://www.springframework.org/schema/aop https://www.springframework.org/schema/aop/spring-aop.xsd">

    <context:component-scan base-package="com.controller"/>
    <mvc:annotation-driven/>
</beans>
web.xml
<?xml version="1.0" encoding="UTF-8"?>
<web-app xmlns="http://xmlns.jcp.org/xml/ns/javaee"
         xmlns:xsi="http://www.w3.org/2001/XMLSchema-instance"
         xsi:schemaLocation="http://xmlns.jcp.org/xml/ns/javaee http://xmlns.jcp.org/xml/ns/javaee/web-app_4_0.xsd"
         version="4.0">
<servlet>
    <servlet-name>dispatcherServlet</servlet-name>
    <servlet-class>org.springframework.web.servlet.DispatcherServlet</servlet-class>
<init-param>
    <param-name>contextConfigLocation</param-name>
    <param-value>classpath:application.xml</param-value>
</init-param>
</servlet>
    <servlet-mapping>
        <servlet-name>dispatcherServlet</servlet-name>
        <!--除了web资源根路径下的jsp文件,其余所有都经过dispatcherServlet-->
        <url-pattern>/</url-pattern>
    </servlet-mapping>

</web-app>
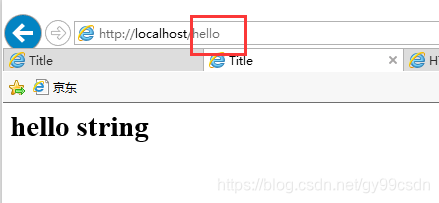
7.1返回值和ModelAndView相关
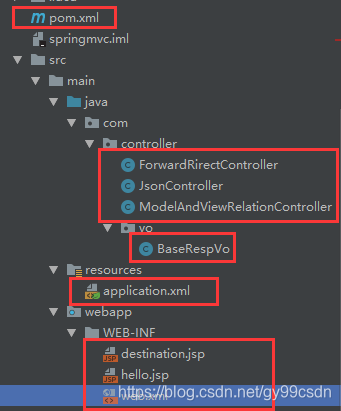
ModelAndViewRelationController
//返回值和ModelAndView相关
@Controller
public class ModelAndViewRelationController {

    @RequestMapping("hello")
    public String hello(Model model){
        model.addAttribute("result","string");
        return "/WEB-INF/hello.jsp";
    }
}
hello.jsp
<%@ page contentType="text/html;charset=UTF-8" language="java" %>
<html>
<head>
    <title>Title</title>
</head>
<body>
<h1>hello ${result}</h1>
</body>
</html>
结果:
7.2返回值字符串作为ViewName
BaseRespVo
public class BaseRespVo<T> {

    public T getData() {
        return data;
    }

    public void setData(T data) {
        this.data = data;
    }

    public String getMessage() {
        return message;
    }

    public void setMessage(String message) {
        this.message = message;
    }

    public long getErrno() {
        return errno;
    }

    public void setErrno(long errno) {
        this.errno = errno;
    }

    T data;
    String message;
    long errno;
}
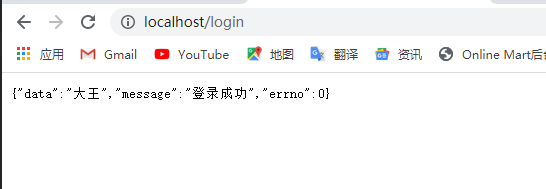
JsonController
//@Controller
//@ResponseBody
@RestController// = @Controller + @ResponseBody
public class JsonController {
    @RequestMapping("login")
    @ResponseBody
    public BaseRespVo login() {
        BaseRespVo baseRespVo = new BaseRespVo();
        baseRespVo.setData("大王");
        baseRespVo.setMessage("登录成功");
        baseRespVo.setErrno(0);
        return baseRespVo;
    }
}
结果;
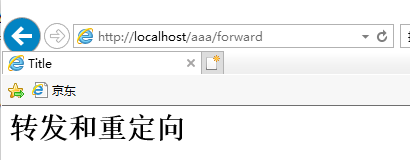
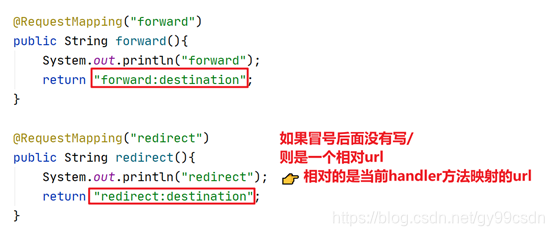
7.3请求转发和重定向
返回值为字符串
转发和重定向的是请求
ForwardRirectController
//转发和重定向
@Controller
public class ForwardRirectController {
@RequestMapping("destination")
public String destination(){
return "/WEB-INF/destination.jsp";
}
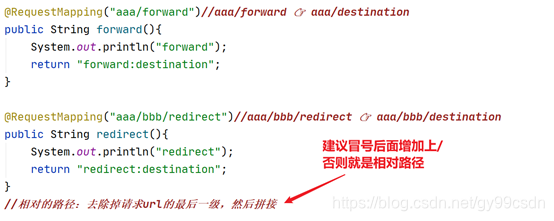
@RequestMapping("aaa/forward")//aaa/forward 👉 aaa/destination
public String forward(){
System.out.println("forward");
return "forward:/destination";
}
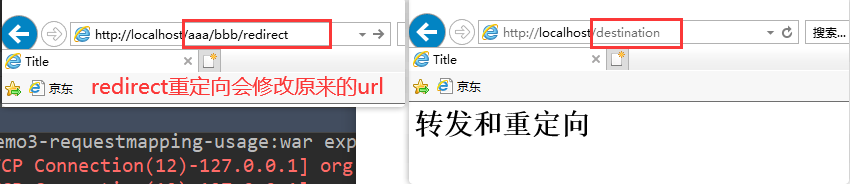
@RequestMapping("aaa/bbb/redirect")//aaa/bbb/redirect 👉 aaa/bbb/destination
public String redirect(){
System.out.println("redirect");
return "redirect:/destination";
}
}
destinnation.jsp
<%@ page contentType="text/html;charset=UTF-8" language="java" %>
<html>
<head>
    <title>Title</title>
</head>
<body>

<h1>转发和重定向</h1>
</body>
</html>
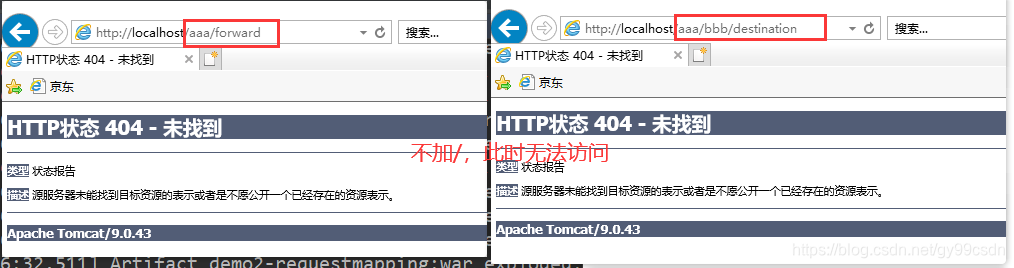
结果:
相对路径


 5425
5425

 被折叠的 条评论
为什么被折叠?
被折叠的 条评论
为什么被折叠?
 到【灌水乐园】发言


