


1.入门案例1
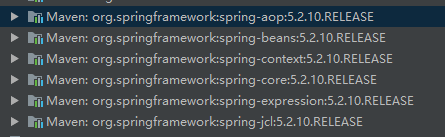
1.1导包
spring-core
spring-context
spring-bean
spring-aop
spring-expression
只需导入spring-context就行了
<dependency>
            <groupId>org.springframework</groupId>
            <artifactId>spring-context</artifactId>
            <version>5.2.10.RELEASE</version>
</dependency>
1.2 创建spring容器 → spring配置文件
xml格式 → schema
配置文件的名称:application(-xxx).xml
1、 复制已有schema
2、 spring官网
3、 文件模板
1.3 配置文件中管理实例
userServiceImpl的实例交给spring容器
组件:Spring容器管理的实例
注册:管理
1.4实现
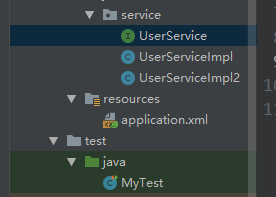
UserService接口
public interface UserService {
    public void sayHello(String username);
}
UserServiceImpl.java
public class UserServiceImpl implements UserService{
    public void sayHello(String username) {
        System.out.println("hello"+username);
    }
}
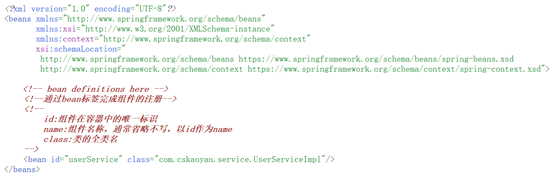
application.xml
<?xml version="1.0" encoding="UTF-8"?>
<beans xmlns="http://www.springframework.org/schema/beans"
       xmlns:xsi="http://www.w3.org/2001/XMLSchema-instance"
       xsi:schemaLocation="http://www.springframework.org/schema/beans http://www.springframework.org/schema/beans/spring-beans.xsd">

    <!-- bean definitions here -->
    <!--通过bean标签完成组件的注册-->
    <!--
        id:组件在容器中的唯一标识
        name:组件名称,通常省略不写,以id作为name
        class:类的全类名
    -->
    <bean id="userService" class="service.UserServiceImpl"/>
</beans>
MyTest.java(测试类)
public class MyTest {
@Test
public void mytest1(){
UserService userService=new UserServiceImpl();
userService.sayHello("葫芦娃");
}
@Test
public void mytest2(){
//从容器中取出userService
//ApplicationContext是容器具体的存在
//加载的位置是:classpath路径
ApplicationContext applicationContext = new ClassPathXmlApplicationContext("application.xml");
//按照组件的id,从容器中取出userService组件
UserService userService=(UserService) applicationContext.getBean("userService");
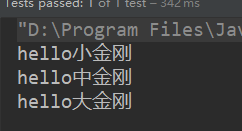
userService.sayHello("小金刚");
//根据组件的类型 → 容器中该类型(Class)的组件只有一个的时候
UserService userService2 = applicationContext.getBean(UserService.class);
userService2.sayHello("中金刚");
// 既按照id,又按照类型
UserService userService3 = applicationContext.getBean("userService", UserService.class);
userService3.sayHello("大金刚");
}
}
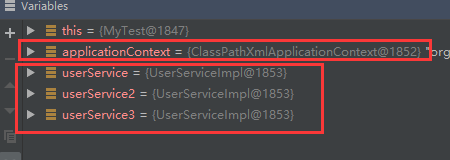
说明是单例
2.入门案例2
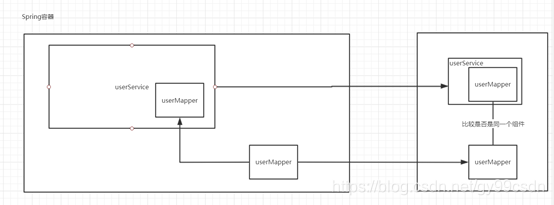
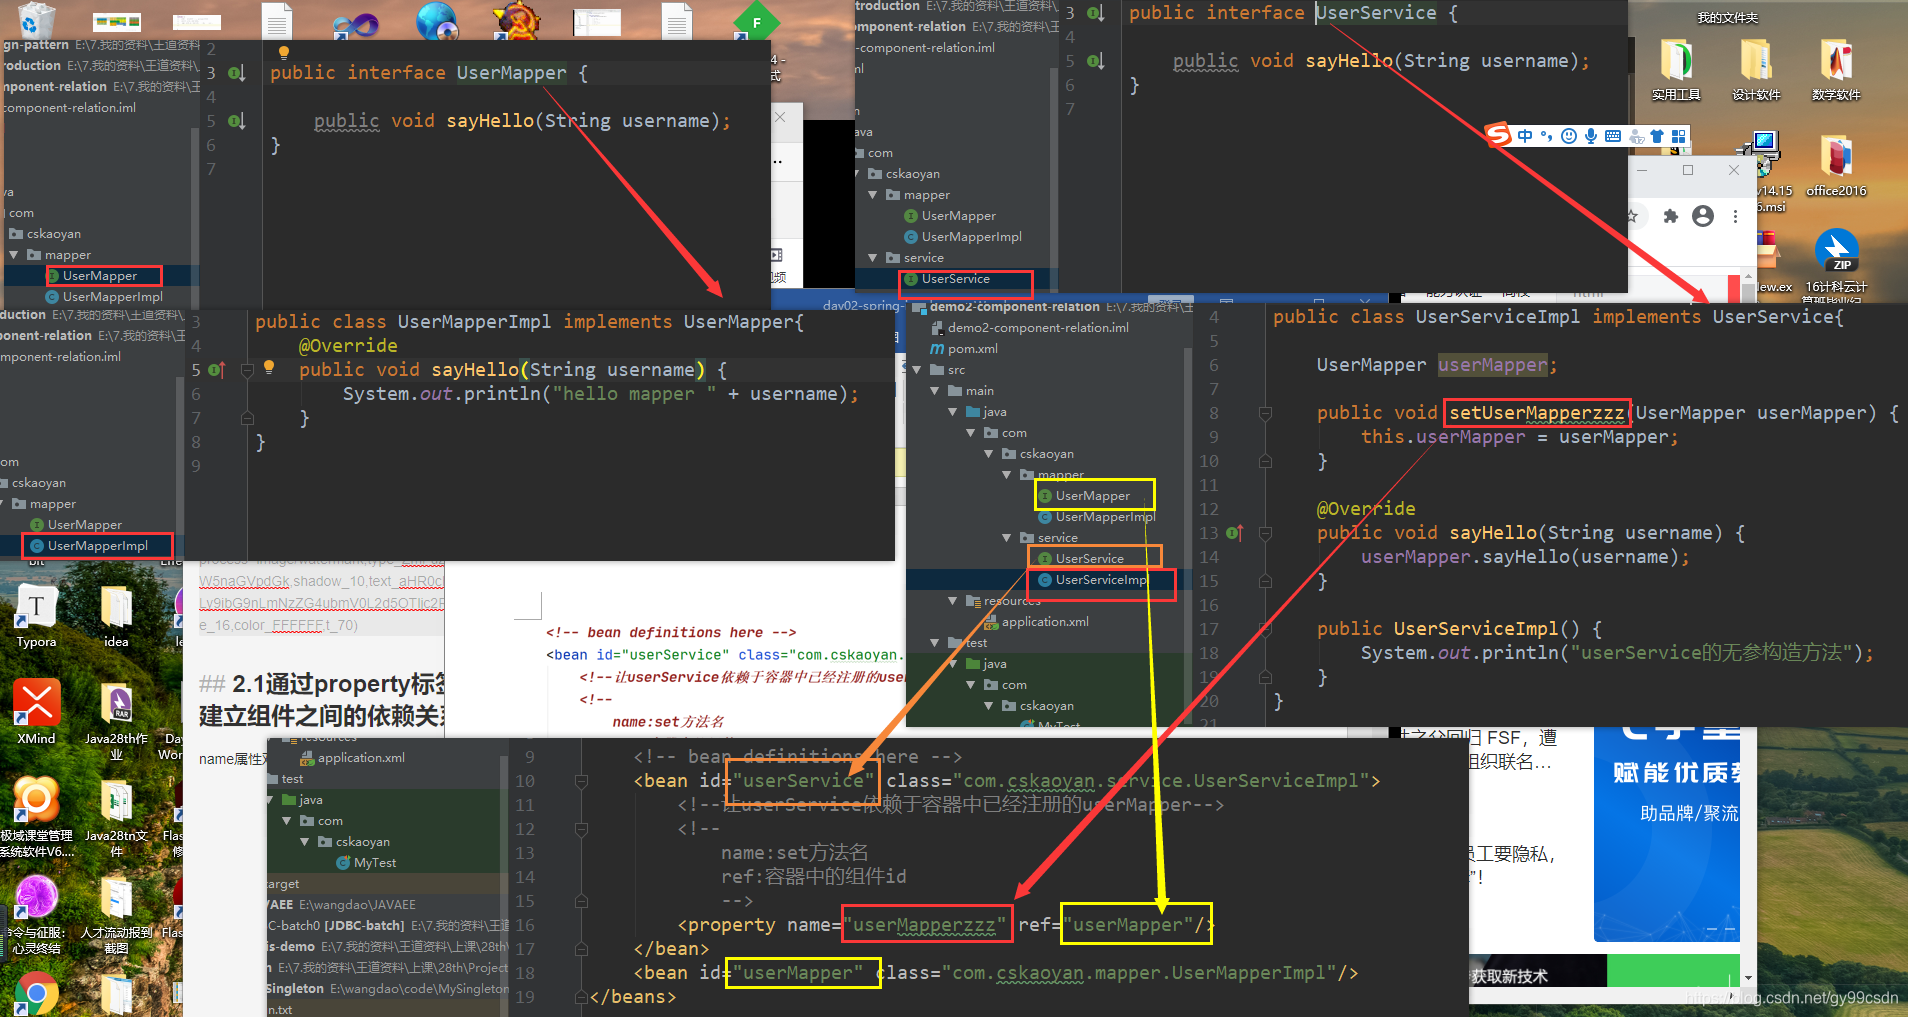
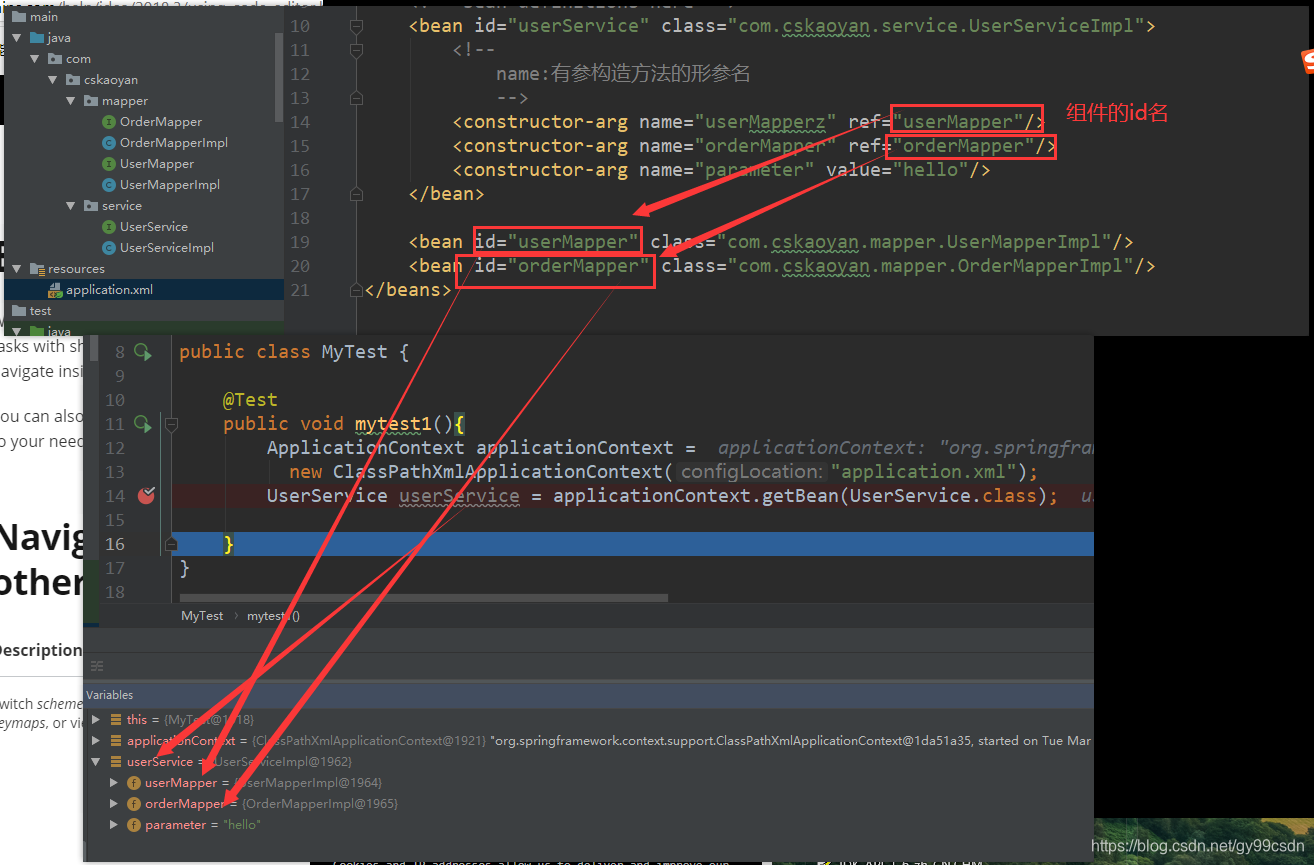
2.1通过property标签建立组件之间的依赖关系
name属性对应set方法
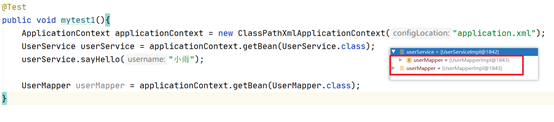
2.2 单元测试
从容器中取出的userService中的userMapper和直接从容器中取出的userMapper是同一个组件
3 接口(容器接口)
3.1 BeanFactory
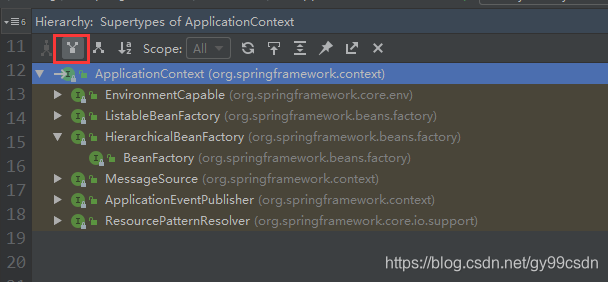
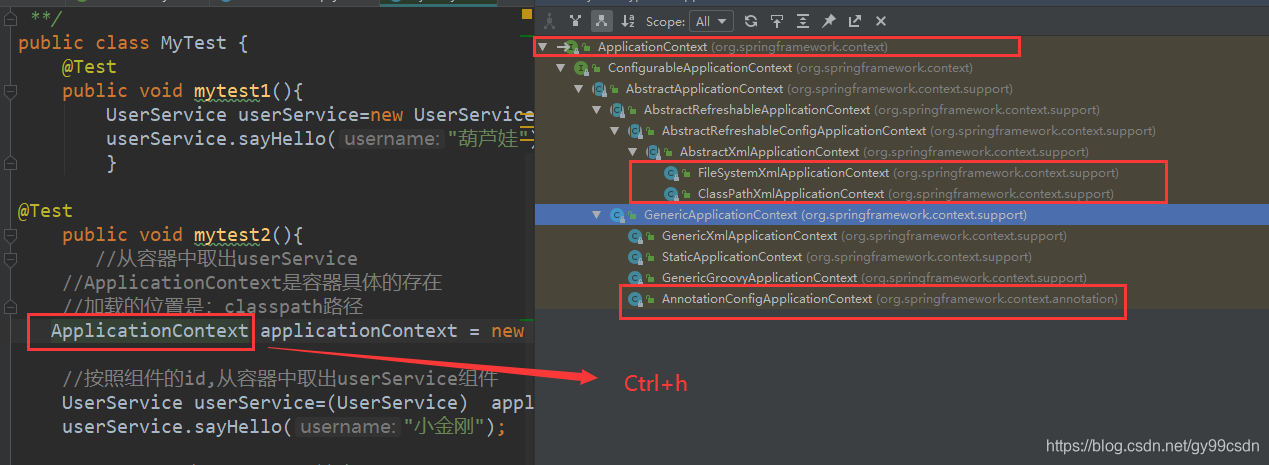
3.2 ApplicationContext
ClasspathXmlApplicationContext
FileSystemXmlApplicationContext
AnnotationConfigApplicationContext
WebApplicationContext
4 bean的实例化
控制反转:实例的生成权交给了spring容器
4.1构造方法
4.1.1 无参构造(最常用)
默认使用的方式就是无参构造

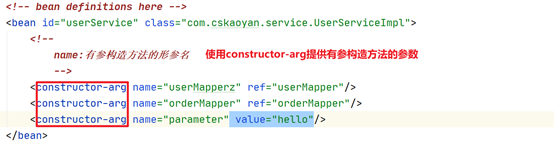
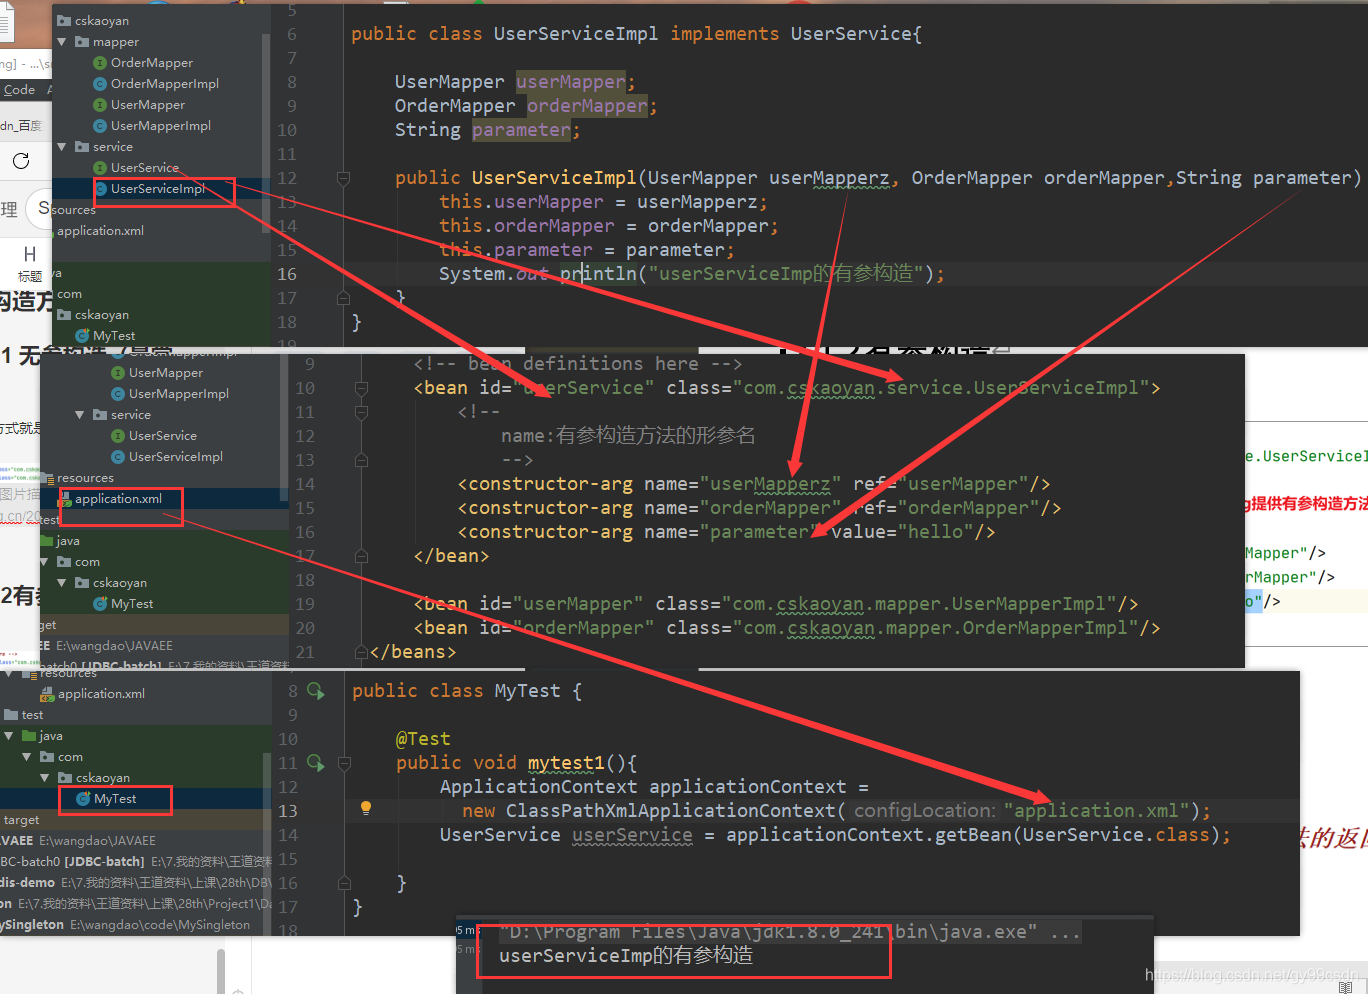
4.1.2有参构造
4.2 工厂
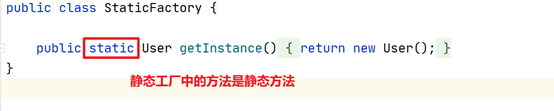
工厂中的生产方法是否为静态方法

4.2.1 静态工厂

4.2.2 实例工厂
需要先提供一个工厂组件


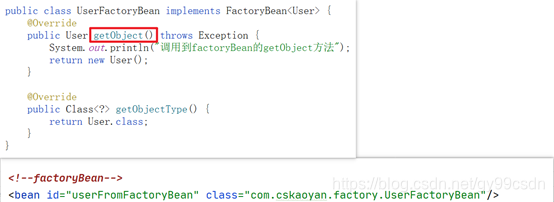
4.2.3 FactoryBean
BeanFactory和FactoryBean之间的区别:
- BeanFactory:生产全部组件
- XXXFactoryBean 👉 生产特定的xxx组件
- FactoryBean接口中提供了一个方法 👉 getObject(注册的组件类型和该方法的返回值相关)
4.2.4 全部代码
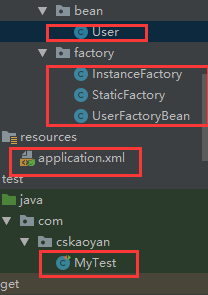
User.java
public class User {
}
InstanceFactory.java
public class InstanceFactory {

    public User getInstance() {
        return new User();
    }
}
StaticFactory.java
public class StaticFactory {

    public static User getInstance() {
        return new User();
    }
}
UserFactoryBean.java
public class UserFactoryBean implements FactoryBean<User> {
    @Override
    public User getObject() throws Exception {
        System.out.println("调用到factoryBean的getObject方法");
        return new User();
    }

    @Override
    public Class<?> getObjectType() {
        return User.class;
    }
}
application.xml
<?xml version="1.0" encoding="UTF-8"?>
<beans xmlns="http://www.springframework.org/schema/beans"
       xmlns:xsi="http://www.w3.org/2001/XMLSchema-instance"
       xmlns:context="http://www.springframework.org/schema/context"
       xsi:schemaLocation="
        http://www.springframework.org/schema/beans https://www.springframework.org/schema/beans/spring-beans.xsd
        http://www.springframework.org/schema/context https://www.springframework.org/schema/context/spring-context.xsd">

    <!-- bean definitions here -->
    <!--组件类型和factory-method对应的方法的返回值类型是相关的-->
    <!--
        静态工厂factory-method: 当前class中的方法名(静态的方法)
    -->
    <bean id="userFromStaticFactory" class="com.cskaoyan.factory.StaticFactory" factory-method="getInstance"/>

    <!--
        实例工厂factory-bean:工厂组件的id
               factory-method:当前factory-bean中的方法名
    -->
    <bean id="instanceFactory" class="com.cskaoyan.factory.InstanceFactory"/>
    <bean id="userFromInstanceFactory" factory-bean="instanceFactory" factory-method="getInstance"/>

    <!--factoryBean-->
    <bean id="userFromFactoryBean" class="com.cskaoyan.factory.UserFactoryBean"/>
</beans>
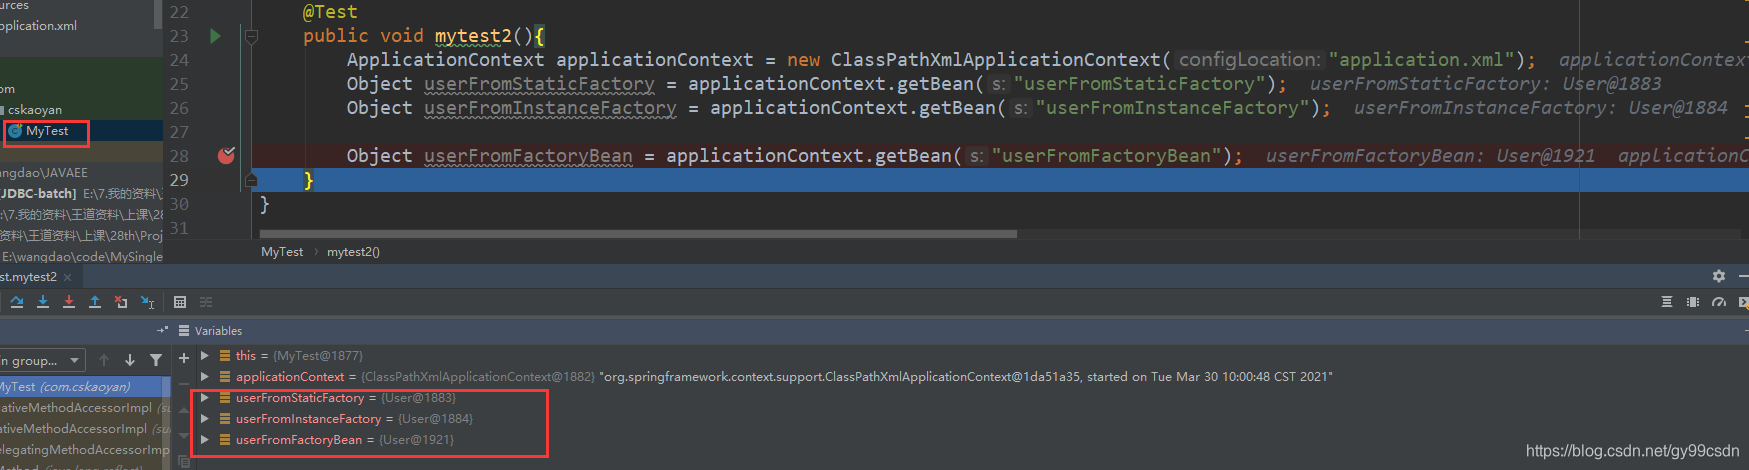
测试类
   @Test
    public void mytest2(){
        ApplicationContext applicationContext = new ClassPathXmlApplicationContext("application.xml");
        Object userFromStaticFactory = applicationContext.getBean("userFromStaticFactory");
        Object userFromInstanceFactory = applicationContext.getBean("userFromInstanceFactory");

        Object userFromFactoryBean = applicationContext.getBean("userFromFactoryBean");
    }
5 作用域scope(默认不写是singleton)
singleton:组件在容器中以单例的形式存在
prototype: 原型,每一次获得组件的时候都去获得一个新的

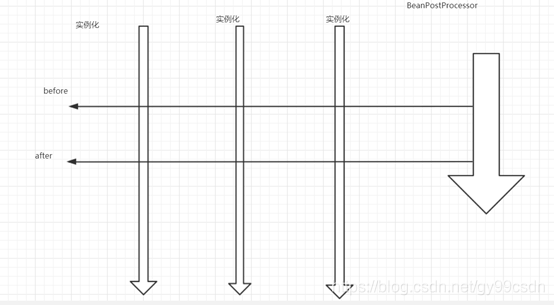
6 生命周期
容器中的组件的生命周期:我们要去使用组件,要经过哪一些过程
6.1 流程图

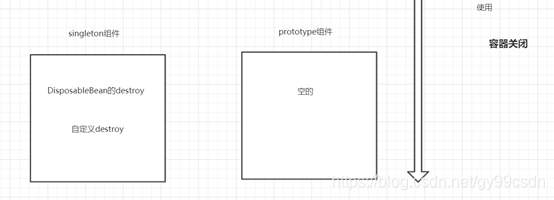
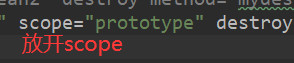
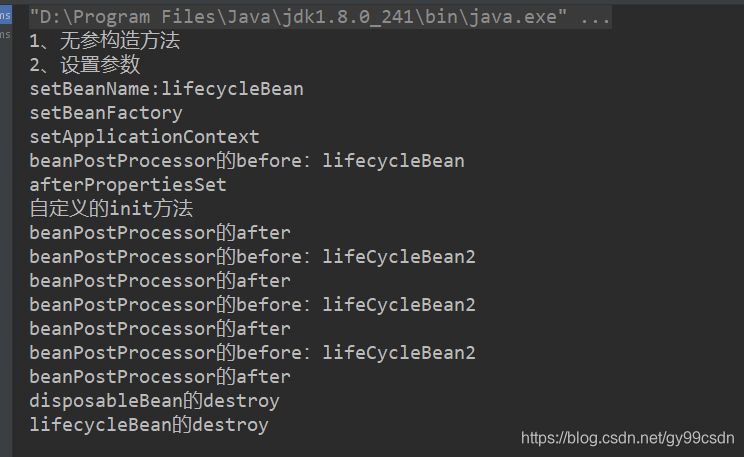
6.2 scope对生命周期的影响
scope:会影响组件到达可用状态之前的这些生命周期的执行(影响执行开始的时间)
singleton:容器初始化的时候(调用getBean方法之前已经执行完了)
prototype:当调用getBean(获得组件时),才开始执行生命周期
6.3 代码
6.3.1 给组件提供生命周期
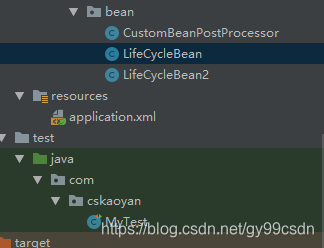
LifeCycleBean.java
public class LifeCycleBean implements BeanNameAware, BeanFactoryAware,
ApplicationContextAware, InitializingBean, DisposableBean {
String password;
String beanName;//null 👉 通过setBeanName方法完成赋值
BeanFactory beanFactory;
ApplicationContext applicationContext;
public LifeCycleBean() {
System.out.println("1、无参构造方法");
}
public void setPassword(String password) {
System.out.println("2、设置参数");
this.password = password;
}
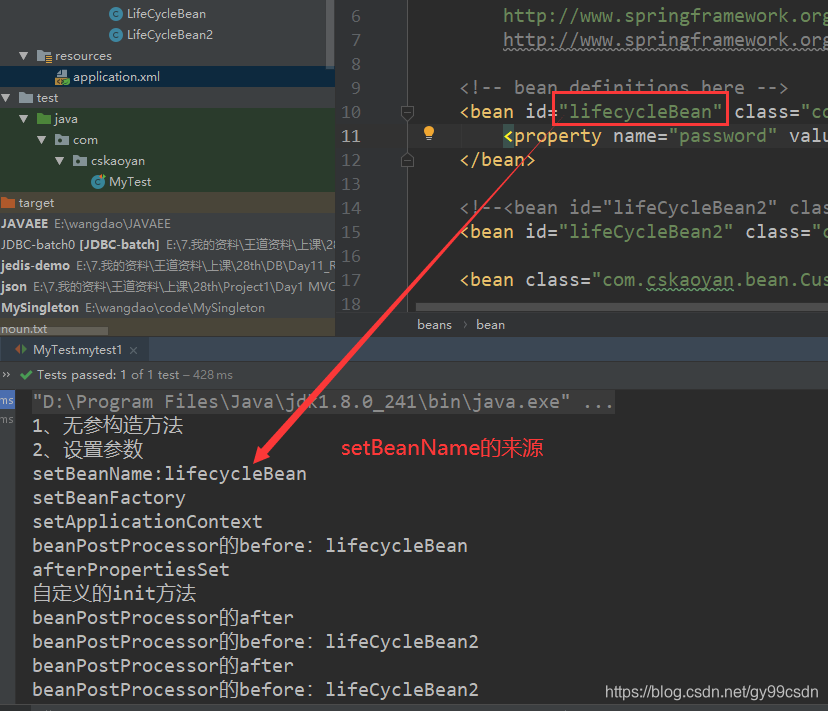
//获得该组件的name 👉 可以利用获得的组件的name给当前组件的成员变量复制
@Override
public void setBeanName(String s) {
System.out.println("setBeanName:" + s);
this.beanName = s;
}
@Override
public void setBeanFactory(BeanFactory beanFactory) throws BeansException {
System.out.println("setBeanFactory");
this.beanFactory = beanFactory;
}
@Override
public void setApplicationContext(ApplicationContext applicationContext) throws BeansException {
System.out.println("setApplicationContext");
this.applicationContext = applicationContext;
}
@Override
public void afterPropertiesSet() throws Exception {
System.out.println("afterPropertiesSet");
}
public void myinit() {
System.out.println("自定义的init方法");
}
public void mydestroy() {
System.out.println("lifecycleBean的destroy");
}
@Override
public void destroy() throws Exception {
System.out.println("disposableBean的destroy");
}
}
LifeCycleBean2.java
public class LifeCycleBean2 implements DisposableBean {
    public void mydestroy() {
        System.out.println("lifecycleBean2的destroy");
    }

    @Override
    public void destroy() throws Exception {
        System.out.println("life2 disposableBean的destroy");
    }
}
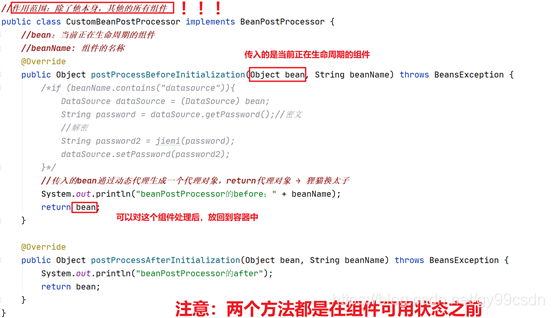
CustomBeanPostProcessor.java
//作用范围:除了他本身,其他的所有组件
public class CustomBeanPostProcessor implements BeanPostProcessor {
    //bean:当前正在生命周期的组件
    //beanName: 组件的名称
    @Override
    public Object postProcessBeforeInitialization(Object bean, String beanName) throws BeansException {

        //传入的bean通过动态代理生成一个代理对象,return代理对象 → 狸猫换太子
        System.out.println("beanPostProcessor的before:" + beanName);
        return bean;
    }

    @Override
    public Object postProcessAfterInitialization(Object bean, String beanName) throws BeansException {
        System.out.println("beanPostProcessor的after");
        return bean;
    }
}
<?xml version="1.0" encoding="UTF-8"?>
<beans xmlns="http://www.springframework.org/schema/beans"
xmlns:xsi="http://www.w3.org/2001/XMLSchema-instance"
xmlns:context="http://www.springframework.org/schema/context"
xsi:schemaLocation="
http://www.springframework.org/schema/beans https://www.springframework.org/schema/beans/spring-beans.xsd
http://www.springframework.org/schema/context https://www.springframework.org/schema/context/spring-context.xsd">
<!-- bean definitions here -->
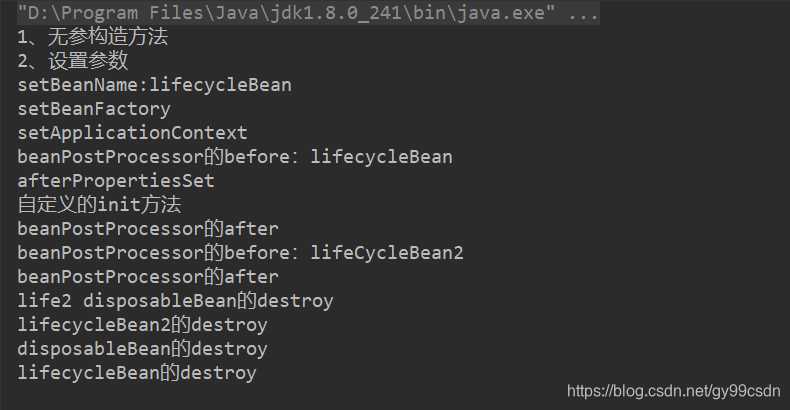
<bean id="lifecycleBean" class="com.cskaoyan.bean.LifeCycleBean" init-method="myinit" destroy-method="mydestroy">
<property name="password" value="hello"/>
</bean>
<bean id="lifeCycleBean2" class="com.cskaoyan.bean.LifeCycleBean2" destroy-method="mydestroy"/>
<!--<bean id="lifeCycleBean2" class="com.cskaoyan.bean.LifeCycleBean2" scope="prototype" destroy-method="mydestroy"/>-->
<bean class="com.cskaoyan.bean.CustomBeanPostProcessor"/>
</beans>
MyTest.java(测试类)
public class MyTest {

    //在获得组件之前已经完成了实例化
    @Test
    public void mytest1(){
        ClassPathXmlApplicationContext applicationContext = new ClassPathXmlApplicationContext("application.xml");
        //LifeCycleBean bean = applicationContext.getBean(LifeCycleBean.class);

        LifeCycleBean2 bean1 = applicationContext.getBean(LifeCycleBean2.class);
        LifeCycleBean2 bean2 = applicationContext.getBean(LifeCycleBean2.class);
        LifeCycleBean2 bean3 = applicationContext.getBean(LifeCycleBean2.class);
        applicationContext.close();
    }
}
结果:
6.3.2 自定义BeanPostProcessor
7 注解(重中之重)
7.1理论

其他注解
@Service :service层的组件
@Repository:dao层的组件
@Controller:controller层的组件(SpringMVC阶段才去使用)
组件注入
@Autowired:按照类型来进行注入
@Autowired + @Qualifier
@Resource
生命周期和scope
init-method:@PostConstruct
destroy-method:@PreDestroy
将注解写在方法上
@Scope :将作用域的值写在注解中
LifeCycleBean.java(生命周期和scope)
@Component
@Scope("singleton")
public class LifeCycleBean {
    @PostConstruct
    public void init() {
        System.out.println("自定义init");
    }

    @PreDestroy
    public void destroy() {
        System.out.println("自定义destroy");
    }
}
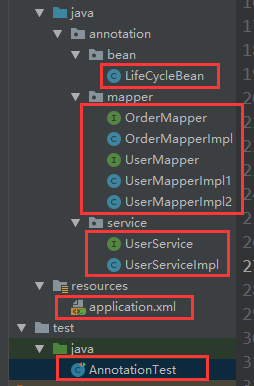
LifeCycleBean.java
public class LifeCycleBean {
}
OrderMapper.java
public interface OrderMapper {

    public void hello();
}
OrderMapperImpl.java
@Component
public class OrderMapperImpl implements OrderMapper {
    @Override
    public void hello() {
        System.out.println("hello orderMapper");
    }
}
UserMapper.java
public interface UserMapper {

    public void sayHello();
}
UserMapperImpl1.java
@Repository
public class UserMapperImpl1 implements UserMapper {
    @Override
    public void sayHello() {
        System.out.println("hello userMapper1");
    }
}
UserMapperImpl2.java
@Repository
public class UserMapperImpl2 implements UserMapper {

    @Override
    public void sayHello() {
        System.out.println("hello userMapper2");
    }
}
UserService.java
public interface UserService {

    public void sayAllHello();
}
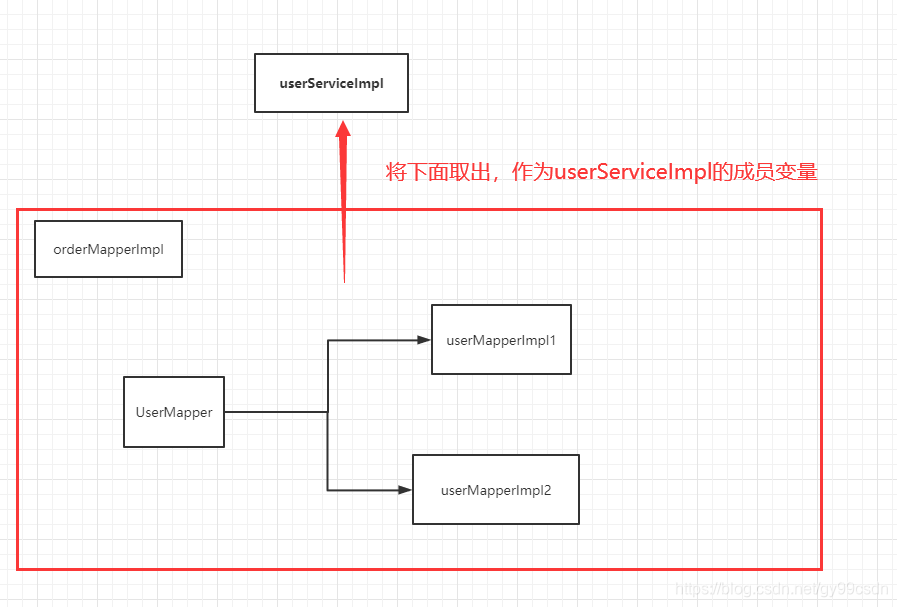
UserServiceImpl.java
//@Component("userService") //组件id为该注解的value属性值
@Component //组件id的默认值 → 类名的首字母小写 → userServiceImpl
public class UserServiceImpl implements UserService {
//容器中该类型的组件只有一个
@Autowired
OrderMapper orderMapper;
@Autowired
@Qualifier("userMapperImpl1")
UserMapper userMapper1;
//默认可以按照类型注入,可以使用name属性来指定组件id
@Resource(name = "userMapperImpl2")
UserMapper userMapper2;
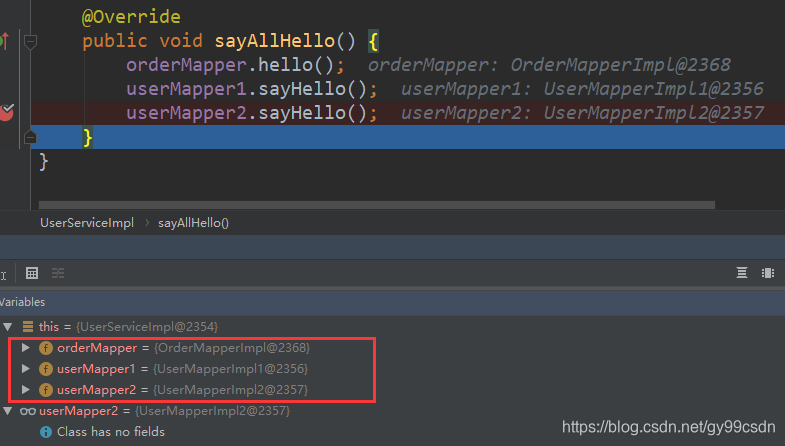
@Override
public void sayAllHello() {
orderMapper.hello();
userMapper1.sayHello();
userMapper2.sayHello();
}
}
application.xml
<?xml version="1.0" encoding="UTF-8"?>
<beans xmlns="http://www.springframework.org/schema/beans"
       xmlns:xsi="http://www.w3.org/2001/XMLSchema-instance"
       xmlns:context="http://www.springframework.org/schema/context"
       xsi:schemaLocation="
        http://www.springframework.org/schema/beans https://www.springframework.org/schema/beans/spring-beans.xsd
        http://www.springframework.org/schema/context https://www.springframework.org/schema/context/spring-context.xsd">

    <!-- bean definitions here -->
    <!--扫描该包目录以及所有子包:如果发现了组件注册功能的注解-->
    <context:component-scan base-package="annotation"/>

</beans>
AnnotationTest.java(测试类)
//给单元测试类构建一个spring的环境,将单元测试类当做是容器中的组件
//👉 注入功能的注解
@RunWith(SpringJUnit4ClassRunner.class)
@ContextConfiguration("classpath:application.xml")
public class AnnotationTest {
@Autowired
UserService userService;
@Autowired
OrderMapper orderMapper;
@Autowired
ApplicationContext applicationContext;
@Test
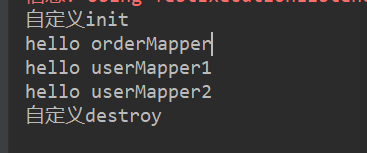
public void mytest1() {
userService.sayAllHello();
}
}
结果:


 173万+
173万+


 到【灌水乐园】发言


