


 本文详细介绍了在Spring MVC框架中如何处理各种类型的参数输入,包括使用HttpServletRequest、方法参数、对象、ModelAndView、ModelMap、@ModelAttribute、Session及重定向等进行数据接收与传递的方法。同时,展示了如何通过不同方式返回视图信息。
直接上代码把
那些配置开启扫描的就不贴了,前面博客里有
//这里写的就是单纯的传值接收值,可以自己加些逻辑
@Controller
@RequestMapping("/demo")
public class TestController {
// 1.使用request接收参数
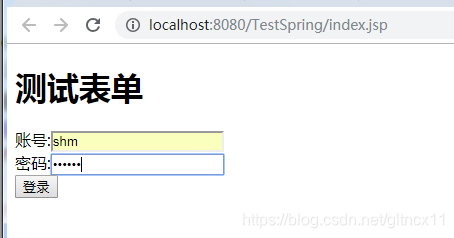
@RequestMapping("/test1.do")
public ModelAndView test1(HttpServletRequest request) {
String username = request.getParameter("username");
String password = request.getParameter("password");
System.out.println(username);
System.out.println(password);
return new ModelAndView("jsp/hello");
}
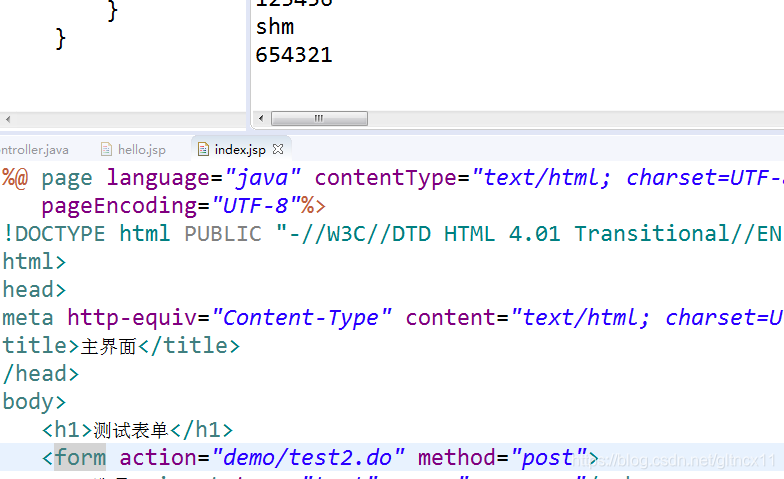
// 2.使用方法参数接收参数
@RequestMapping("/test2.do")
public ModelAndView test2(String username,@RequestParam("password") String pwd) {
System.out.println(username);
System.out.println(pwd);
return new ModelAndView("jsp/hello");
}
// 3.使用对象接收参数
@RequestMapping("/test3.do")
public ModelAndView test3(User user) {
System.out.println(user.getUsername());
System.out.println(user.getPassword());
return new ModelAndView("jsp/hello");
}
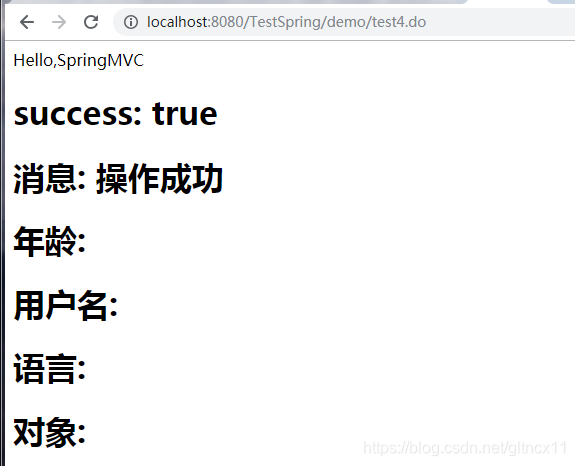
// 1.使用ModelAndView传出数据
@RequestMapping("/test4.do")
public ModelAndView test4() {
Map<String, Object> data = new HashMap<String, Object>();
data.put("success", "true");
data.put("message", "操作成功");
return new ModelAndView("jsp/hello",data);
}
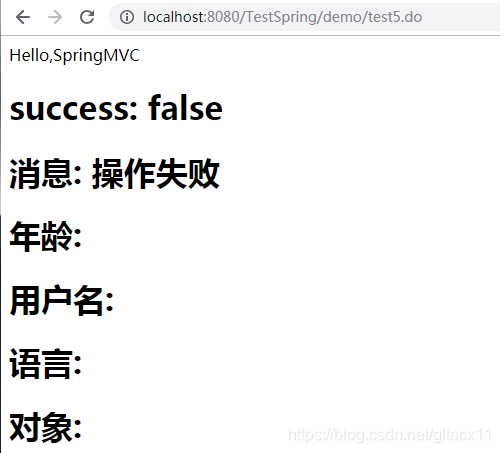
// 2.使用ModelMap传出数据
@RequestMapping("/test5.do")
public ModelAndView test5(ModelMap modelMap) {
modelMap.addAttribute("success", false);
modelMap.addAttribute("message", "操作失败");
return new ModelAndView("jsp/hello");
}
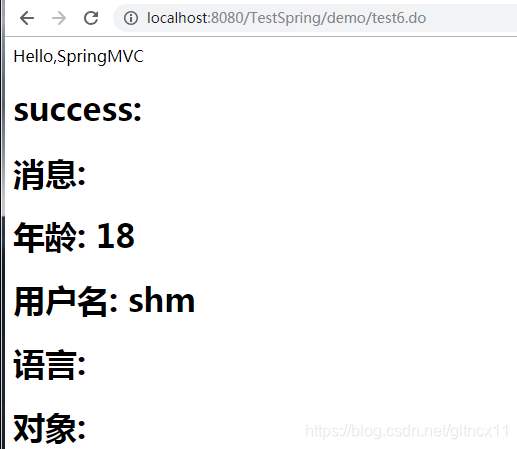
// 3.使用@ModelAttribute传出bean水性
@ModelAttribute("age")
public int getAge() {
return 18;
}
// 4.使用@ModelAttribute传输参数值
@RequestMapping("/test6.do")
public ModelAndView test6(@ModelAttribute("username") String username,
String password) {
return new ModelAndView("jsp/hello");
}
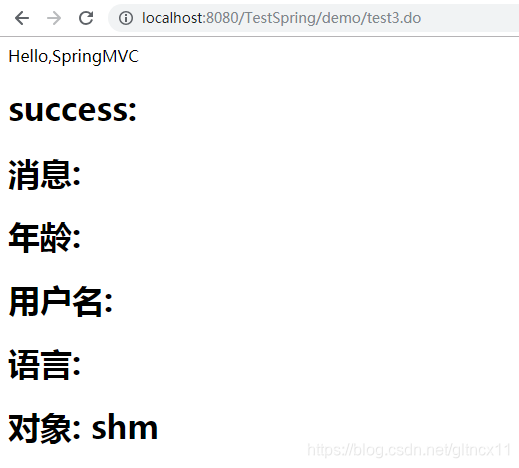
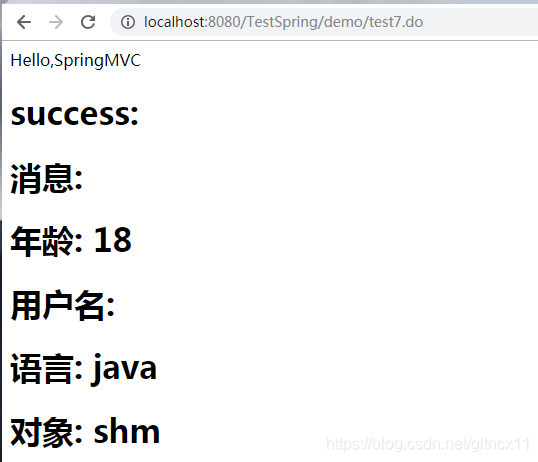
// 5.使用Session
@RequestMapping("/test7.do")
public ModelAndView test7(HttpServletRequest request,User user) {
HttpSession session = request.getSession();
session.setAttribute("langs", "java");
return new ModelAndView("jsp/hello");
}
// 6.返回String:逻辑视图信息/WEB-INF/jsp/hello.jsp
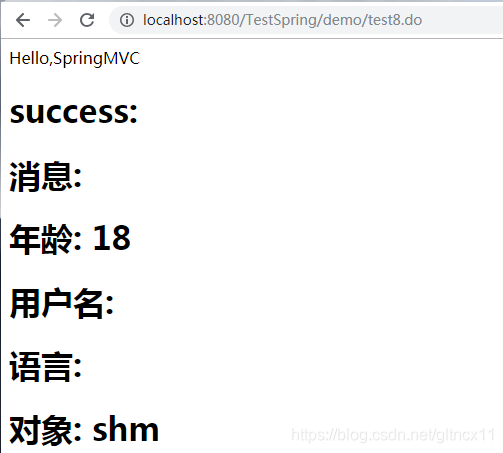
@RequestMapping("/test8.do")
public String test8(User user,ModelMap modelMap) {
modelMap.addAttribute("user",user);
return "jsp/hello";
}
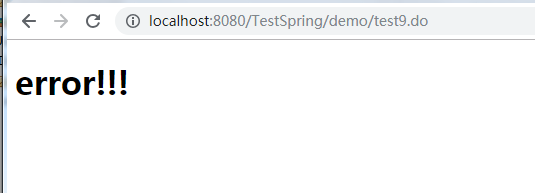
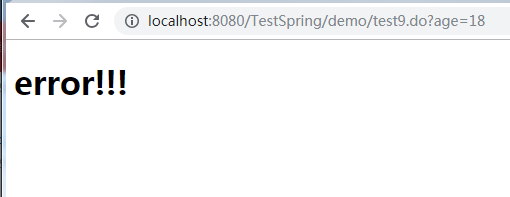
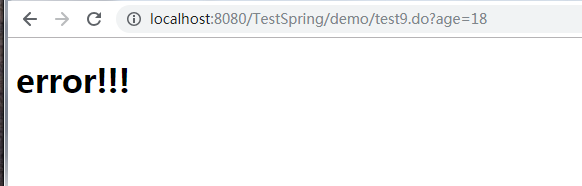
// 7.系统错误页面
@RequestMapping("/test9.do")
public String test9() {
return "jsp/error";
}
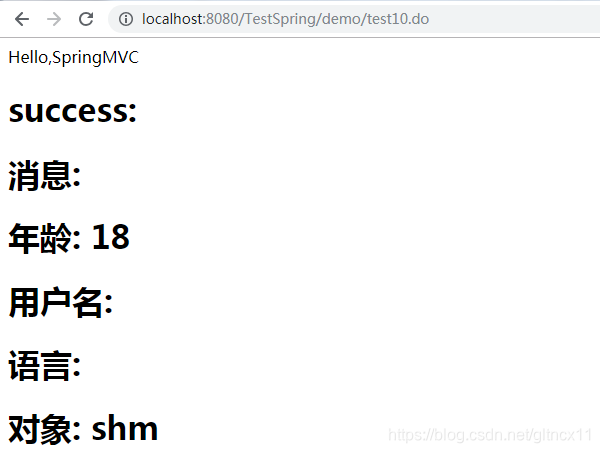
// 8.使用RedirectView重定向
@RequestMapping("/test10.do")
public ModelAndView test10(User user) {
if ("shm".equals(user.getUsername())) {
return new ModelAndView("jsp/hello");
}else {
return new ModelAndView(new RedirectView("test9.do"));
}
}
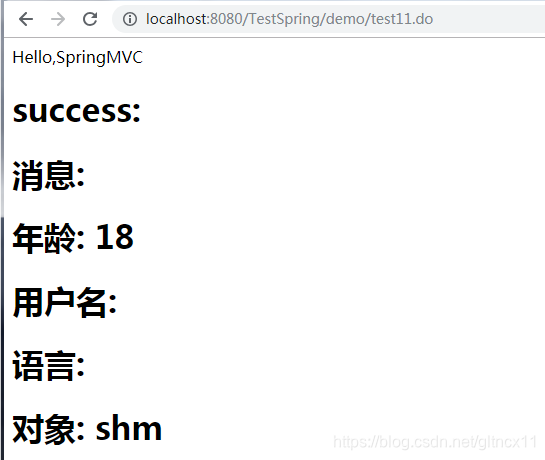
// 9.使用redirect重定向
@RequestMapping("/test11.do")
public String test11(User user) {
if ("shm".equals(user.getUsername())) {
return "jsp/hello";
}else {
return "redirect:test9.do";
}
}
}
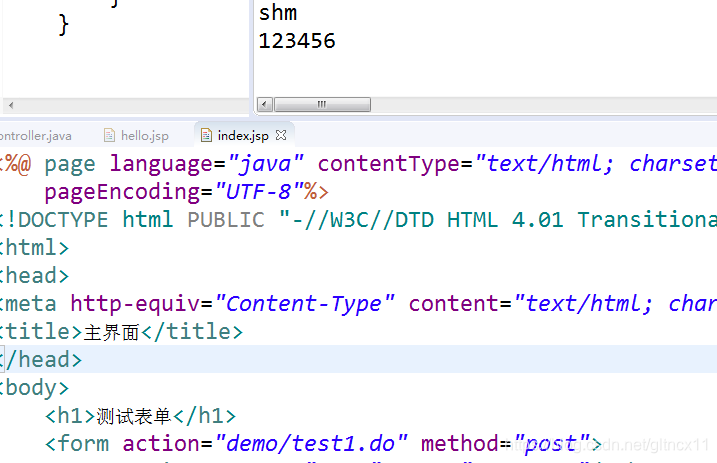
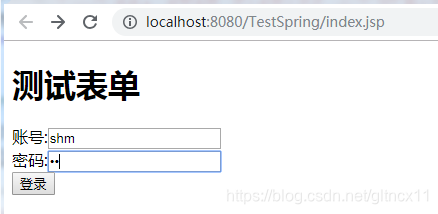
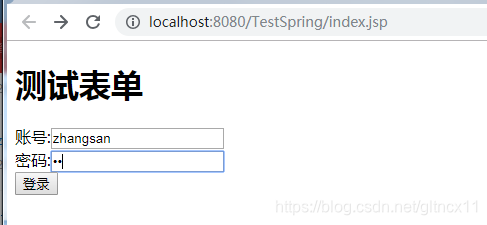
index.jsp(不要放在WEB-INF下,与WEB-INF同级,否则访问不到)
<body>
	<h1>测试表单</h1>
	<form action="demo/test(1,2,3...).do" method="post">
		账号:<input type="text" name="username"/><br>
		密码:<input type="password" name="password"/><br>
		<input type="submit" value="登录">
	</form>
</body>
hello.jsp
<body>
	<a>Hello,SpringMVC</a>
	<h1>success: ${success}</h1>
	<h1>消息: ${message}</h1>
	<h1>年龄: ${age}</h1>
	<h1>用户名: ${username}</h1>
	<h1>语言: ${sessionScope.langs}</h1>
	<h1>对象: ${user.username}</h1>
</body>
error.jsp
<body>
	<h1>error!!!</h1>
</body>
User
/**
 * 创建javabean用来分装前端传值
 * @author Administrator
 *
 */
public class User {
	private Integer id;
	private String username;
	private String password;
	public Integer getId() {
		return id;
	}
	public void setId(Integer id) {
		this.id = id;
	}
	public String getUsername() {
		return username;
	}
	public void setUsername(String username) {
		this.username = username;
	}
	public String getPassword() {
		return password;
	}
	public void setPassword(String password) {
		this.password = password;
	}

}
测试
test1.do

test2.do
test3.do
test4.do
test5.do
test6.do
test7.do
test8.do
test9.do
test10.do

test11.do


 11万+
11万+

 被折叠的 条评论
为什么被折叠?
被折叠的 条评论
为什么被折叠?
 到【灌水乐园】发言


