0、部署vagrant
安装vagrant,直接到官网下载对应平台的vagrant,如果嫌慢就用下面的连接下载
https://c4ys.com/archives/1230
我使用的是centos7
下载完了放到项目目录下
D:\shen\vagrant\vm
λ ls
Vagrant-CentOS-7.box  Vagrantfile
下载后的使用方法
添加vagrant box到box list
vagrant box add vm-test Vagrant-CentOS-7.box初始化一个虚拟机使用刚才添加的vagrant box
vagrant init centos7修改生成的配置Vagrantfile文件:(参考设置如下)
# -*- mode: ruby -*-
# vi: set ft=ruby :

# All Vagrant configuration is done below. The "2" in Vagrant.configure
# configures the configuration version (we support older styles for
# backwards compatibility). Please don't change it unless you know what
# you're doing.
Vagrant.configure("2") do |config|
  config.vm.box = "vm-test"
  config.vm.box_check_update = false
  config.vm.network :forwarded_port, guest: 22, host: 1234
  config.vm.network :forwarded_port, guest: 8082, host: 28082

  config.vm.synced_folder ".", "/srv/vm-test"
end
host和虚机的端口映射
config.vm.network :forwarded_port, guest: 9001, host: 9001同步文件设置
config.vm.synced_folder ".", "/srv/web_develop" 共享目录要安装的插件
vagrant plugin install vagrant-vbguest启动vagrant box虚拟机
vagrant up登陆
vagrant ssh设置root密码并切换到root账户
[vagrant@localhost ~]$ sudo passwd root
Changing password for user root.
New password:
BAD PASSWORD: The password is shorter than 8 characters
Retype new password:
passwd: all authentication tokens updated successfully.
[vagrant@localhost ~]$ su
Password:
[root@localhost vagrant]#
ssh 秘钥登陆设置
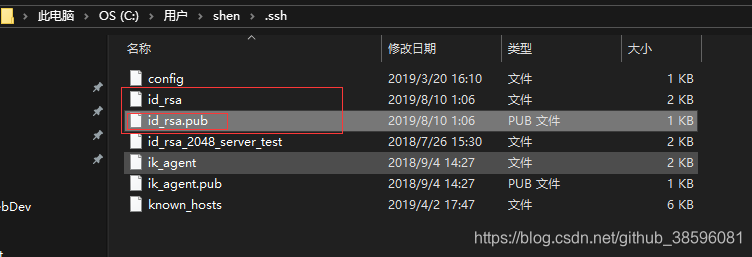
将公钥内容复制到vm的~/.ssh/authorized_keys

mkdir -p ~/.ssh
chmod 700 ~/.ssh
touch ~/.ssh/authorized_keys
chmod 644 ~/.ssh/authorized_keys
vim ~/.ssh/authorized_keys

ssh-rsa AAAAB3NzaC1yc2EAAAADAQABAAABAQC/wYvXgD6PzxJ8raPQo9tAUdItqj4rJ6pX3LCbhCJmB77zdifLPrT9V2vNJOi1//FrA8fMbviF/FK/YZRDLPrTTzagzoO7JXZCYKCGJcx7ZKqx3W0TC/5duS5dJF8H4NA3+1RjTDnM/gJxiVS+SGdyC+nAlIHe0eQZRyIhV3joygx5tyW7AcTuFGr13AzanWZ4TV/X+QJ4cbFceQpdI5XnYW3QeJ5VHiOJi+hovPndHO6FTTL9sDW9qPujMfq5o7Lusoxh/81zL+T+imRSennLWYAwiQbLN21C2JYbP8jpRnXzbuyhb0XJCT2z6ACq1ECc8Rpj+NH2otomv49HN+3J shen@DESKTOP-NR5O5ND

wq
关闭
vagrant halt1、CentOS 7.3安装python3.7
CentOS 7.3 默认安装了python2.7.5 因为一些命令要用它比如yum 它使用的是python2.7.5。所以建议不要直接将python3路径链接为/usr/bin/python
首先安装依赖包
yum install -y libffi-devel
yum -y install gcc openssl-devel libxml2-devel libffi-devel
下载python
wget https://www.python.org/ftp/python/3.7.4/Python-3.7.4.tgz
# tar -zxvf Python-3.7.4.tgz
cd Python-3.7.4
./configure --prefix=/usr/local/python3
make && make install
【这一步遇到ModuleNotFoundError: No module named ‘_ctypes’ make: *** [install] Error 1】解决方式见下方。
安装yum install -y libffi-devel
[root@localhost bin]# ln -fs /usr/local/python3/bin/python3 /usr/bin/python3
[root@localhost bin]# ln -fs /usr/local/python3/bin/pip3 /usr/bin/pip3
永久linux pip源修改
mkdir ~/.pip

touch ~/.pip/pip.conf

vim ~/.pip/pip.conf
Linux下,修改 ~/.pip/pip.conf (没有就创建一个), 修改 index-url至tuna,内容如下:
[global]
index-url = https://pypi.tuna.tsinghua.edu.cn/simple
2:安装python虚拟环境
单独建立虚拟环境的文件夹
/srv/web_develop_venv3.7/
cd 到目录
python3 -m venv .
完成后生成相关文件
[root@localhost web_develop]# ls /srv/web_develop_venv3.7/
bin include lib lib64 pyvenv.cfg
3:autoenv自动载入python虚拟环境
克隆项目到本地
$ git clone git://github.com/kennethreitz/autoenv.git ~/.autoenv
配置用户环境变量
$ echo 'source ~/.autoenv/activate.sh' >> ~/.bashrc
载入用户环境变量
$ source ~/.bashrc
写入虚拟环境到项目文件夹
    $ echo "source /srv/web_develop_venv3.7/bin/activate" > /srv/web_develop/.env
    # venv/bin/activate 代表python的虚拟环境位置,project表示你的项目文件夹,需要手动修改
进入项目路径,自动激活python虚拟环境
[root@localhost srv]# cd web_develop
(web_develop_venv3.7) [root@localhost web_develop]#
报错:
Vagrant was unable to mount VirtualBox shared folders. This is usually
because the filesystem "vboxsf" is not available. This filesystem is
made available via the VirtualBox Guest Additions and kernel module.
Please verify that these guest additions are properly installed in the
guest. This is not a bug in Vagrant and is usually caused by a faulty
Vagrant box. For context, the command attempted was:

mount -t vboxsf -o uid=1001,gid=1001 srv_web_develop /srv/web_develop

The error output from the command was:

/sbin/mount.vboxsf: mounting failed with the error: No such device
安装
vagrant plugin install vagrant-vbguestvagrant参考命令:
$ vagrant init      # 初始化

$ vagrant up        # 启动虚拟机
$ vagrant halt      # 关闭虚拟机
$ vagrant reload    # 重启虚拟机
$ vagrant ssh       # SSH 至虚拟机
$ vagrant suspend   # 挂起虚拟机
$ vagrant resume    # 唤醒虚拟机
$ vagrant status    # 查看虚拟机运行状态
$ vagrant destroy   # 销毁当前虚拟机


#box管理命令
$ vagrant box list    # 查看本地box列表
$ vagrant box add     # 添加box到列表

$ vagrant box remove  # 从box列表移除
错误参考:
Questions tagged [vagrant-windows]
https://stackoverflow.com/questions/tagged/vagrant-windows?pageSize=50&sort=frequent


 本文详细介绍了如何在Windows环境下利用Vagrant部署CentOS 7.3虚拟机,并在其中安装Python 3.7及自动激活的虚拟环境(autoenv)。首先,下载并安装Vagrant,然后添加box,初始化虚拟机,设置端口映射和共享目录。接着,通过yum安装依赖并手动编译安装Python 3.7。最后,创建Python虚拟环境并配置autoenv,使得进入项目目录时自动激活虚拟环境。


 1404
1404

 被折叠的 条评论
为什么被折叠?


