


Android学习-UI组件-Notification
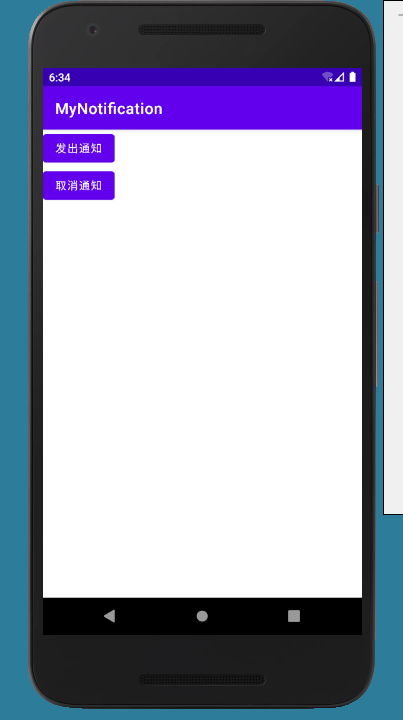
效果展示
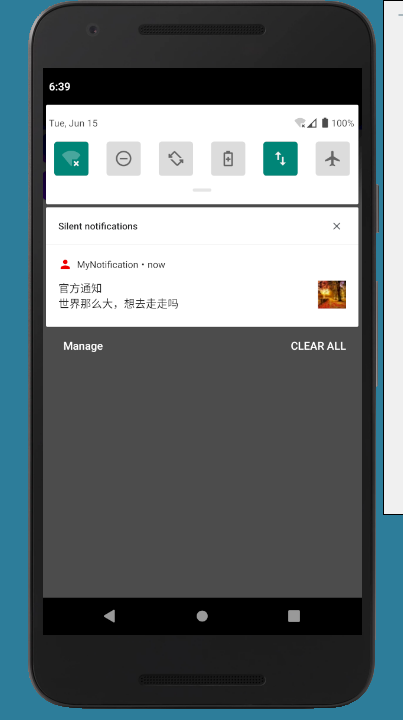
Notification的基本布局
组成元素依次是:
Icon/Photo:大图标
Title/Name:标题
Message:内容信息
Timestamp:通知时间,默认是系统发出通知的时间,也可以通过setWhen()来设置
Secondary Icon:小图标
内容文字,在小图标的左手边的一个文字
2.Notification的基本使用流程
状态通知栏主要涉及到2个类:Notification 和NotificationManager
Notification:通知信息类,它里面对应了通知栏的各个属性
NotificationManager:是状态栏通知的管理类,负责发通知、清除通知等操作。
使用的基本流程:
Step 1. 获得NotificationManager对象: NotificationManager mNManager = (NotificationManager) getSystemService(NOTIFICATION_SERVICE);
Step 2. 创建一个通知栏的Builder构造类: Notification.Builder mBuilder = new Notification.Builder(this);
Step 3. 对Builder进行相关的设置,比如标题,内容,图标,动作等!
Step 4.调用Builder的build()方法为notification赋值
Step 5.调用NotificationManager的notify()方法发送通知!
PS:另外我们还可以调用NotificationManager的cancel()方法取消通知
设置相关的一些方法:
Notification.Builder mBuilder = new Notification.Builder(this);
后再调用下述的相关的方法进行设置:(官方API文档:Notification.Builder) 常用的方法如下:
setContentTitle(CharSequence):设置标题
setContentText(CharSequence):设置内容
setSubText(CharSequence):设置内容下面一小行的文字
setTicker(CharSequence):设置收到通知时在顶部显示的文字信息
setWhen(long):设置通知时间,一般设置的是收到通知时的System.currentTimeMillis()
setSmallIcon(int):设置右下角的小图标,在接收到通知的时候顶部也会显示这个小图标
setLargeIcon(Bitmap):设置左边的大图标
setAutoCancel(boolean):用户点击Notification点击面板后是否让通知取消(默认不取消)
setDefaults(int):向通知添加声音、闪灯和振动效果的最简单、 使用默认(defaults)属性,可以组合多个属性,
Notification.DEFAULT_VIBRATE(添加默认震动提醒);
Notification.DEFAULT_SOUND(添加默认声音提醒);
Notification.DEFAULT_LIGHTS(添加默认三色灯提醒)
Notification.DEFAULT_ALL(添加默认以上3种全部提醒)
setVibrate(long[]):设置振动方式,比如:
setVibrate(new long[] {0,300,500,700});延迟0ms,然后振动300ms,在延迟500ms, 接着再振动700ms,关于Vibrate用法后面会讲解!
setLights(int argb, int onMs, int offMs):设置三色灯,参数依次是:灯光颜色, 亮持续时间,暗的时间,不是所有颜色都可以,这跟设备有关,有些手机还不带三色灯; 另外,还需要为Notification设置flags为Notification.FLAG_SHOW_LIGHTS才支持三色灯提醒!
setSound(Uri):设置接收到通知时的铃声,可以用系统的,也可以自己设置,例子如下:
.setDefaults(Notification.DEFAULT_SOUND) //获取默认铃声
.setSound(Uri.parse(“file:///sdcard/xx/xx.mp3”)) //获取自定义铃声
.setSound(Uri.withAppendedPath(Audio.Media.INTERNAL_CONTENT_URI, “5”)) //获取Android多媒体库内的铃声
setOngoing(boolean):设置为ture,表示它为一个正在进行的通知。他们通常是用来表示 一个后台任务,用户积极参与(如播放音乐)或以某种方式正在等待,因此占用设备(如一个文件下载, 同步操作,主动网络连接)
setProgress(int,int,boolean):设置带进度条的通知 参数依次为:进度条最大数值,当前进度,进度是否不确定 如果为确定的进度条:调用setProgress(max, progress, false)来设置通知, 在更新进度的时候在此发起通知更新progress,并且在下载完成后要移除进度条 ,通过调用setProgress(0, 0, false)既可。如果为不确定(持续活动)的进度条, 这是在处理进度无法准确获知时显示活动正在持续,所以调用setProgress(0, 0, true) ,操作结束时,调用setProgress(0, 0, false)并更新通知以移除指示条
setContentIntent(PendingIntent):PendingIntent和Intent略有不同,它可以设置执行次数, 主要用于远程服务通信、闹铃、通知、启动器、短信中,在一般情况下用的比较少。比如这里通过 Pending启动Activity:getActivity(Context, int, Intent, int),当然还可以启动Service或者Broadcast PendingIntent的位标识符(第四个参数):
FLAG_ONE_SHOT 表示返回的PendingIntent仅能执行一次,执行完后自动取消
FLAG_NO_CREATE 表示如果描述的PendingIntent不存在,并不创建相应的PendingIntent,而是返回NULL
FLAG_CANCEL_CURRENT 表示相应的PendingIntent已经存在,则取消前者,然后创建新的PendingIntent, 这个有利于数据保持为最新的,可以用于即时通信的通信场景
FLAG_UPDATE_CURRENT 表示更新的PendingIntent
使用示例:
//点击后跳转Activity
Intent intent = new Intent(context,XXX.class);
PendingIntent pendingIntent = PendingIntent.getActivity(context, 0, intent, 0);
mBuilder.setContentIntent(pendingIntent)
setPriority(int):设置优先级:
MAX 重要而紧急的通知,通知用户这个事件是时间上紧迫的或者需要立即处理的。
HIGH 高优先级用于重要的通信内容,例如短消息或者聊天,这些都是对用户来说比较有兴趣的。
DEFAULT 默认优先级用于没有特殊优先级分类的通知。
LOW 低优先级可以通知用户但又不是很紧急的事件。
MIN 用于后台消息 (例如天气或者位置信息)。最低优先级通知将只在状态栏显示图标,只有用户下拉通知抽屉才能看到内容。
对应属性:Notification.PRIORITY_HIGH…
activity_main.xml:
<?xml version="1.0" encoding="utf-8"?>
<LinearLayout xmlns:android="http://schemas.android.com/apk/res/android"
    android:layout_width="match_parent"
    android:layout_height="match_parent"
    android:orientation="vertical">

    <Button
        android:layout_width="wrap_content"
        android:layout_height="wrap_content"
        android:onClick="sendNotification"
        android:text="发出通知" />

    <Button
        android:layout_width="wrap_content"
        android:layout_height="wrap_content"
        android:onClick="cacelNotification"
        android:text="取消通知" />

</LinearLayout>
MainActivity.java
package com.enjoy.mynotification;

import androidx.appcompat.app.AppCompatActivity;
import androidx.core.app.NotificationCompat;

import android.app.Notification;
import android.app.NotificationChannel;
import android.app.NotificationManager;
import android.app.PendingIntent;
import android.content.Intent;
import android.graphics.BitmapFactory;
import android.graphics.Color;
import android.os.Build;
import android.os.Bundle;
import android.view.View;

public class MainActivity extends AppCompatActivity {

    private NotificationManager manager;

    private Notification notification;

    @Override
    protected void onCreate(Bundle savedInstanceState) {
        super.onCreate(savedInstanceState);
        setContentView(R.layout.activity_main);

        manager = (NotificationManager) getSystemService(NOTIFICATION_SERVICE);

        if (Build.VERSION.SDK_INT >= Build.VERSION_CODES.O) {
            NotificationChannel channel = new NotificationChannel("leo", "测试通知",
                    NotificationManager.IMPORTANCE_HIGH);
            manager.createNotificationChannel(channel);
        }

        Intent intent = new Intent(this, NotificationActivity.class);
        PendingIntent pendingIntent = PendingIntent.getActivity(this, 0, intent, 0);

        notification = new NotificationCompat.Builder(this, "leo")
                .setContentTitle("官方通知")
                .setContentText("世界那么大,想去走走吗")
                .setSmallIcon(R.drawable.ic_baseline_person_24)
                .setLargeIcon(BitmapFactory.decodeResource(getResources(), R.drawable.ceshi1))
                .setColor(Color.parseColor("#ff0000"))
                .setContentIntent(pendingIntent)
                .setAutoCancel(true)
                .build();
    }

    public void sendNotification(View view) {
        manager.notify(1, notification);
    }

    public void cacelNotification(View view) {
        manager.cancel(1);
    }
}
NotificationActivity.xml
package com.enjoy.mynotification;

import android.app.Activity;
import android.os.Bundle;
import android.util.Log;

import androidx.annotation.Nullable;

public class NotificationActivity  extends Activity {

    @Override
    protected void onCreate(@Nullable Bundle savedInstanceState) {
        super.onCreate(savedInstanceState);

        Log.e("leo", "onCreate: 进入NotificationActivity" );
    }
}
小图标
<vector xmlns:android="http://schemas.android.com/apk/res/android"
    android:width="24dp"
    android:height="24dp"
    android:viewportWidth="24"
    android:viewportHeight="24"
    android:tint="?attr/colorControlNormal">
  <path
      android:fillColor="@android:color/white"
      android:pathData="M12,12c2.21,0 4,-1.79 4,-4s-1.79,-4 -4,-4 -4,1.79 -4,4 1.79,4 4,4zM12,14c-2.67,0 -8,1.34 -8,4v2h16v-2c0,-2.66 -5.33,-4 -8,-4z"/>
</vector>


 4886
4886

 被折叠的 条评论
为什么被折叠?
被折叠的 条评论
为什么被折叠?
 到【灌水乐园】发言


