


在iOS 7中,苹果介绍了UIViewController中的topLayoutGuide和bottomLayoutGuide这两个属性,用来描述一个不被任何内容遮挡的屏幕区域,比如说顶部状态栏status bar、导航栏navigation bar、工具栏toolbar、菜单栏tab bar等。在IOS 11,苹果弃用了这些属性而启用safe area。苹果建议我们不要把任何交互放在safe area之外,从iOS 11开始,我们在开发iOS应用的时候,需要进行视图布局时,必须使用新的safe area API。
当我们做iPhone X适配或者去试着支持safe area时,会发现UIKit中的很多类里都有新的safe area(安全区)特性。本文的目的就是对他们进行概括和介绍。
目录
本文分为以下几个部分。
- UIView
- UIViewController
- UIScrollView
- UITableView
- UICollectionView
这些都是具有安全区属性和方法的类。
示例
可以在Github中找到示例代码,阅读本文时可以同步运行。
UIView
在iOS 11,UIViewController中的UIView的topLayoutGuide和bottomLayoutGuide被替换成了新的安全区属性。
@available(iOS 11.0, *)
open var safeAreaInsets: UIEdgeInsets { get }

@available(iOS 11.0, *)
open var safeAreaLayoutGuide: UILayoutGuide { get }
safeAreaInsets属性意味着屏幕可以被任何方向遮挡,并不只是上下,当iPhone X出现时,我们就明白了为什么我们需要对左右两边也进行缩进。
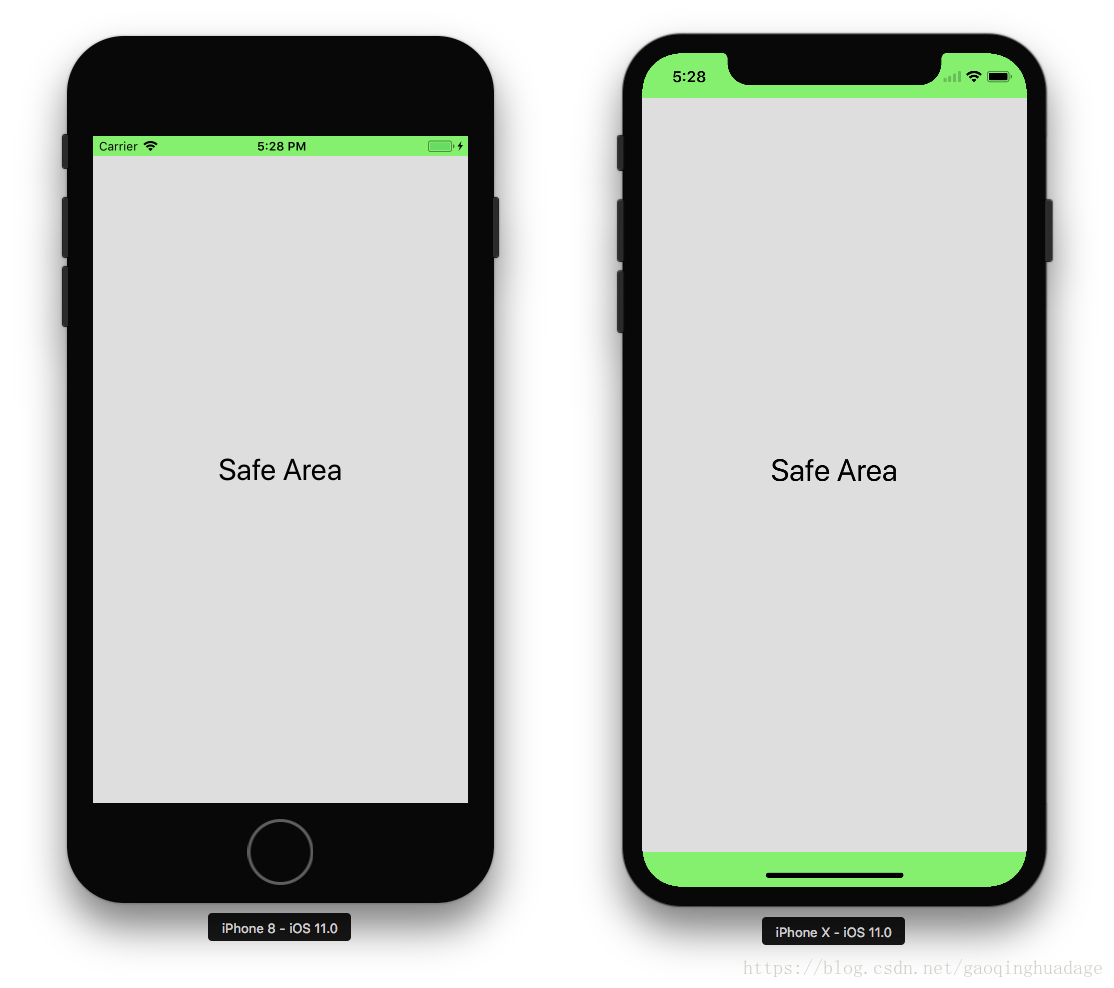
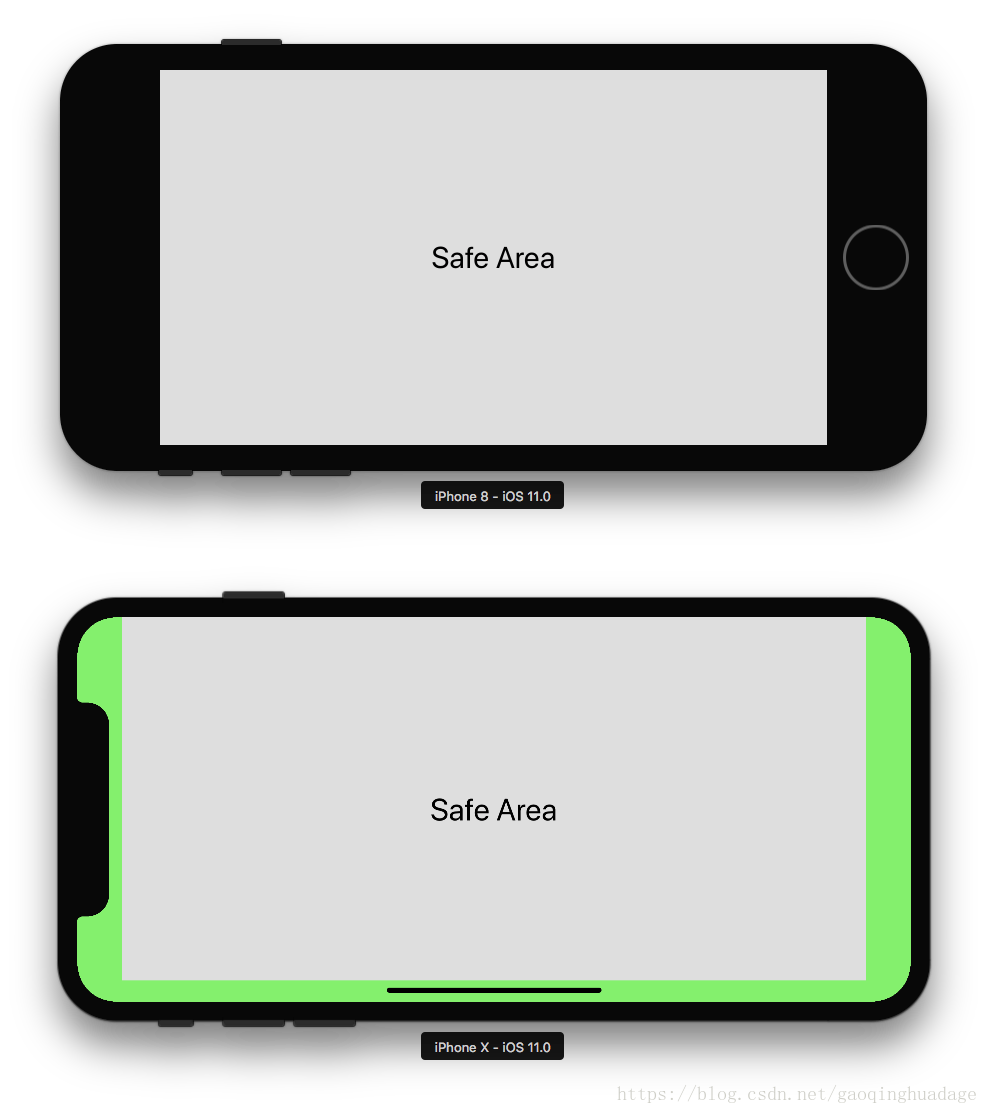
可以看到,iPhone X在纵向时有上、下的safe area缩进,而在横向时有左、右、下的缩进。
看一下示例中的情况,我们在一个控制器的view中添加了两个子视图,它们分别包含一个label和一段特定的高度,然后,让他们抵住了view的顶部和底部,也都贴到了view的边缘。
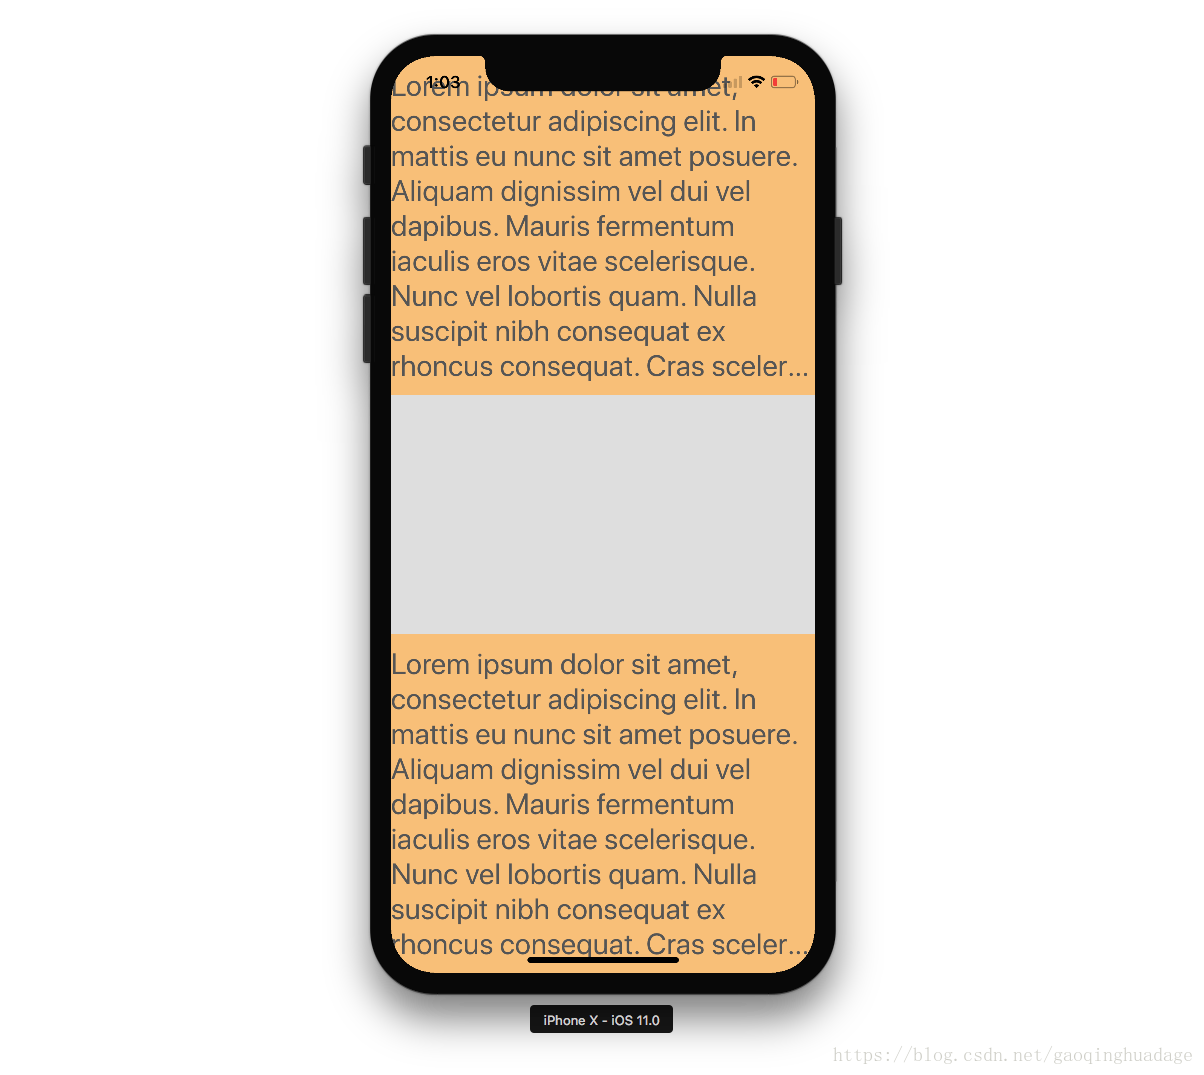
我们看到子视图的内容和顶部的刘海、底部的home指示器重叠了。要正确布局子视图的位置,我们可以使用手动布局将它们附加到safe area。
topSubview.frame.origin.x = view.safeAreaInsets.left
topSubview.frame.origin.y = view.safeAreaInsets.top
topSubview.frame.size.width = view.bounds.width - view.safeAreaInsets.left - view.safeAreaInsets.right
topSubview.frame.size.height = 300
或者使用自动布局
bottomSubview.leftAnchor.constraint(equalTo: view.safeAreaLayoutGuide.leftAnchor).isActive = true
bottomSubview.rightAnchor.constraint(equalTo: view.safeAreaLayoutGuide.rightAnchor).isActive = true
bottomSubview.bottomAnchor.constraint(equalTo: view.safeAreaLayoutGuide.bottomAnchor).isActive = true
bottomSubview.heightAnchor.constraint(equalToConstant: 300).isActive = true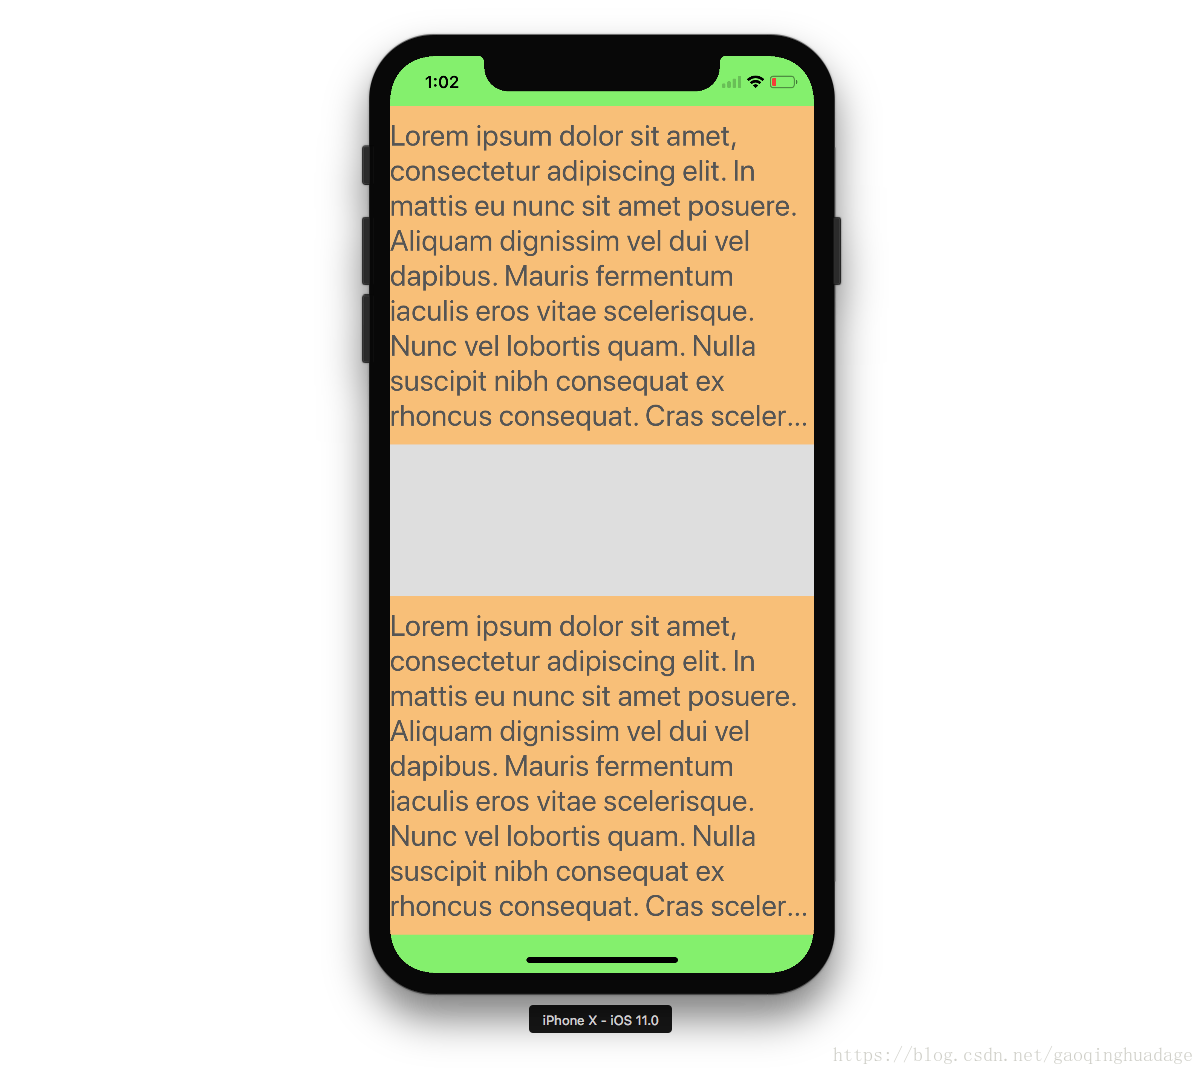
看起来好点了。此外还可以在子视图的类里直接设置子视图上的孙视图的位置,将孙视图放在子视图的safe area里。
label.frame = safeAreaLayoutGuide.layoutFrame或者使用自动布局
label.topAnchor.constraint(equalTo: safeAreaLayoutGuide.topAnchor).isActive = true
label.bottomAnchor.constraint(equalTo: safeAreaLayoutGuide.bottomAnchor).isActive = true
label.leftAnchor.constraint(equalTo: safeAreaLayoutGuide.leftAnchor).isActive = true
label.rightAnchor.constraint(equalTo: safeAreaLayoutGuide.rightAnchor).isActive = true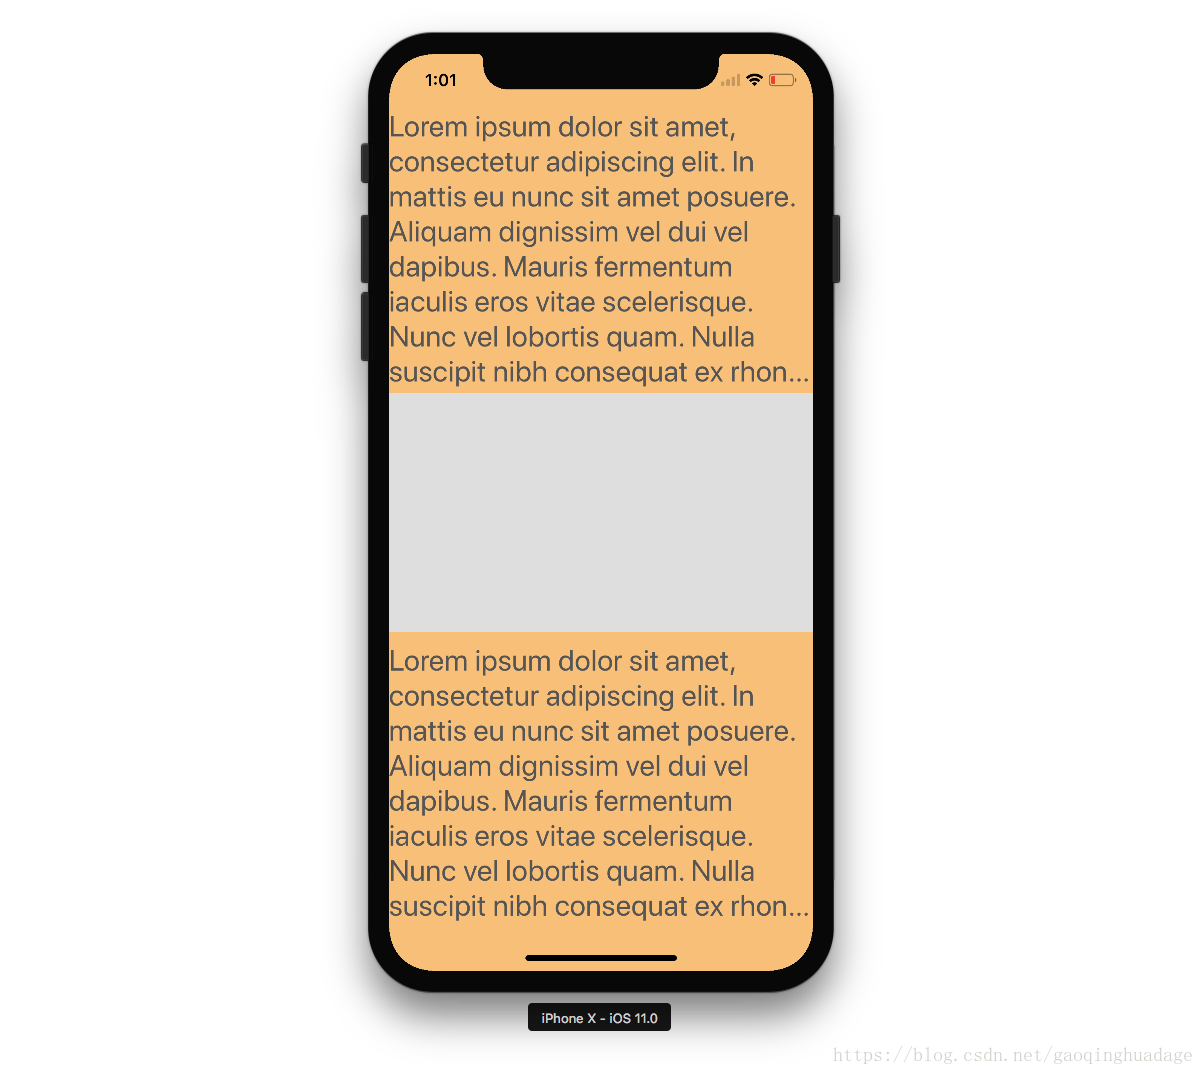
这下就厉害了,我们不仅在控制器里可以将view放在安全区,还可以在任意一层子视图结构中,将view放在其父控件的安全区。这样一来,我们可以在保证文本不被刘海和home指示器遮挡的情况下,还能自定义安全区外部分的颜色或者图片背景。
UIViewController
在iOS 11,UIViewController有了一个新属性(额外的安全区缩进):
@available(iOS 11.0, *)
open var additionalSafeAreaInsets: UIEdgeInsets
当ViewController包含其他嵌入的子ViewController时,将使用这个属性。比如说苹果会在UINavigationController和UITabBarController中当它们各自的bar为半透明时使用这个属性。
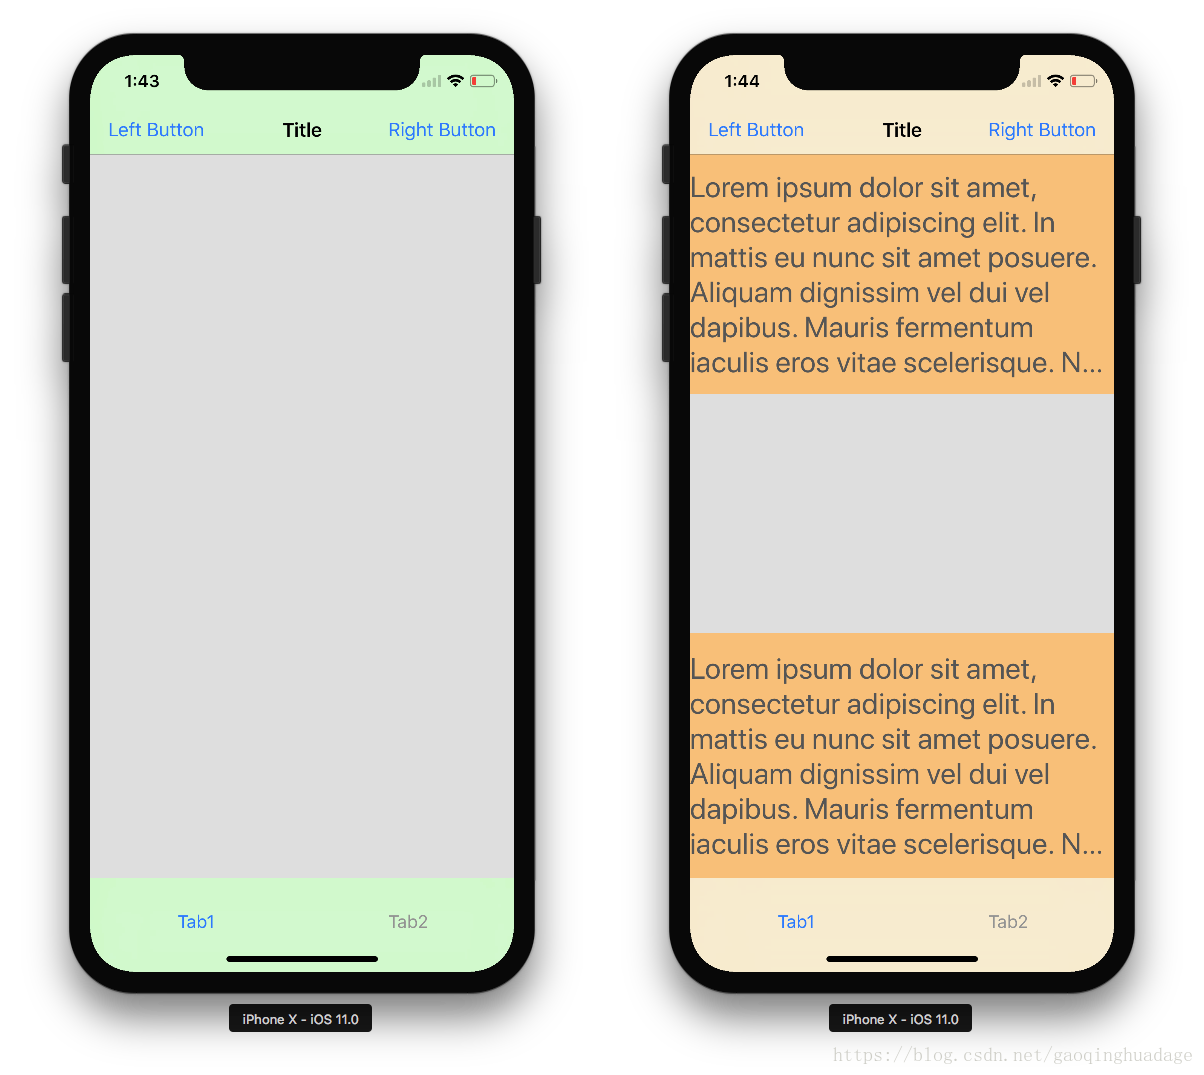
效果还不错,但是当状态栏隐藏时,奇怪的事情发生了。
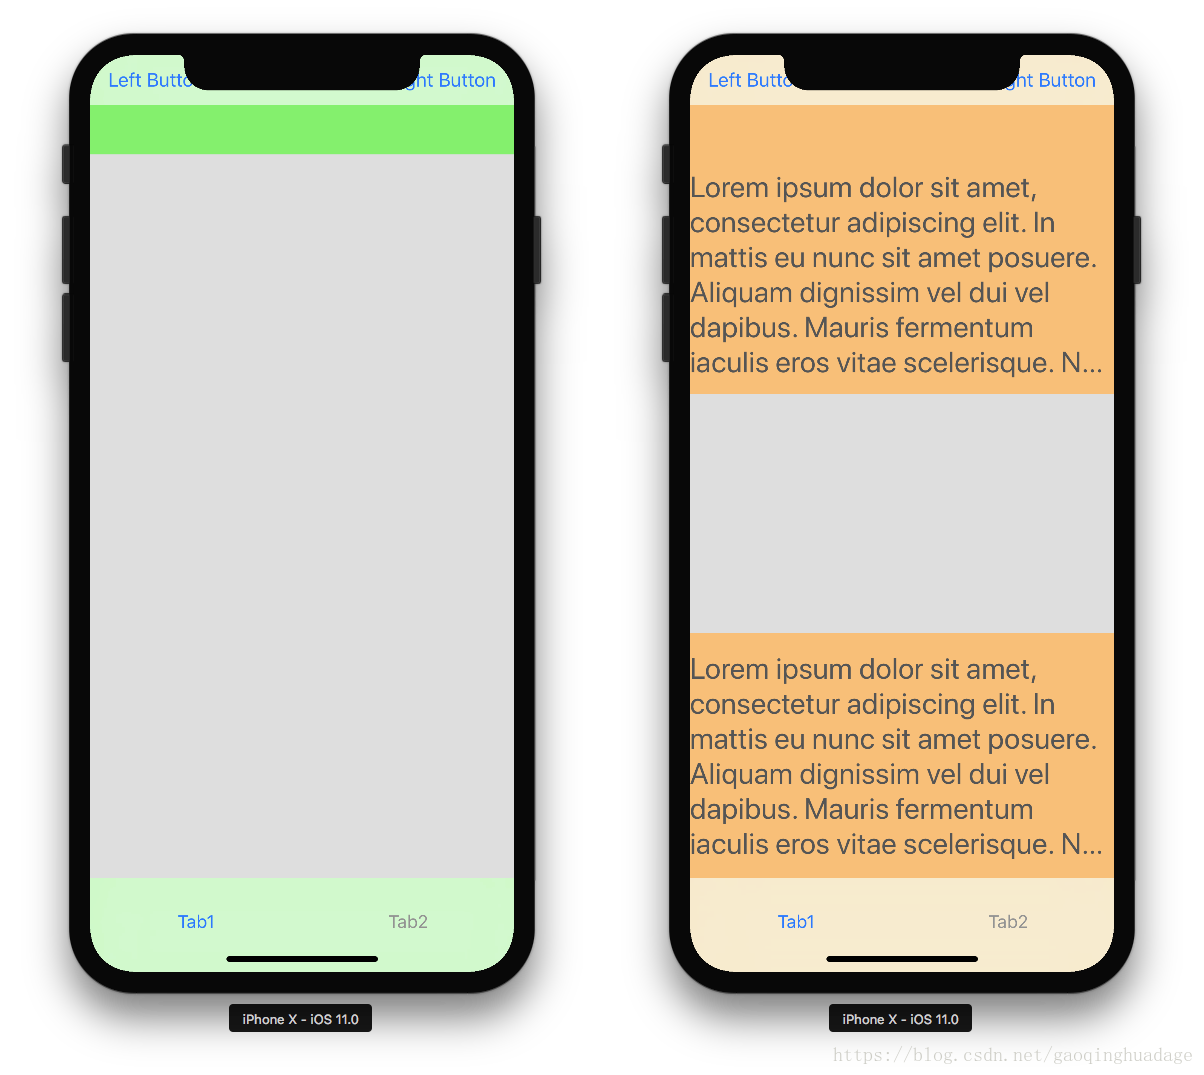
其他安全区的缩进尺寸都在预料中,但是导航栏向上移动到了刘海下面。这是个棘手的bug,而且除了在Stack Overflow上找到的一个还好的方法之外,目前没找到更好的方法去解决。
当我们修改additional safe area insets属性或者safe area insets被系统修改时,我们可以通过UIViewController或者UIView中特定的方法来监听。
// UIView
@available(iOS 11.0, *)
open func safeAreaInsetsDidChange()

//UIViewController
@available(iOS 11.0, *)
open func viewSafeAreaInsetsDidChange()
模拟iPhone X的安全区
额外的安全区缩进也可以用于,当你没有iPhone X真机或者不方便用iPhone X的模拟器时,测试你的app是否支持iPhone X。比如像示例代码里一样,通过实时修改缩进值,观察安全区的变化。
//portrait orientation, status bar is shown
additionalSafeAreaInsets.top = 24.0
additionalSafeAreaInsets.bottom = 34.0

//portrait orientation, status bar is hidden
additionalSafeAreaInsets.top = 44.0
additionalSafeAreaInsets.bottom = 34.0

//landscape orientation
additionalSafeAreaInsets.left = 44.0
additionalSafeAreaInsets.bottom = 21.0
additionalSafeAreaInsets.right = 44.0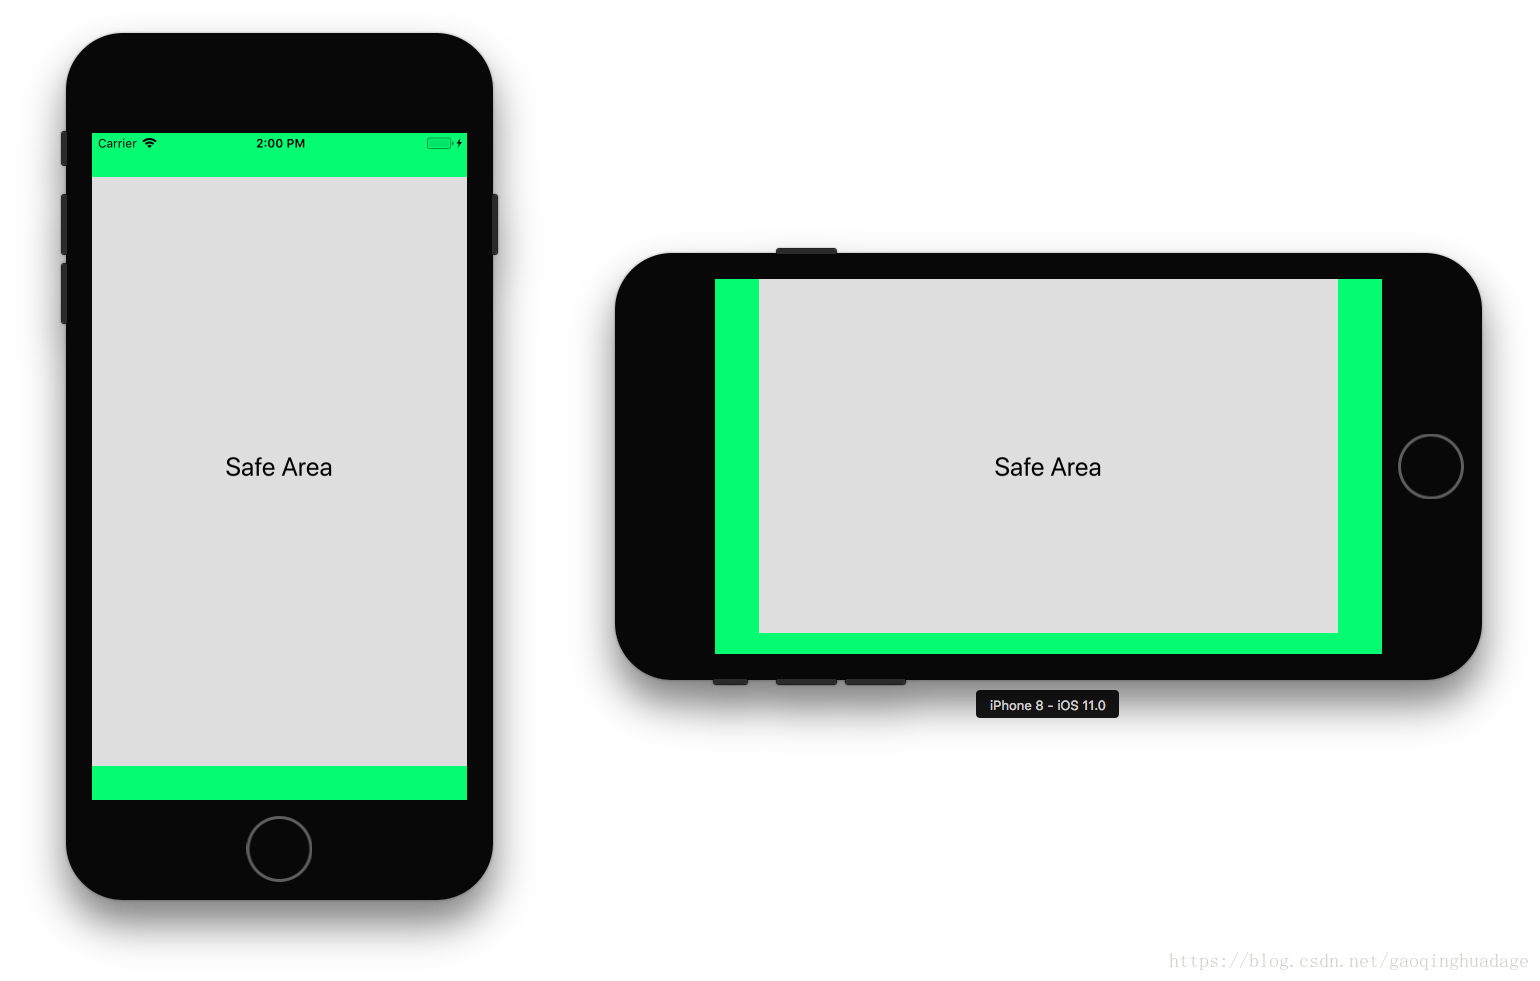
UIScrollView
在控制器上添加一个带label的scroll view,并且将其设置为贴着view边缘。
我们可以看到scroll view的缩进在顶部和底部自动适配了。在iOS 7及更高版本的系统,scroll view的内容缩进可以用UIViewController’s中的automaticallyAdjustsScrollViewInsets属性进行适配;但是在iOS 11中,这个属性被弃用了,取而代之的是UIScrollView中的一个新属性contentInsetAdjustmentBehavior。
@available(iOS 11.0, *)
public enum UIScrollViewContentInsetAdjustmentBehavior : Int {
    case automatic          //default value
    case scrollableAxes
    case never
    case always
}

@available(iOS 11.0, *)
open var contentInsetAdjustmentBehavior: UIScrollViewContentInsetAdjustmentBehavior
Content Insets Adjustment Behavior
never —— scroll view内容永远不适配,很好理解。
scrollableAxes —— 只对可滚动的方向上适配。比如说当scroll view的content size高度大于frame.size的高度或者启用了alwaysBounceVertical属性时,纵向可滑动;类似的当content size宽度大于frame.size的宽度或者启用了alwaysBounceHorizontal属性时,横向可滑动。

水平模式下只有底部content inset会适配,左侧和右侧content inset不会适配,因为此时横向不能滑动。
always —— 不管是否可滑动,scroll view的content insets永远适配。
automatic —— 是默认项,也是最有意思的。当它满足下列情况时,它和always 一样:
- scroll view横向可滑动,纵向不可滑动
- scroll view是控制器view的最底层子视图
- 控制器是navigation控制器或tabBar控制器的子控制器
- automaticallyAdjustsScrollViewInsets为真
在其他情况下automatic相当于scrollableAxes
关于automatic选项的更多描述,可以查看UIScrollView类:
类似于.scrollableAxes,但是考虑到向下兼容,当scroll view位于navigation controller中且设定了automaticallyAdjustsScrollViewInsets为真时,也会自动调整顶部和底部的contentInset,不管scroll view是否可滑动。
然而xcode苹果文档中的描述略有不同
当一个控制器展示在一个navigation控制器或者tabBar控制器时,其中的scroll view总是会被自动调整。如果scroll view处于横向可滑动,那么当未设置安全区indest的时候,横向的content offset也会自动调整。
因为考虑到向下兼容,automatic项被设置为默认。也就是说,在 iOS 10和 iOS 11中,横向可滑动的scroll view将会拥有相同的顶部和底部缩进。
Adjusted Content Insets
在iOS 11中,UIScrollView拥有了一个新的属性——adjustedContentInset:
@available(iOS 11.0, *)
open var adjustedContentInset: UIEdgeInsets { get }
那么contentInset和adjustedContentInset属性有什么不同?我们打印一下当scroll view被导航栏和菜单栏遮挡时两者的值:
//iOS 10
//contentInset = UIEdgeInsets(top: 64.0, left: 0.0, bottom: 49.0, right: 0.0)
//iOS 11
//contentInset = UIEdgeInsets(top: 0.0, left: 0.0, bottom: 0.0, right: 0.0)
//adjustedContentInset = UIEdgeInsets(top: 64.0, left: 0.0, bottom: 49.0, right: 0.0)
现在我们给contentInset从四个方向分别加10个点,然后再打印一下:
//iOS 10
//contentInset = UIEdgeInsets(top: 74.0, left: 10.0, bottom: 59.0, right: 10.0)
//iOS 11
//contentInset = UIEdgeInsets(top: 10.0, left: 10.0, bottom: 10.0, right: 10.0)
//adjustedContentInset = UIEdgeInsets(top: 74.0, left: 10.0, bottom: 59.0, right: 10.0)
我们可以看到在iOS 11中,scroll view实际的content insets将从adjustedContentInset属性中取得,而不再是contentInset属性。意思是当app需要同时支持iOS 10和 iOS 11时,我们需要为content insets的适配写两套不同的逻辑。
想要监听contentInset的值被修改的情况,UIScrollView和UIScrollViewDelegate提供了响应的方法。
//UIScrollView
@available(iOS 11.0, *)
open func adjustedContentInsetDidChange()

//UIScrollViewDelegate
@available(iOS 11.0, *)
optional public func scrollViewDidChangeAdjustedContentInset(_ scrollView: UIScrollView)
UITableView
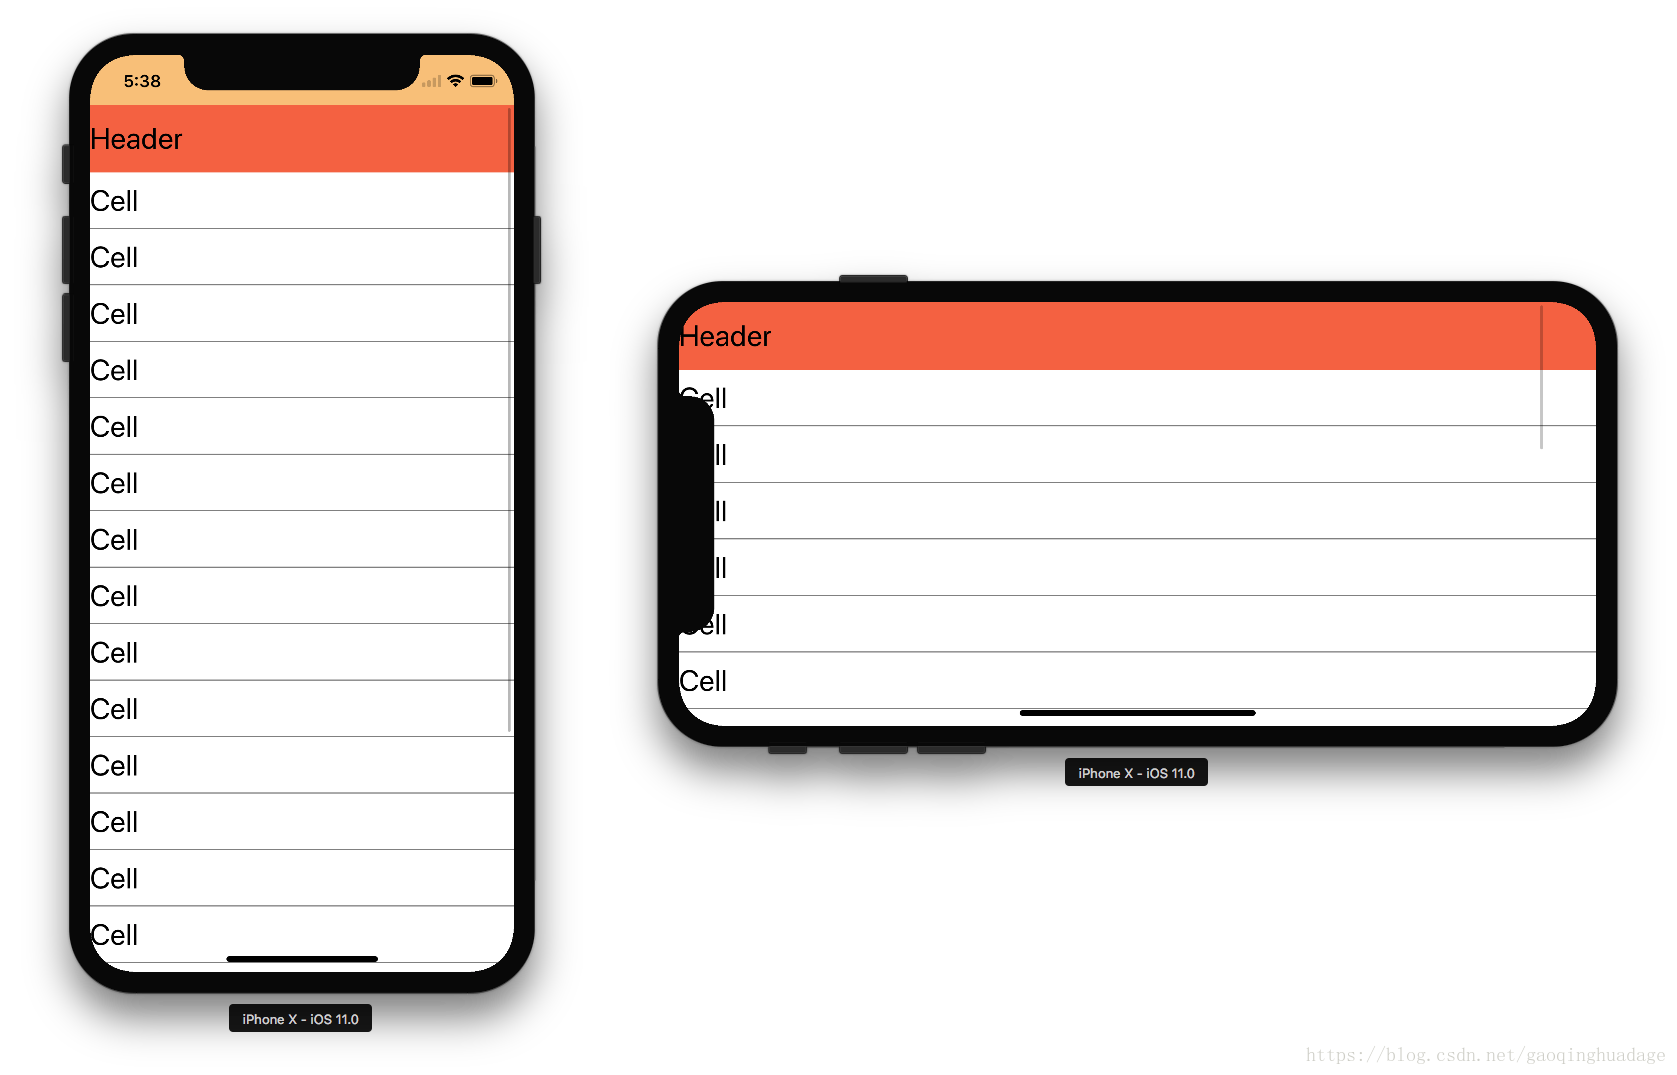
在控制器上添加一个带有自定义header和自定义cell的table view。
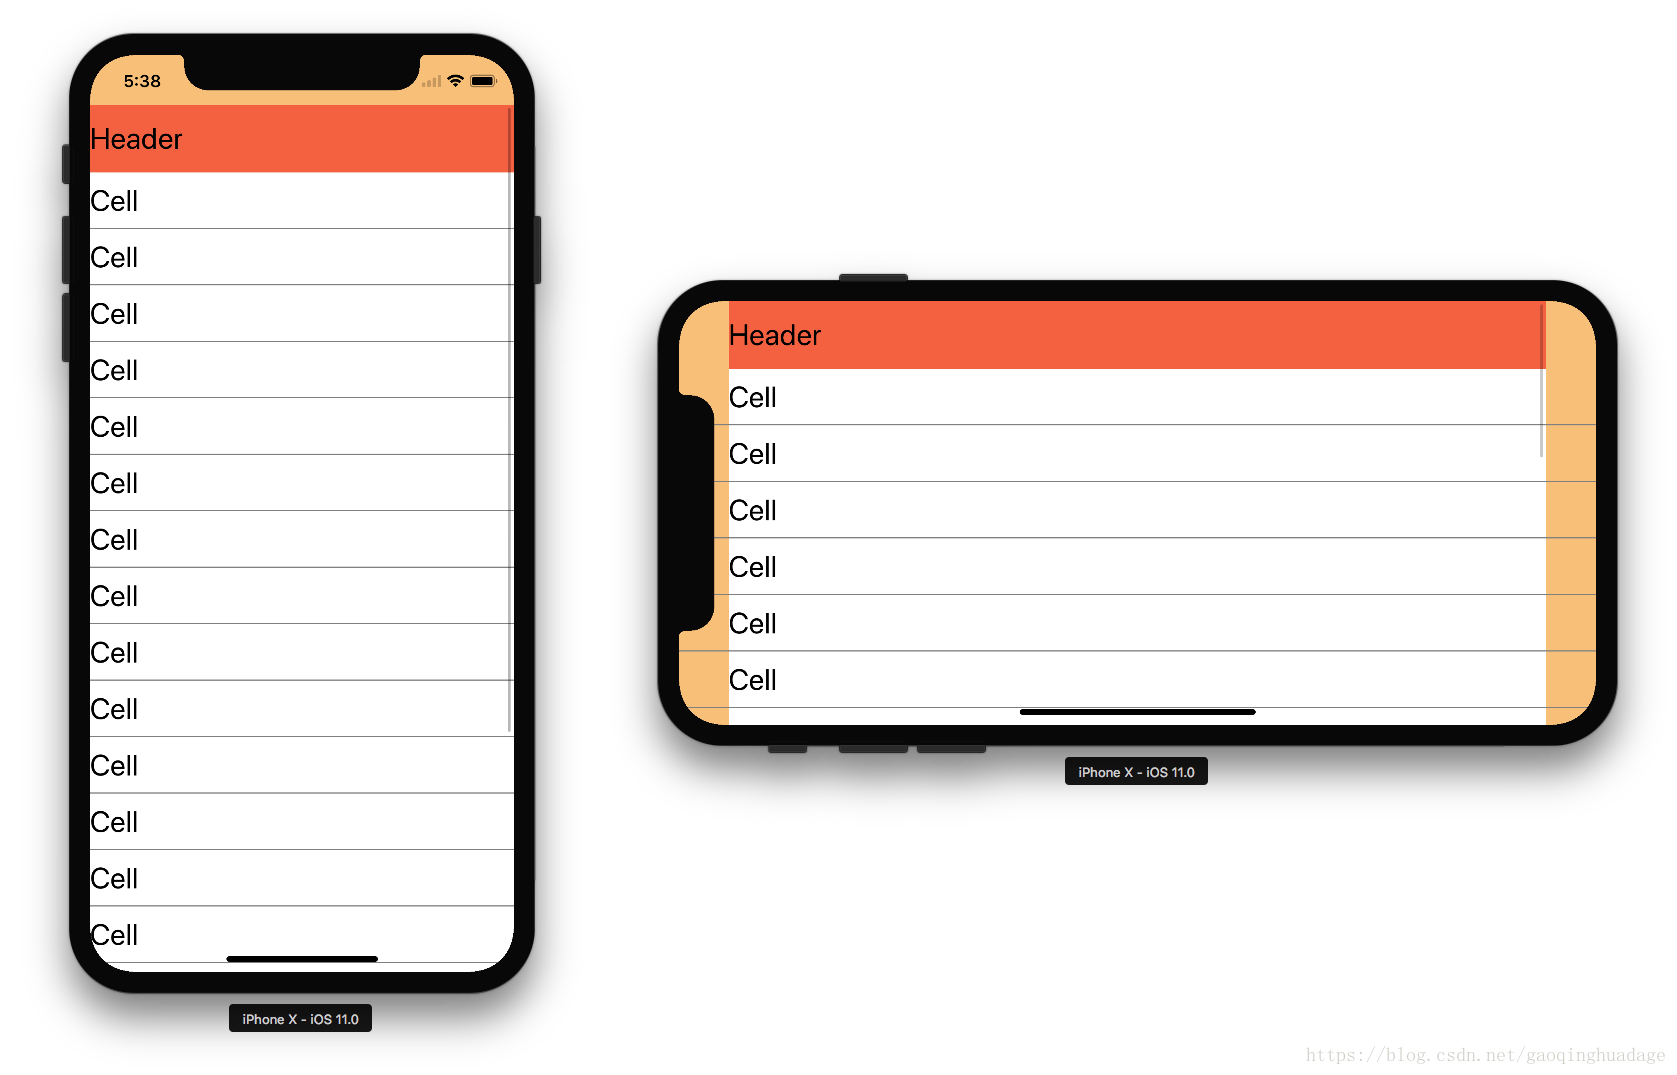
自定义的header上有一个label。自定义的cell也有一个label,带一个分割线。header和cell是透明的,cell的content view背景为白色,header的content view背景为红色。
我们可以看到,当横屏时,header和cell的content view frame变了,但是同时cell以及分割线的frame没有变。这是个默认项,我们可以用UITableView的新属性insetsContentViewsToSafeArea来进行控制。
@available(iOS 11.0, *)
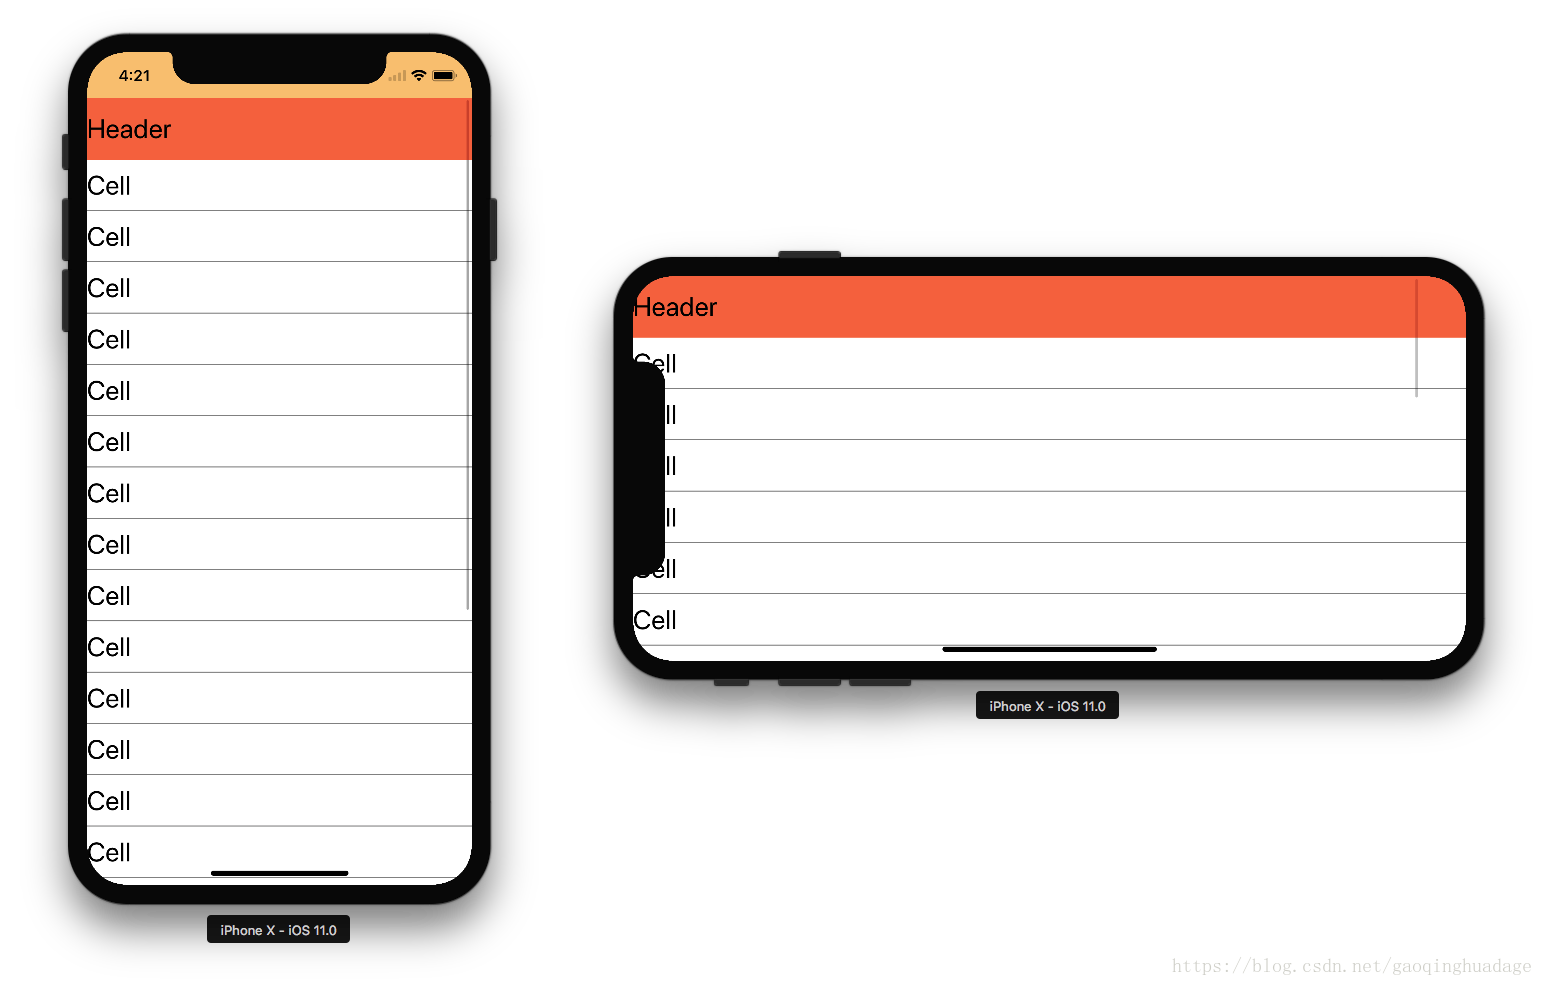
open var insetsContentViewsToSafeArea: Bool如果将此属性设置为NO:
我们可以看到现在header、footer、cell的content views frame就等于他们各自的frame。
这就意味着在iOS 11,我们在为header、footer、cell添加子控件时,不需要改变子控件的位置,UITableView自动帮我们适配。
UICollectionView
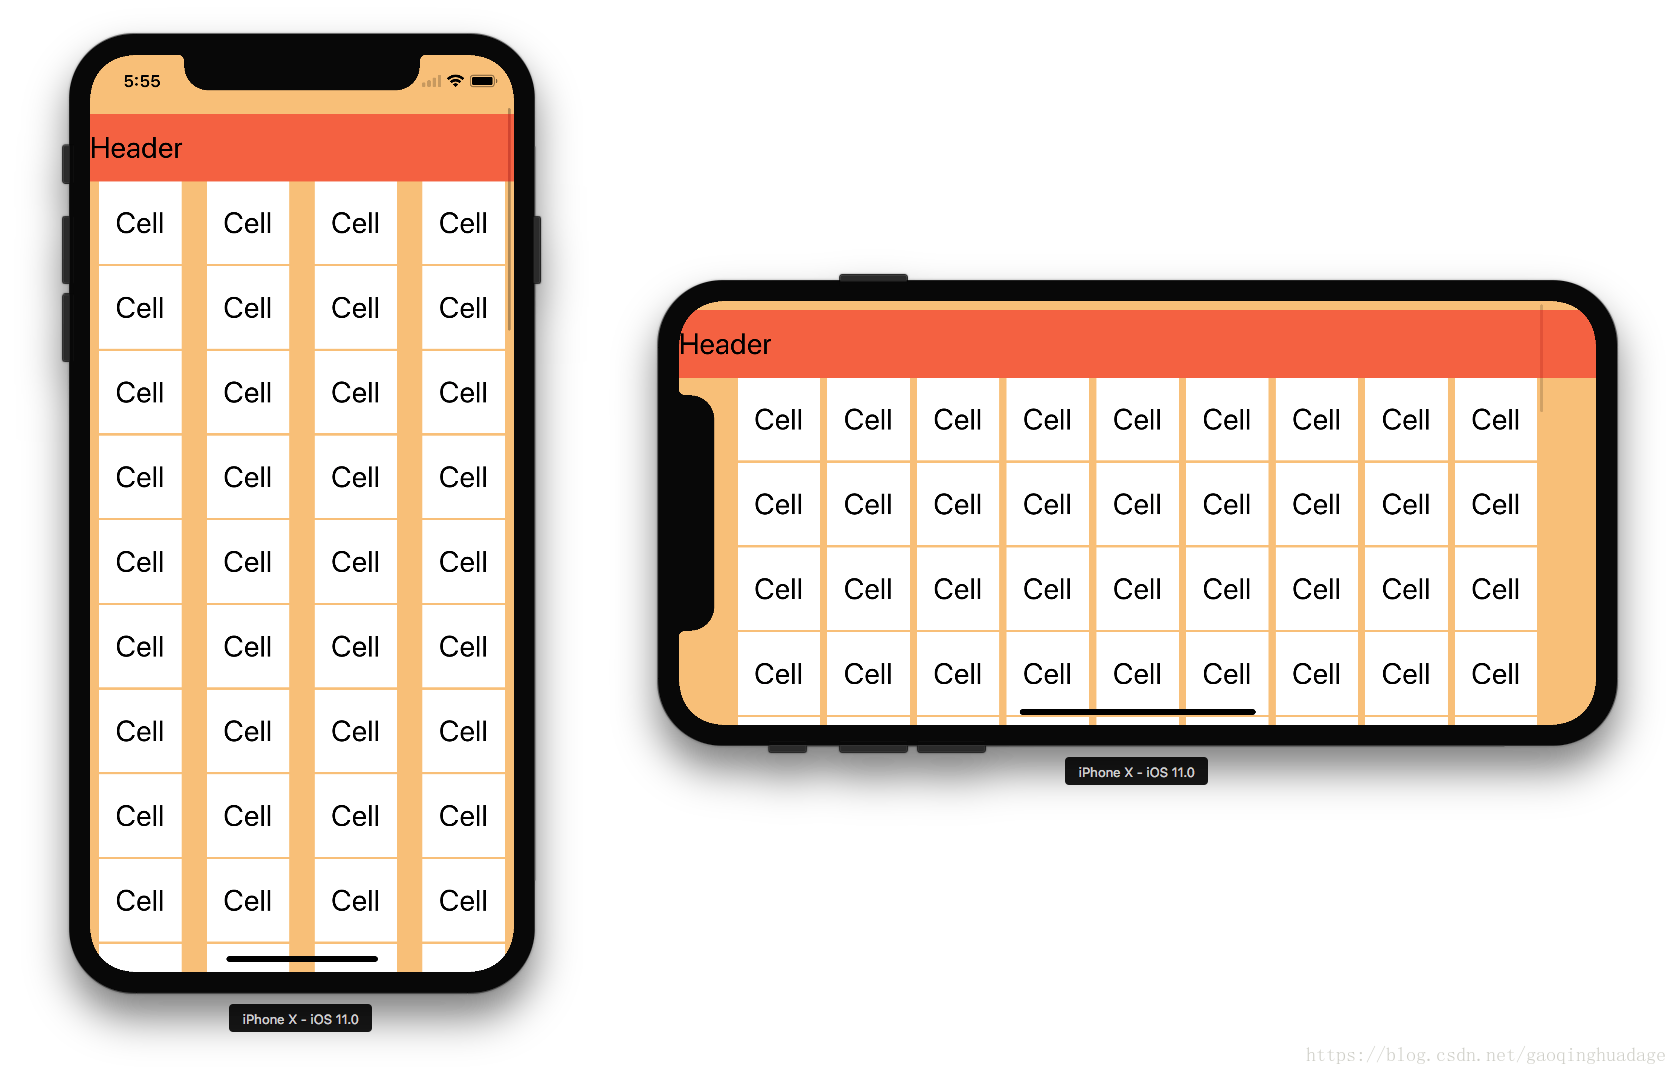
我们再试着在UICollectionView做一个同样的列表:
在collection view中使用了UICollectionViewFlowLayout,滑动方向设为纵向,cell是透明的,cell的content view背景设为白色,header也就是UICollectionReusableView没有contentView,我们把它的背景设为红色。
从截图中可以看到,collection view在默认情况下没有缩进header、footer和cell的内容。想要正确布局它的内容,唯一的方法是把子视图放到安全区:

好,现在改变cell的size,使我们的collection view显示网格:
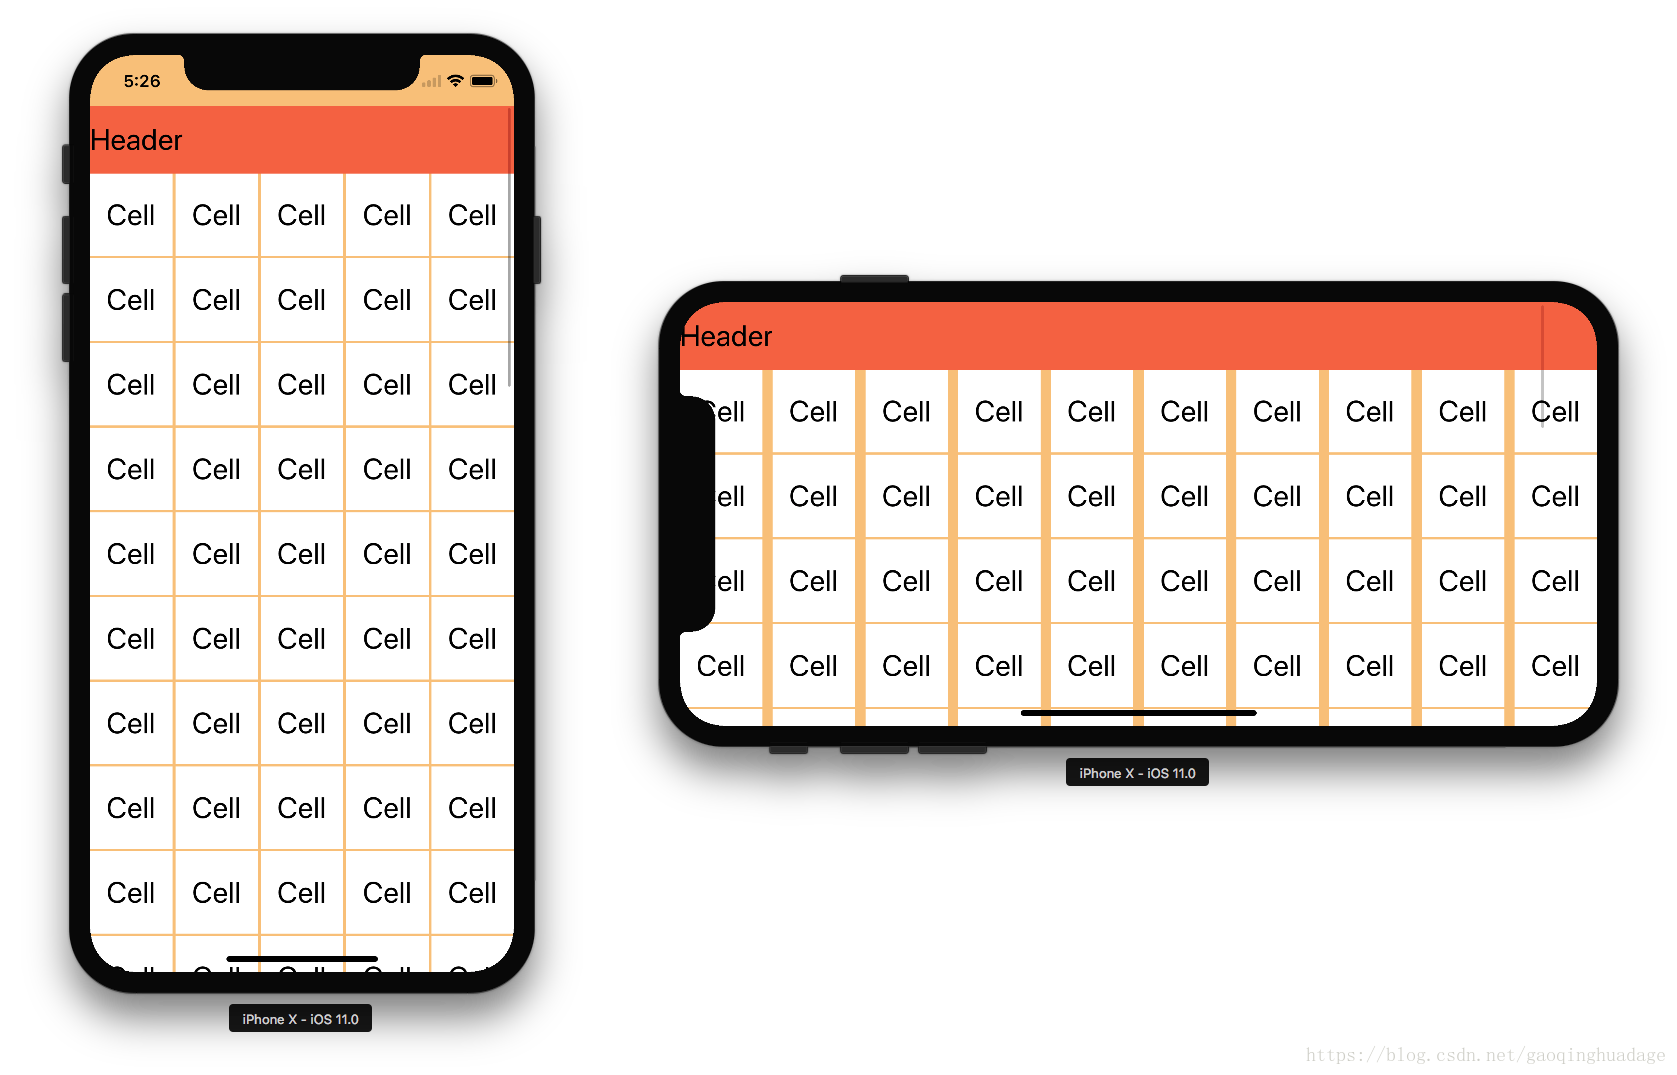
可以看到在横屏时cell被刘海遮挡了一部分。想要解决这个问题我们需要在section的content insets上添加安全区,但是其实在iOS 11中UICollectionViewFlowLayout有了一个新属性sectionInsetReference用来处理它。
@available(iOS 11.0, *)
public enum UICollectionViewFlowLayoutSectionInsetReference : Int {
    case fromContentInset        //default value
    case fromSafeArea
    case fromLayoutMargins
}

@available(iOS 11.0, *)
open var sectionInsetReference: UICollectionViewFlowLayoutSectionInsetReference
想做出我们想要的效果只需要设置成fromSafeArea。这个时候section的实际 content insets就等于content insets加上安全区insets。
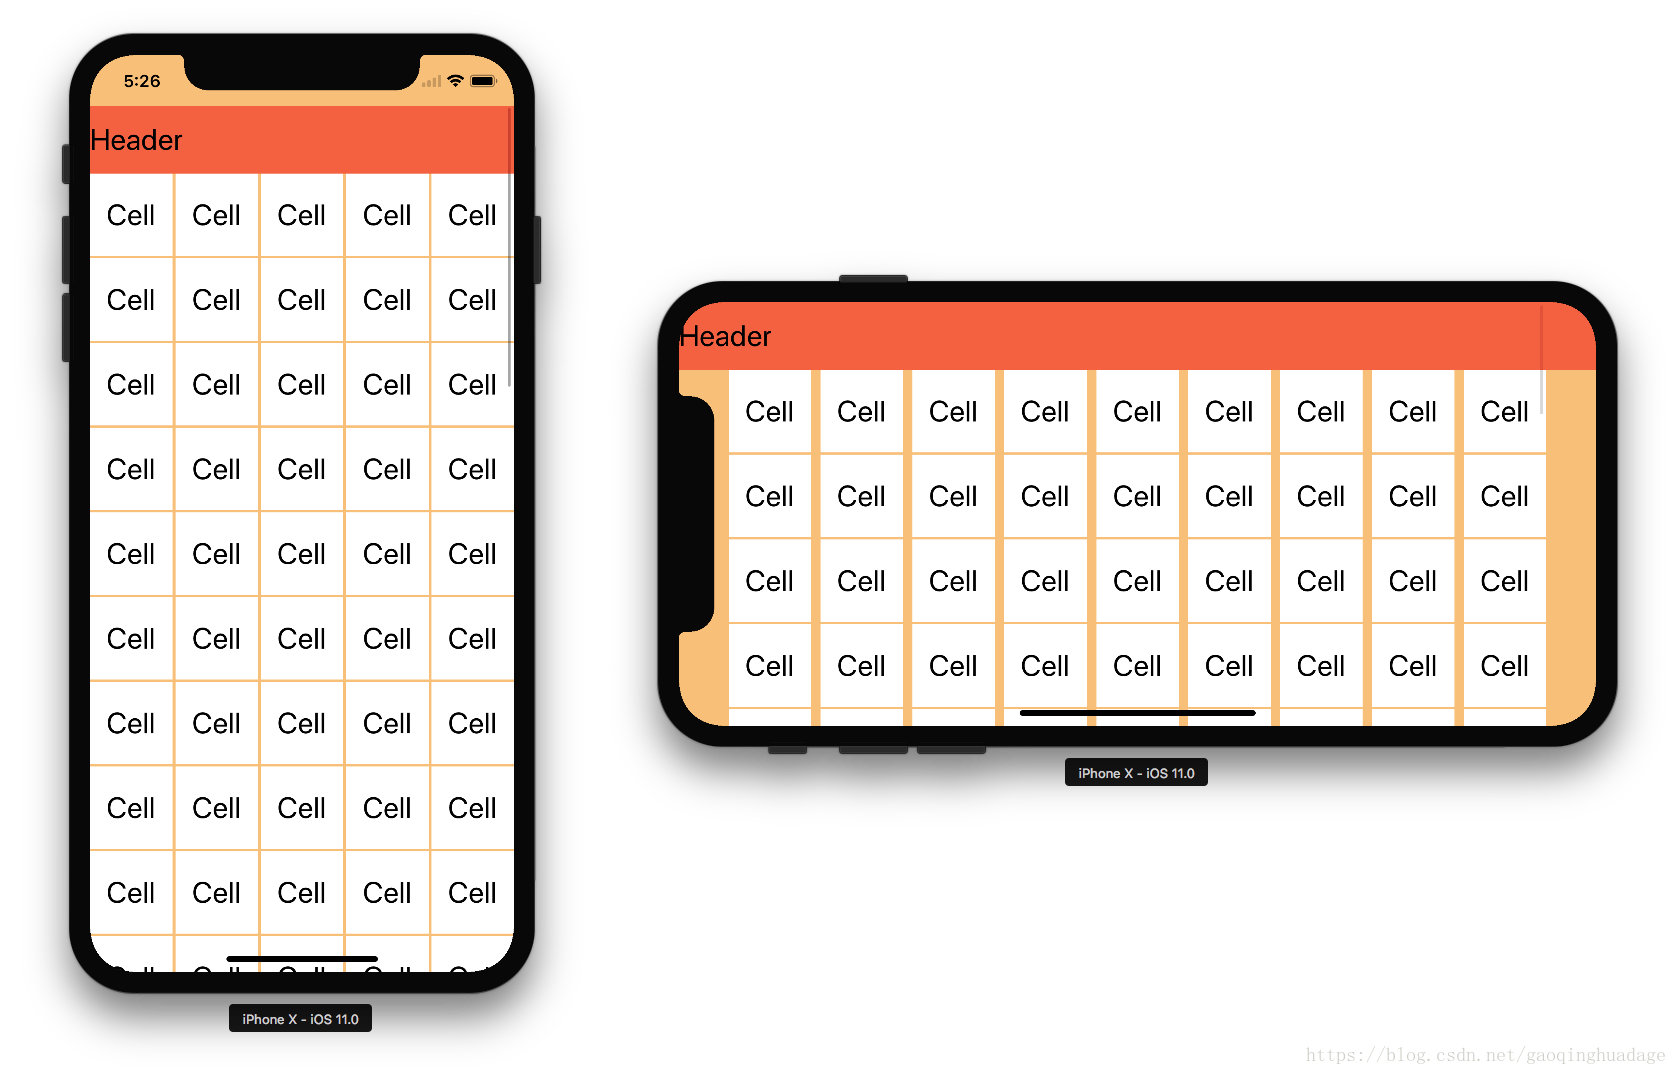
类似地,当使用fromLayoutMargins时,collection view就在content insets基础上加了margins。
总结
在iOS 11中,苹果为我们加了很多实用的工具来使用安全区。在这篇文章我试着把他们全部介绍了一遍。希望本文可以帮助大家更好地在app中应用安全区。另外,我建议大家看一下相关的WWDC视频或者阅读相关文章:
- Updating Your App for iOS 11
- What’s New in Cocoa Touch
- Building Apps for iPhone X
- Positioning Content Relative to the Safe Area
- Designing for iPhone X
如果使用storyboards的话,还有专门的讲解(我不用):
也可以看一下我为这篇文章专门写的示例代码:
示例代码
如果有什么问题欢迎留言,谢谢观看!
原文地址


 2646
2646

 被折叠的 条评论
为什么被折叠?
被折叠的 条评论
为什么被折叠?
 到【灌水乐园】发言


