


一.小知识
1.wx.saveFile(OBJECT):保存文件到本地。
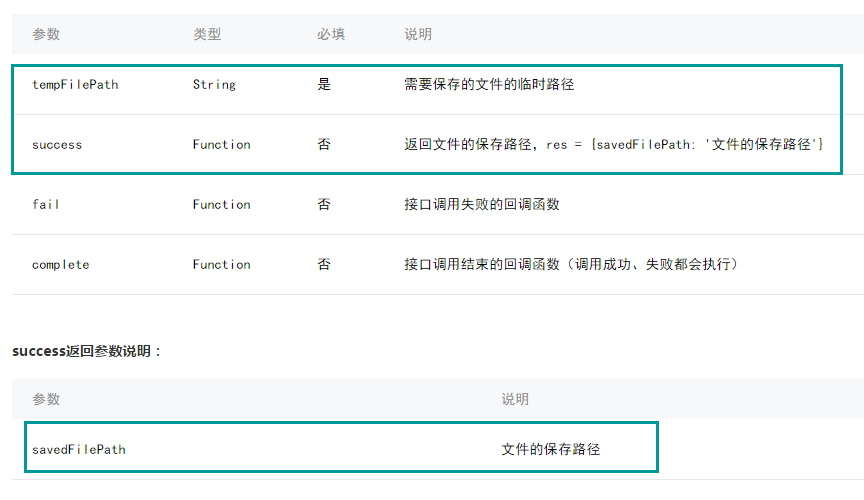
wx.chooseImage({
  success: function(res) {
    var tempFilePaths = res.tempFilePaths
    wx.saveFile({
      tempFilePath: tempFilePaths[0],
      success: function(res) {
        var savedFilePath = res.savedFilePath
      }
    })
  }
})
2.wx.getSavedFileList(OBJECT):获取本地已保存的文件列表
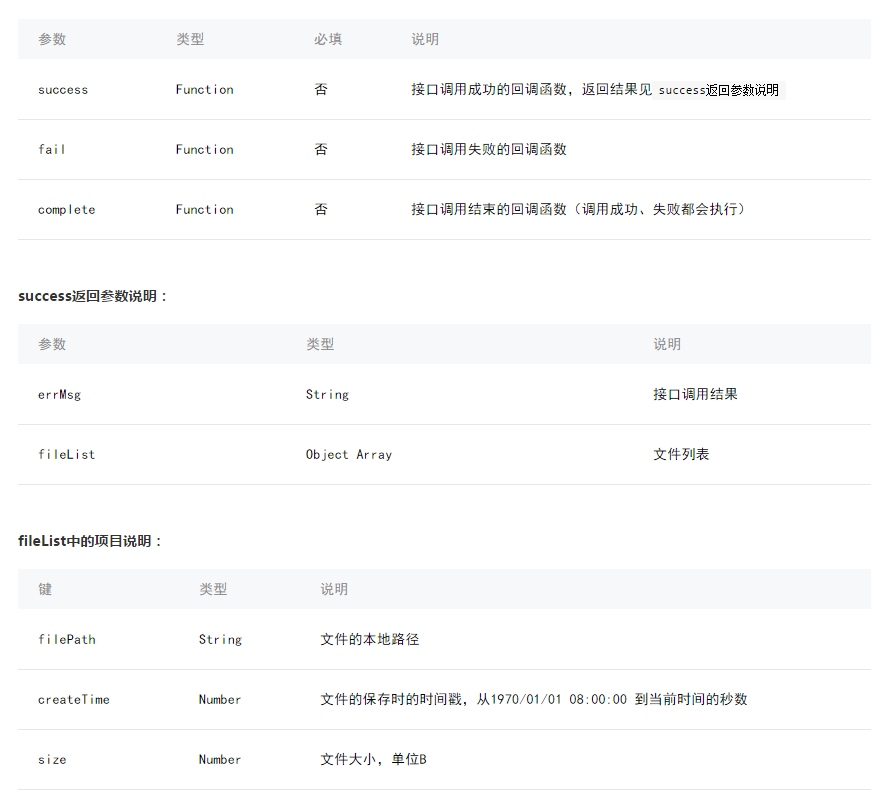
wx.getSavedFileList({
  success: function(res) {
    console.log(res.fileList)
  }
})
3.wx.getSavedFileInfo(OBJECT):获取本地文件的文件信息
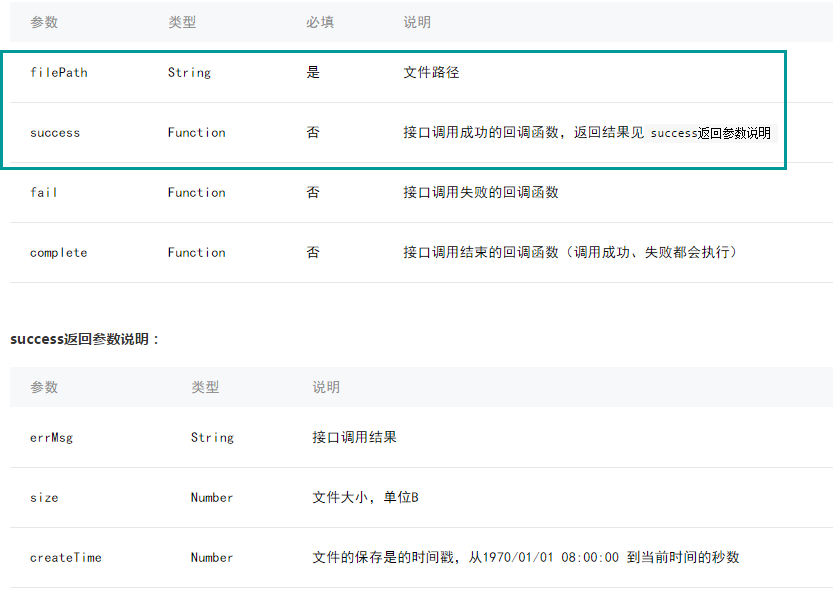
wx.getSavedFileInfo({
  filePath: 'wxfile://somefile', //仅做示例用,非真正的文件路径
  success: function(res) {
    console.log(res.size)
    console.log(res.createTime)
  }
})4.wx.removeSavedFile(OBJECT):删除本地存储的文件
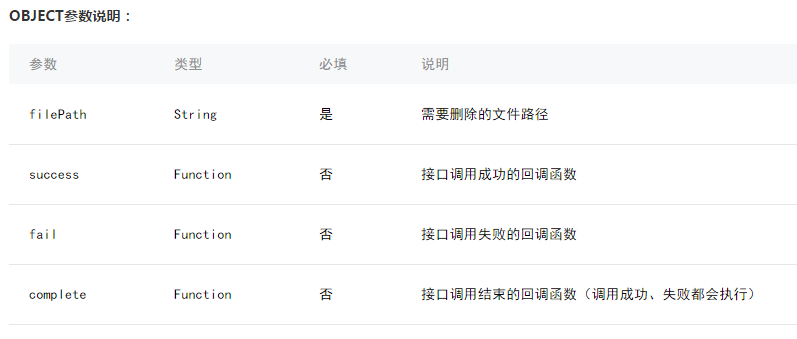
wx.getSavedFileList({
  success: function(res) {
    if (res.fileList.length > 0){
      wx.removeSavedFile({
        filePath: res.fileList[0].filePath,
        complete: function(res) {
          console.log(res)
        }
      })
    }
  }
})
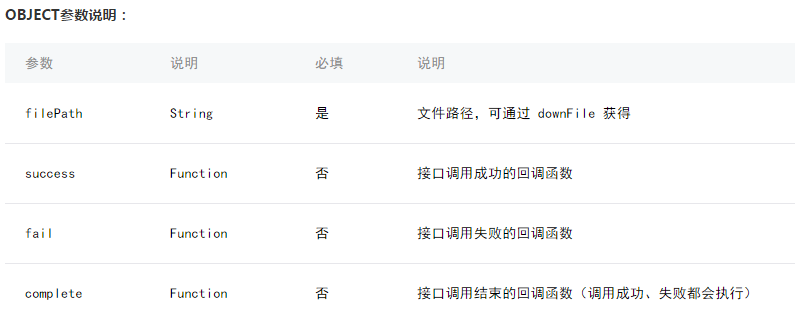
5.wx.openDocument(OBJECT):新开页面打开文档,支持格式:doc, xls, ppt, pdf, docx, xlsx, pptx
wx.downloadFile({
  url: 'http://example.com/somefile.pdf',
  success: function (res) {
    var filePath = res.tempFilePath
    wx.openDocument({
      filePath: filePath,
      success: function (res) {
        console.log('打开文档成功')
      }
    })
  }
})
二.列子
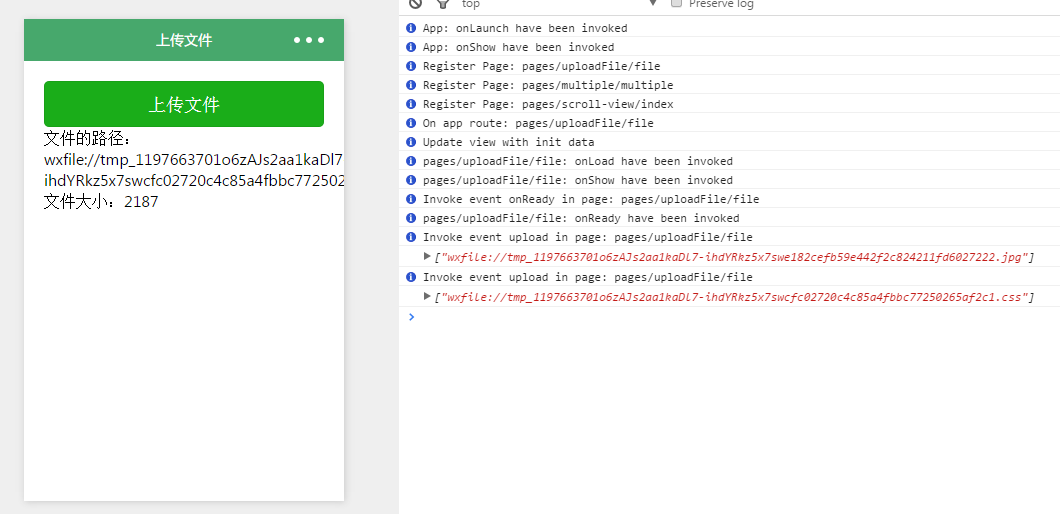
3.wx.getSavedFileInfo(OBJECT):获取本地文件的文件信息
<view class="container">
	<button type="primary" bindtap="upload">上传文件</button>
	<text>文件的路径:{{ path}}px</text>
	<text>文件大小:{{filesize}}</text>
</view>
//获取应用实例
var app = getApp()
Page({
  	data:{
    	path:'',
    	filesize:0,
 	},
  	upload:function(){
	    var that=this
	    wx.chooseImage({
	        count: 1,
	        sizeType: ['original', 'compressed'],// 可以指定是原图还是压缩图,默认二者都有
	        sourceType: ['album', 'camera'],  // 可以指定来源是相册还是相机,默认二者都有
	        success: function (res) {
	            var tempFilePaths = res.tempFilePaths;
	            console.log(tempFilePaths)
	            wx.getSavedFileInfo({
				  	filePath:res.tempFilePaths[0], //仅做示例用,非真正的文件路径
				  	success: function(res) {
				  		that.setData({
					      	filesize:res.size,
					    })
				  	}
				})
	            that.setData({
	                path:tempFilePaths
	            })
	        }
	    })
  	}
})
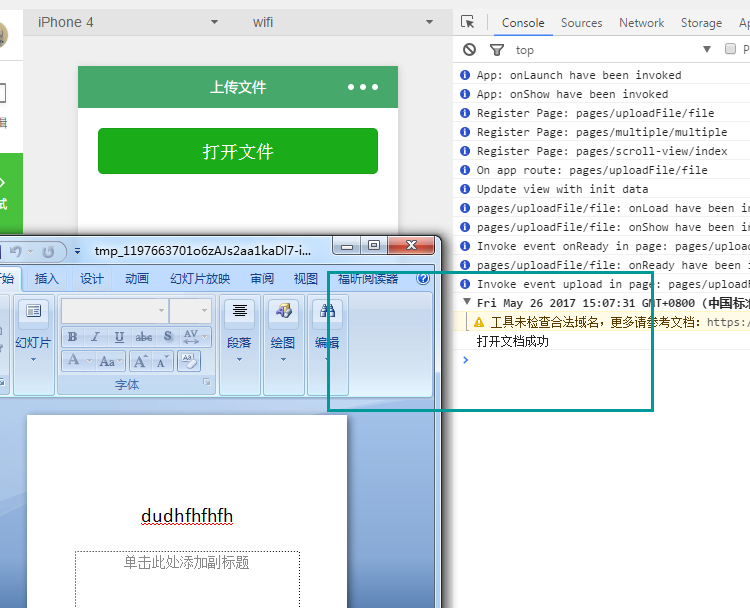
5.wx.openDocument(OBJECT):打开文档
<view class="container">
	<button type="primary" bindtap="upload">打开文件</button>
</view>
//获取应用实例
var app = getApp()
Page({
data:{
path:'',
},
upload:function(){
var that=this
wx.downloadFile({
url: 'http://192.168.56.1/sino-ui/www.941in.com.hk/m.v1/o.pptx',//文件的在本地的路径
success: function (res) {
var filePath = res.tempFilePath
wx.openDocument({
filePath: filePath,
success: function (res) {
console.log('打开文档成功')
}
})
}
})
}
})
这个文件的路径,必须是http或是Https,不能使url: 'D:/WWW/sino-ui/www.941in.com.hk/m.v1/o.pptx',
三.注意问题
上传只能一张图片或是一个文件,不能多张。
解决方式:微信小程序上传(多个文件上传)
如下
/**
  * 上传照片//选择图片时限制9张,如需超过9张,同理亦可参照此方法上传多张照片
  */
uploadImg:function(){
   var that = this;
   wx.chooseImage({
       count: 9,
           sizeType: ['original', 'compressed'],
           sourceType: ['album', 'camera'],
           success: function(res){
               var successUp = 0; //成功
               var failUp = 0; //失败
               var length = res.tempFilePaths.length; //总数
               var count = 0; //第几张
              that.uploadOneByOne(res.tempFilePaths,successUp,failUp,count,length);
           },
   });
},
/**
  * 采用递归的方式上传多张
  */
 uploadOneByOne(imgPaths,successUp, failUp, count, length){
   var that = this;
   wx.showLoading({
      title: '正在上传第'+count+'张',
    })
   wx.uploadFile({
     url: 'https://example.weixin.qq.com/upload', //仅为示例,非真实的接口地址
     filePath: imgPaths[count],
     name: count,//示例,使用顺序给文件命名
     success:function(e){
       successUp++;//成功+1
     },
     fail:function(e){
       failUp++;//失败+1
     },
     complete:function(e){
       count++;//下一张
       if(count == length){
         //上传完毕,作一下提示
         console.log('上传成功' + successUp + ',' + '失败' + failUp);
         wx.showToast({
           title: '上传成功' + successUp,
           icon: 'success',
           duration: 2000
         })
       }else{
         //递归调用,上传下一张
         that.uploadOneByOne(imgPaths, successUp, failUp, count, length);
         console.log('正在上传第' + count + '张');
       }
     }
   })
 }


 860
860

 被折叠的 条评论
为什么被折叠?
被折叠的 条评论
为什么被折叠?
 到【灌水乐园】发言


