


 本文详细介绍在传统IDC环境下,从零开始编译安装PHP 7.3.0及Nginx的过程,包括解决各种编译错误,配置启动脚本,以及如何通过历史命令回顾整个安装流程。
文章目录
PHP编译和安装
下载PHP
PHP 官网www.php.net
之前5版本用得多,现在用7版本
我们使用7.3.0稳定版
复制镜像网址,使用wget命令下载到/usr/local/src/
    cd /usr/local/src
    wget http://cn2.php.net/distributions/php-7.3.0.tar.bz2
解压
安装bzip2工具
yum install -y bzip2
解压源码包
tar jxvf php-7.3.0.tar.bz2
编译和安装
编译安装一个软件包的一般步骤:
配置编译参数 编译源码 安装
./configure make make install
前往解压后的文件夹
cd php-7.3.0
配置php 编译参数:
./configure --prefix=/usr/local/php-fpm --with-config-file-path=/usr/local/php-fpm/etc --enable-fpm --with-fpm-user=php-fpm --with-fpm-group=php-fpm --with-mysql=/usr/local/mysql --with-mysqli=/usr/local/mysql/bin/mysql_config --with-pdo-mysql=/usr/local/mysql --with-mysql-sock=/tmp/mysql.sock --with-libxml-dir --with-gd --with-jpeg-dir --with-png-dir --with-freetype-dir --with-iconv-dir --with-zlib-dir --with-mcrypt --enable-soap --enable-gd-native-ttf --enable-ftp --enable-mbstring --enable-exif --with-pear --with-curl --with-openssl
查看php的安装帮助文件
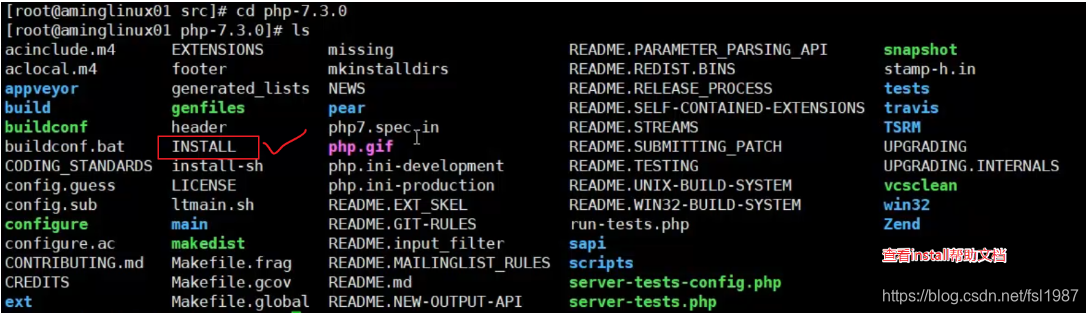
帮助文件给了一个安装指导网址

点击Nginx下的安装指导,查看参考安装步骤
执行配置编译参数

编译错误
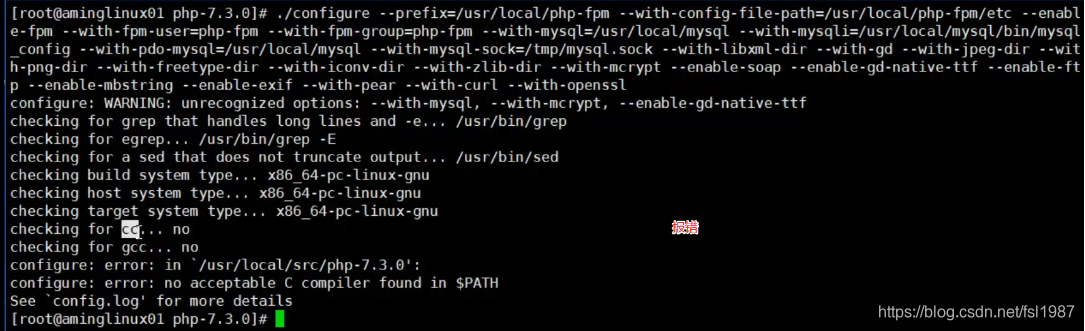
· 错误1,缺少gcc编译器
checking for cc... no
checking for gcc... no
解决: yum install -y gcc
经验:
安装时提示: xxx not found.
一般是缺少某个安装包,可以利用yum list命令搜索关键字
如:

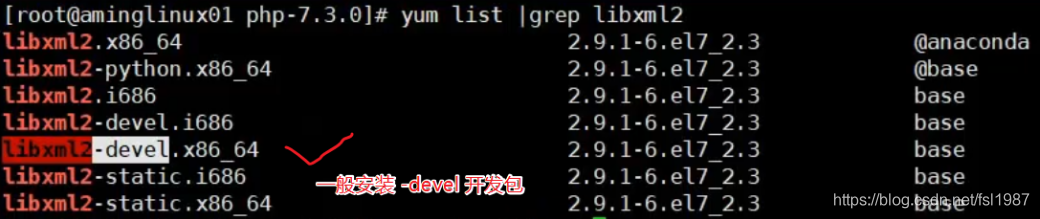
错误2,
error: libxml2 not found
解决:yum install -y libxml2-devel
 grep -i 不区分大小写
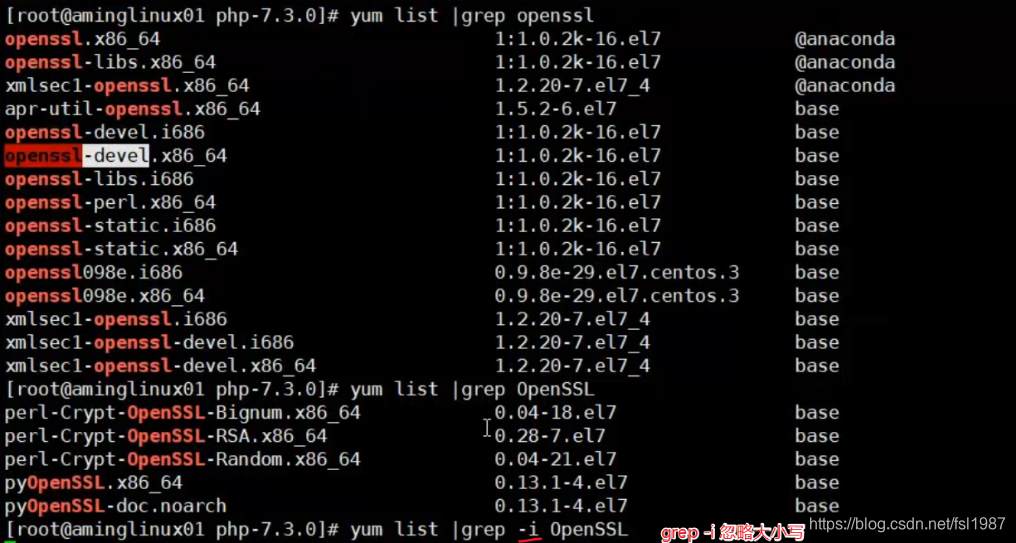
错误3,
error: Cannot find OpenSSL's
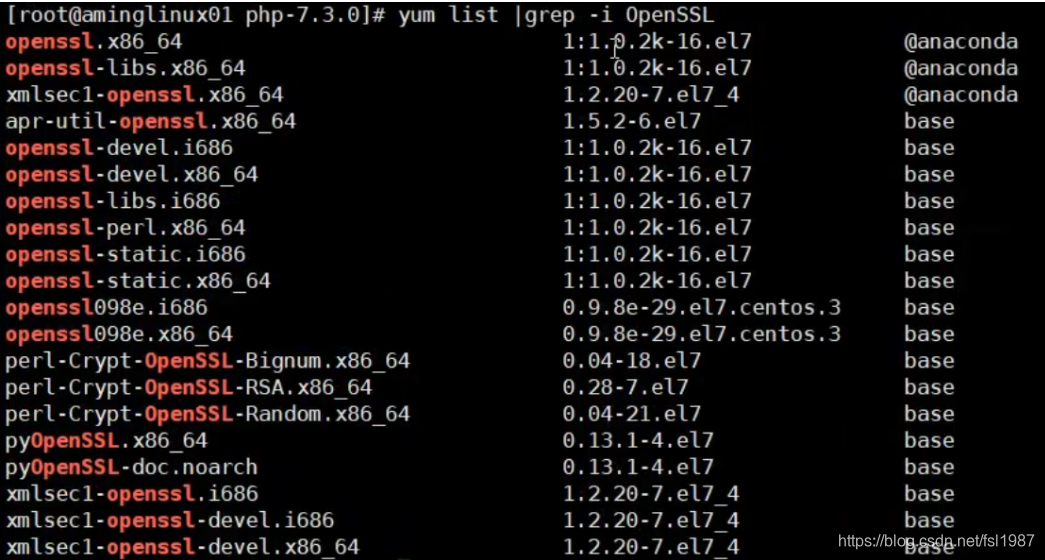
解决:yum install -y openssl-devel
错误4,
error: cURL version 7.15.5 or later is required
解决:yum install -y libcurl-devel
错误5,
configure: error: jpeglib.h not found
解决:yum install -y libjpeg-turbo-devel
错误6,
configure: error: png.h not found
解决:yum install -y libpng-devel
错误7,
configure: error: freetype-config not found.
解决: yum install -y freetype-devel
错误8,
configure: error: wrong mysql library version or lib not found
解决:下载一个低版本的MySQL/Mariadb
wget http://mirrors.163.com/mysql/Downloads/MySQL-5.6/mysql-5.6.39-linux-glibc2.12-x86_64.tar.gz
tar zxvf mysql-5.6.39-linux-glibc2.12-x86_64.tar.gz
mv mysql-5.6.39-linux-glibc2.12-x86_64 /usr/local/mysql5.6
改编译参数
./configure --prefix=/usr/local/php-fpm --with-config-file-path=/usr/local/php-fpm/etc --enable-fpm --with-fpm-user=php-fpm --with-fpm-group=php-fpm --with-mysql=/usr/local/mysql5.6 --with-mysqli=/usr/local/mysql5.6/bin/mysql_config --with-pdo-mysql=/usr/local/mysql5.6 --with-mysql-sock=/tmp/mysql.sock --with-libxml-dir --with-gd --with-jpeg-dir --with-png-dir --with-freetype-dir --with-iconv-dir --with-zlib-dir --with-mcrypt --enable-soap --enable-gd-native-ttf --enable-ftp --enable-mbstring --enable-exif --with-pear --with-curl --with-openssl
配置参数成功后,
make 编译生成二进制码

make install 安装
使用history回顾安装过程。
卸载的话删除/usr/local/php-fpm目录,其他install可以不用卸载。
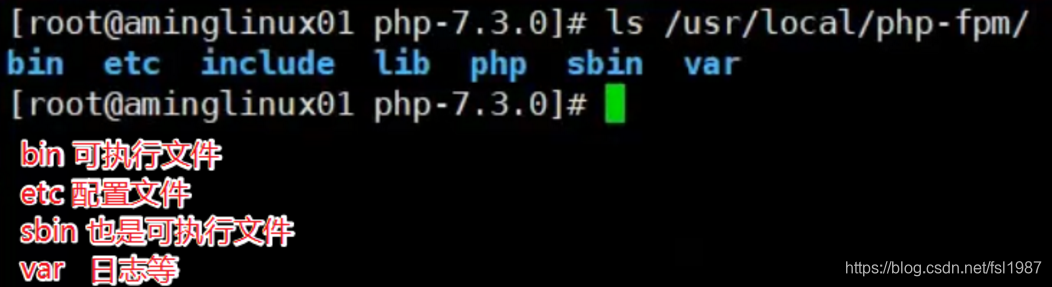
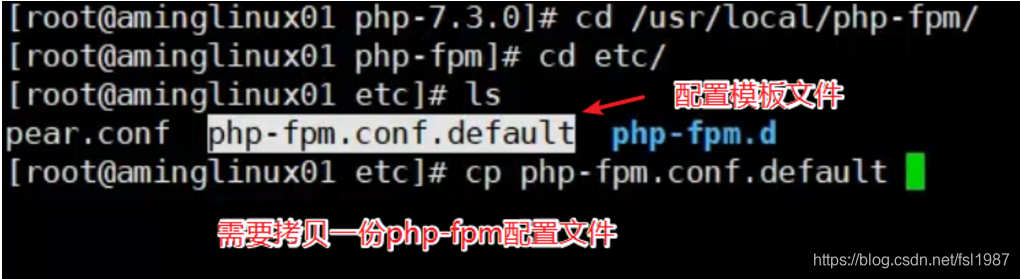
配置文件
需要php-fpm配置文件,参考官方安装指导

配置文件1,php-fpm.conf
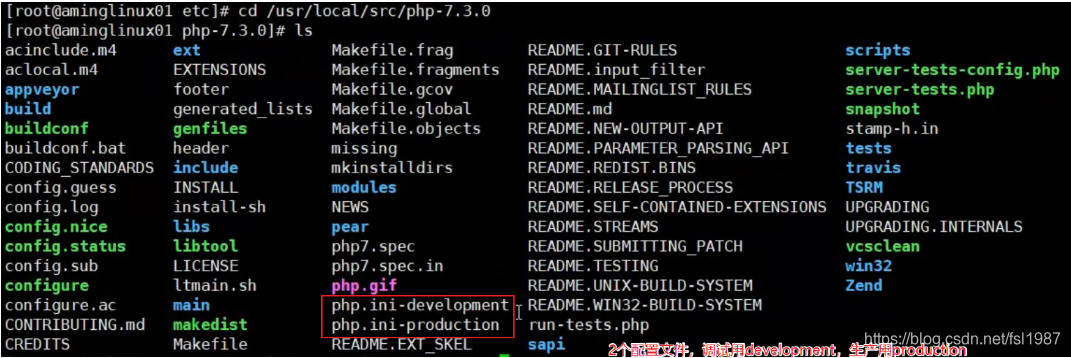
配置文件2,php.ini
启动脚本

不使用针对centos7的,配置不容易,使用针对centos6的init.d.php-fpm
cd /usr/local/src/php-7.3.0
cp sapi/fpm/init.d.php-fpm /etc/init.d/php-fpm
chkconfig --add php-fpm
chkconfig php-fpm on
chmod 755 /etc/init.d/php-fpm

chkconfig --list 查看服务列表
错误9,
ERROR: [pool www] cannot get uid for user ‘php-fpm’
解决:useradd php-fpm
启动服务
启动服务

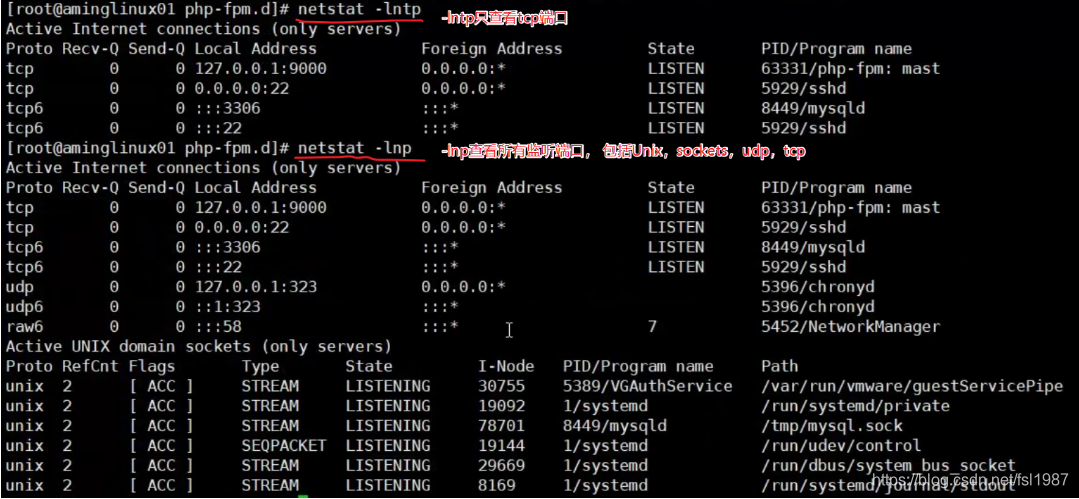
查看php服务监听的端口,端口为9000
补充1
vi 里面在一般模式下,按dd可以删除行(剪切),5dd(剪切5行),光标挪到要粘贴的位置,按p。
操作错误之后,想要撤销,可以按u,反着撤销按 ctrl+r;
一般模式下按gg可以把光标定位到首行,按G可以定位到末行;
按yy复制,5yy复制5行;按p粘贴
显示行号,在一般模式里输入:set nu; 取消行号输入:set nonu
定位到指定的行:一般模式下直接按数字G。如10G,直接至10行;
补充2
diff 查看两个文件的差异的,如 diff 1.txt 2.txt
编译安装Nginx
官网:http://nginx.org/
官方文档:http://nginx.org/en/docs/install.html
下载
cd /usr/local/src/
wget http://nginx.org/download/nginx-1.14.2.tar.gz
解压
tar zxvf nginx-1.14.2.tar.gz
cd nginx-1.14.2
编译和安装
编译参考官网帮助文档
http://nginx.org/en/docs/configure.html里的Building nginx from Sources
官方参考编译配置
Example of parameters usage (all of this needs to be typed in one line):
./configure
    --sbin-path=/usr/local/nginx/nginx
    --conf-path=/usr/local/nginx/nginx.conf
    --pid-path=/usr/local/nginx/nginx.pid
    --with-http_ssl_module
    --with-pcre=../pcre-8.42
    --with-zlib=../zlib-1.2.11
实际安装,只需要配置2个模块
编译配置
./configure --prefix=/usr/local/nginx --with-http_ssl_module
如果配置出错,提示缺少zlib,pcre,安装如下包

编译和安装
make && make install
&&表示前面的命令执行成功,再执行后面的命令
启动:
/usr/local/nginx/sbin/nginx
回车,直接启动
ps aux |grep nginx
查看nginx服务是否启动

查看配置文件
vi nginx.conf
查看监听端口
netstat -ltnp |grep nginx


 1730
1730

 被折叠的 条评论
为什么被折叠?
被折叠的 条评论
为什么被折叠?
 到【灌水乐园】发言


