


 本文记录了在SpringBoot项目中集成Swagger的配置过程,并提供了接口测试的简易教程。通过链接获取完整的工程代码,了解如何配置pom.xml、User实体、HelloController以及Swagger的配置类SwaggerConfig。你可以通过http://localhost:8080/swagger-ui.html访问Swagger UI进行接口管理。文章还介绍了两种关闭Swagger的方法,包括在config类上使用@Profile注解。
本工程地址:https://github.com/Fateasstring/SwaggerTest
更详细的参考:https://github.com/itguang/swagger/tree/master/springboot-swagger-demo1
工程目录:

pom.xml:
<?xml version="1.0" encoding="UTF-8"?>
<project xmlns="http://maven.apache.org/POM/4.0.0" xmlns:xsi="http://www.w3.org/2001/XMLSchema-instance"
         xsi:schemaLocation="http://maven.apache.org/POM/4.0.0 https://maven.apache.org/xsd/maven-4.0.0.xsd">
    <modelVersion>4.0.0</modelVersion>
    <parent>
        <groupId>org.springframework.boot</groupId>
        <artifactId>spring-boot-starter-parent</artifactId>
        <version>2.3.0.RELEASE</version>
        <relativePath/> <!-- lookup parent from repository -->
    </parent>
    <groupId>com.example</groupId>
    <artifactId>swagger</artifactId>
    <version>0.0.1-SNAPSHOT</version>
    <name>swagger</name>
    <description>Demo project for Spring Boot</description>

    <properties>
        <java.version>1.8</java.version>
    </properties>

    <dependencies>
        <dependency>
            <groupId>org.springframework.boot</groupId>
            <artifactId>spring-boot-starter-web</artifactId>
        </dependency>

        <dependency>
            <groupId>org.springframework.boot</groupId>
            <artifactId>spring-boot-starter-test</artifactId>
            <scope>test</scope>
            <exclusions>
                <exclusion>
                    <groupId>org.junit.vintage</groupId>
                    <artifactId>junit-vintage-engine</artifactId>
                </exclusion>
            </exclusions>
        </dependency>

        <!-- https://mvnrepository.com/artifact/io.springfox/springfox-swagger-ui -->
        <dependency>
            <groupId>io.springfox</groupId>
            <artifactId>springfox-swagger-ui</artifactId>
            <version>2.9.2</version>
        </dependency>

        <!-- https://mvnrepository.com/artifact/io.springfox/springfox-swagger2 -->
        <dependency>
            <groupId>io.springfox</groupId>
            <artifactId>springfox-swagger2</artifactId>
            <version>2.9.2</version>
        </dependency>


    </dependencies>

    <build>
        <plugins>
            <plugin>
                <groupId>org.springframework.boot</groupId>
                <artifactId>spring-boot-maven-plugin</artifactId>
            </plugin>
        </plugins>
    </build>

</project>
User:
import io.swagger.annotations.ApiModel;
import io.swagger.annotations.ApiModelProperty;

@ApiModel("用户实体类")
public class User {
    @ApiModelProperty("用户名")
    public String username;
    @ApiModelProperty("用户密码")
    public String password;
}
HelloController:
@RestController
public class HelloController {

    @GetMapping("/hello")
    public String hello(){
        return "hello";
    }

    /** 只要在接口中,返回值中存在实体类,就会被扫描到Swagger扫描到 */
    @PostMapping("/user")
    public User user(){
        return new User();
    }
    //Operation接口,放在方法上
    @ApiOperation("Hello控制类")
    @GetMapping("/hello2")
    public String hello2(@ApiParam("用户名") String username){
        return "hello"+username;
    }

    //Operation接口,放在方法上
    @ApiOperation("Hello控制类")
    @PostMapping("/post")
    public User post(@ApiParam("用户名") User user){
        return user;
    }
}
SwaggerConfig:
import org.springframework.context.annotation.Bean;
import org.springframework.context.annotation.Configuration;
import org.springframework.core.env.Environment;
import org.springframework.core.env.Profiles;
import springfox.documentation.builders.RequestHandlerSelectors;
import springfox.documentation.service.ApiInfo;
import springfox.documentation.service.Contact;
import springfox.documentation.spi.DocumentationType;
import springfox.documentation.spring.web.plugins.Docket;
import springfox.documentation.swagger2.annotations.EnableSwagger2;
import java.util.ArrayList;

@Configuration
@EnableSwagger2
public class SwaggerConfig {

    /** 配置多个Docket实例 */
    @Bean
    public Docket docket1(){
        return new Docket(DocumentationType.SWAGGER_2).groupName("A");
    }

    @Bean
    public Docket docket2(){
        return new Docket(DocumentationType.SWAGGER_2).groupName("B");
    }

    @Bean
    public Docket docket3(){
        return new Docket(DocumentationType.SWAGGER_2).groupName("C");
    }

    /** 配置swagger的Docket的bean实例 */
    @Bean
    public Docket docket(Environment environment){

        /** 设置要显示的Swagger环境,读到哪个取哪个,dev为true,否则为false */
        Profiles profiles = Profiles.of("dev","test");

        /**通过 environment.acceptsProfiles 判断是否处在自己设定的环境当中*/
        boolean flag = environment.acceptsProfiles(profiles);


        return new Docket(DocumentationType.SWAGGER_2)
                .apiInfo(apiInfo())
                .enable(flag) //监听环境
                .select()
                //RequestHandlerSelectors:配置要扫描接口的方式
                .apis(RequestHandlerSelectors.basePackage("com.example.swagger.Controller"))
                //paths():过滤什么路径
                //.paths(PathSelectors.ant("/**"))
                .build();
    }

    /** 配置Swagger信息=apiInfo */
    private ApiInfo apiInfo(){

        /** 作者信息 */
        Contact contact = new Contact("drion","http:xxxxxxx.com","qqq@qq.com");

        return new ApiInfo(
                "Api Documentation",
                "Api Documentation",
                "1.0",
                "urn:tos",
                contact,
                "Apache 2.0",
                "http://www.apache.org/licenses/LICENSE-2.0",
                new ArrayList()
        );
    }
}
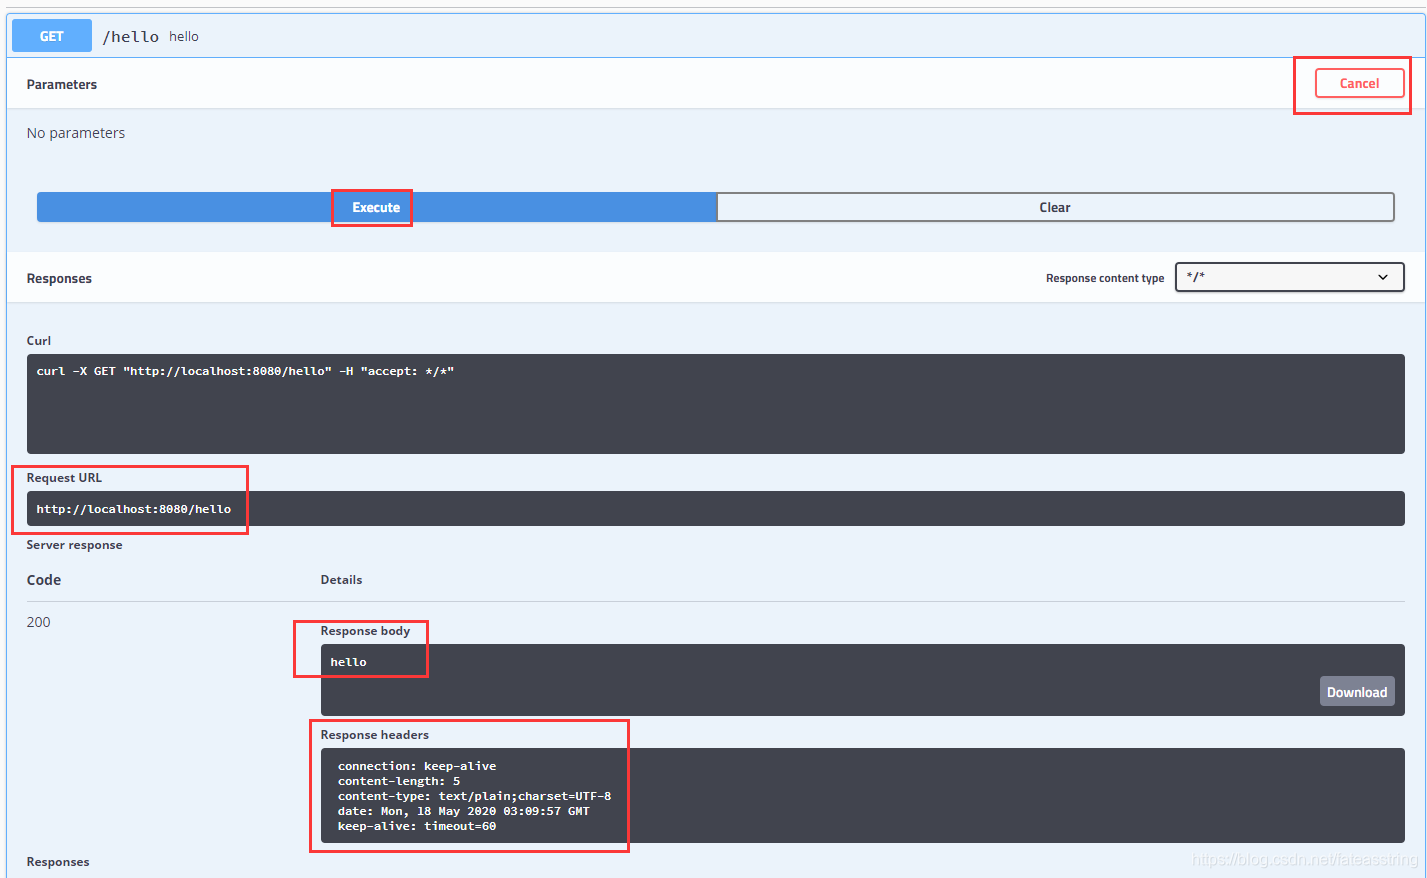
访问swagger管理界面:http://localhost:8080/swagger-ui.html
GET:

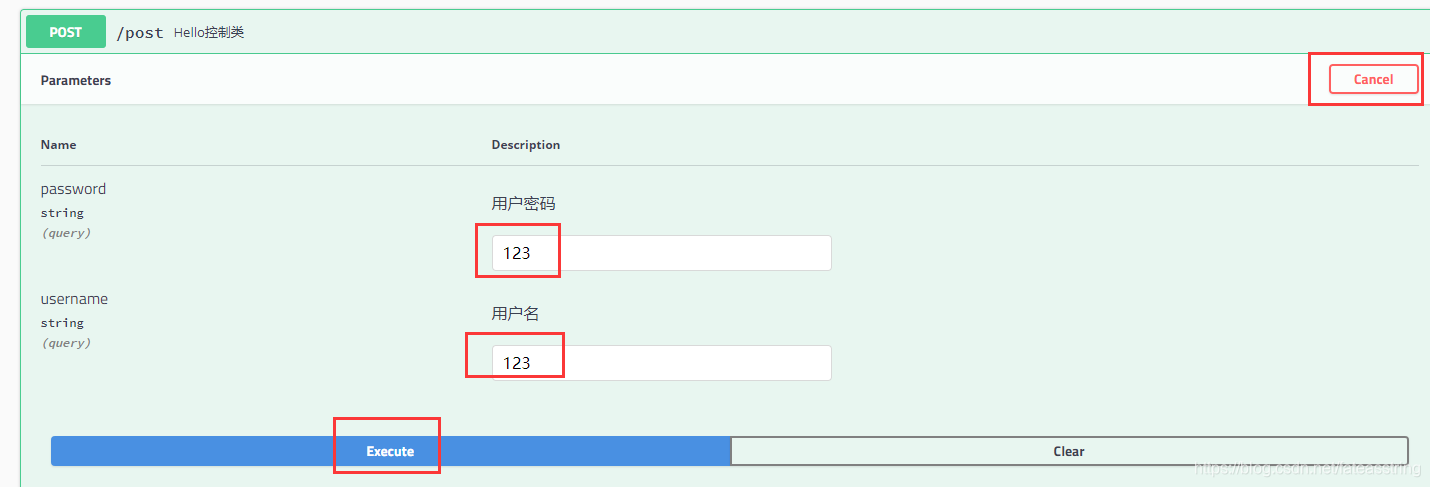
POST:
关闭Swagger:
1.Swagger的congif类上声明@Profile({"dev", "test"}),发布到生产上使用product的profile时, swagger是无效的。
2.
@Configuration
@EnableSwagger2
@EnableWebMvc
@ComponentScan("com.XXX.controller")
public class SwaggerConfig{
 @Autowired
 ConfigService configService;

 @Bean
 public Docket customDocket() {
  if(configService.getServerEnv() == ServerEnvEnum.ONLINE) {
   return new Docket(DocumentationType.SWAGGER_2)
   .apiInfo(apiInfoOnline())
  .select()
    .paths(PathSelectors.none())//如果是线上环境,添加路径过滤,设置为全部都不符合
  .build();
  }else {
   return new Docket(DocumentationType.SWAGGER_2)
   .apiInfo(apiInfo());
  }
 }

 private ApiInfo apiInfo() {
  return new ApiInfoBuilder()
    .title("XXX系统")
    .description("XXX系统接口")
    .license("")
    .licenseUrl("")
    .termsOfServiceUrl("")
    .version("1.0.0")
    .contact(new Contact("","", ""))
    .build();
 }
 private ApiInfo apiInfoOnline() {
  return new ApiInfoBuilder()
    .title("")
    .description("")
    .license("")
    .licenseUrl("")
    .termsOfServiceUrl("")
    .version("")
    .contact(new Contact("","", ""))
    .build();
 }
}


 1592
1592

 被折叠的 条评论
为什么被折叠?
被折叠的 条评论
为什么被折叠?
 到【灌水乐园】发言


