


 本文记录了使用IDEA创建Spring Boot项目,并集成Mybatis的详细步骤,包括项目创建、配置POM文件、编写Controller、设置application.properties、定义User对象、创建Mapper、Service以及解决启动和访问时遇到的问题。
近日学习spring boot,书以记之。
最终项目结构为

1 创建项目
其余不赘述,在Dependencies一页,选择web,如图

2 创建controller并访问
controller代码
import org.springframework.web.bind.annotation.RequestMapping;
import org.springframework.web.bind.annotation.RestController;

@RestController
public class UserController {

    @RequestMapping("/hello")
    public String hello(){
        return "hello";
    }

}
启动并访问http://localhost:8080/hello

3 配置pom文件
        <dependency>
            <groupId>mysql</groupId>
            <artifactId>mysql-connector-java</artifactId>
            <version>5.1.46</version>
        </dependency>

        <dependency>
            <groupId>org.mybatis.spring.boot</groupId>
            <artifactId>mybatis-spring-boot-starter</artifactId>
            <version>1.3.2</version>
        </dependency>

        <dependency>
            <groupId>org.projectlombok</groupId>
            <artifactId>lombok</artifactId>
            <version>1.16.10</version>
        </dependency>
4 配置application.properties
spring.datasource.url=jdbc:mysql://127.0.0.1:3306/test?characterEncoding=UTF-8&useSSL=false
spring.datasource.username=root
spring.datasource.password=root
spring.datasource.driver-class-name=com.mysql.jdbc.Driver
5 建立User对象
import lombok.Data;

import java.io.Serializable;

@Data
public class User implements Serializable {

    private Long id;

    private String name;

}
6 mapper
import com.example.demo.entity.User;
import org.springframework.stereotype.Repository;

import java.util.List;

@Repository
public interface UserMapper {

    List<User> findAll();

}
<?xml version="1.0" encoding="UTF-8"?>
<!DOCTYPE mapper PUBLIC "-//mybatis.org//DTD Mapper 3.0//EN" "http://mybatis.org/dtd/mybatis-3-mapper.dtd">
<mapper namespace="com.example.demo.mapper.UserMapper">

    <select id="findAll" resultType="com.example.demo.entity.User">
        select id, name from master
    </select>

</mapper>
7 service
import com.example.demo.entity.User;
import com.example.demo.mapper.UserMapper;
import org.springframework.beans.factory.annotation.Autowired;
import org.springframework.stereotype.Service;

import java.util.List;

@Service
public class UserService {

    @Autowired
    private UserMapper userMapper;

    public List<User> findAll(){
        return userMapper.findAll();
    }

}
8 controller改造为
import com.example.demo.service.UserService;
import org.springframework.beans.factory.annotation.Autowired;
import org.springframework.web.bind.annotation.RequestMapping;
import org.springframework.web.bind.annotation.RestController;

@RestController
public class UserController {

    @Autowired
    private UserService userService;

    @RequestMapping("/hello")
    public String hello(){
        return userService.findAll().toString();
    }

}
此时启动,会报错
Description:

Field userMapper in com.example.demo.service.UserService required a bean of type 'com.example.demo.mapper.UserMapper' that could not be found.

The injection point has the following annotations:
	- @org.springframework.beans.factory.annotation.Autowired(required=true)


Action:

Consider defining a bean of type 'com.example.demo.mapper.UserMapper' in your configuration.
看报错就明白,是没有mapper的bean,在启动类上增加包扫描即可
import org.mybatis.spring.annotation.MapperScan;
import org.springframework.boot.SpringApplication;
import org.springframework.boot.autoconfigure.SpringBootApplication;

@SpringBootApplication
@MapperScan("com.example.demo.mapper")
public class DemoApplication {

    public static void main(String[] args) {
        SpringApplication.run(DemoApplication.class, args);
    }

}
然而,此时虽可以启动,在访问时还是会报错
org.apache.ibatis.binding.BindingException: Invalid bound statement (not found): com.example.demo.mapper.UserMapper.findAll
经过几番查证,发现并没有在target里面生成xml文件,于是pom的build增加如下代码
    <build>
        <plugins>
            <plugin>
                <groupId>org.springframework.boot</groupId>
                <artifactId>spring-boot-maven-plugin</artifactId>
            </plugin>
        </plugins>

        <resources>
            <resource>
                <directory>src/main/java</directory>
                <includes>
                    <include>**/*.xml</include>
                </includes>
            </resource>
        </resources>
    </build>
resources为新增。
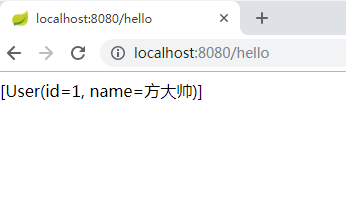
至此,完成搭建,可以访问了


 1万+
1万+

 被折叠的 条评论
为什么被折叠?
被折叠的 条评论
为什么被折叠?
 到【灌水乐园】发言


