


 本文介绍了如何将Spring与MyBatis进行整合,主要内容包括添加相关jar包、配置xml文件,如mybatis-config.xml、log4j.xml、application.xml等,以及创建IUserInfoDao接口、IUserInfoService接口及其实现类,最后通过测试类验证整合效果。
使用Spring整合MyBatis的话,大致就是让Spring管理MyBatis中的SqlSessionFactory
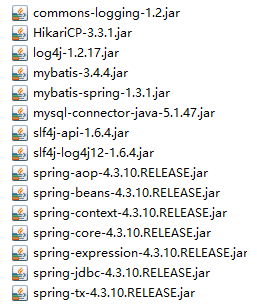
1.添加所用到的jar包
2.配置xml文件
mybatis-config.xml
<?xml version="1.0" encoding="UTF-8"?>
<!DOCTYPE configuration PUBLIC "-//mybatis.org//DTD Config 3.0//EN" "http://mybatis.org/dtd/mybatis-3-config.dtd">
<configuration>
	<settings>
		<!-- name:参数项名称;value:参数项值 -->
		<setting name="mapUnderscoreToCamelCase" value="true"/>
	</settings>
</configuration>
log4j.xml
<?xml version="1.0" encoding="UTF-8" ?>
<!DOCTYPE log4j:configuration SYSTEM "log4j.dtd">

<log4j:configuration xmlns:log4j="http://jakarta.apache.org/log4j/">

	<appender name="STDOUT" class="org.apache.log4j.ConsoleAppender">
		<param name="Encoding" value="UTF-8" />
		<layout class="org.apache.log4j.PatternLayout">
			<param name="ConversionPattern" value="%-5p %d{MM-dd HH:mm:ss,SSS} %m  (%F:%L) \n" />
		</layout>
	</appender>
	<logger name="java.sql">
		<level value="debug" />
	</logger>
	<logger name="org.apache.ibatis">
		<level value="info" />
	</logger>
	<root>
		<level value="debug" />
		<appender-ref ref="STDOUT" />
	</root>
</log4j:configuration>
application.xml
<?xml version="1.0" encoding="UTF-8"?>
<beans xmlns="http://www.springframework.org/schema/beans"
	xmlns:xsi="http://www.w3.org/2001/XMLSchema-instance"
	xmlns:context="http://www.springframework.org/schema/context"
	xmlns:mybatis-spring="http://mybatis.org/schema/mybatis-spring"
	xmlns:p="http://www.springframework.org/schema/p"
	xsi:schemaLocation="http://mybatis.org/schema/mybatis-spring http://mybatis.org/schema/mybatis-spring-1.2.xsd
		http://www.springframework.org/schema/beans http://www.springframework.org/schema/beans/spring-beans.xsd
		http://www.springframework.org/schema/context http://www.springframework.org/schema/context/spring-context-4.3.xsd">

	<context:component-scan base-package="yxy.club"></context:component-scan>
	<!-- 配置数据库连接信息 -->
	<bean id="dataSource" class="com.zaxxer.hikari.HikariDataSource" lazy-init="false" destroy-method="close">
	<property name="driverClassName" value="com.mysql.jdbc.Driver"></property>
	<property name="jdbcUrl" value="jdbc:mysql://127.0.0.1:3306/test?characterEncoding=utf8"></property>
	<property name="username" value="root"></property>
	<property name="password" value="root"></property>
	</bean>

	<bean class="org.mybatis.spring.SqlSessionFactoryBean"
	p:dataSource-ref="dataSource" p:configLocation="classpath:mybatis-config.xml"
	p:mapperLocations="classpath:./sql/*.xml">
	</bean>

	<mybatis-spring:scan base-package="yxy.club.*.dao"/>
</beans>
user_info.xml在sql包下面
<?xml version="1.0" encoding="UTF-8"?>
<!DOCTYPE mapper PUBLIC "-//mybatis.org//DTD Mapper 3.0//EN" "http://mybatis.org/dtd/mybatis-3-mapper.dtd">
<mapper namespace="yxy.club.userinfo.dao.IUserInfoDao">

	<delete id="delete">
		delete from user_info where id in
		<foreach item="id" collection="ids" open="(" separator="," close=")">
			#{id}
		</foreach>
	</delete>
</mapper>
3.创建接口与实现类
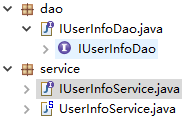
IUserInfoDao
package yxy.club.userinfo.dao;


import org.apache.ibatis.annotations.Param;


public interface IUserInfoDao {
	boolean delete(@Param("ids")int[] ids);
}
IUserInfoService
package yxy.club.userinfo.service;

public interface IUserInfoService {

	boolean delete(int[] ids);
}
UserInfoService
package yxy.club.userinfo.service;

import org.springframework.beans.factory.annotation.Autowired;
import org.springframework.stereotype.Service;

import yxy.club.userinfo.dao.IUserInfoDao;

@Service
public class UserInfoService implements IUserInfoService{
	@Autowired
	private IUserInfoDao userInfoDao;
	@Override
	public boolean delete(int[] ids) {

		return userInfoDao.delete(ids);
	}


}
4.测试类Test
package yxy.club.test;

import org.springframework.context.support.ClassPathXmlApplicationContext;

import yxy.club.userinfo.service.IUserInfoService;

public class Test {
	public static void main(String[] args){
		ClassPathXmlApplicationContext applicationContext = new ClassPathXmlApplicationContext("application.xml");

		IUserInfoService userInfoService =applicationContext.getBean(IUserInfoService.class);
		System.out.println(userInfoService.delete(new int[]{1,2}));
		applicationContext.close();
	}

}


 2258
2258

 被折叠的 条评论
为什么被折叠?
被折叠的 条评论
为什么被折叠?
 到【灌水乐园】发言


