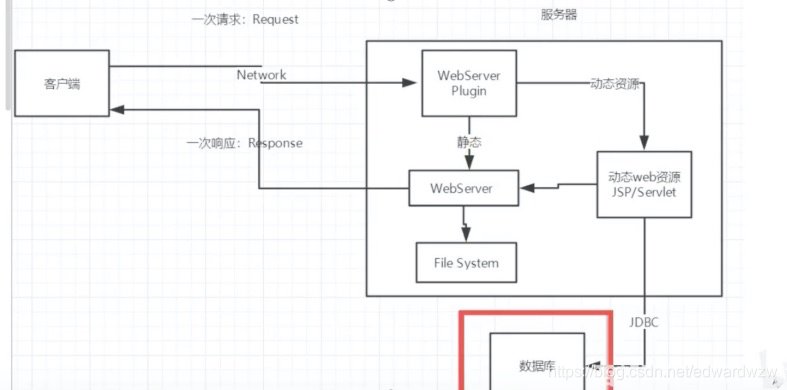
Java Servlet 是运行在 Web 服务器或应用服务器上的程序,它是作为来自 Web 浏览器或其他 HTTP 客户端的请求和 HTTP 服务器上的数据库或应用程序之间的中间层。
Servlet 由 Web 服务器调用,Web 服务器在收到浏览器请求之后,返回相应的信息。我们常用的Servlet 的 Web 服务器为 Tomcat。

在maven 仓库中搜: servlet 和 jsp-api
1、在项目的 pom.xml 中引入依赖:
    <dependencies>
        <dependency>
            <groupId>javax.servlet</groupId>
            <artifactId>javax.servlet-api</artifactId>
            <version>4.0.1</version>
            <scope>provided</scope>
        </dependency>
        <dependency>
            <groupId>javax.servlet.jsp</groupId>
            <artifactId>javax.servlet.jsp-api</artifactId>
            <version>2.3.3</version>
            <scope>provided</scope>
        </dependency>
</dependencies>2、在 servlet 包下创建 HelloServlet 类,(继承 HttpServlet):

package com.edward.servlet;

import javax.servlet.ServletException;
import javax.servlet.http.HttpServlet;
import javax.servlet.http.HttpServletRequest;
import javax.servlet.http.HttpServletResponse;
import java.io.IOException;
import java.io.PrintWriter;

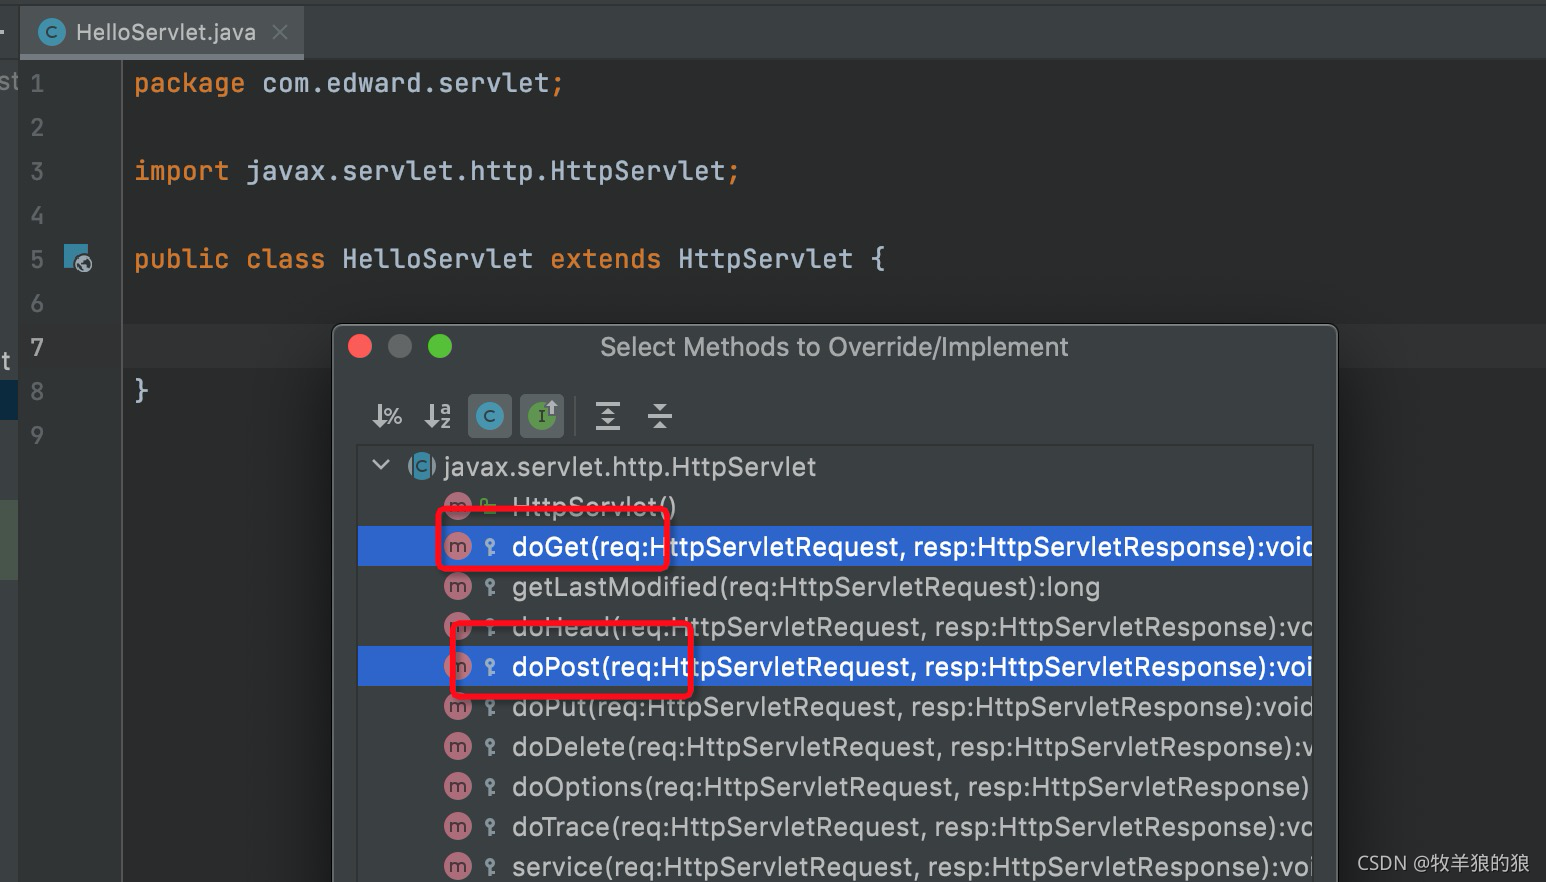
public class HelloServlet extends HttpServlet {

    @Override
    protected void doGet(HttpServletRequest req, HttpServletResponse resp) throws ServletException, IOException {
        PrintWriter printWriter = resp.getWriter();
        printWriter.println("hello servlet!");

        // 1. 数据层处理 Model
       String method = req.getParameter("method");
       if (method.equals("add")) {
            req.getSession().setAttribute("msg", "使用了add方法");
        } else if(method.equals("delete")) {
           req.getSession().setAttribute("msg", "使用了delete方法");
       }

       // 2. 业务层处理

       // 3. 视图层转发或重定向 View
        req.getRequestDispatcher("index.jsp").forward(req,resp);
    }

    @Override
    protected void doPost(HttpServletRequest req, HttpServletResponse resp) throws ServletException, IOException {
        super.doPost(req, resp);
    }
}
3、在 web.xml 配置 Servlet 映射:(在web服务器中注册Servlet对应的地址,用于给浏览器提供访问路径)
<?xml version="1.0" encoding="UTF-8"?>
<web-app xmlns="http://xmlns.jcp.org/xml/ns/javaee"
         xmlns:xsi="http://www.w3.org/2001/XMLSchema-instance"
         xsi:schemaLocation="http://xmlns.jcp.org/xml/ns/javaee http://xmlns.jcp.org/xml/ns/javaee/web-app_4_0.xsd"
         version="4.0">
    <!-- 注册 Servlet-->
    <servlet>
        <servlet-name>hello</servlet-name>
        <servlet-class>com.edward.servlet.HelloServlet</servlet-class>
    </servlet>

    <!-- Servlet 的请求路径-->
    <servlet-mapping>
        <servlet-name>hello</servlet-name>
        <url-pattern>/hello </url-pattern>
    </servlet-mapping>

</web-app>
4、index.jsp 写页面: ${msg}
<%@ page contentType="text/html;charset=UTF-8" language="java" %>
<html>
  <head>
    <title>servlet-01</title>
  </head>
  <body>
    ${msg}
  </body>
</html>
5、打包项目,配置Tomcat并发布,
在浏览器访问: http://localhost:8080/s1/hello(项目在服务器中的域名为 s1)

IntelliJ IDEA打包SpringMVC程序成war包并进行部署Tomcat https://blog.youkuaiyun.com/mazhongjia/article/details/104376724
表单提交demo:
需求:提交表单后跳到/login页面,并提示登录成功,效果如下:


index.jsp 中写表单页面:
<%@ page contentType="text/html;charset=UTF-8" language="java" %>
<html>
  <head>
    <title>servlet-01</title>
  </head>
  <body>

    <form action="/s1/login" method="post">
      姓名:<input type="text" name="username" value=""/>  <br/>
      性别:<input type="radio" name="sex" value="1"/>男 <input type="radio" name="sex" value="2"/>女  <br/>
      爱好: <input type="checkbox" name="hobbys" value="篮球">篮球 <input type="checkbox" name="hobbys" value="打游戏">打游戏 <input type="checkbox" name="hobbys" value="旅游">旅游 <input type="checkbox" name="hobbys" value="弹琴">弹琴  <br/>
      <input type="submit" value="提交">
    </form>


  </body>
</html>
success.jsp:
<%@ page contentType="text/html;charset=UTF-8" language="java" %>
<html>
  <head>
    <title>success</title>
  </head>
  <body>
    <h1>登录成功!</h1>
  </body>
</html>
LoginServlet:
package com.edward.servlet;

import javax.servlet.ServletException;
import javax.servlet.http.HttpServlet;
import javax.servlet.http.HttpServletRequest;
import javax.servlet.http.HttpServletResponse;
import java.io.IOException;

public class LoginServlet extends HttpServlet {
    @Override
    protected void doGet(HttpServletRequest req, HttpServletResponse resp) throws ServletException, IOException {
        String username = req.getParameter("username");
        String sex = req.getParameter("sex");
        String[] hobbys = req.getParameterValues("hobbys");

         // 注意这里的路径前不要加斜杠,另外要加上forward(req,resp)
        req.getRequestDispatcher("success.jsp").forward(req,resp);
    }

    @Override
    protected void doPost(HttpServletRequest req, HttpServletResponse resp) throws ServletException, IOException {
        doGet(req, resp); // 注意这里是调用了上面的doGet方法,不是super.doGet()
    }
}
web.xml 配置LoginServlet映射:
<?xml version="1.0" encoding="UTF-8"?>
<web-app xmlns="http://xmlns.jcp.org/xml/ns/javaee"
         xmlns:xsi="http://www.w3.org/2001/XMLSchema-instance"
         xsi:schemaLocation="http://xmlns.jcp.org/xml/ns/javaee http://xmlns.jcp.org/xml/ns/javaee/web-app_4_0.xsd"
         version="4.0">
    <servlet>
        <servlet-name>login</servlet-name>
        <servlet-class>com.edward.servlet.LoginServlet</servlet-class>
    </servlet>

    <servlet-mapping>
        <servlet-name>login</servlet-name>
        <url-pattern>/login</url-pattern>
    </servlet-mapping>
</web-app>
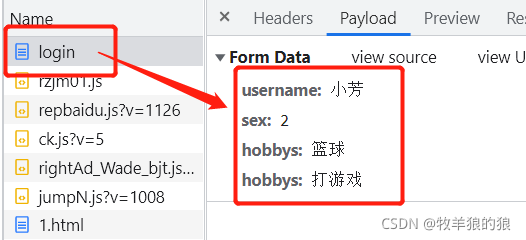
完成,去访问localhost:8080/s1,提交表单后跳转至/s1/login,查看表单提交数据如下:


 本文介绍了如何在Maven项目中使用Servlet和JSP,从引入依赖、创建HelloServlet、配置web.xml到处理表单提交,一步步构建一个基础的Web应用实例。
 https://blog.youkuaiyun.com/qq540827396/article/details/86556461


 494
494

 被折叠的 条评论
为什么被折叠?


