 使用Rust构建多线程网络服务器教程


 本文档详细介绍了如何使用Rust语言构建一个多线程的网络服务器,涵盖了TCP和HTTP的基础知识,从单线程服务器开始,逐步转变为多线程,通过线程池提高服务器性能。教程中包括了监听TCP连接、解析HTTP请求、创建HTTP响应以及实现优雅的关闭和清理。
https://doc.rust-lang.org/1.30.0/book/second-edition/ch20-00-final-project-a-web-server.html
用Rust 来搭建一个多线程网络服务器,主要覆盖
- 了解点TCP和 HTTP.
- 在一个socket上监听TCP connections
- 解析很小一部分 HTTP requests.
- 创建适当的 HTTP response.
- 用 thread pool 来提高服务器吞吐量.
注意:本项目是示例教程。
1. Building a Single-Threaded Web Server 搭建一个单线程web server
2.Turning Our Single-Threaded Server into a Multithreaded Server 将单线程web server 改成 多线程
3. Graceful Shutdown and Cleanup 优雅地关闭和清除
1.搭建一个单线程web server
TCP 和 HTTP 都是 request-response 协议。即一个客户端client向服务器server发送请求request,服务器server
监听请求request,并提供响应response给客户端client。
TCP 是低层协议,描述了信息是如何从一个机器到另外一个机器的但并不指定内容;HTTP是高层协议,在TCP之上,定义了
请求和响应的内容。技术上讲,HTTP可以和其它协议结合使用。但是大部分情况,HTTP和TCP一起使用。
1.1 首先建立一个新的项目,然后来修改代码。
zzl@zzl-virtualbox2:~/rustprj$ cargo new hello --bin
Created binary (application) `hello` package
zzl@zzl-virtualbox2:~/rustprj$
修改src/main.rs 文件如下:
use std::net::TcpListener;
fn main() {
let listener = TcpListener::bind("127.0.0.1:7878").unwrap();
for stream in listener.incoming() {
let stream = stream.unwrap();
println!("Connection established!");
}
}
使用TcpListener绑定127.0.0.1:7878,监听 TCP connections。
bind函数有点像 new 函数,返回一个新的TcpListener实例.
bind 函数返回 Result<T, E>, 表明绑定有可能失败。例如,连接80端口需要管理员特权,非管理员只能监听1024之上
的端口。或者俩个实例绑到同一端口会冲突。 本教程以学习为目的,所以不必担心处理各种错误,只是简单使用unwrap
来停止程序,如果有错误发生。
Tincoming 方式返回一个迭代器,包含一系列Stream(TcpStream). 一个stream代表一个client和server间的open connection。一个 connection代表request/response的全过程:client连接server,server生成响应,Server 关闭连接。 TcpStream将读到client发送了什么,然后允许将response写给stream。
下面运行程序cargo run 。 并打开浏览器,在地址栏输入127.0.0.1:7878
zzl@zzl-virtualbox2:~/rustprj/hello$ cargo run
Compiling hello v0.1.0 (/home/zzl/rustprj/hello)
Finished dev [unoptimized + debuginfo] target(s) in 0.48s
Running `target/debug/hello`
Connection established!
Connection established!
Connection established!
Connection established!
1.2 读取request
实现一个函数来读取浏览器的request。创建一个新函数 new handle_connection来处理。新函数从 TCP stream 读取数据
并打印,这样服务器端可以看到浏览器发送的数据。.
将src/main.rs 修改如下:
use std::io::prelude::*;
use std::net::TcpStream;
use std::net::TcpListener;
fn main() {
let listener = TcpListener::bind("127.0.0.1:7878").unwrap();
for stream in listener.incoming() {
let stream = stream.unwrap();
handle_connection(stream);
}
}
fn handle_connection(mut stream: TcpStream) {
let mut buffer = [0; 512];
stream.read(&mut buffer).unwrap();
println!("Request: {}", String::from_utf8_lossy(&buffer[..]));
}
引入std::io::prelude 获取某些 traits ,以便读写stream数据。在 for循环中,调用 handle_connection函数,将stream
传给它。.
在 handle_connection 中将stream 参数 mutable.
然后从stream读数据. 首先定义一个buffer存储读到的数据,. buffer 大小512 bytes足够容纳本节需要的数据。 其次,将它转化成string并打印。String::from_utf8_lossy 从&[u8] 生成String . The “lossy” 表示遇到无效的UTF-8序列,将用 �代替。, 即 U+FFFD REPLACEMENT CHARACTER.
下面运行程序并打开浏览器。
zzl@zzl-virtualbox2:~/rustprj/hello$ cargo run
Compiling hello v0.1.0 (/home/zzl/rustprj/hello)
Finished dev [unoptimized + debuginfo] target(s) in 0.89s
Running `target/debug/hello`
Request: GET / HTTP/1.1
Host: 127.0.0.1:7878
Connection: keep-alive
Cache-Control: max-age=0
Upgrade-Insecure-Requests: 1
User-Agent: Mozilla/5.0 (X11; Linux x86_64) AppleWebKit/537.36 (KHTML, like Gecko) Chrome/78.0.3904.97 Safari/537.36
Sec-Fetch-User: ?1
Accept: text/html,application/xhtml+xml,application/xml;q=0.9,image/webp,image/apng,*/*;q=0.8,application/signed-exchange;v=b3
Sec-Fetch-Site: none
Sec-Fetch-Mode: navigate
Accept-Encoding: gzip, deflate, br
Accept-Language: en-US,en;q=0.9
1.3 HTTPrequest
HTTP 格式:
Method Request-URI HTTP-Version CRLF
headers CRLF
message-body
1.4 编写响应 response
response 格式:
HTTP-Version Status-Code Reason-Phrase CRLF
headers CRLF
message-body
一个最简单的响应,没有headers,没有body,例如 HTTP/1.1 200 OK\r\n\r\n
修改src/main.rs的连接处理函数代码:
#![allow(unused_variables)]
fn main() {
use std::io::prelude::*;
use std::net::TcpStream;
fn handle_connection(mut stream: TcpStream) {
let mut buffer = [0; 512];
stream.read(&mut buffer).unwrap();
let response = "HTTP/1.1 200 OK\r\n\r\n";
stream.write(response.as_bytes()).unwrap();
stream.flush().unwrap();
}
}
在运行程序cargo run 和打开浏览器。浏览器是一个空白页,没有报错。服务器终端也不打印数据输出。
zzl@zzl-virtualbox2:~/rustprj/hello$ cargo run
Finished dev [unoptimized + debuginfo] target(s) in 0.02s
Running `target/debug/hello`
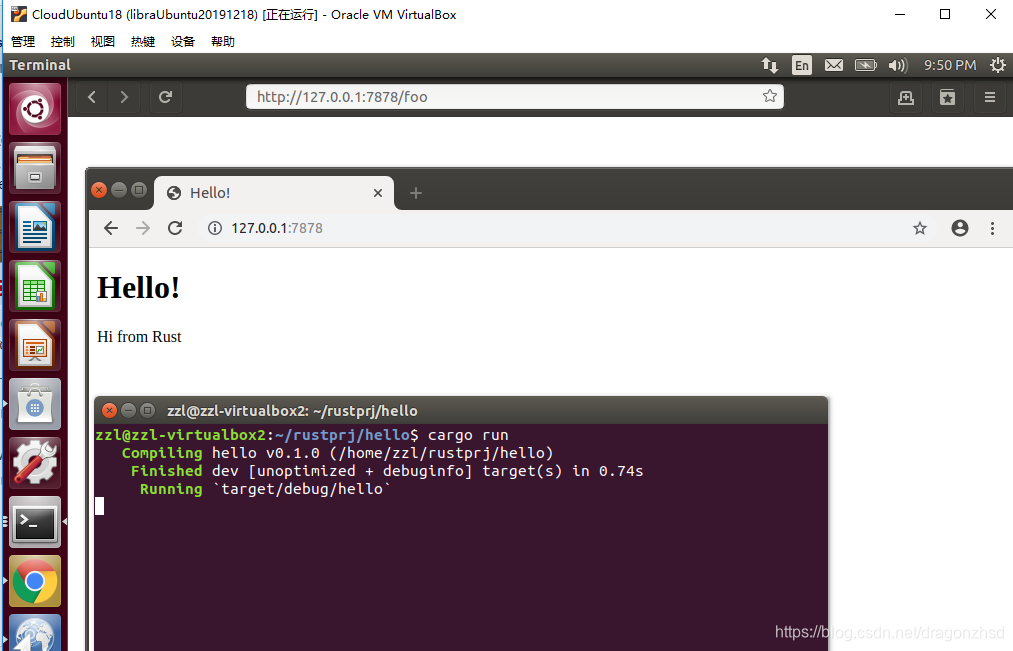
1.5 返回一个HTML
编写一个hello.html,放到src的父目录。例如:
<!DOCTYPE html>
<html lang="en">
<head>
<meta charset="utf-8">
<title>Hello!</title>
</head>
<body>
<h1>Hello!</h1>
<p>Hi from Rust</p>
</body>
</html>
在src/main.rs 增加 use std::fs::File;
修改其中的handle_connection函数如下:
#![allow(unused_variables)]
fn handle_connection(mut stream: TcpStream) {
let mut buffer = [0; 512];
stream.read(&mut buffer).unwrap();
let mut file = File::open("hello.html").unwrap();
let mut contents = String::new();
file.read_to_string(&mut contents).unwrap();
let response = format!("HTTP/1.1 200 OK\r\n\r\n{}", contents);
stream.write(response.as_bytes()).unwrap();
stream.flush().unwrap();
}
1.6 确认请求,并有选择地响应。
使用if ...else. 修改handle_connection:
#![allow(unused_variables)]
fn handle_connection(mut stream: TcpStream) {
let mut buffer = [0; 512];
stream.read(&mut buffer).unwrap();
let get = b"GET / HTTP/1.1\r\n";
if buffer.starts_with(get) {
let mut file = File::open("hello.html").unwrap();
let mut contents = String::new();
file.read_to_string(&mut contents).unwrap();
let response = format!("HTTP/1.1 200 OK\r\n\r\n{}", contents);
stream.write(response.as_bytes()).unwrap();
stream.flush().unwrap();
} else {
// some other request
let status_line = "HTTP/1.1 404 NOT FOUND\r\n\r\n";
let mut file = File::open("404.html").unwrap();
let mut contents = String::new();
file.read_to_string(&mut contents).unwrap();
let response = format!("{}{}", status_line, contents);
stream.write(response.as_bytes()).unwrap();
stream.flush().unwrap();
}
}
}
然后添加一个404.html 到hello.html所在目录。代码如下:
<!DOCTYPE html>
<html lang="en">
<head>
<meta charset="utf-8">
<title>Hello!</title>
</head>
<body>
<h1>Oops!</h1>
<p>Sorry, I don't know what you're asking for.</p>
</body>
</html>
这样,再次运行程序。打开浏览器,当输入的请求找不到,就会返回404.html。
1.7 重构代码:
上面if...else...代码有重复,可以简化如下:
#![allow(unused_variables)]
fn handle_connection(mut stream: TcpStream) {
let mut buffer = [0; 512];
stream.read(&mut buffer).unwrap();
let get = b"GET / HTTP/1.1\r\n";
let (status_line, filename) = if buffer.starts_with(get) {
("HTTP/1.1 200 OK\r\n\r\n", "hello.html")
} else {
("HTTP/1.1 404 NOT FOUND\r\n\r\n", "404.html")
};
let mut file = File::open(filename).unwrap();
let mut contents = String::new();
file.read_to_string(&mut contents).unwrap();
let response = format!("{}{}", status_line, contents);
stream.write(response.as_bytes()).unwrap();
stream.flush().unwrap();
}
这样,一个简单的单线程 web server就完成了!
。。。。。。。待续


 1373
1373

 被折叠的 条评论
为什么被折叠?
被折叠的 条评论
为什么被折叠?
 到【灌水乐园】发言


