


1.搭建构建前环境


直接去github下载源码,选择5.x版本
https://github.com/spring-projects/spring-framework
https://repo.spring.io/libs-release-local/org/springframework/spring/
将下载的源码解压到本地就行,下一步就是开始构建源码了。
在cmd中进入源码目录,输入gradlew.bat命令
使用工具编译时,可能会出现内存溢出情况,这里我们编译时需要增加相关参数xml -XX:MaxPermSize=2048m -Xmx2048m -XX:MaxHeapSize=2048m

使用国内的地址能明显提高依赖的下载速度
maven { url "http://maven.aliyun.com/nexus/content/groups/public/"}

发现构建gradle不通过
解决方法:关于这个问题我在网上找了很多资料,最后发现多更新几次就没问题了,主要是需要下载很多依赖包,但可能由于网速的问题导致失败。总之fail了你就多refresh几次,这个过程需要一定时间的。
等待一定时间后,构建成功!【并没有网上说的那么难,以前的版本可能需要配置很多文件。现在的版本构建很简单,需要失败可能是由下载依赖包失败导致的】

在IDEA中,如果能找到ApplicationContext类,按下Ctrl+Shift+Alt+U键,出现下图所示类图界面说明构建成功了!
此时可以查看Spring的源码了,但是我们需要在源码的基础上面进行修改,开发,最好将源码进行编译打包,下面就是将源码编译的过程。
在构建完成源码之后,就搭建好了阅读源码的环境了。但是我们还可以将源码编译打包。在编译之前需要进行一些配置修改,可以查看import-into-idea.md文档
在编译之前还需要对dosc.gradle文档进行修改,因为有些注释,文件路径在编译时需要调整。


下面将两个地方的路劲替换使用windows环境下的反斜扛 \
下面给出task schemaZip中修改的部分
it.path.endsWith(“META-INF\\spring.schemas”)
it.path.endsWith(schemas.get(key).replaceAll(’\\/’,’\\\\’))
task schemaZip(type: Zip) {
	group = "Distribution"
	baseName = "spring-framework"
	classifier = "schema"
	description = "Builds -${classifier} archive containing all " +
			"XSDs for deployment at https://springframework.org/schema."
	duplicatesStrategy 'exclude'
	moduleProjects.each { subproject ->
		def Properties schemas = new Properties();

		subproject.sourceSets.main.resources.find {
			it.path.endsWith("META-INF\spring.schemas")
		}?.withInputStream { schemas.load(it) }

		for (def key : schemas.keySet()) {
			def shortName = key.replaceAll(/http.*schema.(.*).spring-.*/, '$1')
			assert shortName != key
			File xsdFile = subproject.sourceSets.main.resources.find {
				//it.path.endsWith(schemas.get(key))
				it.path.endsWith(schemas.get(key).replaceAll('\\/','\\\\'))
			}
			assert xsdFile != null
			into (shortName) {
				from xsdFile.path
			}
		}
	}
}
接下来先编译1. Precompile spring-oxm with ./gradlew :spring-oxm:compileTestJava

在Precompile spring-oxm with ./gradlew :spring-oxm:compileTestJava编译完成后,可以编译整个工程了!(这个过程非常耗时间,可能20几分钟!)
进过一段时间编译build后发现spring-aspects模块有错误, 选中该模块,右键–Load/Unload Modules ,把spring-aspects下的所有项目排除出去。

到这里,整个Spring源码的编译和环境准备就完成了,接下来我们编写一个demo来调试一下,看看我们的代码是否没问题。
完成了上面的过程后,我们可以自己编写一个模块测试该源码构建编译过程是否完成!
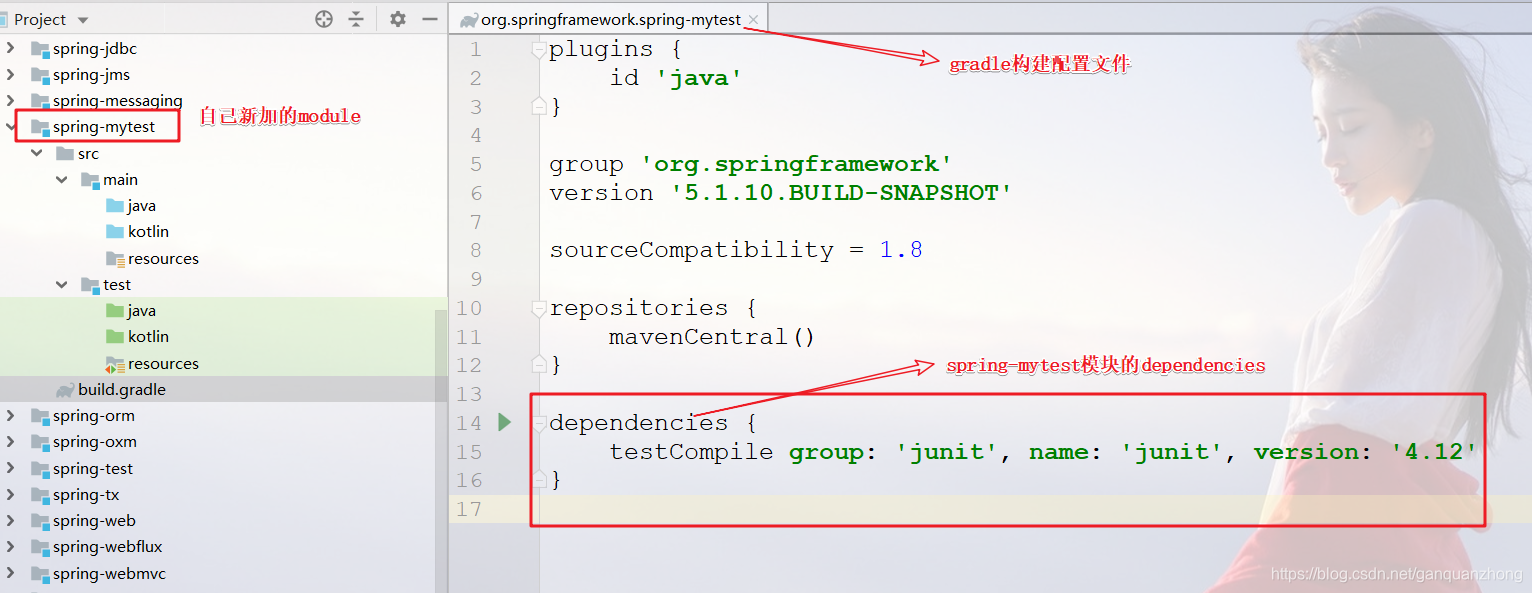
- 在Spring中添加自己的module模块,同样选择gradle构建。

- 输入ArtufactId,工程名

- 选择默认的存储路径即可

- 确认,idea会自动帮助我们构建spring-mytest模块。

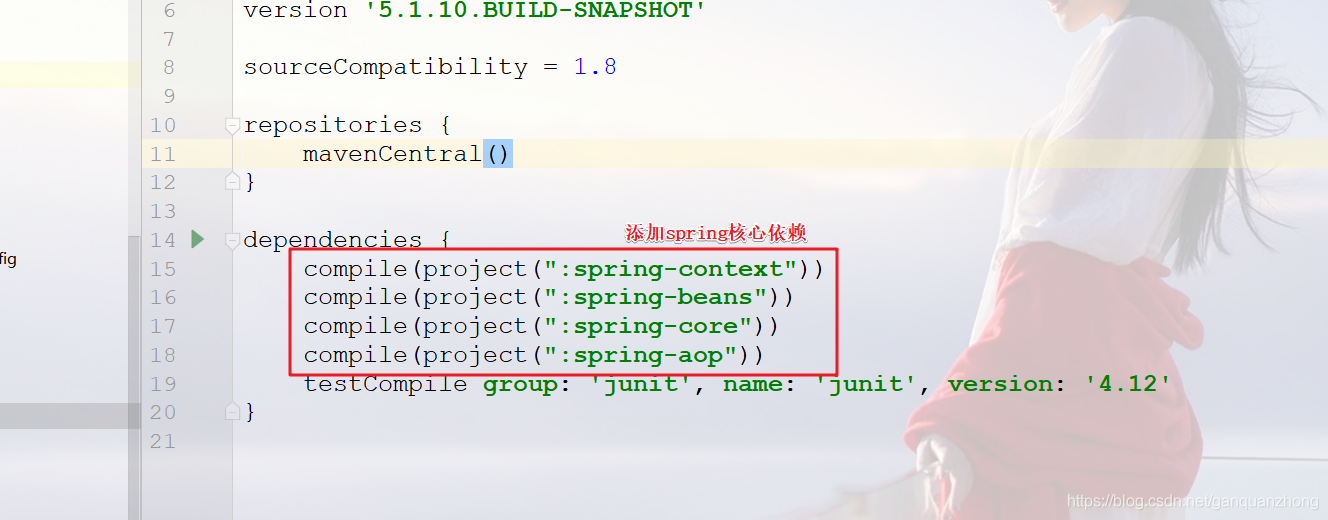
- 下面编写一个简单的applicationContext获取容器用的bean,主要是测试Spring源码构建编译过程是否成功!
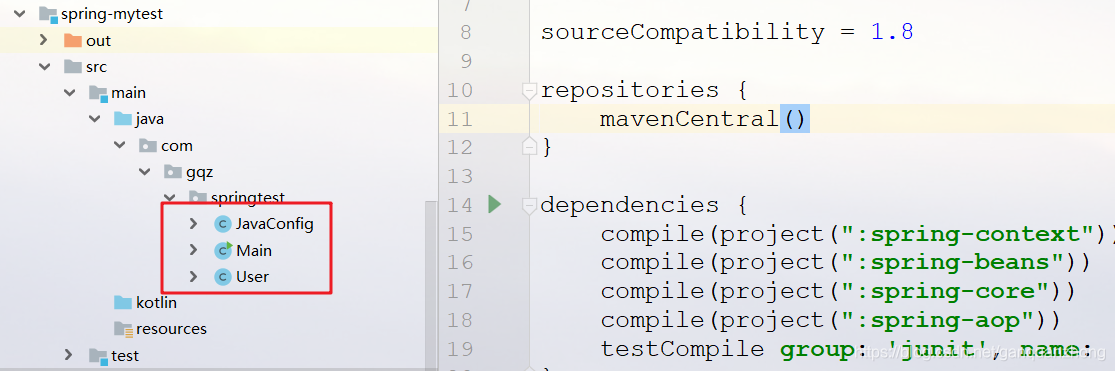
新建User.java
package com.gqz.springtest;

/** * @ClassName: User * @author: ganquanzhong * @date: 2019/9/2 11:27 */ public class User { private int uid; private String username; private String pwd; private String tel; private String addr; public User(int uid, String username, String pwd, String tel, String addr) { this.uid = uid; this.username = username; this.pwd = pwd; this.tel = tel; this.addr = addr; } @Override public String toString() { return "User{" + "uid=" + uid + ", username='" + username + '\'' + ", pwd='" + pwd + '\'' + ", tel='" + tel + '\'' + ", addr='" + addr + '\'' + '}'; } }
新建JavaConfig.java (使用注解的方式声明bean)
package com.gqz.springtest;

import org.springframework.context.annotation.Bean; import org.springframework.context.annotation.ComponentScan; import org.springframework.context.annotation.Configuration; /** * @ClassName: JavaConfig * @author: ganquanzhong * @date: 2019/9/2 11:43 */ @Configuration @ComponentScan public class JavaConfig { @Bean public User user(){ return new User(101,"ganquanzhong","pwd","13995978321","china"); } }
最后写一个测试类Main.java
package com.gqz.springtest;

import org.springframework.context.ApplicationContext; import org.springframework.context.annotation.AnnotationConfigApplicationContext; /** * @ClassName: Main * @author: ganquanzhong * @date: 2019/9/2 12:29 */ public class Main { public static void main(String[] args){ ApplicationContext ac =new AnnotationConfigApplicationContext(JavaConfig.class); User user = (User) ac.getBean("user"); System.out.println(user.toString()); } } - 运行
consoloe输出
User{uid=101, username='ganquanzhong', pwd='pwd', tel='13995978321', addr='china'}


 被折叠的 条评论
为什么被折叠?
被折叠的 条评论
为什么被折叠?
 到【灌水乐园】发言


