


 本文介绍了如何使用 DBeaver 连接 OB Oracle 数据库,包括下载 DBeaver,新建 OB Oracle 驱动,配置连接参数,并成功执行 SQL 查询。详细步骤包括软件下载、驱动配置、数据库连接测试等。
前言
- OB MySQL 兼容 MySQL 协议和驱动,因此可以直接使用 MySQL 生态的数据库开发工具,比如 MySQL Client、Navicat、Sequel Pro 等,唯一需要注意的是 OB MySQL 的用户名格式为
{用户名}@{租户名},详见。

- 但 Oracle 是商业闭源数据库,其数据库协议并未对外公开,因此 OB Oracle 仅在数据库行为和 SQL 语法等方面与 Oracle 保持兼容,无法使用基于 Oracle 驱动的 SQL Developer 和 Navicat 工具进行连接。

配置流程
软件下载
- 下载 DBeaver 并安装: https://dbeaver.io/download/,社区版即可满足需求。
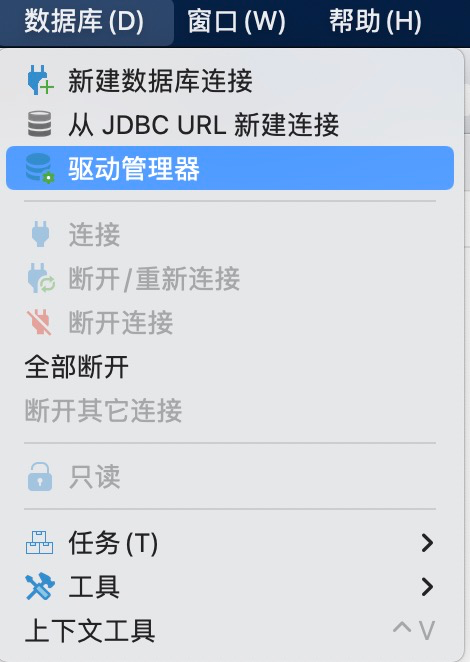
- 安装完后打开
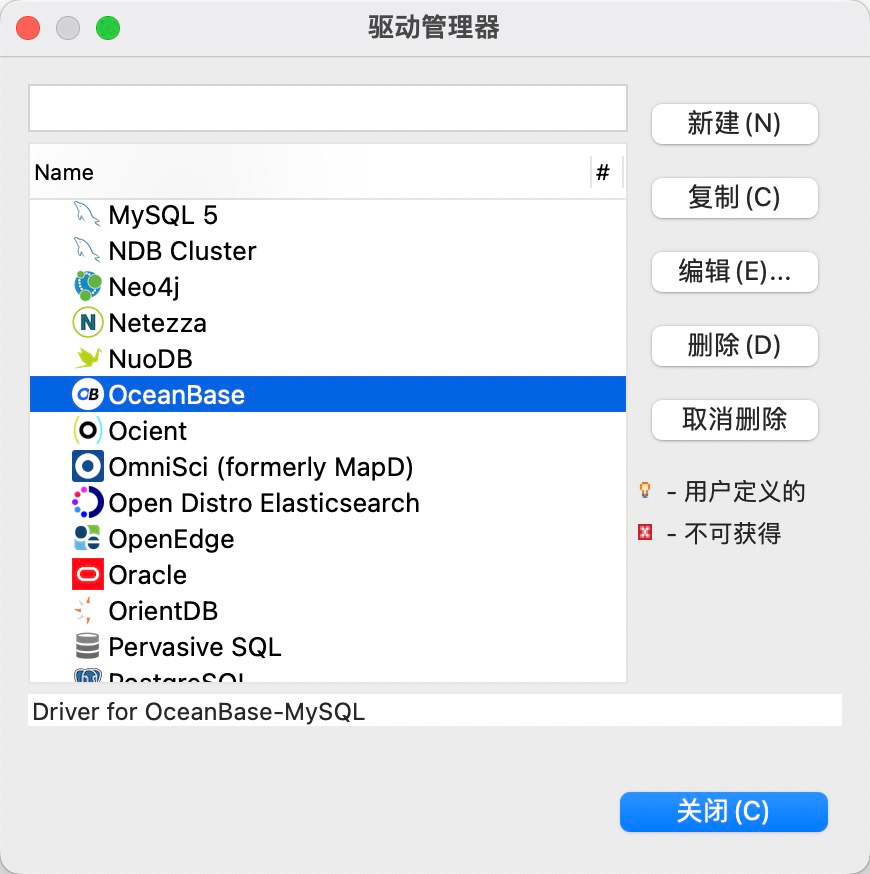
数据库->驱动管理器,可以看到已经有了一个 OceanBase 驱动,说明 DBeaver 官方集成并支持 OB 数据库连接,只不过这个驱动只支持 OB MySQL。因此我们需要手动新建 OB Oracle 的驱动。
- 下载 OB 官方提供的 JDBC 驱动: https://oceanbase-aliyun-docs.oss-cn-hangzhou.aliyuncs.com/downloads/obclient/oceanbase-client-1.1.7.jar
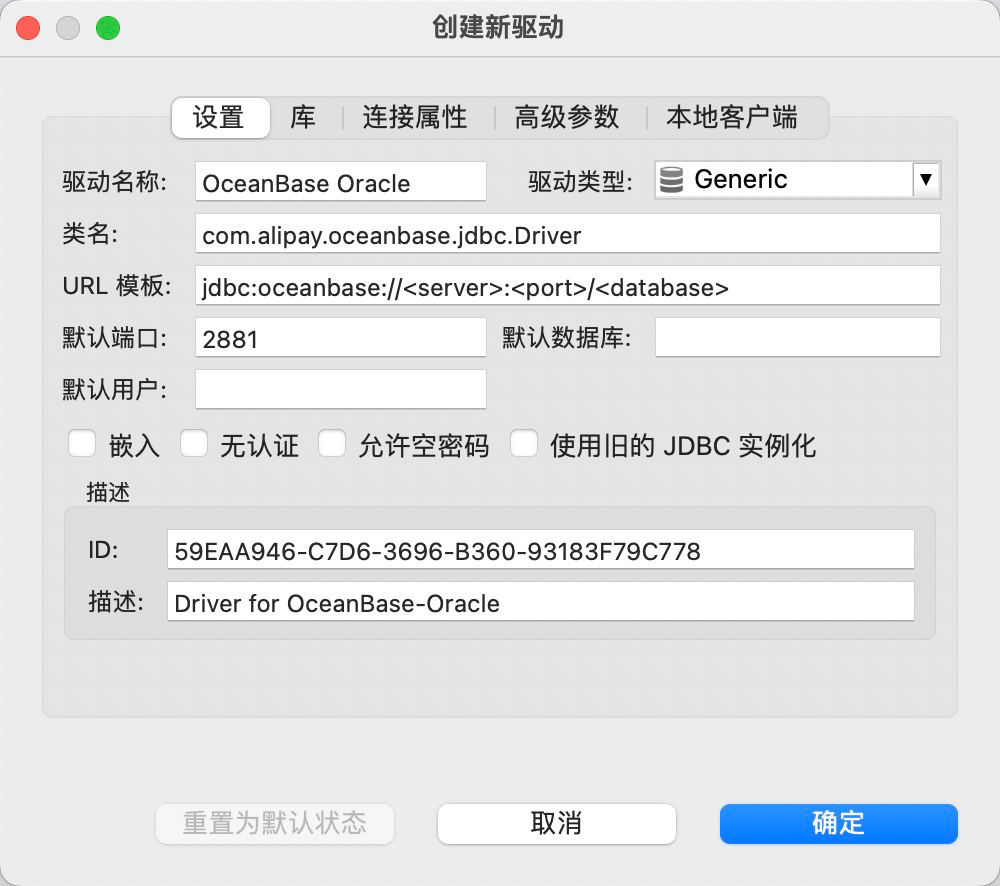
新建 OB Oracle 驱动
- 功能入口:
数据库->驱动管理器->新建。 - 先设置库信息: 添加文件 -> 选中下载的驱动文件 -> 找到类 -> 加载驱动类。
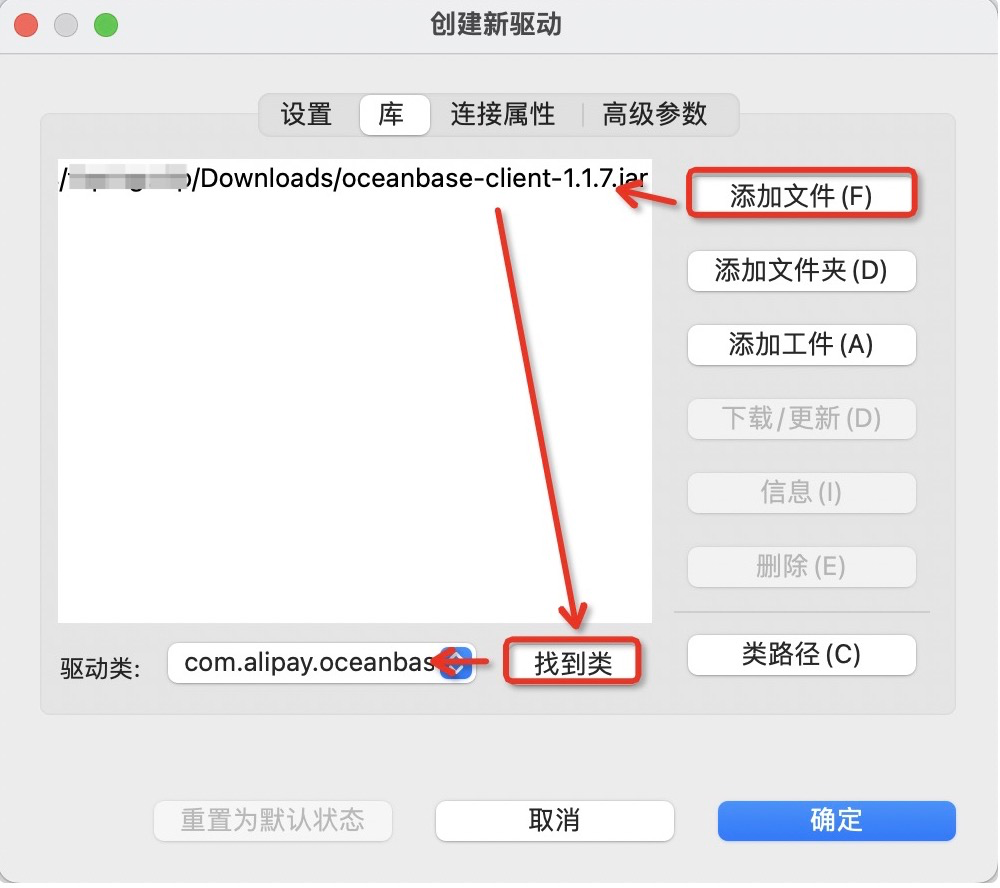
- 再设置驱动的基本信息和连接信息,其中类名为
com.alipay.oceanbase.jdbc.Driver,URL 模板为jdbc:oceanbase://<server>:<port>/<database>。
:::info
📢 需要注意: 驱动类型需要选 Generic,不能选 OceanBase (那是给 OB MySQL 模式用的)。
:::
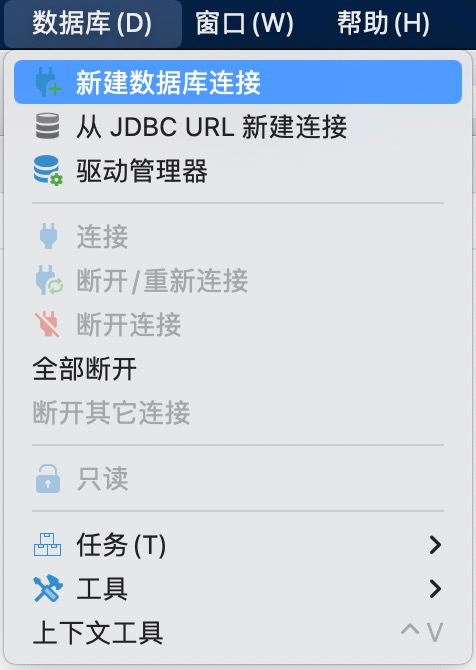
新建数据库连接
- 功能入口:
数据库->新建数据库连接。
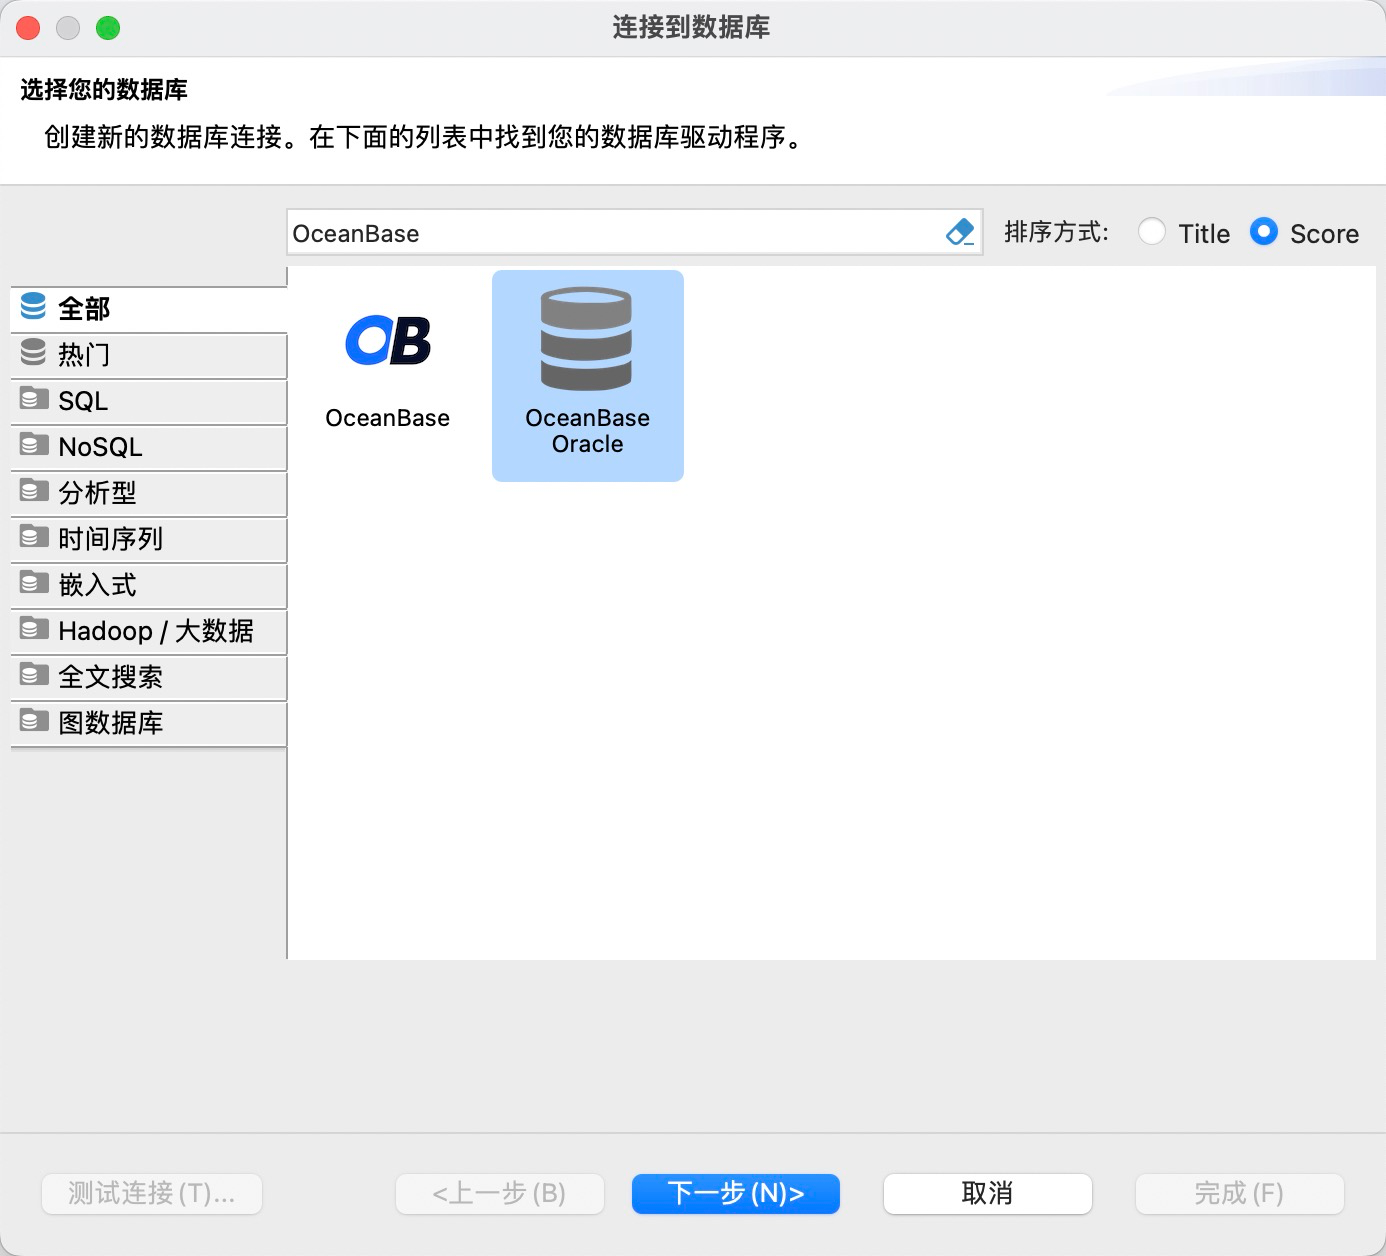
- 选择刚刚新建的
OceanBase Oracle驱动。
- 设置 JDBC 连接信息,这里只要设置用户名和密码。
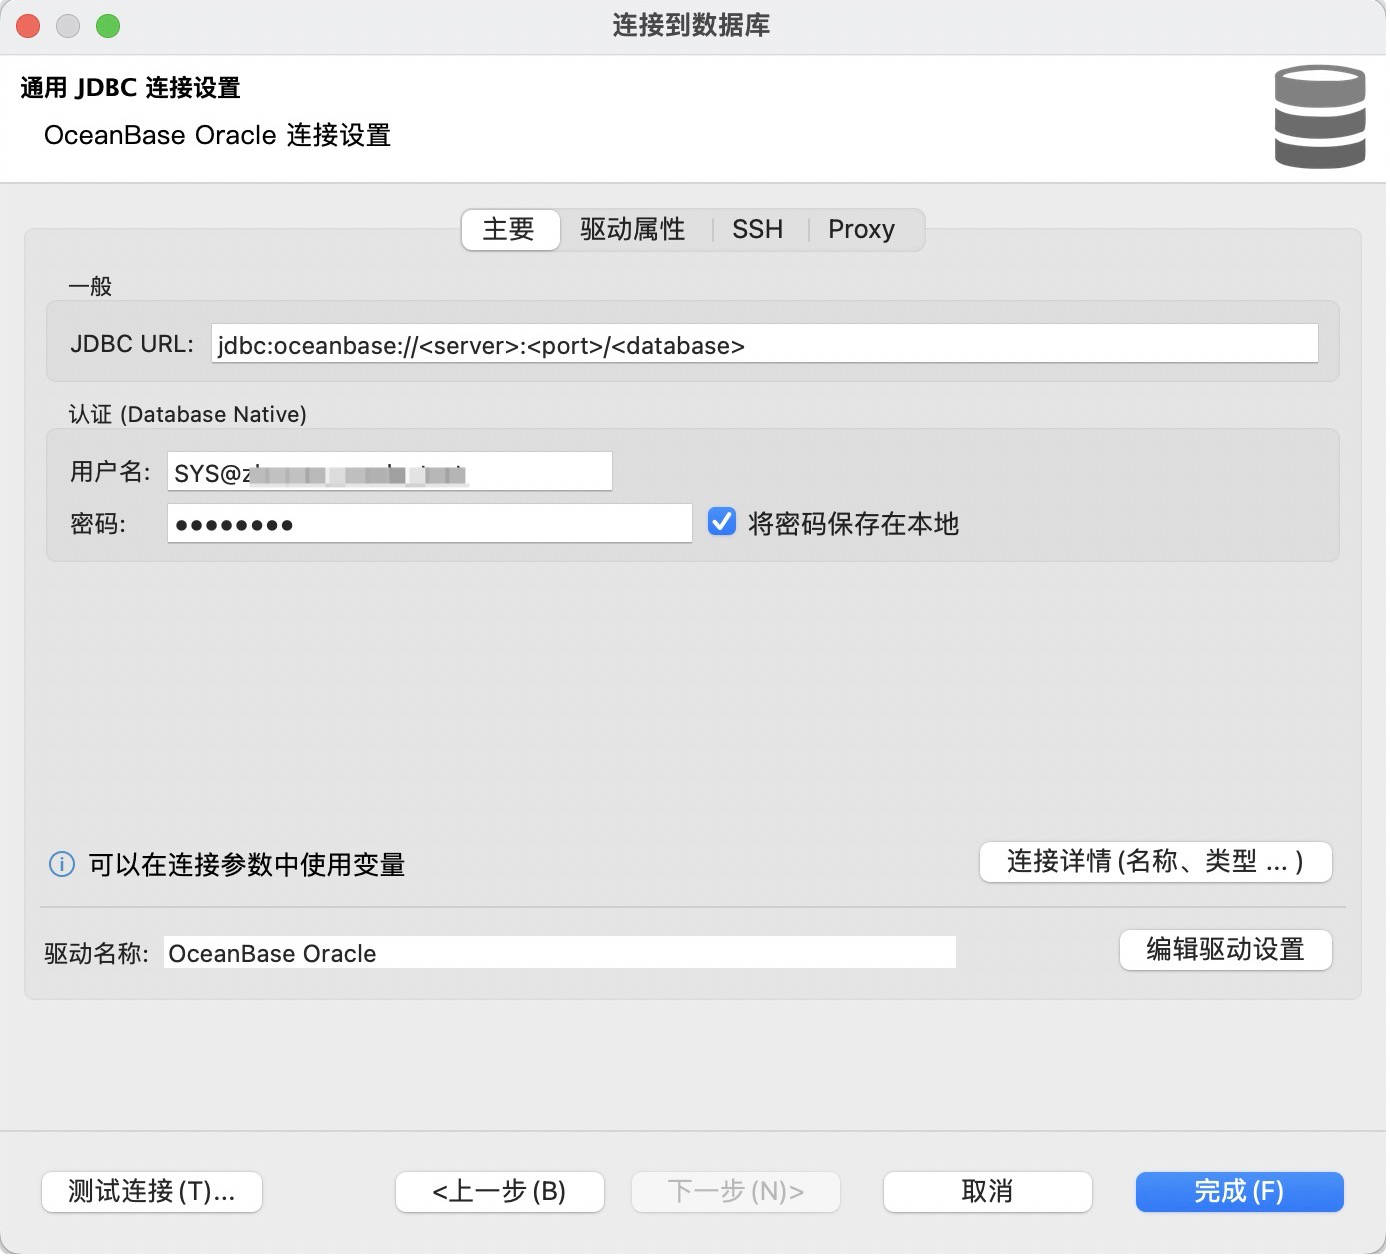
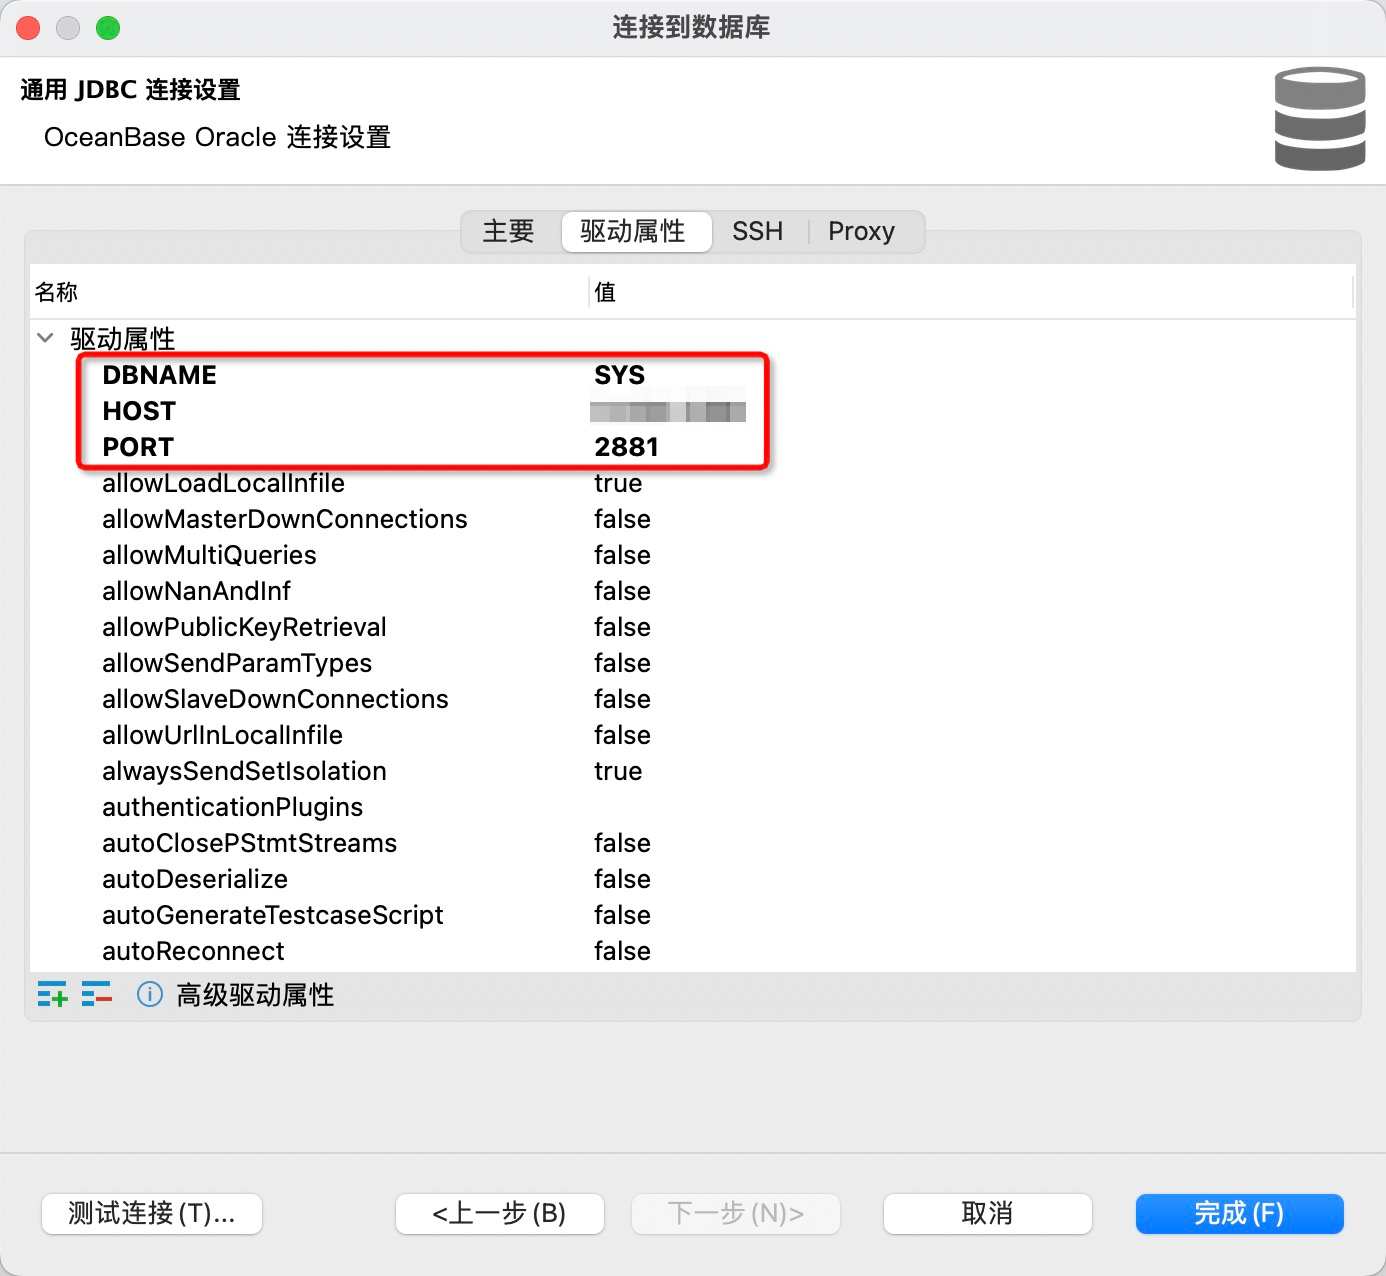
- 实际的连接参数需要在
驱动属性中设置,包括 DANAME、HOST 和 PORT。由于 Oracle 没有数据库的概念,因此这里的 DANAME 填写 SYS 即可。
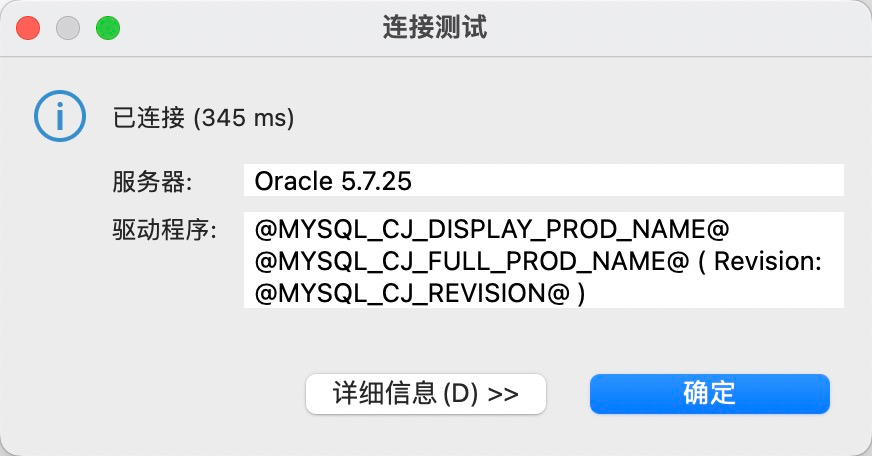
- 连接测试成功:
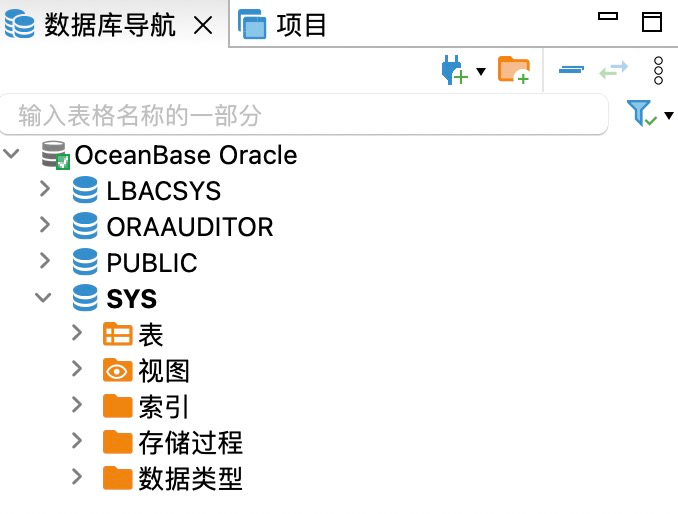
- 连接新建成功:
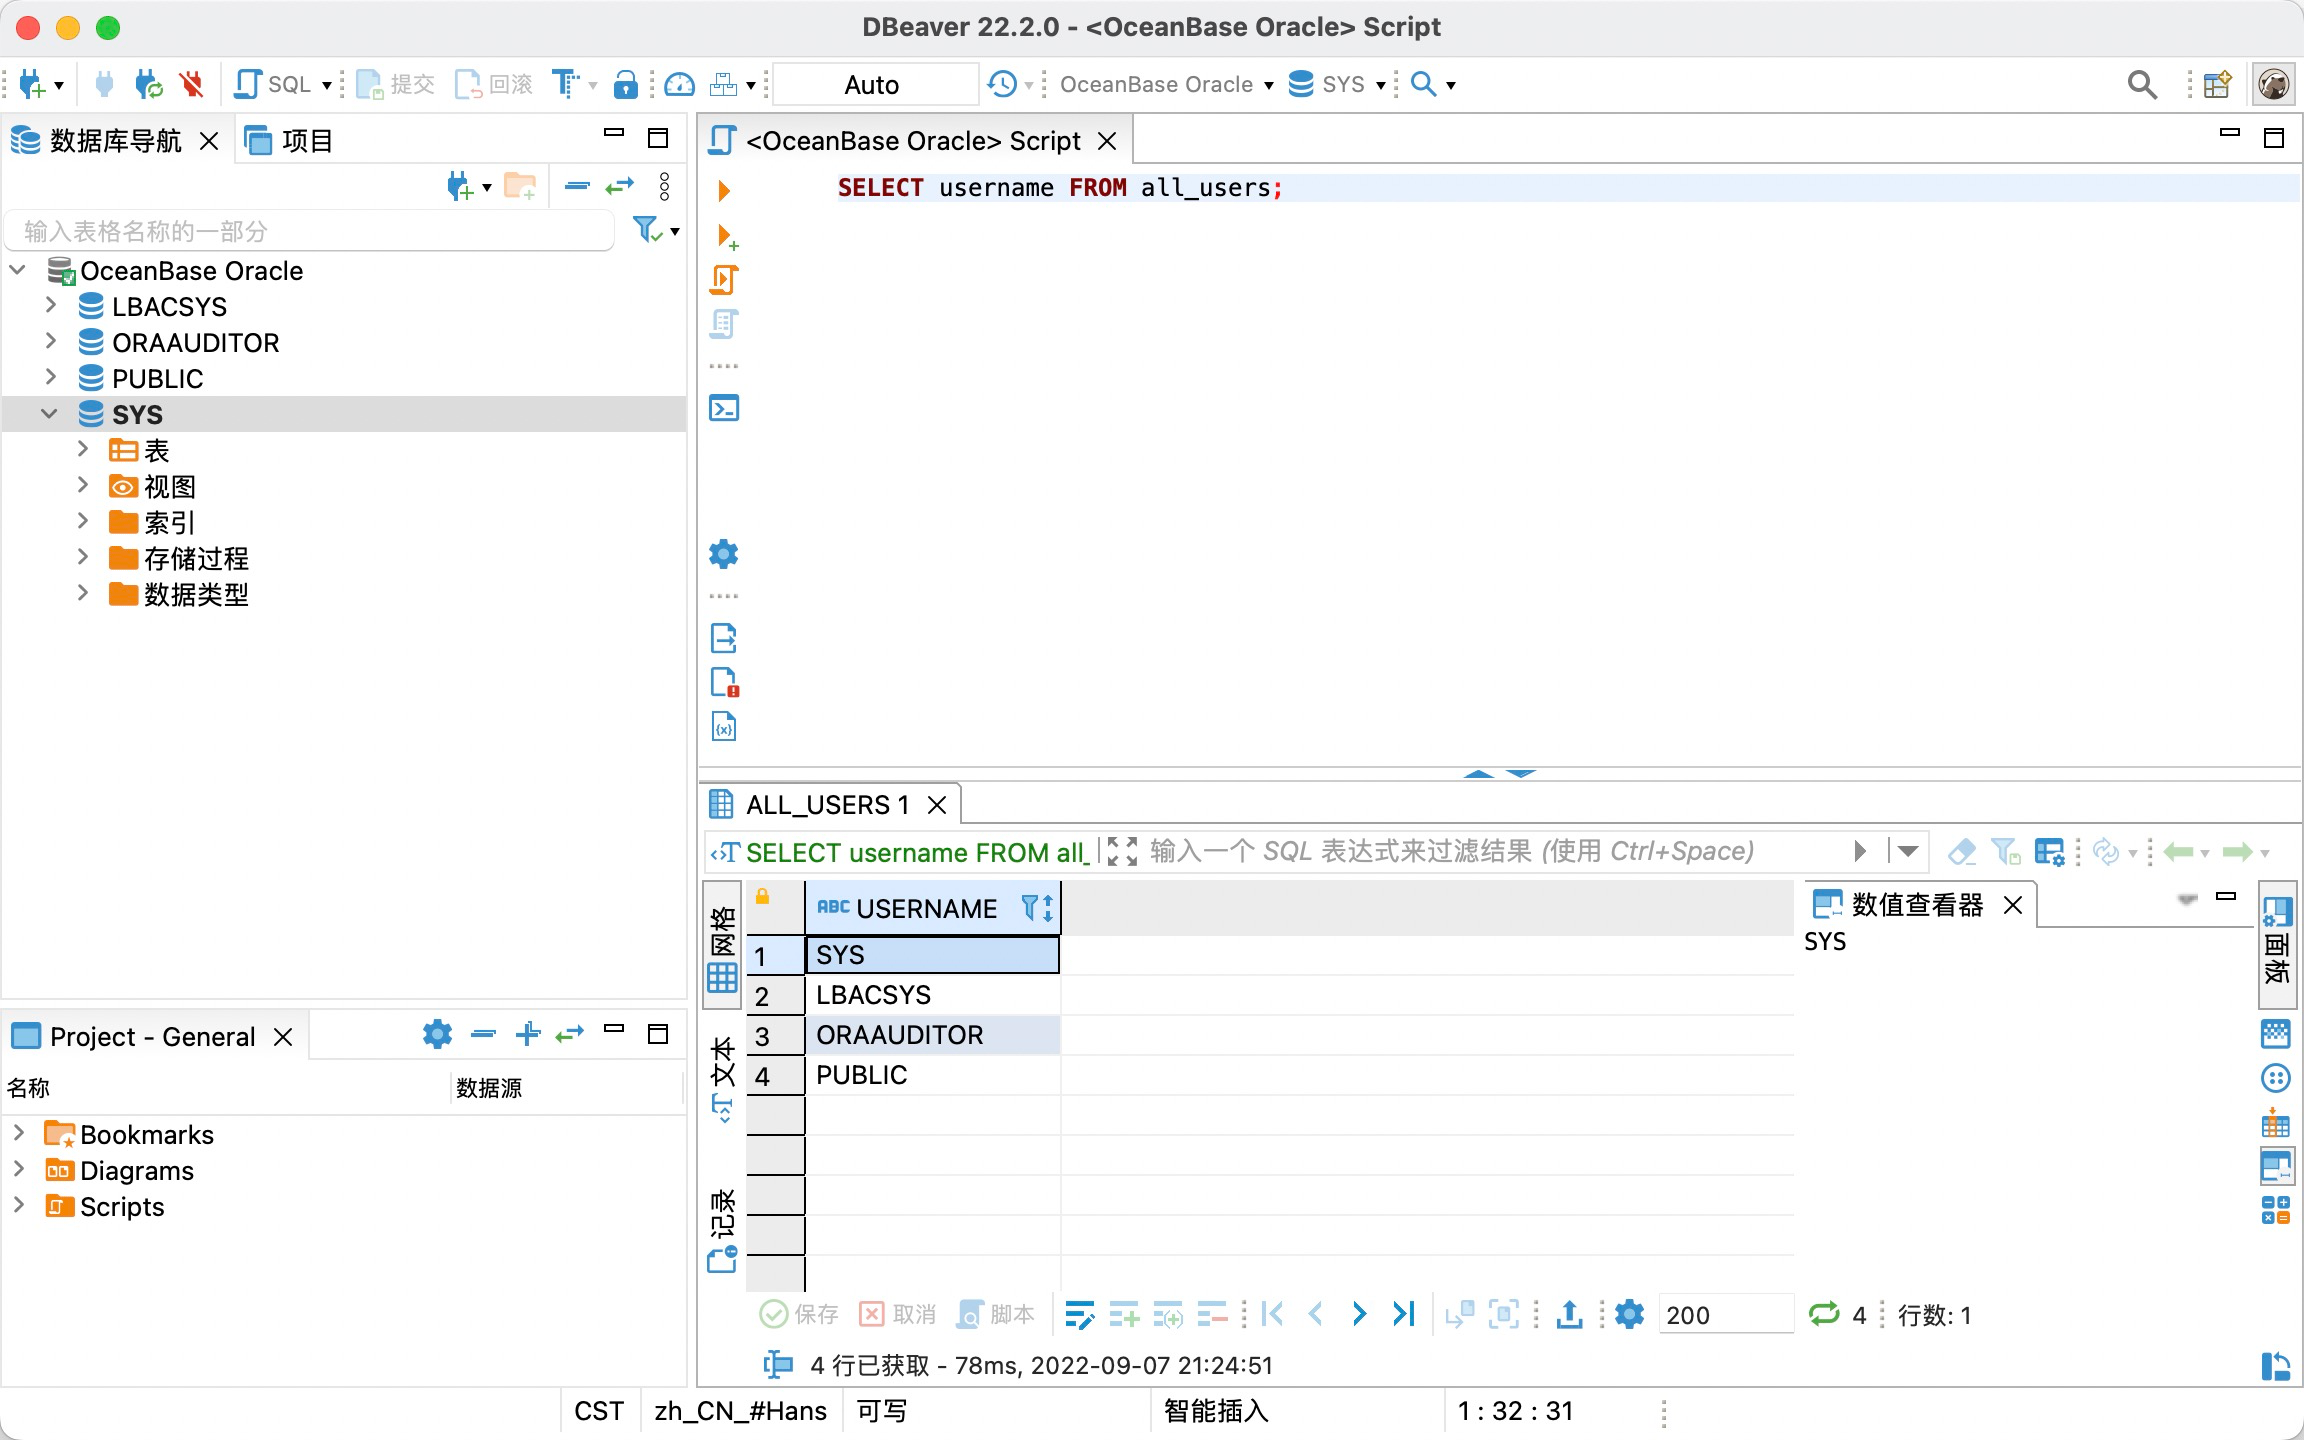
成功执行 SQL 👏🏻


 2957
2957

 被折叠的 条评论
为什么被折叠?
被折叠的 条评论
为什么被折叠?
 到【灌水乐园】发言


