


前言:
在 docker 上部署的 Ubuntu 不能做为独立的 OS 来使用,共享 NAS 系统的网口,所以“端口号”不能重复。
QNAP NAS 也提供了 Virtualization Machine App 来安装并运行虚拟机,搞了 1 晚上 Ubuntu 到显示桌面时就完蛋了,没去找原因,猜测内存不够可能性多。
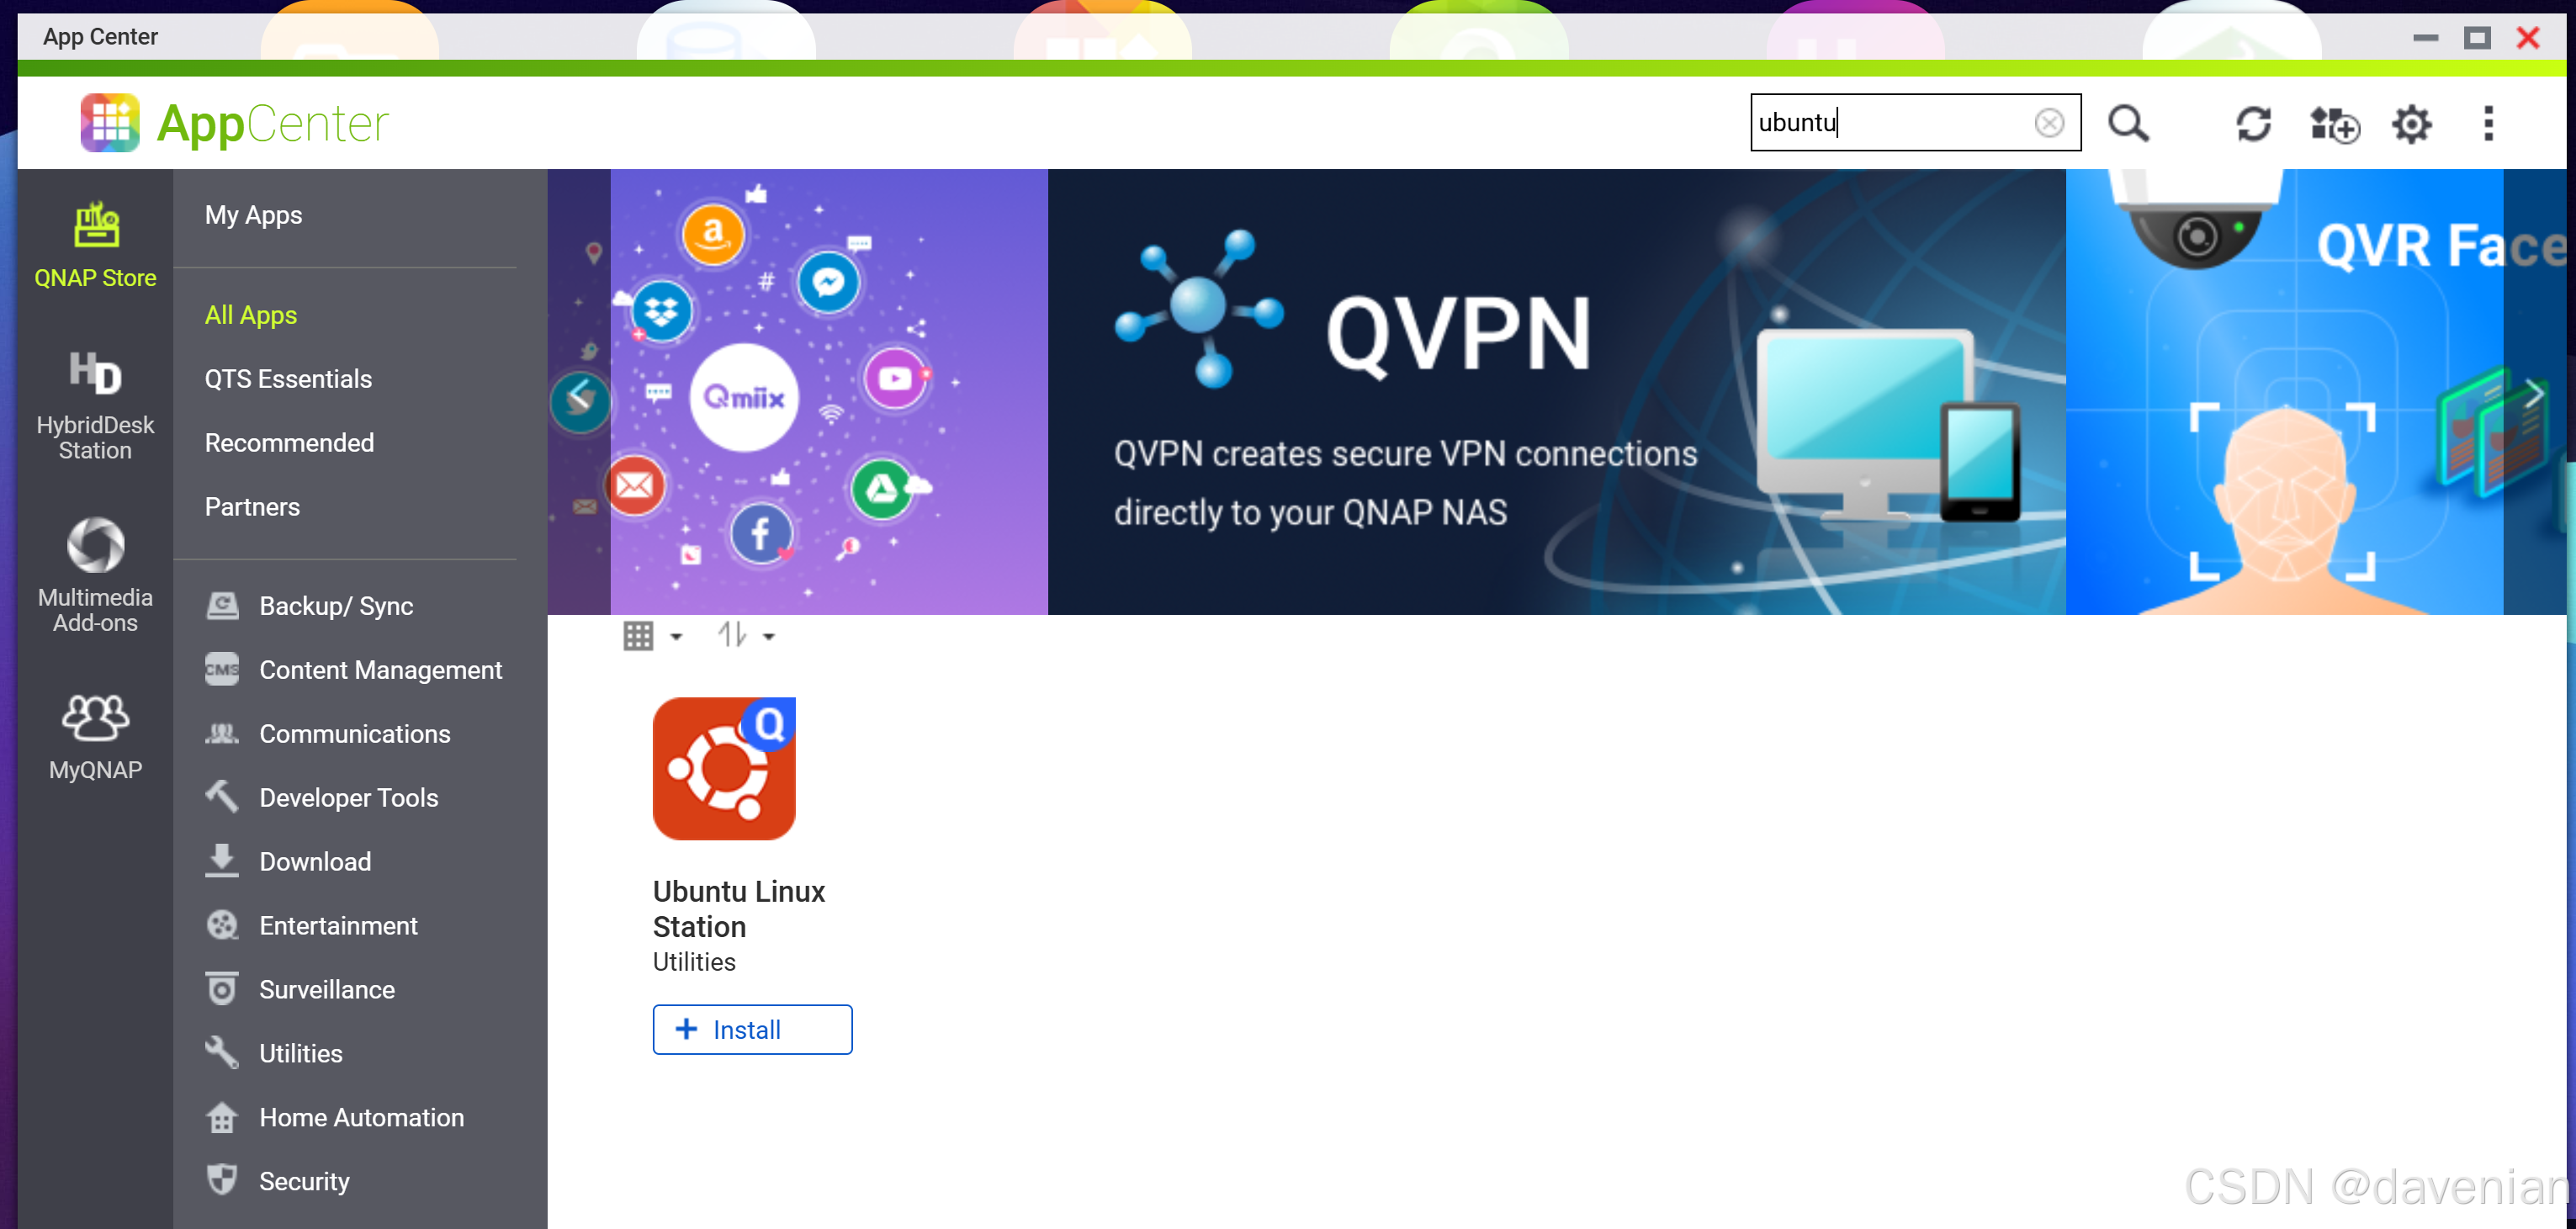
想起以前在 QNAP NAS 的 APP Center 中有: Ubuntu Linux Station,可以利用它来运行 Ubuntu 24/22/20 Desktop 系统。
注:以前 NAS 只有 4GB 内存,当时的 QTS 不能运行上面两个 Apps
实践:
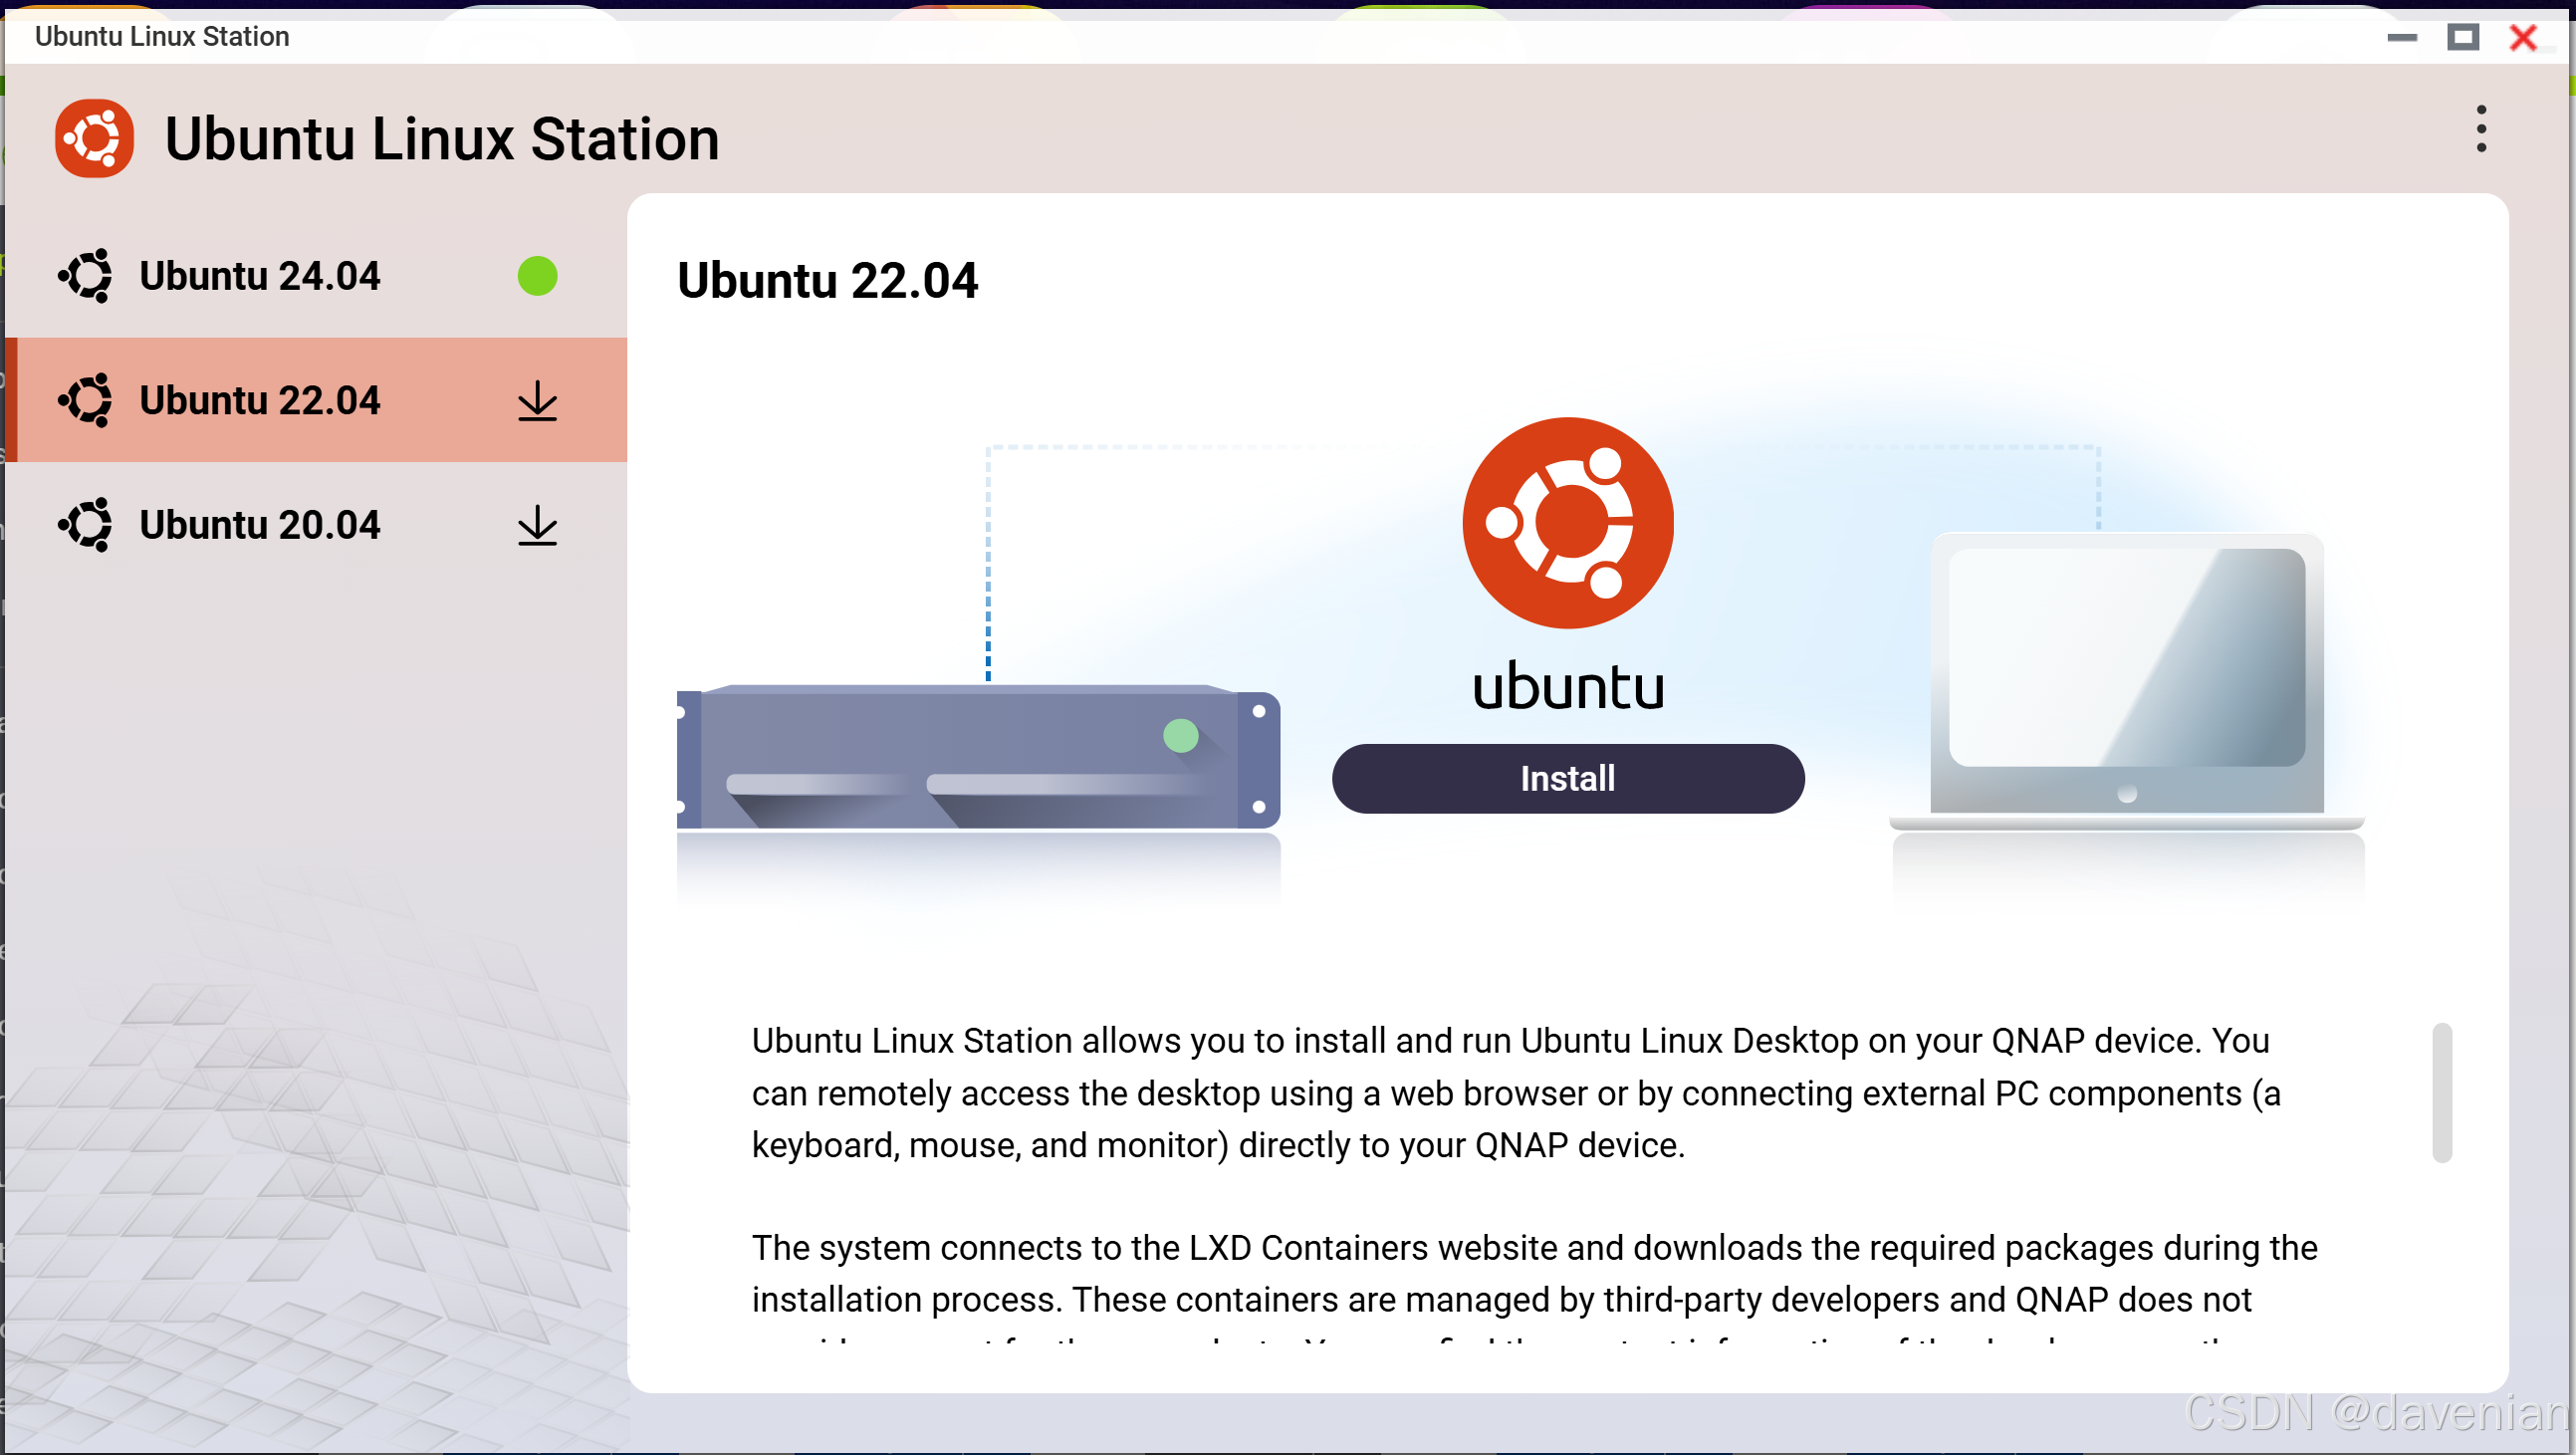
1. 通过 AppCente 安装 Ubuntu Linux Station
2. 通过 Ubuntu Linux Station 运行 Ubuntu Desktop
App 提示:
Ubuntu Linux Station allows you to install and run Ubuntu Linux Desktop on your QNAP device. You can remotely access the desktop using a web browser or by connecting external PC components (a keyboard, mouse, and monitor) directly to your QNAP device.
The system connects to the LXD Containers website and downloads the required packages during the installation process. These containers are managed by third-party developers and QNAP does not provide support for these products. You can find the contact information of the developers on the application's website.
Note:
- Ubuntu's operating system user credentials were synchronized with the system's enabled administrator user credentials during the installation process.
- Ensure that the QNAP device is connected to a stable network connection throughout the installation process.
- You can enable only one operating system at a time.
- Remote desktop currently does not support audio output.
大概意思: 这个 APP 是运行 Ubuntu 桌面版,能在浏览器中使用当为一个主机。这是以容器运行的,使用 NAS 上的用户登录。
3. 界面
配置的地方不多,可以用远程桌面连接 URL:
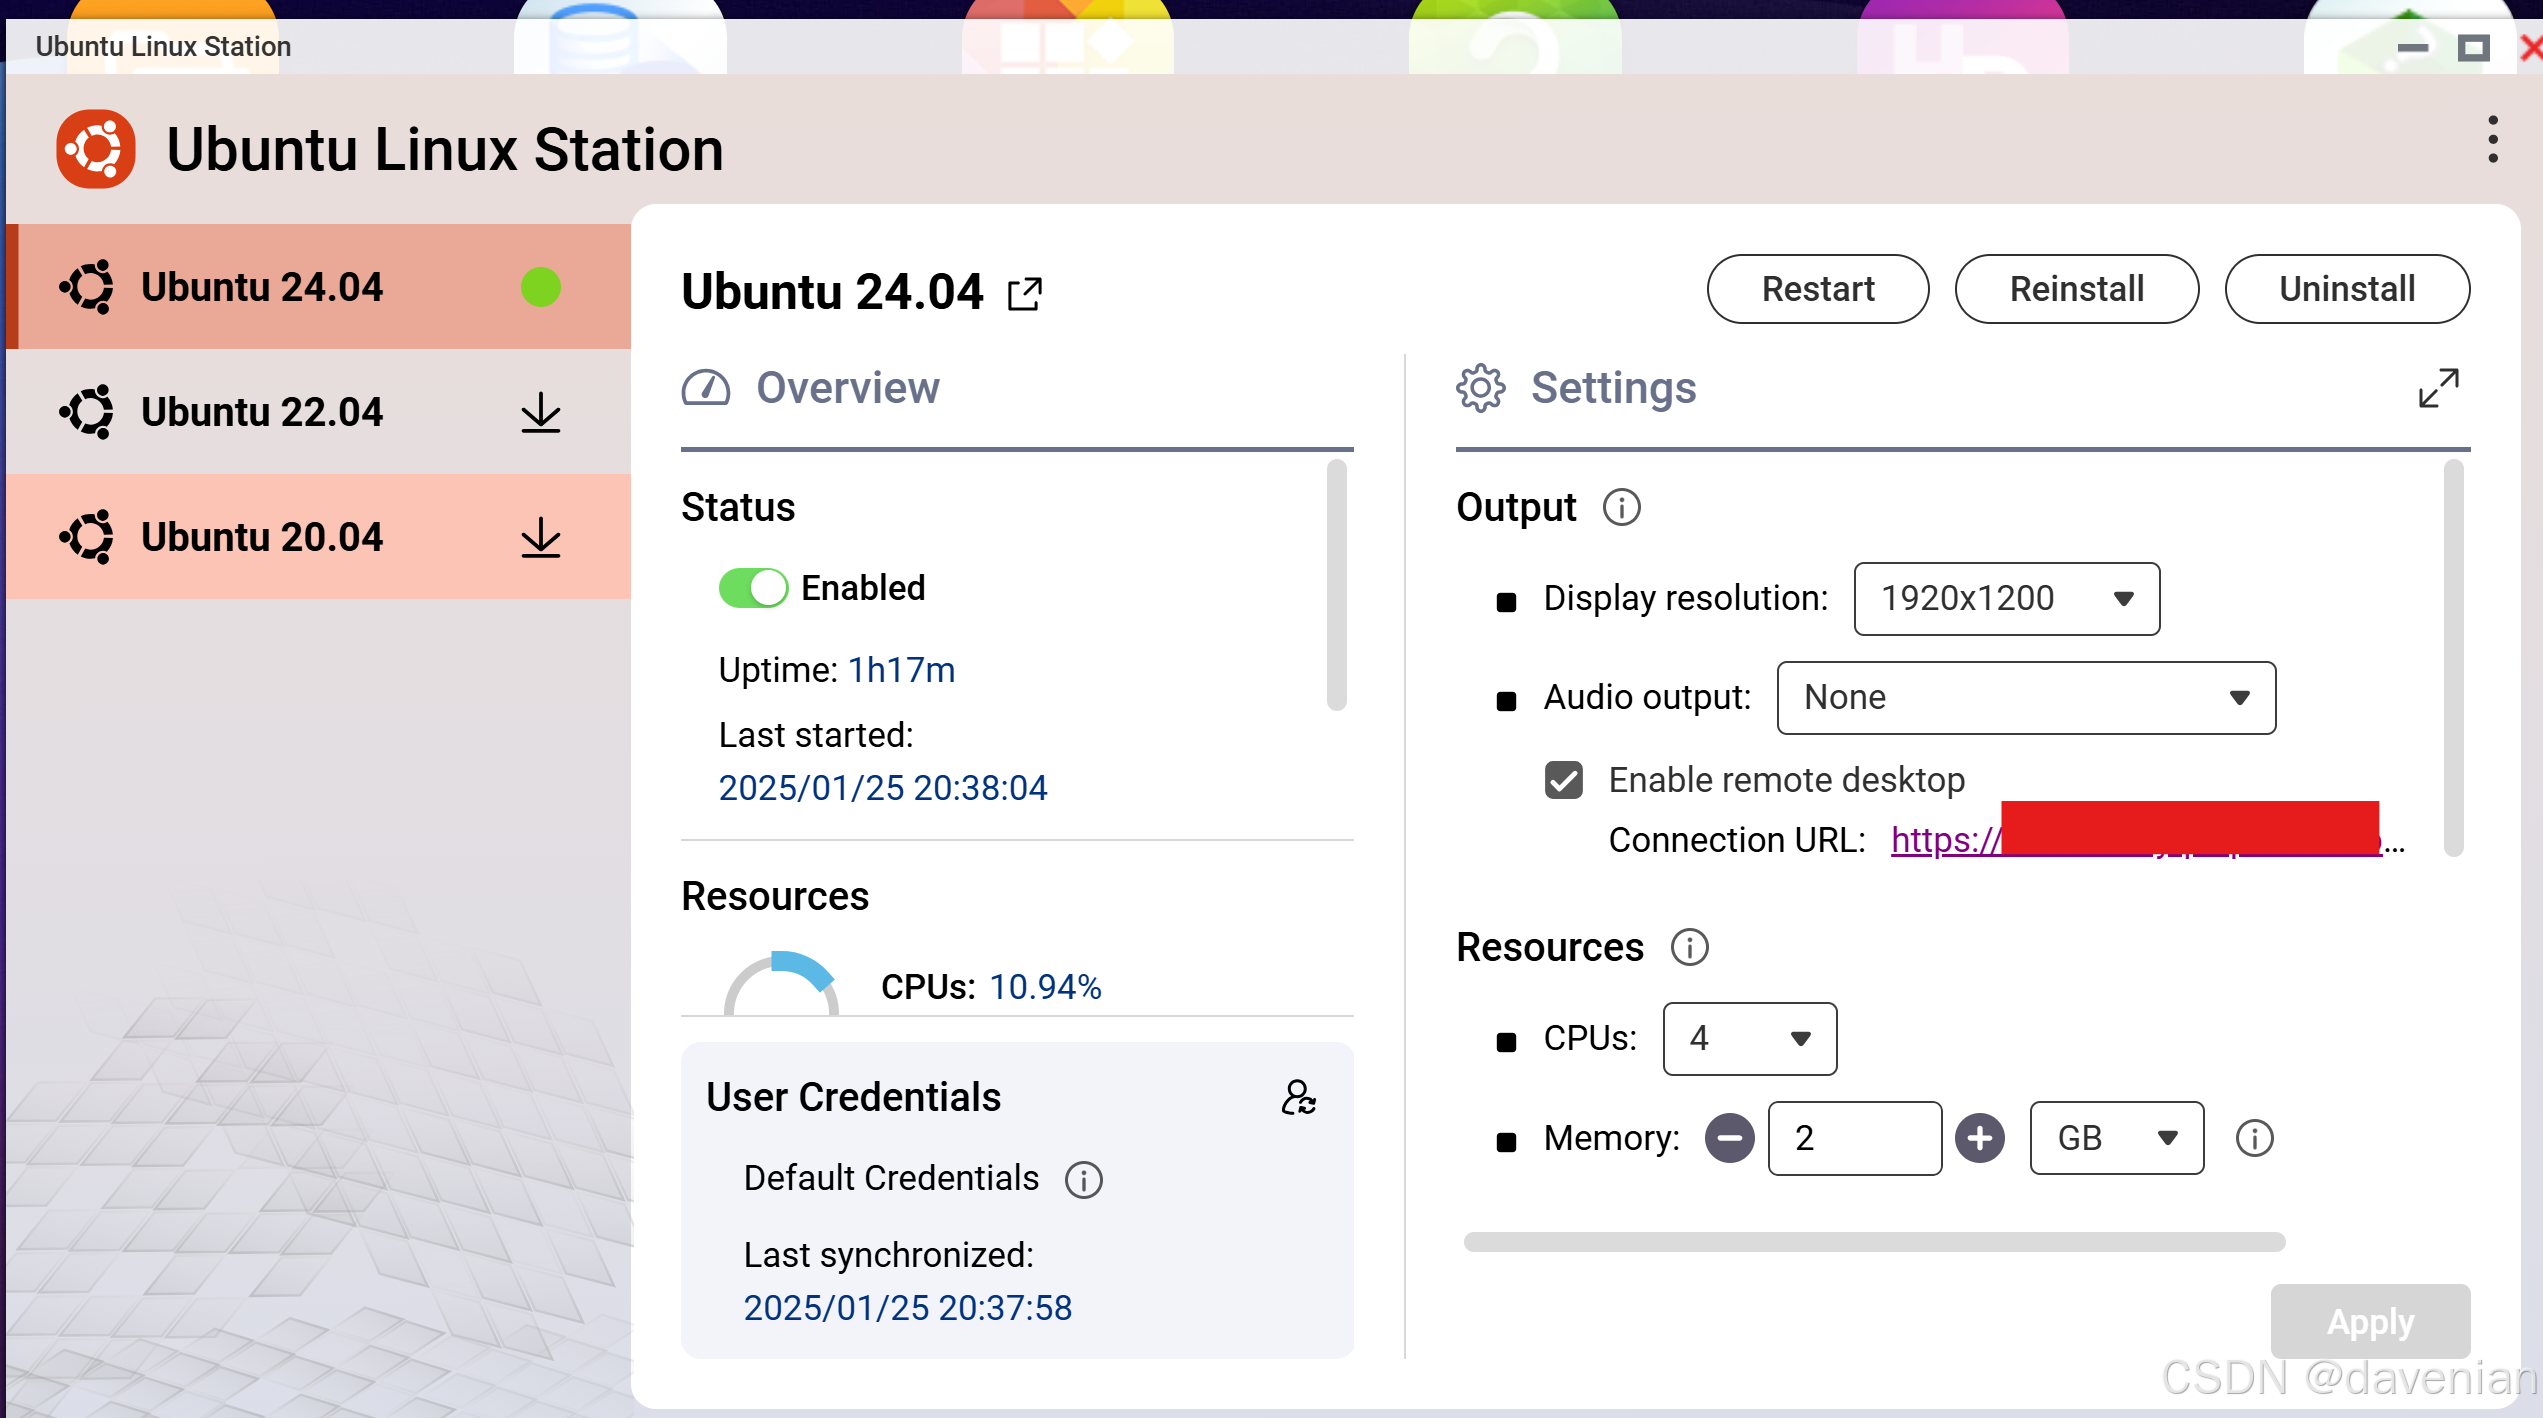
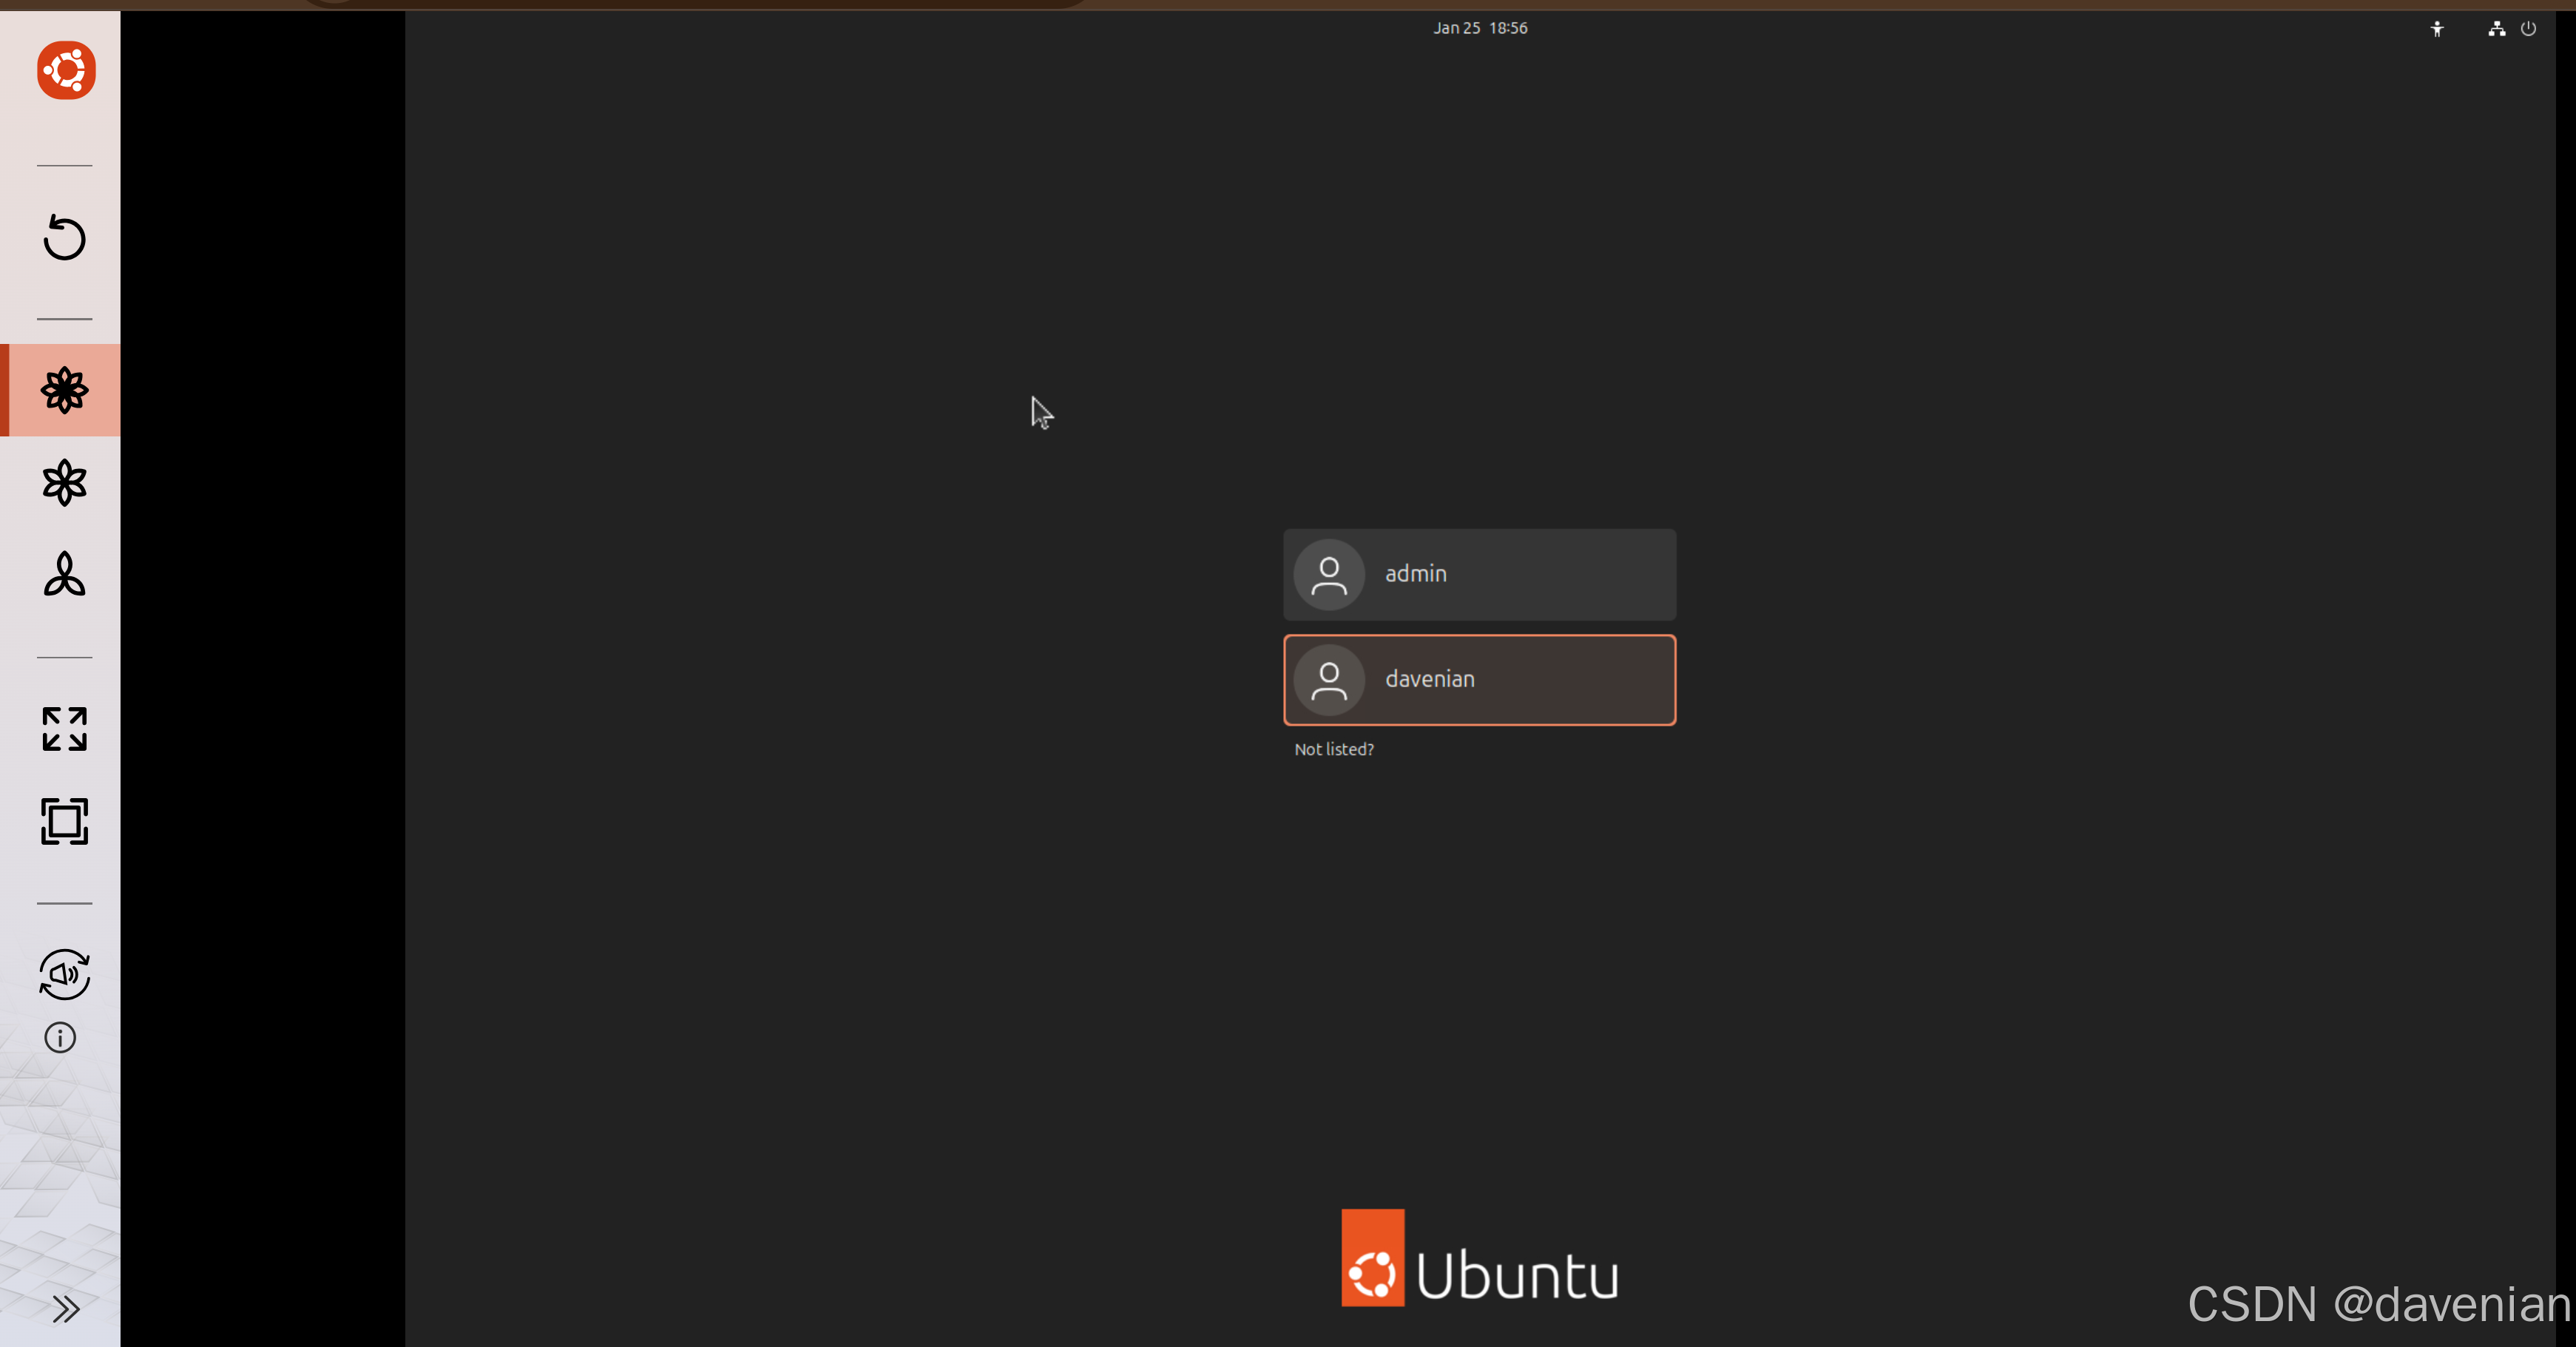
使用 NAS 账号登录:
4. 优点:
有独立的 HOME LAN IP:
5. 安装必要软件
1) 安装 ssh
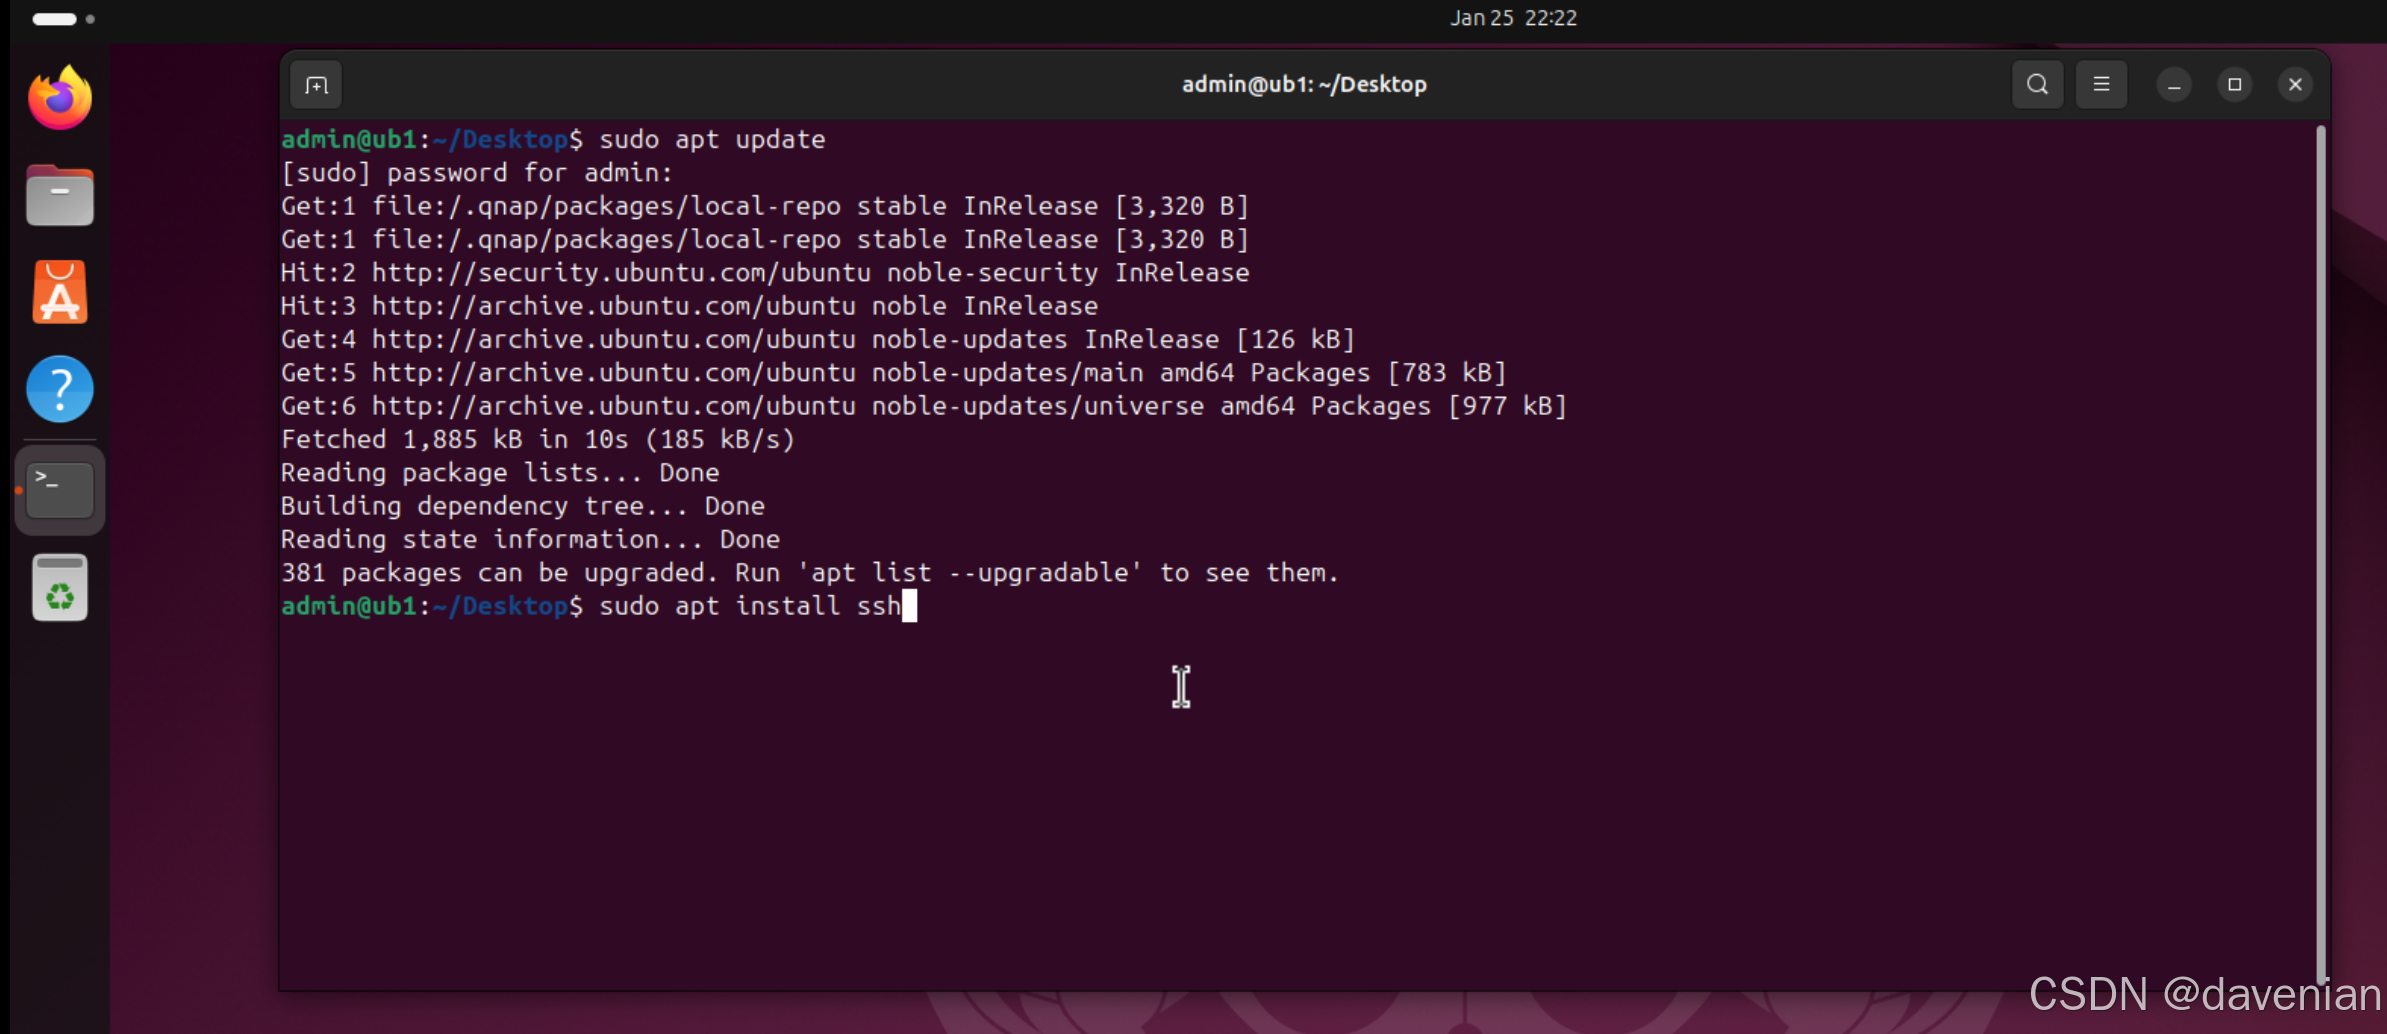
下面的命令:
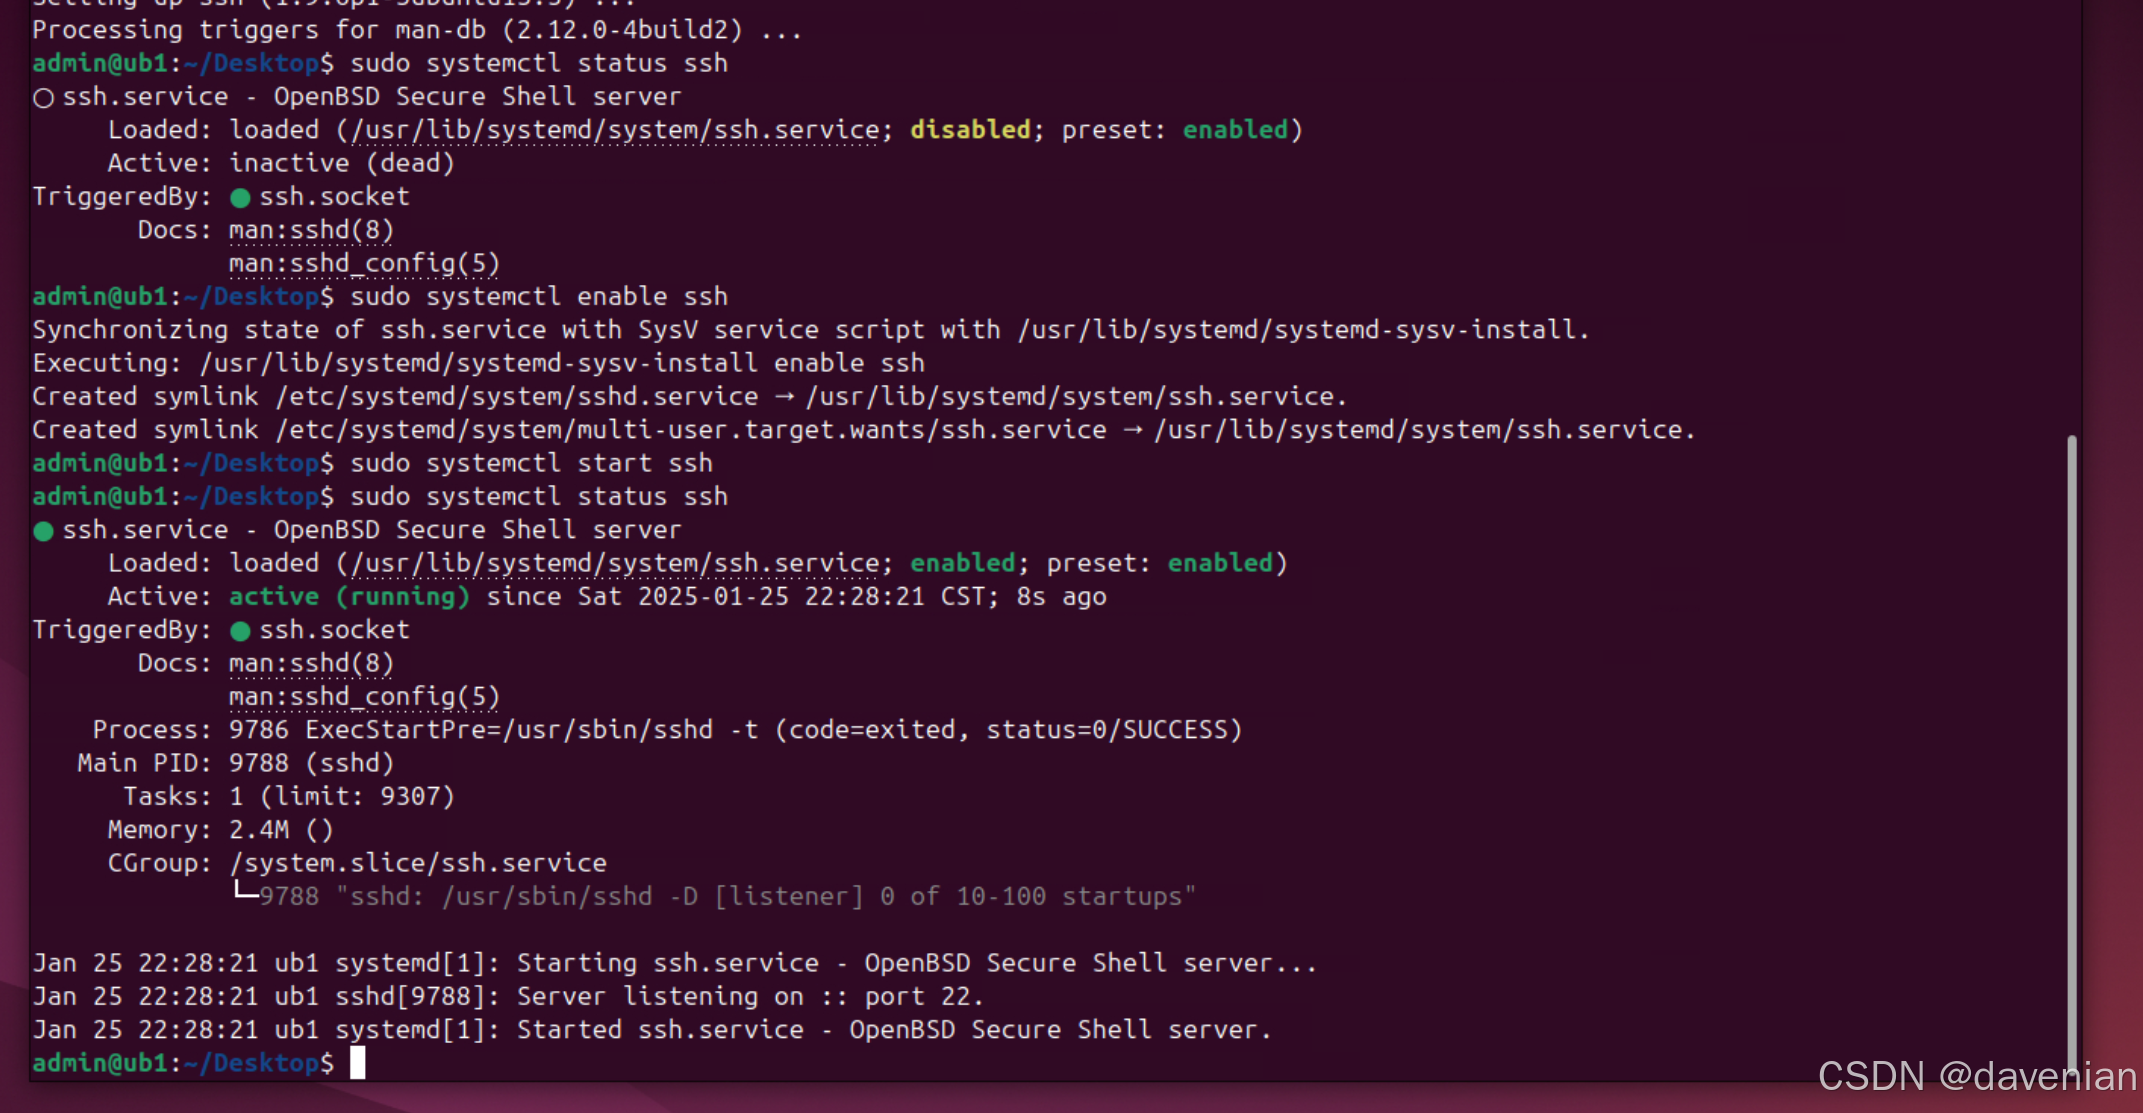
- 安装后,查看 ssh 服务状态
- 添加到自启动
- 启动 ssh 服务
- 查看 ssh 服务状态
2)安装常用 关网络工具
sudo apt update
sudo apt install net-tools
sudo apt install iproute2
sudo apt install traceroute
sudo apt install nmap
3)已知网络问题 - 用 netplan 解决
eth0 在 NAT 交换机上, eth1 在主交换机。所以拿不到 WIFI LAN 的 IP 地址。
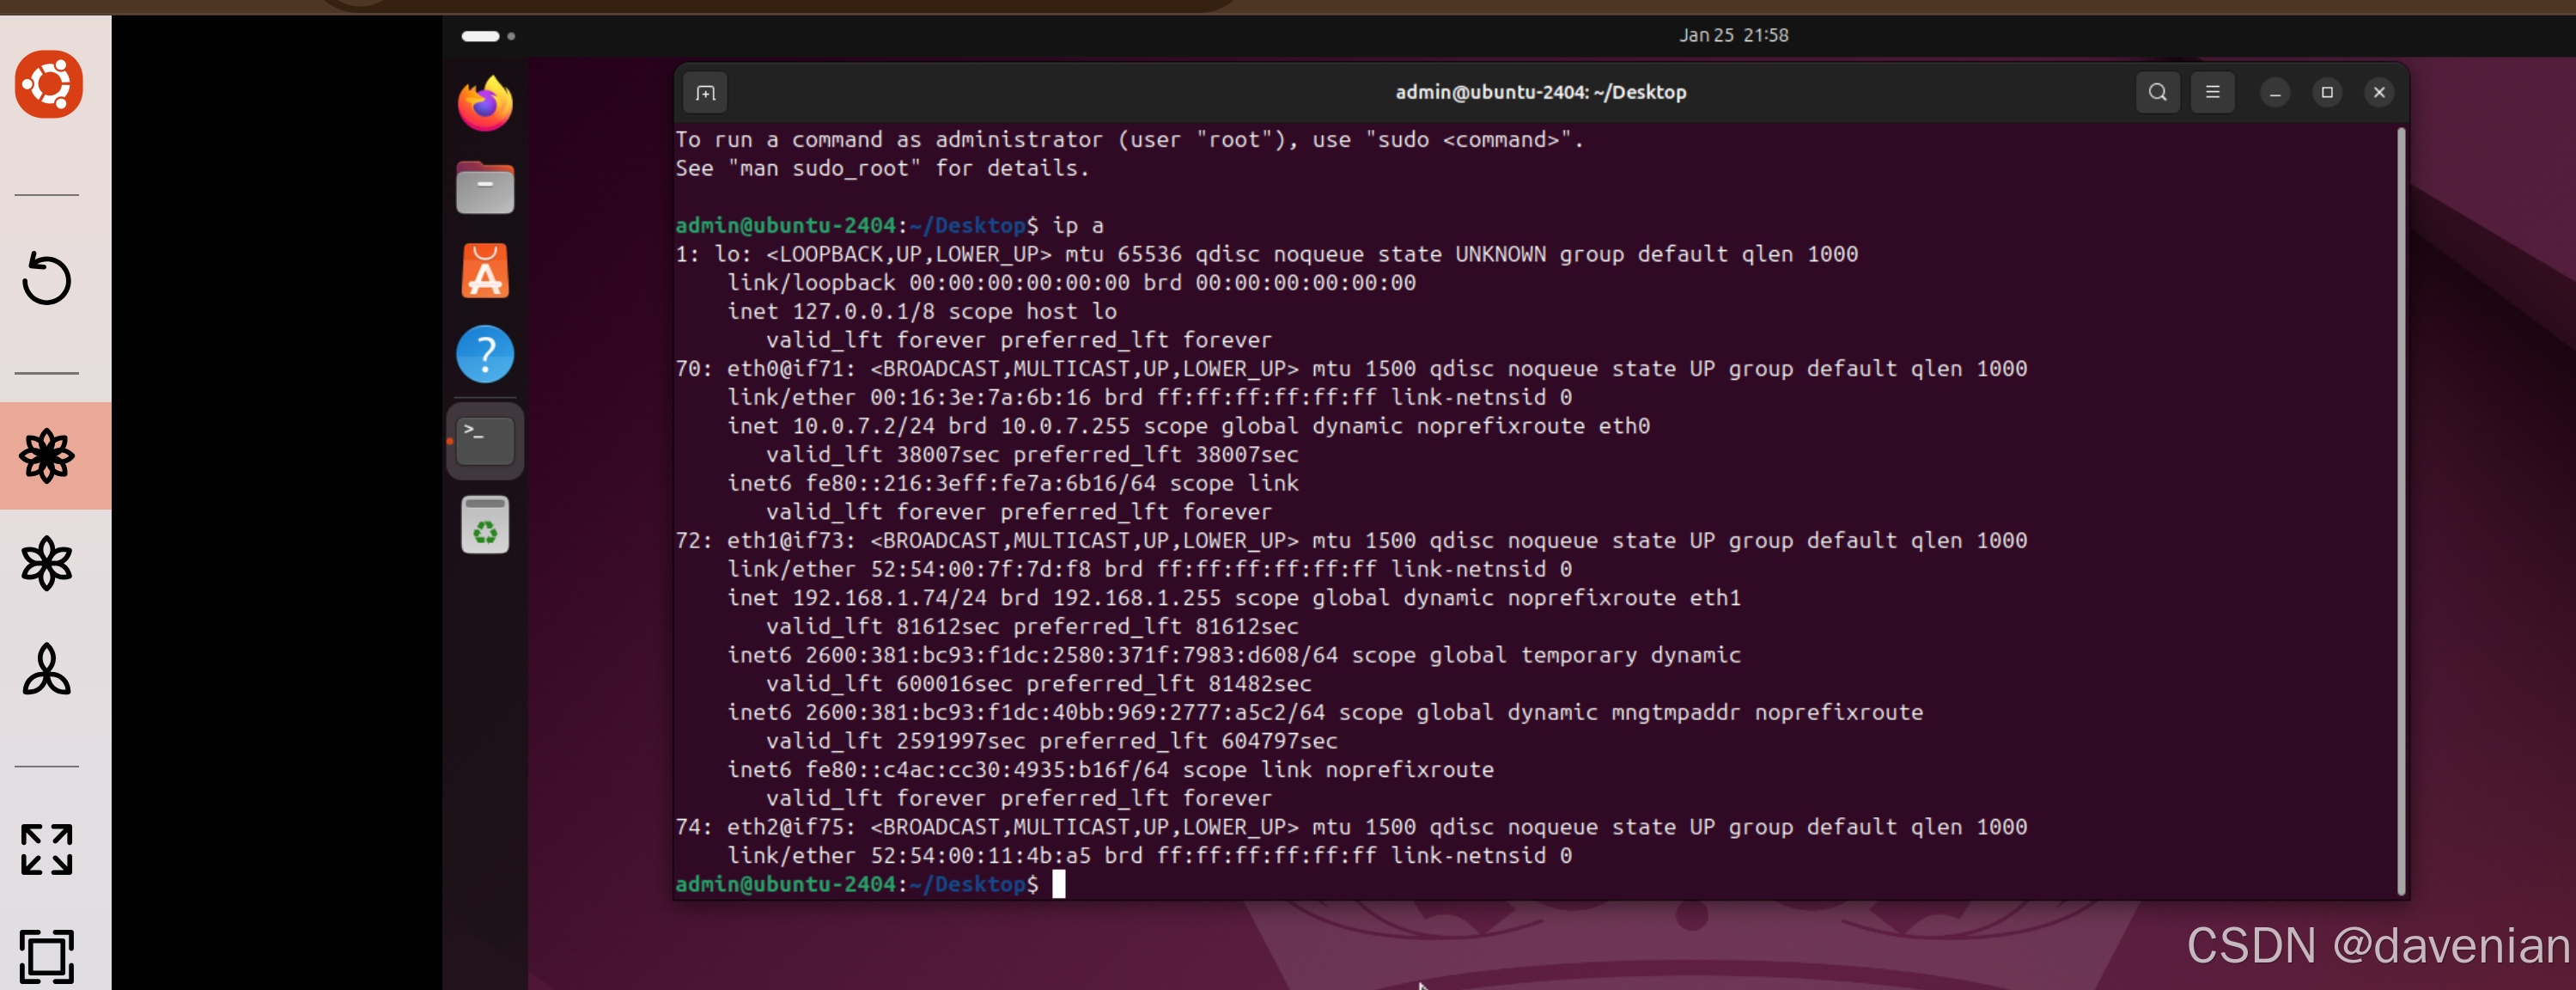
可以看到,这个 image 有2个网口,逻辑上连接到2个 虚拟交换机。但 QNAP NAS 的交换机配置总是报错,只能命令来操作。
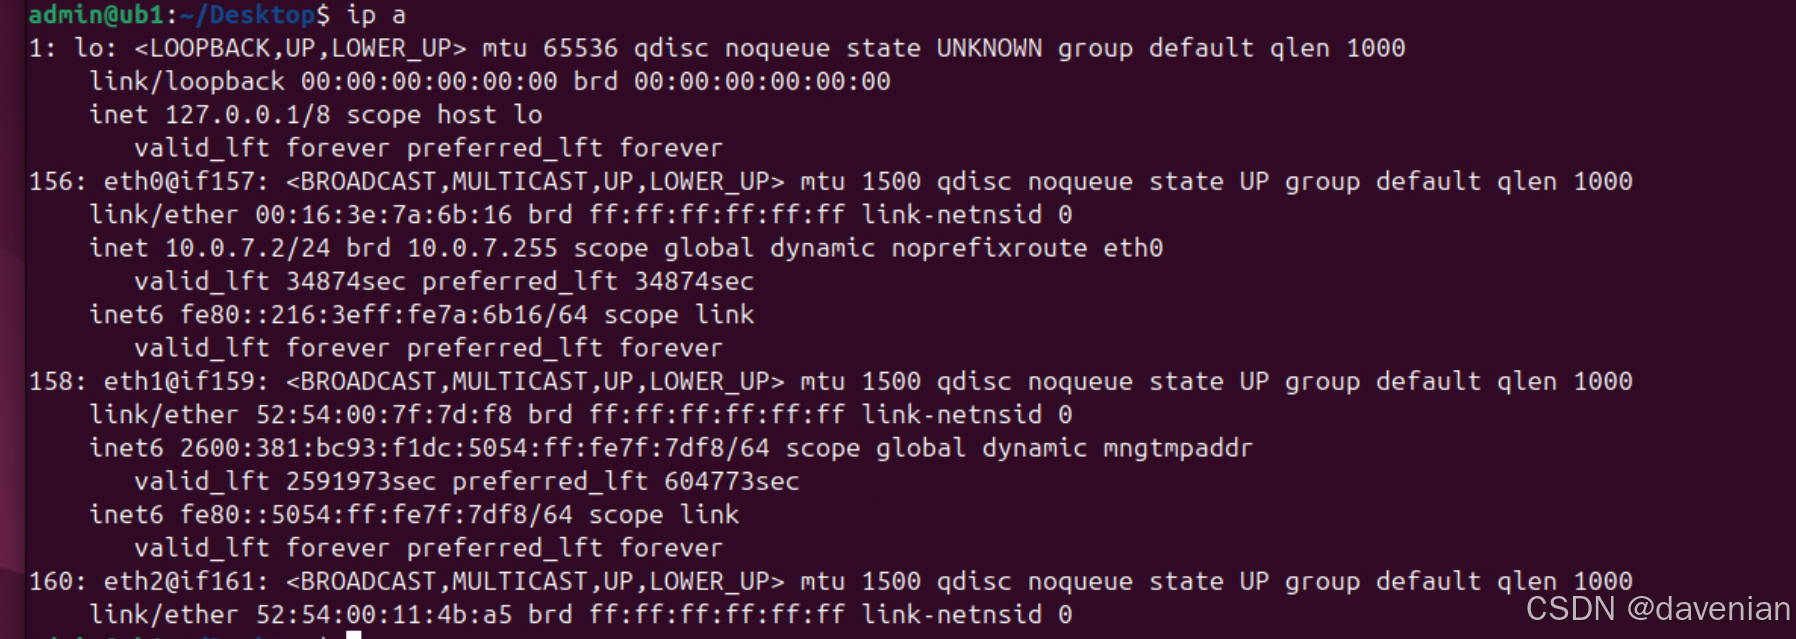
从上面 ip a 输出的内容可以看到有1+3个网卡
- 1: loop : 127.0.0.1
- 156:eth0: 10.0.7.2
- 158:eth1: 没拿到 IP
- 160:eth2: 没拿到 IP
它喵的,主网卡接的是容器交换机,逻辑第二网卡接到 NAS 主交换机:
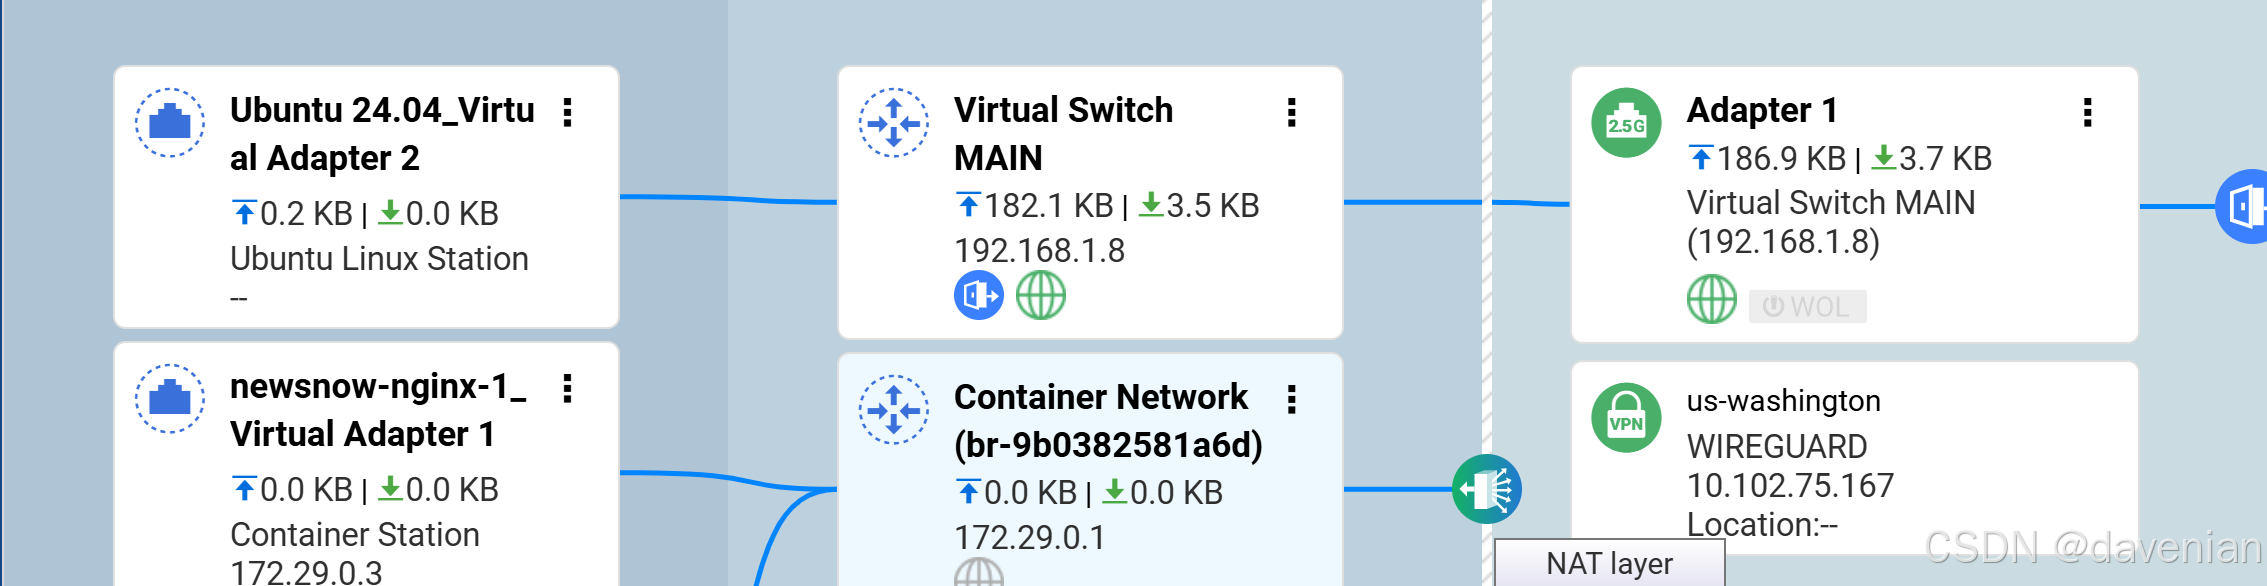
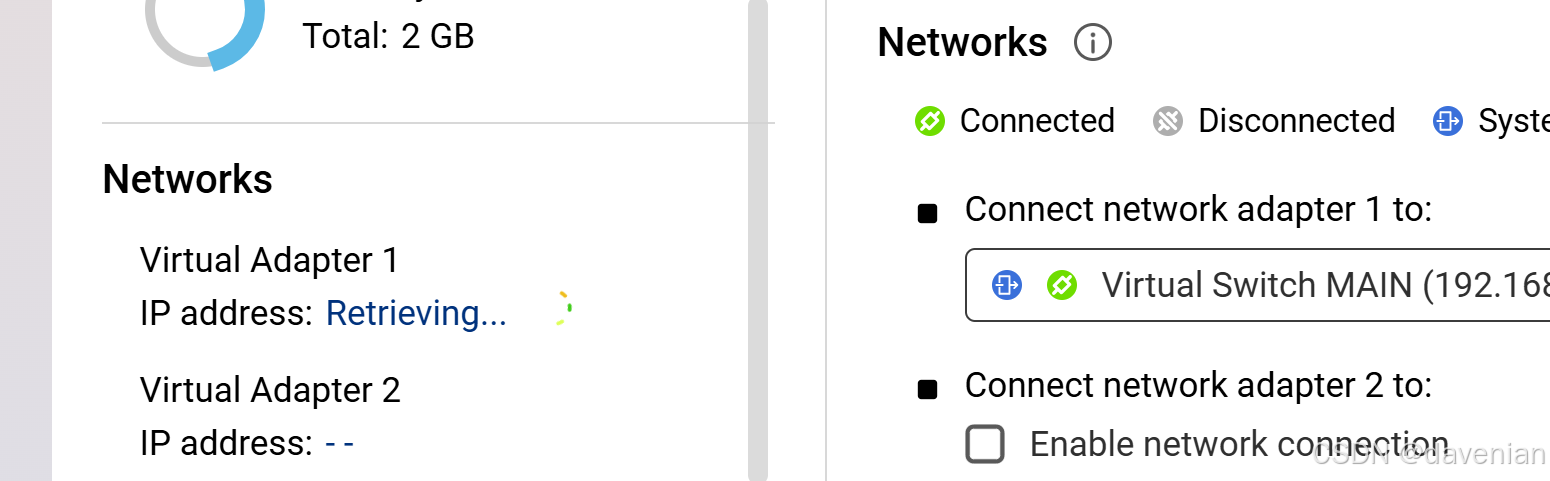
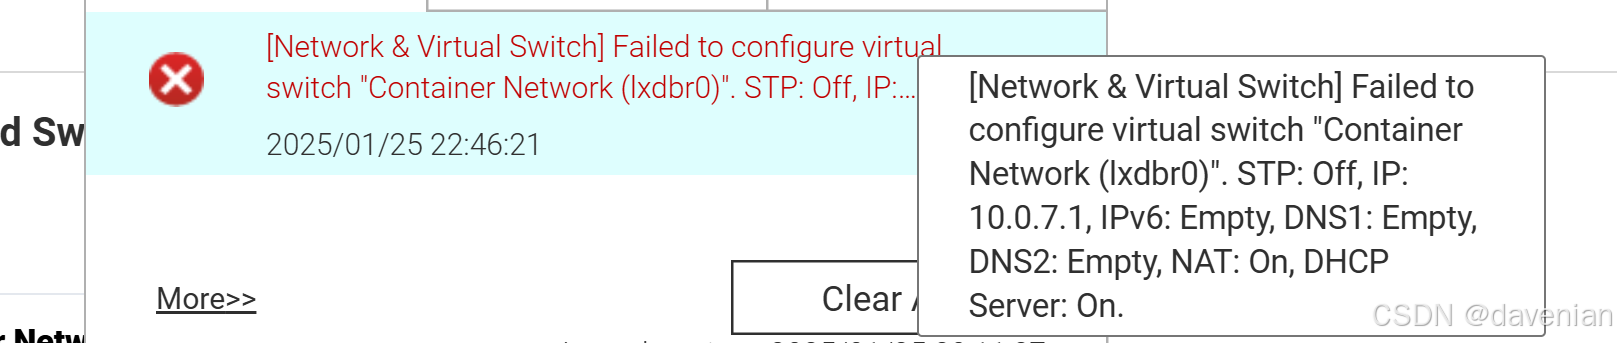
希望 eth1 拿到 192 的 IP 地址,eth0 停用。使用 Network & Virtual Switch 操作,没成功:
那就这么搞搞:使用 netplan
目标:
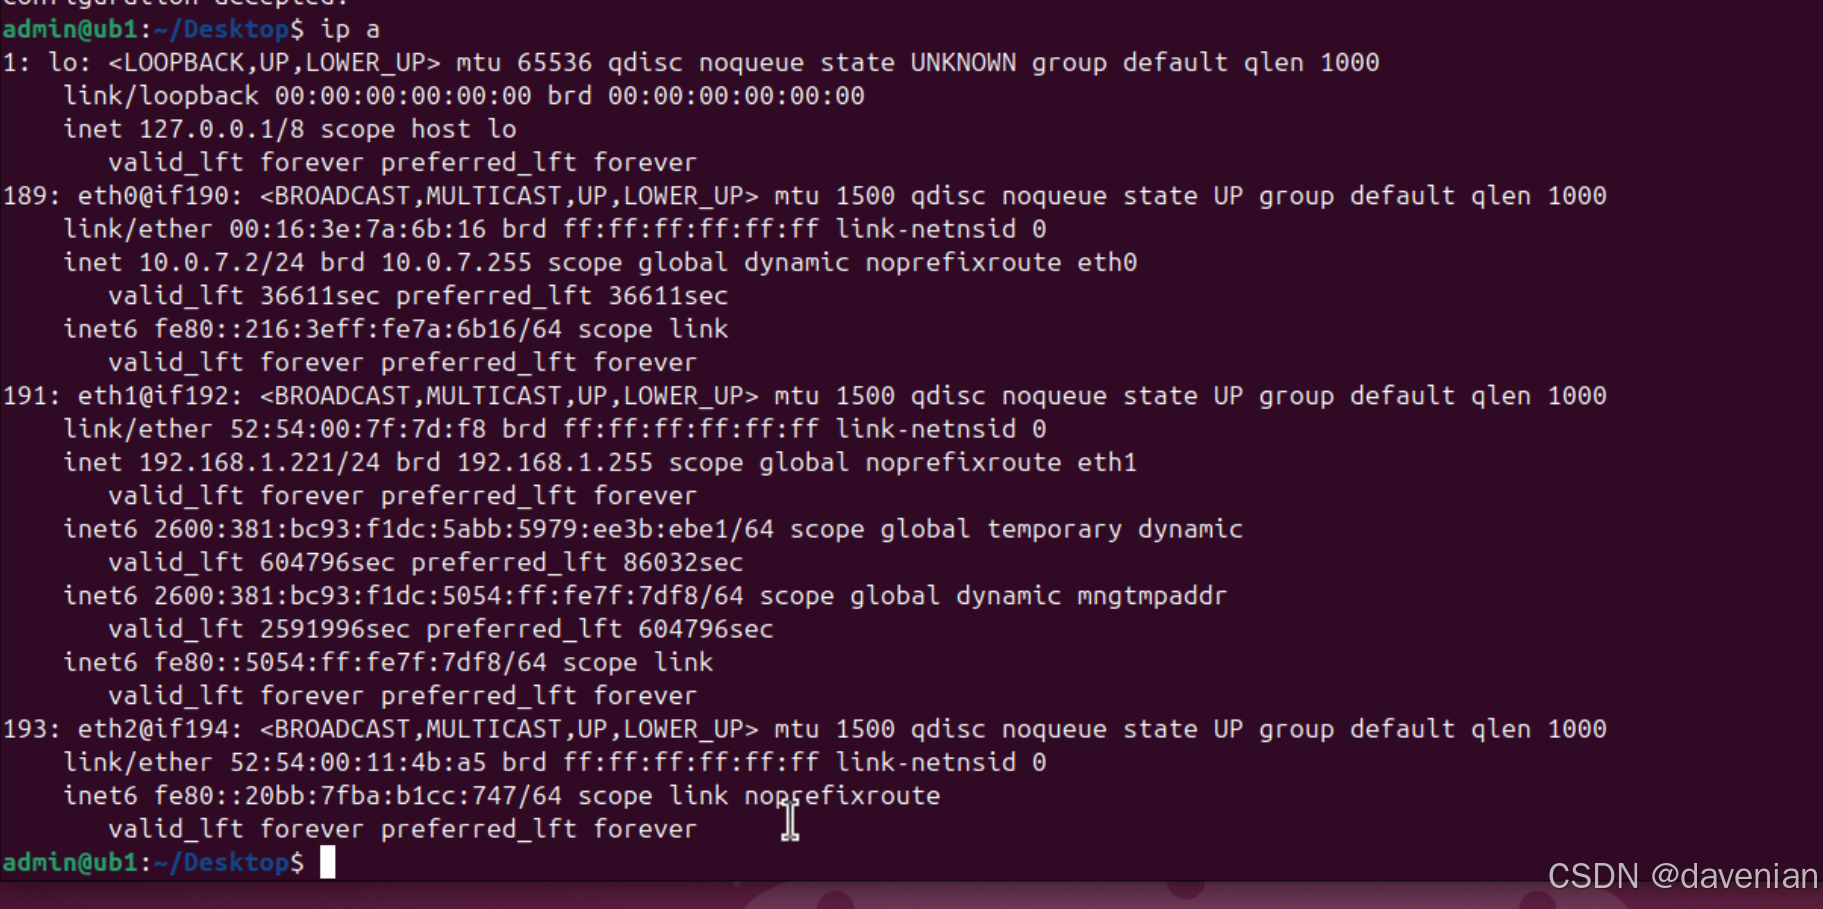
在 eth1 上分配一个固定 IP : 192.168.1.221/24,网关 192.168.1.254,DNS: 8.8.8.8 8.8.8.4
配置过程:目录,文件,内容,文件权限,校验格式,应用配置
sudo mkdir -p /etc/netplan
sudo vi /etc/netplan/01-netcfg.yamlnetwork:
version: 2
ethernets:
eth0:
addresses:
- 192.168.1.221/24
routes:
- to: default
via: 192.168.1.254
nameservers:
addresses: [8.8.8.8, 8.8.4.4]sudo chmod 600 /etc/netplan/01-netcfg.yamlsudo netplan try
sudo netplan apply送算不用看那 4k 小字,可以用上 ssh 终端。

重启后, 配置会丢失。要用
systemctl 来启动:
sudo vi /etc/systemd/system/netplan-apply.serviceadmin@ub1:~$ sudo cat /etc/systemd/system/netplan-apply.service
[Unit]
Description=Apply netplan config at boot
After=network.target
[Service]
Type=oneshot
ExecStart=/usr/sbin/netplan apply
[Install]
WantedBy=multi-user.target
admin@ub1:~$
...
总结:
通过 vSwitch (我增删除几个不用的 vSwitchs , ULS 就不能运行,在重新安装 AppContainer 后解决,但我那之前运行的 22个容器,要重新... )可以看到,还有这个 APP 介绍也可以知晓,它是以容器运行的,要与 AppContainer (Docker) 配合使用。
安装/Pulled 后,利用它提供第二网口分配到 NAS 主交换机上的默认设置,来实现拥有一台“独立”主机。 充分利用 NAS,实现 24 小时来运行轻量应用。 正因为是独立主机,不会出现与 NAS 抢占端口的问题。
有一台 24 小时运行的主机,能做很多事。推荐安装 ufw ,并有合理的策略。
sudo apt update
sudo apt install ufw
sudo ufw default deny incoming
sudo ufw default allow outgoing
sudo ufw allow ssh
#sudo ufw allow http
sudo ufw enable


 被折叠的 条评论
为什么被折叠?
被折叠的 条评论
为什么被折叠?
 到【灌水乐园】发言


