


这篇给大家说说如何在vscode创建一个和AI聊天的面板,参考文章vscode插件官网Webview API |Visual Studio Code 扩展 应用程序接口
vscode有内置的webview API,所以允许扩展在 Visual Studio Code 中创建完全可自定义的视图
我们在项目src目录下新建一个,chatPanel.ts文件
然后我们需要实现一个类,在里面编写一些必要的代码来显示打开聊天面板

下面我具体说说几个功能
一.创建面板与显示
代码有注释就不详细说了,其实就是调用vscode的API
  public static createOrShow(extensionUri: vscode.Uri) {
    const column = vscode.window.activeTextEditor ? vscode.window.activeTextEditor.viewColumn : undefined;
  // 如果已经存在面板,则显示它。
    if (ChatPanel.currentPanel) {
      ChatPanel.currentPanel._panel.reveal(column);
      return;
    }
  // 否则,创建一个新的面板。
    const panel = vscode.window.createWebviewPanel(
      ChatPanel.viewType,
      'AI Chat',
      vscode.ViewColumn.Three,
      {
        enableScripts: true,
        localResourceRoots: [extensionUri],
        // 可以设置面板的初始大小和位置
        retainContextWhenHidden: true  // 保持上下文,避免重新加载
      }
    );
    ChatPanel.currentPanel = new ChatPanel(panel, extensionUri);
  }
二.自定义面板内容
创建好面板之后,我们需要写一个函数去返回想展示的html
 private _getHtmlForWebview(webview: vscode.Webview) {
    const nonce = getNonce();
    const cspSource = webview.cspSource;

    return `<!doctype html>
    <html lang="en">
      <head>
        <meta charset="UTF-8" />
        <meta http-equiv="Content-Security-Policy" content="default-src 'none'; img-src ${cspSource} https:; script-src 'nonce-${nonce}'; style-src 'unsafe-inline' ${cspSource};">
        <meta name="viewport" content="width=device-width, initial-scale=1.0" />
        <title>AI Chat</title>
        <style>
          body {
            font-family: -apple-system, BlinkMacSystemFont, 'Segoe WPC', 'Segoe UI', Roboto, 'Helvetica Neue', Arial;
            margin:0; padding:0; height:100vh; display:flex; flex-direction:column;
            /* 设置最大宽度,让界面不会太宽 */
            max-width: 800px; margin: 0 auto;
          }
          #messages {
            flex:1; padding:12px; overflow:auto; background:#f6f8fa;
            /* 限制消息区域的最大宽度 */
            max-width: 100%;
          }
          .msg {
            margin:8px 0; padding:8px 12px; border-radius:8px;
            /* 调整消息最大宽度,让界面更紧凑 */
            max-width:70%; word-wrap: break-word;
          }
          .user { background:#0066ff; color:#fff; margin-left:auto }
          .assistant { background:#e5e7eb; color:#111; margin-right:auto }
          #composer {
            display:flex; padding:8px; border-top:1px solid #ddd;
            /* 限制输入框区域宽度 */
            max-width: 100%;
          }
          #input { flex:1; padding:8px; font-size:14px; max-width: 100%; }
          button { margin-left:8px; padding:8px 12px }
        </style>
      </head>
      <body>
        <div id="messages"></div>
        <form id="composer">
          <input id="input" autocomplete="off" placeholder="输入消息并回车或点击发送..." />
          <button type="submit">发送</button>
        </form>

        <script nonce="${nonce}">
          const vscode = acquireVsCodeApi();
          const messagesEl = document.getElementById('messages');
          const inputEl = document.getElementById('input');

          function appendMessage(text, cls) {
            const div = document.createElement('div');
            div.className = 'msg ' + cls;
            div.textContent = text;
            messagesEl.appendChild(div);
            messagesEl.scrollTop = messagesEl.scrollHeight;
          }

          document.getElementById('composer').addEventListener('submit', (e) => {
            e.preventDefault();
            const text = inputEl.value.trim();
            if (!text) return;
            appendMessage(text, 'user');
            vscode.postMessage({ type: 'userMessage', text });
            inputEl.value = '';
            inputEl.focus();
          });

          // 接收来自扩展的消息
          window.addEventListener('message', event => {
            const msg = event.data;
            if (msg.type === 'assistantMessage') {
              appendMessage(msg.text, 'assistant');
            }
          });
        </script>
      </body>
    </html>`;
  }
面板有了,里面的内容也可以自定义,但是还有很重要的一个点,其实很多时候,我们是需要Webview与拓展主进程去通信而实现一些功能的
三.拓展与面板的通信
(一).拓展主进程给Webview发消息
VS Code 插件中,扩展主进程(Node.js 环境)与 Webview(浏览器环境)的通信是通过「消息传递」完成的,本质是 JSON 数据的双向传递。这段代码展示了「主进程主动发送消息,Webview 接收处理」的单向流程,具体分三步:
1. 主进程:注册发送消息的命令
在扩展激活函数(activate)中,注册了一个名为 catCoding.doRefactor 的命令,作用是给已创建的 Webview 面板发送消息:
// 注册发送消息的命令
vscode.commands.registerCommand('catCoding.doRefactor', () => {
  if (!currentPanel) return; // 确保面板已存在

  // 发送消息:JSON 格式,可自定义字段(这里用 command 标识操作)
  currentPanel.webview.postMessage({ command: 'refactor' });
});
- 关键 API:
webview.postMessage(data),data必须是 JSON 可序列化的数据(字符串、数字、对象等)。 - 作用:当用户触发
catCoding.doRefactor命令(比如通过快捷键或命令面板),主进程就会给 Webview 发一条{ command: 'refactor' }的消息。
2. Webview:监听并接收消息
在 Webview 的 HTML 中,通过 JavaScript 监听 message 事件,接收主进程发来的消息:
<script>
  // Webview 中监听消息事件
  window.addEventListener('message', event => {
    const message = event.data; // 解析主进程发来的 JSON 数据

    // 根据消息内容处理逻辑
    switch (message.command) {
      case 'refactor':
        // 这里是自定义处理:
        console.log('hello')
        break;
    }
  });
</script>
(二).Webview 给拓展主进程发消息
Webview(浏览器环境)向主进程(Node.js 环境)发送消息,本质是通过 VS Code 提供的 API 把数据从前端环境传递到后端扩展,流程分两步:
1. Webview 中:发送消息
在 Webview 的 HTML/JS 中,通过 acquireVsCodeApi() 获取 VS Code 提供的内置 API 对象,然后调用其 postMessage 方法发送消息(消息需是 JSON 可序列化数据)。
<script>
  // 获取 VS Code 提供的 API 对象(仅在 Webview 中可用)
  const vscode = acquireVsCodeApi();

  // 假设用户点击了一个按钮,触发发送消息
  document.getElementById('sendBtn').addEventListener('click', () => {
    // 发送消息:可以是对象、字符串、数字等
    vscode.postMessage({
      command: 'save',
      data: { content: 'Hello from Webview', timestamp: Date.now() }
    });
  });
</script>
- 关键:
acquireVsCodeApi()是 VS Code 注入到 Webview 中的全局方法,返回的vscode对象提供了postMessage方法,专门用于向主进程发送消息。 - 消息格式:与主进程发消息一致,需是 JSON 可序列化数据(避免函数、DOM 等无法序列化的类型)。
2. 主进程中:监听消息
在扩展的激活函数(activate)中,通过 Webview 实例的 onDidReceiveMessage 事件监听 Webview 发来的消息,并定义处理逻辑。
export function activate(context: vscode.ExtensionContext) {
  // 创建 Webview 面板(省略部分代码)
  const panel = vscode.window.createWebviewPanel(...);

  // 监听 Webview 发来的消息
  panel.webview.onDidReceiveMessage(
    (message) => { // message 就是 Webview 发送的 JSON 数据
      switch (message.command) {
        case 'save':
          // 处理 Webview 发来的 "保存" 命令
          console.log('收到 Webview 消息:', message.data);
          // 可以调用 VS Code API 执行操作(如写入文件、显示提示)
          vscode.window.showInformationMessage(`已保存:${message.data.content}`);
          break;
      }
    },
    undefined, // 错误处理(可选)
    context.subscriptions // 加入订阅,确保扩展卸载时自动清理
  );
}
- 关键 API:
webview.onDidReceiveMessage(callback),callback的参数就是 Webview 发送的消息数据。 - 生命周期管理:将事件监听加入
context.subscriptions,能确保扩展卸载时自动取消监听,避免内存泄漏。
双向通信的完整闭环
结合之前主进程给 Webview 发消息的逻辑,整个通信闭环是:
- 主进程 → Webview:
currentPanel.webview.postMessage(...)发送,Webview 用window.addEventListener('message')接收。 - Webview → 主进程:Webview 用
vscode.postMessage(...)发送,主进程用webview.onDidReceiveMessage(...)接收。
最重要的几个点已经说明了下面是chatPanel.ts的完整代码
import * as vscode from 'vscode';

export class ChatPanel implements vscode.Disposable {
  public static currentPanel: ChatPanel | undefined;
  public static readonly viewType = 'aiChat.panel';

  private readonly _panel: vscode.WebviewPanel;
  private readonly _extensionUri: vscode.Uri;
  private _disposables: vscode.Disposable[] = [];

  public static createOrShow(extensionUri: vscode.Uri) {
    const column = vscode.window.activeTextEditor ? vscode.window.activeTextEditor.viewColumn : undefined;

  // 如果已经存在面板,则显示它。
    if (ChatPanel.currentPanel) {
      ChatPanel.currentPanel._panel.reveal(column);
      return;
    }

  // 否则,创建一个新的面板。
    const panel = vscode.window.createWebviewPanel(
      ChatPanel.viewType,
      'AI Chat',
      vscode.ViewColumn.Three,
      {
        enableScripts: true,
        localResourceRoots: [extensionUri],
        // 可以设置面板的初始大小和位置
        retainContextWhenHidden: true  // 保持上下文,避免重新加载
      }
    );

    ChatPanel.currentPanel = new ChatPanel(panel, extensionUri);
  }

  private constructor(panel: vscode.WebviewPanel, extensionUri: vscode.Uri) {
    this._panel = panel;
    this._extensionUri = extensionUri;

  // 设置 webview 的初始 HTML 内容
  this._panel.webview.html = this._getHtmlForWebview(this._panel.webview);

  // 监听来自 webview 的消息
    this._panel.webview.onDidReceiveMessage(
      message => {
        switch (message.type) {
          case 'userMessage':
            this._handleUserMessage(message.text);
            return;
        }
      },
      null,
      this._disposables
    );

    this._panel.onDidDispose(() => this.dispose(), null, this._disposables);
  }

  public dispose() {
    ChatPanel.currentPanel = undefined;

    // 清理资源
    this._panel.dispose();

    while (this._disposables.length) {
      const d = this._disposables.pop();
      if (d) {
        d.dispose();
      }
    }
  }

  private _handleUserMessage(text: string) {
    // 简单模拟 AI 响应:异步延迟后返回一条回复
    const reply = `模拟回复:我收到了你的消息 — "${text}"`;

    // 模拟延迟(例如调用远端 AI API 的占位)
    setTimeout(() => {
      this._panel.webview.postMessage({ type: 'assistantMessage', text: reply });
    }, 700);
  }

  private _getHtmlForWebview(webview: vscode.Webview) {
    const nonce = getNonce();
    const cspSource = webview.cspSource;

    return `<!doctype html>
    <html lang="en">
      <head>
        <meta charset="UTF-8" />
        <meta http-equiv="Content-Security-Policy" content="default-src 'none'; img-src ${cspSource} https:; script-src 'nonce-${nonce}'; style-src 'unsafe-inline' ${cspSource};">
        <meta name="viewport" content="width=device-width, initial-scale=1.0" />
        <title>AI Chat</title>
        <style>
          body {
            font-family: -apple-system, BlinkMacSystemFont, 'Segoe WPC', 'Segoe UI', Roboto, 'Helvetica Neue', Arial;
            margin:0; padding:0; height:100vh; display:flex; flex-direction:column;
            /* 设置最大宽度,让界面不会太宽 */
            max-width: 800px; margin: 0 auto;
          }
          #messages {
            flex:1; padding:12px; overflow:auto; background:#f6f8fa;
            /* 限制消息区域的最大宽度 */
            max-width: 100%;
          }
          .msg {
            margin:8px 0; padding:8px 12px; border-radius:8px;
            /* 调整消息最大宽度,让界面更紧凑 */
            max-width:70%; word-wrap: break-word;
          }
          .user { background:#0066ff; color:#fff; margin-left:auto }
          .assistant { background:#e5e7eb; color:#111; margin-right:auto }
          #composer {
            display:flex; padding:8px; border-top:1px solid #ddd;
            /* 限制输入框区域宽度 */
            max-width: 100%;
          }
          #input { flex:1; padding:8px; font-size:14px; max-width: 100%; }
          button { margin-left:8px; padding:8px 12px }
        </style>
      </head>
      <body>
        <div id="messages"></div>
        <form id="composer">
          <input id="input" autocomplete="off" placeholder="输入消息并回车或点击发送..." />
          <button type="submit">发送</button>
        </form>

        <script nonce="${nonce}">
          const vscode = acquireVsCodeApi();
          const messagesEl = document.getElementById('messages');
          const inputEl = document.getElementById('input');

          function appendMessage(text, cls) {
            const div = document.createElement('div');
            div.className = 'msg ' + cls;
            div.textContent = text;
            messagesEl.appendChild(div);
            messagesEl.scrollTop = messagesEl.scrollHeight;
          }

          document.getElementById('composer').addEventListener('submit', (e) => {
            e.preventDefault();
            const text = inputEl.value.trim();
            if (!text) return;
            appendMessage(text, 'user');
            vscode.postMessage({ type: 'userMessage', text });
            inputEl.value = '';
            inputEl.focus();
          });

          // 接收来自扩展的消息
          window.addEventListener('message', event => {
            const msg = event.data;
            if (msg.type === 'assistantMessage') {
              appendMessage(msg.text, 'assistant');
            }
          });
        </script>
      </body>
    </html>`;
  }
}

function getNonce() {
  let text = '';
  const possible = 'ABCDEFGHIJKLMNOPQRSTUVWXYZabcdefghijklmnopqrstuvwxyz0123456789';
  for (let i = 0; i < 32; i++) {
    text += possible.charAt(Math.floor(Math.random() * possible.length));
  }
  return text;
}
我们在主拓展文件extension.ts去处理他,把他加入到activate函数里面
import { ChatPanel } from './chatPanel';

const openChatDisposable = vscode.commands.registerCommand('hello.openChat', () => {
		ChatPanel.createOrShow(context.extensionUri);
});

context.subscriptions.push(openChatDisposable);
实现效果:
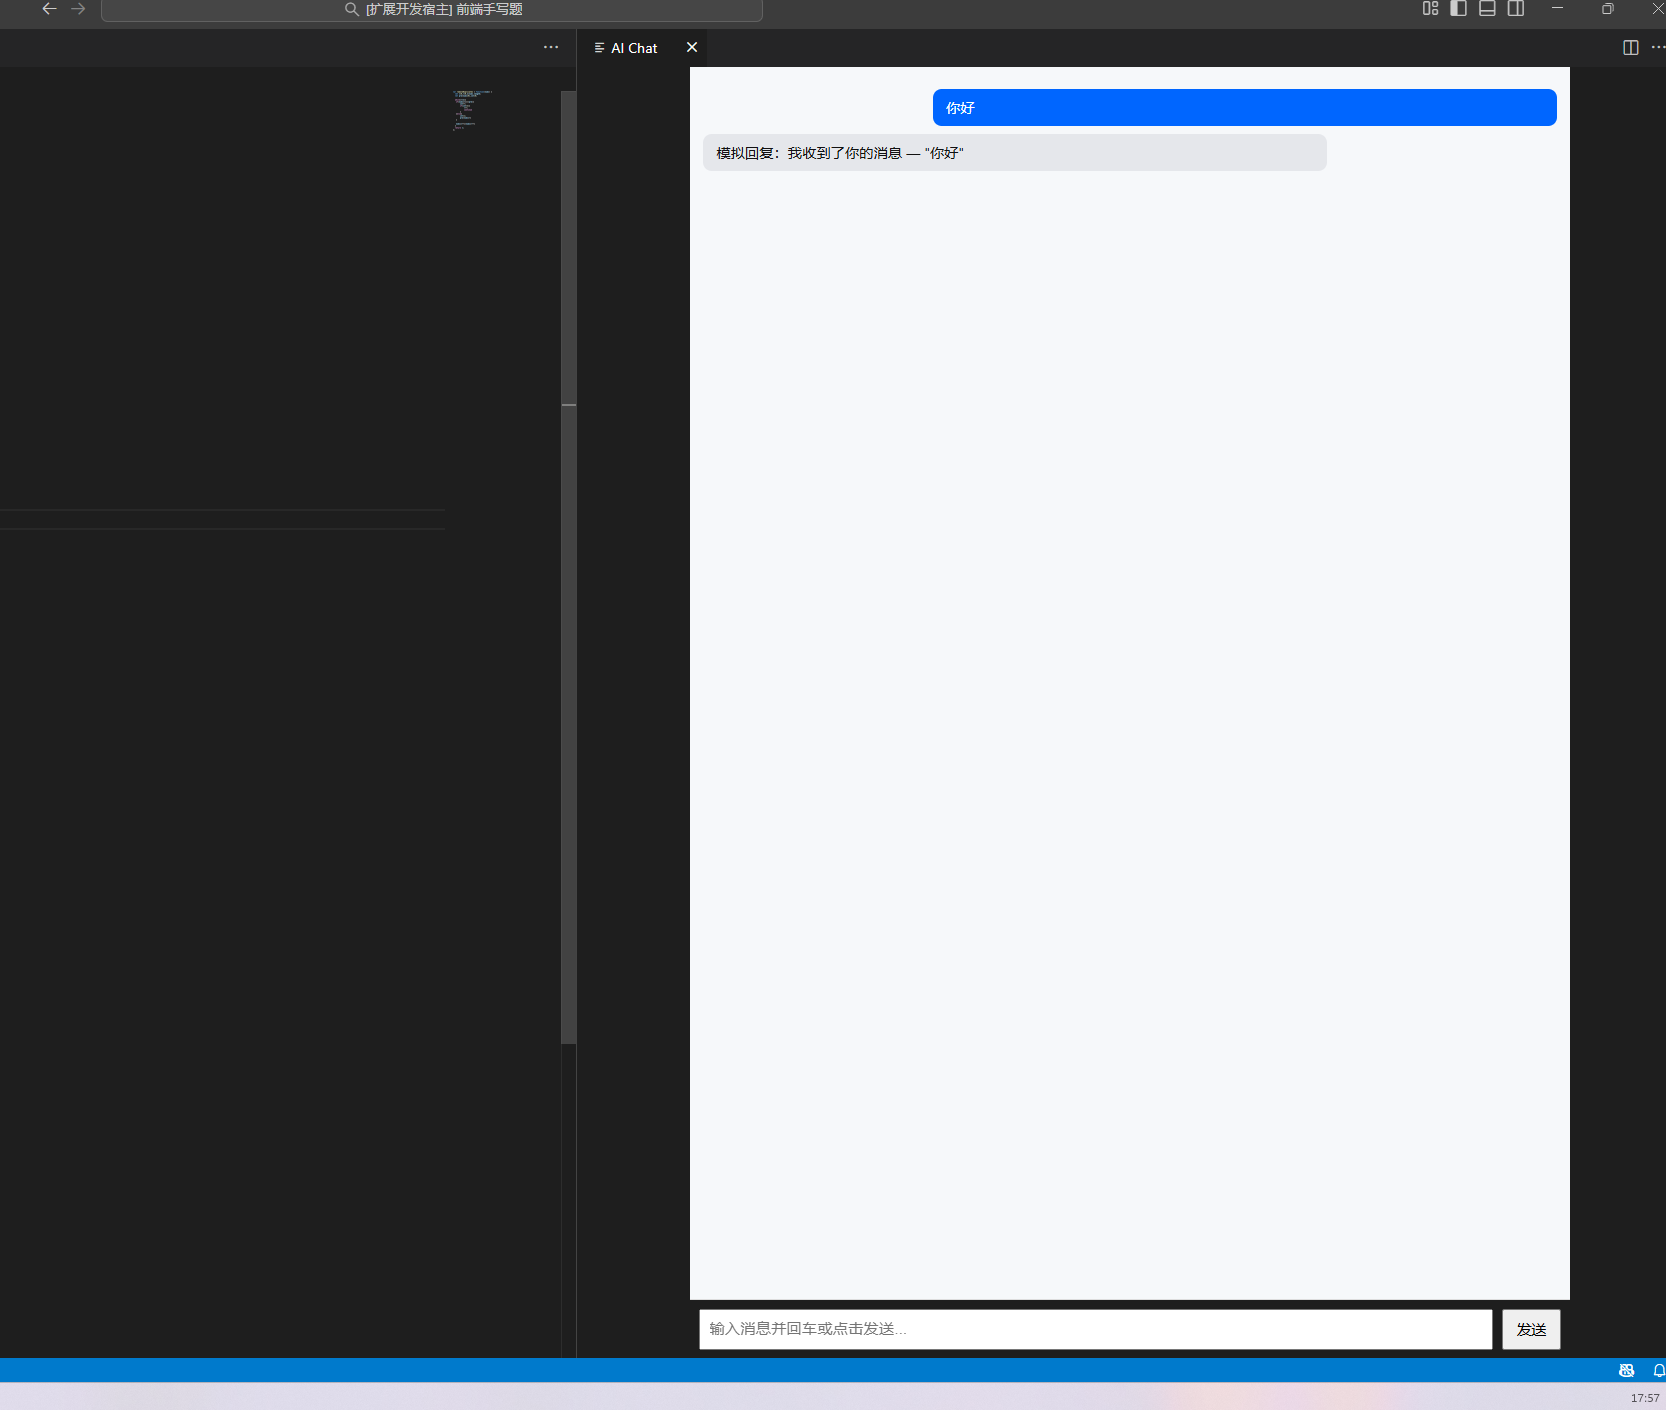
这个界面可以继续美化,但是篇幅过长,就不继续说明了,下一篇会讲,如何接入deepseek免费大模型,实现简单的对话!!!


 1万+
1万+

 被折叠的 条评论
为什么被折叠?
被折叠的 条评论
为什么被折叠?
 到【灌水乐园】发言


