


59-硅谷课堂5-硅谷课堂-整合网关与订单和营销模块-- 笔记
笔记内容来源与尚硅谷教学视频
文章目录
笔记中涉及资源:
链接:https://pan.baidu.com/s/1fNdmp8CS9gx5K9QHoItsfQ
提取码:Coke
一、Spring Cloud相关概念
①:基本概念
1. 什么是Spring Cloud
Spring Cloud是一系列框架的集合。它利用Spring Boot的开发便利性简化了分布式系统基础设施的开发,如服务发现、服务注册、配置中心、消息总线、负载均衡、 熔断器、数据监控等,都可以用Spring Boot的开发风格做到一键启动和部署。Spring并没有重复制造轮子,它只是将目前各家公司开发的比较成熟、经得起实际考验的服务框架组合起来,通过SpringBoot风格进行再封装屏蔽掉了复杂的配置和实现原理,最终给开发者留出了一套简单易懂、易部署和易维护的分布式系统开发工具包
2. Spring Cloud和Spring Boot关系
Spring Boot 是 Spring 的一套快速配置脚手架,可以基于Spring Boot 快速开发单个微服务,Spring Cloud是一个基于Spring Boot实现的开发工具;Spring Boot专注于快速、方便集成的单个微服务个体,Spring Cloud关注全局的服务治理框架; Spring Boot使用了默认大于配置的理念,很多集成方案已经帮你选择好了,能不配置就不配置,Spring Cloud很大的一部分是基于Spring Boot来实现,必须基于Spring Boot开发。可以单独使用Spring Boot开发项目,但是Spring Cloud离不开 Spring Boot
②:Spring Cloud相关基础服务组件
服务发现——Netflix Eureka (Nacos)
服务调用——Netflix Feign
熔断器——Netflix Hystrix
服务网关——Spring Cloud GateWay
分布式配置——Spring Cloud Config (Nacos)
消息总线 —— Spring Cloud Bus (Nacos)
二、搭建Nacos服务
①:Nacos概述
1. 基本概念
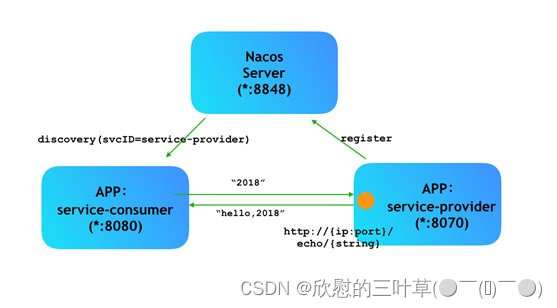
Nacos 是阿里巴巴推出来的一个新开源项目,是一个更易于构建云原生应用的动态服务发现、配置管理和服务管理平台。Nacos 致力于帮助您发现、配置和管理微服务。Nacos 提供了一组简单易用的特性集,帮助您快速实现动态服务发现、服务配置、服务元数据及流量管理。Nacos 帮助您更敏捷和容易地构建、交付和管理微服务平台。 Nacos 是构建以“服务”为中心的现代应用架构 (例如微服务范式、云原生范式) 的服务基础设施。
2. 常见的注册中心
(1)Eureka(原生,2.0遇到性能瓶颈,停止维护)
(2)Zookeeper(支持,专业的独立产品。例如:dubbo)
(3)Consul(原生,GO语言开发)
(4) Nacos
相对于 Spring Cloud Eureka 来说,Nacos 更强大。Nacos = Spring Cloud Eureka + Spring Cloud Config
Nacos 可以与 Spring, Spring Boot, Spring Cloud 集成,并能代替 Spring Cloud Eureka, Spring Cloud Config
- 通过 Nacos Server 和 spring-cloud-starter-alibaba-nacos-discovery 实现服务的注册与发现。
3. Nacos结构图
②:Nacos下载和安装
1. 下载地址和版本
下载地址:https://github.com/alibaba/nacos/releases
下载版本:nacos-server-1.1.4.tar.gz或nacos-server-1.1.4.zip,解压任意目录即可
2. 启动nacos服务
(1) Linux/Unix/Mac
启动命令(standalone代表着单机模式运行,非集群模式)
启动命令:sh startup.sh -m standalone
(2)Windows
启动方式,cmd打开,执行命令: startup.cmd -m standalone。
访问:http://localhost:8848/nacos
用户名密码:nacos/nacos
(3)登录界面
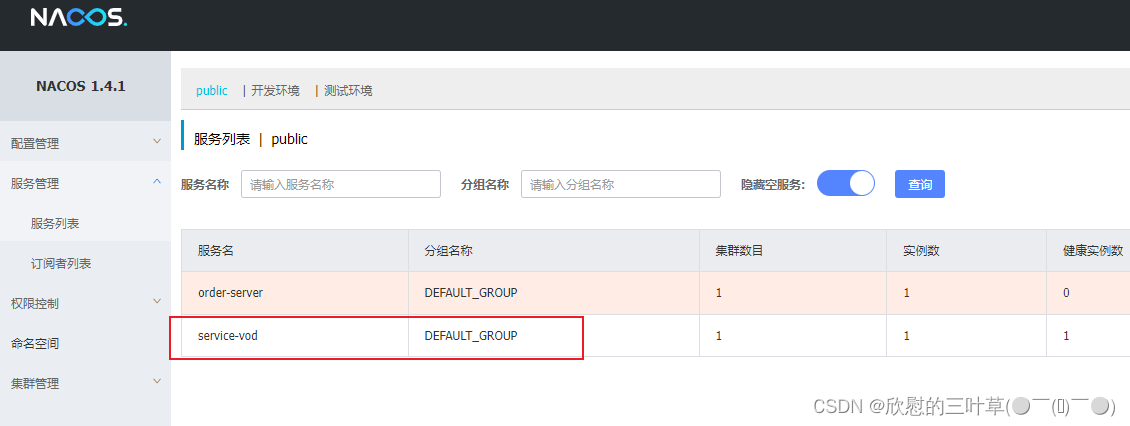
(4)主界面

③:服务注册
把service_vod微服务注册到注册中心,其他模块注册步骤相同
1. 在service模块配置pom
配置Nacos客户端的pom依赖
<!-- 服务注册 -->
<dependency>
    <groupId>com.alibaba.cloud</groupId>
    <artifactId>spring-cloud-starter-alibaba-nacos-discovery</artifactId>
</dependency>

<!-- 服务调用feign -->
<dependency>
    <groupId>org.springframework.cloud</groupId>
    <artifactId>spring-cloud-starter-openfeign</artifactId>
</dependency>
2. 配置service_vod
配置application.properties,在客户端微服务中添加注册Nacos服务的配置信息
# nacos服务地址
spring.cloud.nacos.discovery.server-addr=127.0.0.1:8848
3. 添加Nacos客户端注解
在service_vod微服务启动类中添加注解
@EnableDiscoveryClient
4. 启动客户端微服务
启动注册中心
启动已注册的微服务,可以在Nacos服务列表中看到被注册的微服务
三、整合Spring Cloud GateWay网关
①:网关基本概念
1. Gateway概述
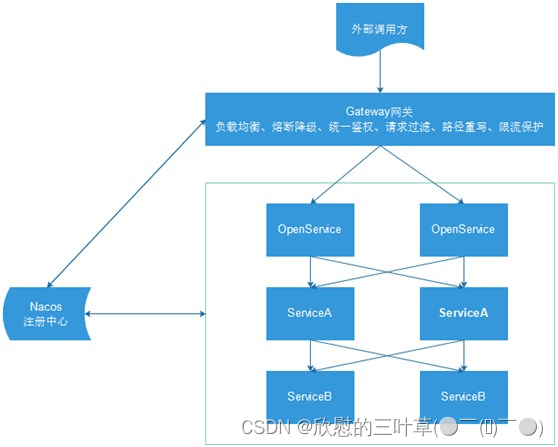
Spring cloud gateway是spring官方基于Spring 5.0、Spring Boot2.0和Project Reactor等技术开发的网关,Spring Cloud Gateway旨在为微服务架构提供简单、有效和统一的API路由管理方式,Spring Cloud Gateway作为Spring Cloud生态系统中的网关,目标是替代Netflix Zuul,其不仅提供统一的路由方式,并且还基于Filter链的方式提供了网关基本的功能,例如:安全、监控/埋点、限流等。
2. Gateway核心概念
网关提供API全托管服务,丰富的API管理功能,辅助企业管理大规模的API,以降低管理成本和安全风险,包括协议适配、协议转发、安全策略、防刷、流量、监控日志等贡呢。一般来说网关对外暴露的URL或者接口信息,我们统称为路由信息。如果研发过网关中间件或者使用过Zuul的人,会知道网关的核心是Filter以及Filter Chain(Filter责任链)。Sprig Cloud Gateway也具有路由和Filter的概念。下面介绍一下Spring Cloud Gateway中几个重要的概念。
**(1)路由。**路由是网关最基础的部分,路由信息有一个ID、一个目的URL、一组断言和一组Filter组成。如果断言路由为真,则说明请求的URL和配置匹配
(2)断言。Java8中的断言函数。Spring Cloud Gateway中的断言函数输入类型是Spring5.0框架中的ServerWebExchange。Spring Cloud Gateway中的断言函数允许开发者去定义匹配来自于http request中的任何信息,比如请求头和参数等。
(3)过滤器。一个标准的Spring webFilter。Spring cloud gateway中的filter分为两种类型的Filter,分别是Gateway Filter和Global Filter。过滤器Filter将会对请求和响应进行修改处理
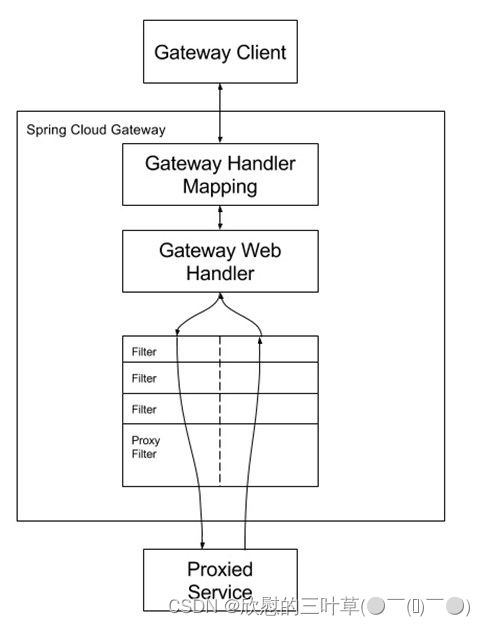
如图所示,Spring cloud Gateway发出请求。然后再由Gateway Handler Mapping中找到与请求相匹配的路由,将其发送到Gateway web handler。Handler再通过指定的过滤器链将请求发送到实际的服务执行业务逻辑,然后返回。
②:实现网关转发功能
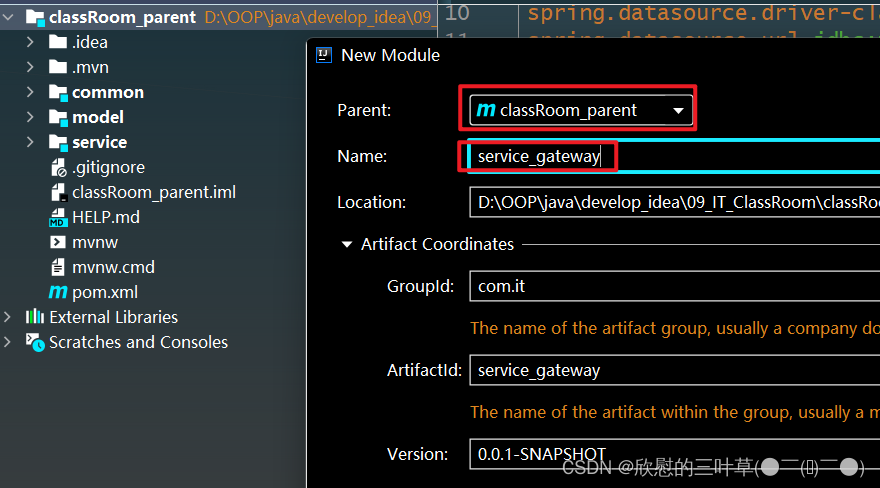
1. 创建网关模块
(1)在classRoom_parent下创建service_gateway
2. 引入网关依赖
    <dependencies>
        <dependency>
            <groupId>com.it</groupId>
            <artifactId>service_utils</artifactId>
            <version>0.0.1-SNAPSHOT</version>
        </dependency>

        <!-- 网关 -->
        <dependency>
            <groupId>org.springframework.cloud</groupId>
            <artifactId>spring-cloud-starter-gateway</artifactId>
        </dependency>

        <!-- 服务注册 -->
        <dependency>
            <groupId>com.alibaba.cloud</groupId>
            <artifactId>spring-cloud-starter-alibaba-nacos-discovery</artifactId>
        </dependency>
    </dependencies>
3. 创建启动类
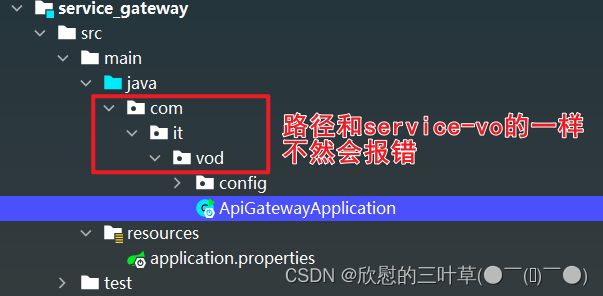
@SpringBootApplication
public class ApiGatewayApplication {
    public static void main(String[] args) {
        SpringApplication.run(ApiGatewayApplication.class, args);
    }
}
4. 配置路由规则
(1)编写application.properties
# 服务端口
server.port=8333

# 服务名
spring.application.name=service-gateway

# nacos服务地址
spring.cloud.nacos.discovery.server-addr=127.0.0.1:8848

#使用服务发现路由
spring.cloud.gateway.discovery.locator.enabled=true

#service-vod模块配置
#设置路由id
spring.cloud.gateway.routes[0].id=service-vod
#设置路由的uri
spring.cloud.gateway.routes[0].uri=lb://service-vod
#设置路由断言,代理servicerId为auth-service的/auth/路径  /vod/chapter/list
spring.cloud.gateway.routes[0].predicates= Path=/vod/**

③:网关解决跨域问题
1. 跨域概述
跨域本质是浏览器对于ajax请求的一种安全限制:一个页面发起的ajax请求,只能是与当前页域名相同的路径,这能有效的阻止跨站攻击。因此:跨域问题 是针对ajax的一种限制。但是这却给我们的开发带来了不便,而且在实际生产环境中,肯定会有很多台服务器之间交互,地址和端口都可能不同。
之前我们通过服务器添加注解实现,现在我们跨域通过网关来解决跨域问题。
2. 创建配置类
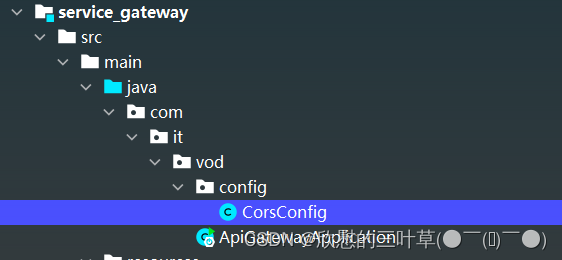
@Configuration
public class CorsConfig {
    //处理跨域
    @Bean
    public CorsWebFilter corsFilter() {
        CorsConfiguration config = new CorsConfiguration();
        config.addAllowedMethod("*");
        config.addAllowedOrigin("*");
        config.addAllowedHeader("*");
        UrlBasedCorsConfigurationSource source = new UrlBasedCorsConfigurationSource(new PathPatternParser());
        source.registerCorsConfiguration("/**", config);
        return new CorsWebFilter(source);
    }
}
注意: 目前我们已经在网关做了跨域处理,那么service服务就不需要再做跨域处理了,将之前在controller类上添加过@CrossOrigin标签的去掉
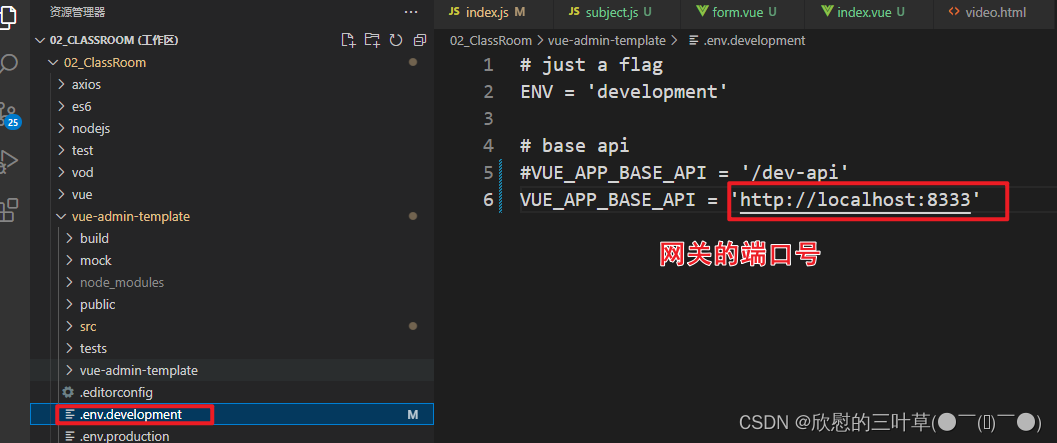
④:修改前端配置文件
1. 修改接口为网关地址
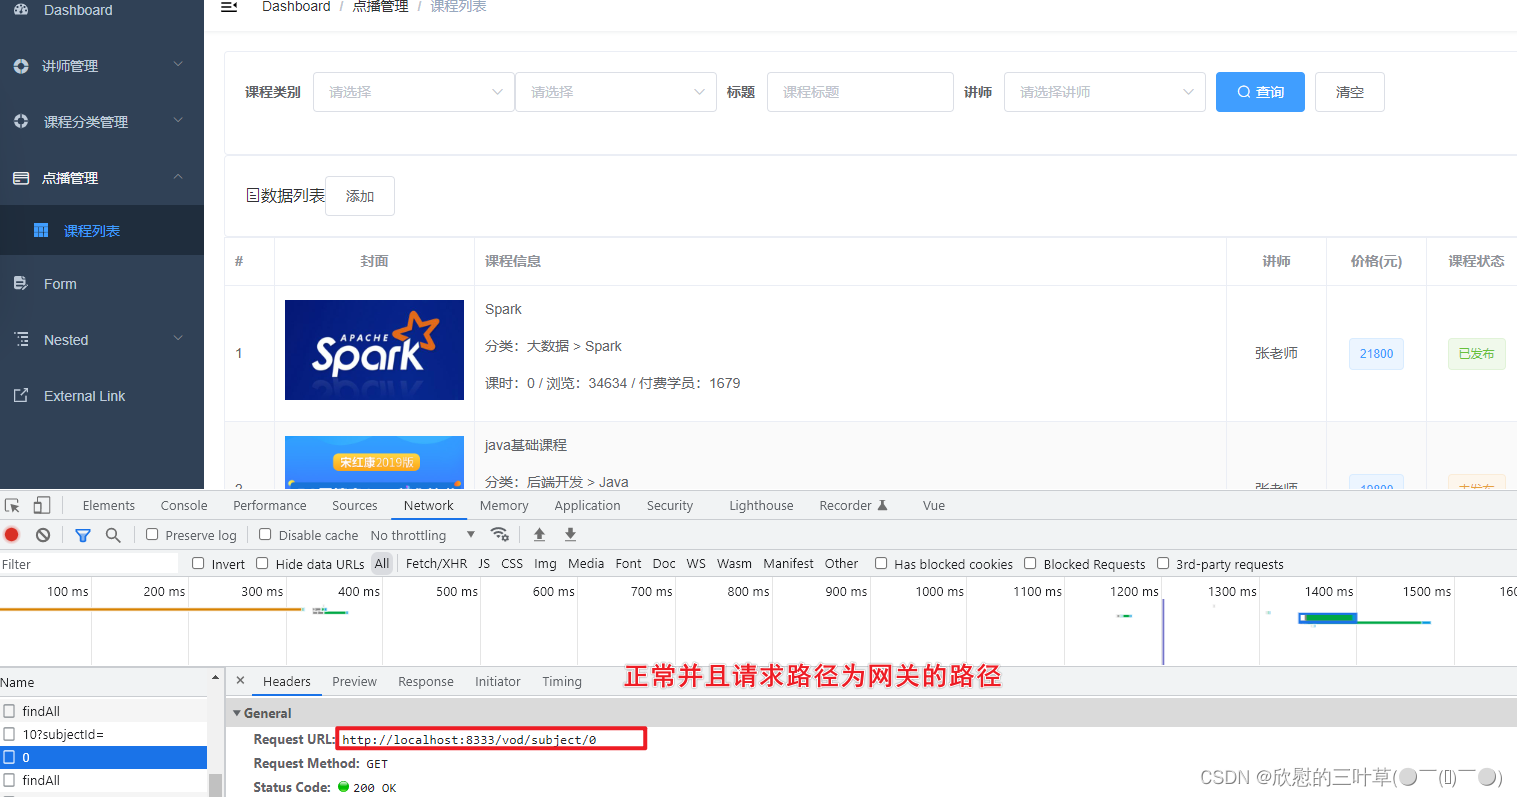
2. 测试
四、后台管理系统-订单管理模块
①:环境准备
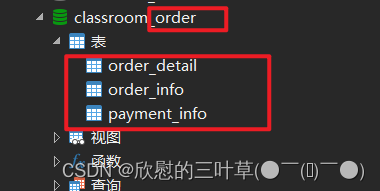
1. 创建数据库表
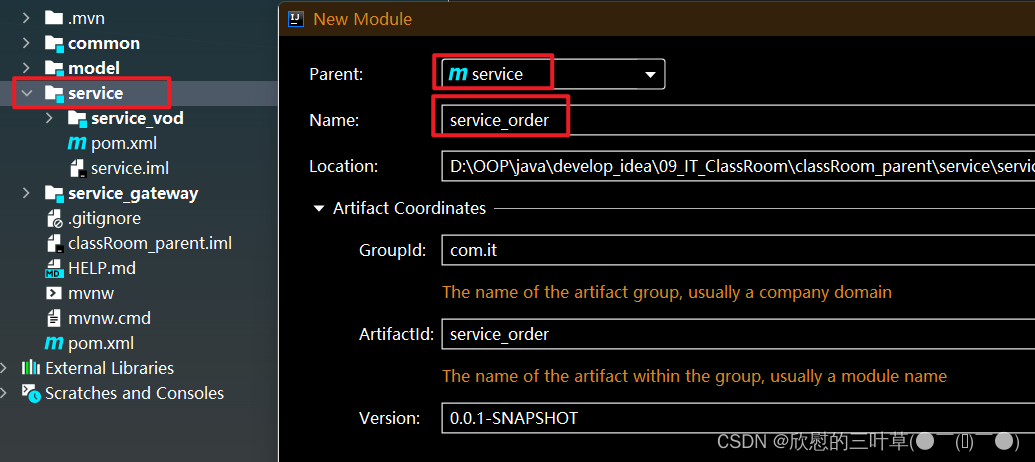
2. 创建订单模块
(1)service模块下创建service_order模块
3. 生成订单相关代码

4. 创建启动类
@SpringBootApplication
@EnableDiscoveryClient
public class ServiceOrderApplication {
  public static void main(String[] args) {
    SpringApplication.run(ServiceOrderApplication.class, args);
  }
}
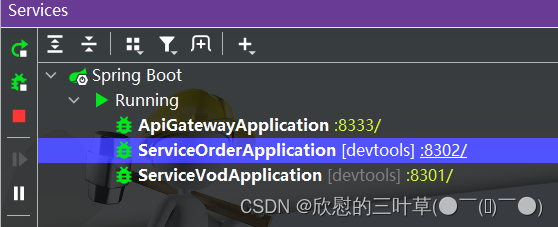
5. 创建配置文件
# 服务端口
server.port=8302

# 服务名
spring.application.name=service-order

# 环境设置:dev、test、prod
spring.profiles.active=dev

# mysql数据库连接
spring.datasource.driver-class-name=com.mysql.jdbc.Driver
spring.datasource.url=jdbc:mysql://localhost:3306/glkt_order?characterEncoding=utf-8&useSSL=false
spring.datasource.username=root
spring.datasource.password=root

#返回json的全局时间格式
spring.jackson.date-format=yyyy-MM-dd HH:mm:ss
spring.jackson.time-zone=GMT+8

#mybatis日志
mybatis-plus.configuration.log-impl=org.apache.ibatis.logging.stdout.StdOutImpl

mybatis-plus.mapper-locations=classpath:com/atguigu/glkt/order/mapper/xml/*.xml

# NAcos 服务地址
spring.cloud.nacos.discovery.server-addr=127.0.0.1:8848
6. 创建配置类
@Configuration
@MapperScan("com.it.order.mapper")
public class OrderConfig {


    /**
     * 分页插件
     * @return PaginationInterceptor
     */
    @Bean
    public PaginationInterceptor paginationInterceptor(){
        return new PaginationInterceptor();
    }
}
②:开发订单列表接口
1. 编写OrderInfoController
@Api(tags = "订单管理")
@RestController
@RequestMapping(value="/order/orderInfo")
public class OrderInfoController {

    @Autowired
    private OrderInfoService orderInfoService;

    @ApiOperation(value = "获取分页列表")
    @GetMapping("{page}/{limit}")
    public Result index(
            @ApiParam(name = "page", value = "当前页码", required = true)
            @PathVariable Long page,
            @ApiParam(name = "limit", value = "每页记录数", required = true)
            @PathVariable Long limit,
            @ApiParam(name = "orderInfoVo", value = "查询对象", required = false)
                    OrderInfoQueryVo orderInfoQueryVo) {
        Page<OrderInfo> pageParam = new Page<>(page, limit);
        Map<String,Object> map = orderInfoService.findPageOrderInfo(pageParam, orderInfoQueryVo);
        return Result.ok(map);
    }
}
2. 编写Service
(1)OrderInfoService定义方法
public interface OrderInfoService extends IService<OrderInfo> {
    //订单列表
    Map<String,Object> findPageOrderInfo(Page<OrderInfo> pageParam, OrderInfoQueryVo orderInfoQueryVo);
}
(2)OrderInfoServiceImpl实现方法
/**
 * <p>
 * 订单表 订单表 服务实现类
 * </p>
 *
 * @author atguigu
 * @since 2022-04-28
 */
@Service
public class OrderInfoServiceImpl extends ServiceImpl<OrderInfoMapper, OrderInfo> implements OrderInfoService {

    @Autowired
    private OrderDetailService orderDetailService;

    //订单列表
    @Override
    public Map<String, Object> selectOrderInfoPage(Page<OrderInfo> pageParam,
                                                   OrderInfoQueryVo orderInfoQueryVo) {
        //orderInfoQueryVo获取查询条件
        Long userId = orderInfoQueryVo.getUserId();
        String outTradeNo = orderInfoQueryVo.getOutTradeNo();
        String phone = orderInfoQueryVo.getPhone();
        String createTimeEnd = orderInfoQueryVo.getCreateTimeEnd();
        String createTimeBegin = orderInfoQueryVo.getCreateTimeBegin();
        Integer orderStatus = orderInfoQueryVo.getOrderStatus();

        //判断条件值是否为空,不为空,进行条件封装
        QueryWrapper<OrderInfo> wrapper = new QueryWrapper<>();
        if(!StringUtils.isEmpty(orderStatus)) {
            wrapper.eq("order_status",orderStatus);
        }
        if(!StringUtils.isEmpty(userId)) {
            wrapper.eq("user_id",userId);
        }
        if(!StringUtils.isEmpty(outTradeNo)) {
            wrapper.eq("out_trade_no",outTradeNo);
        }
        if(!StringUtils.isEmpty(phone)) {
            wrapper.eq("phone",phone);
        }
        if(!StringUtils.isEmpty(createTimeBegin)) {
            wrapper.ge("create_time",createTimeBegin);
        }
        if(!StringUtils.isEmpty(createTimeEnd)) {
            wrapper.le("create_time",createTimeEnd);
        }
        //调用实现条件分页查询
        Page<OrderInfo> pages = baseMapper.selectPage(pageParam, wrapper);
        long totalCount = pages.getTotal();
        long pageCount = pages.getPages();
        List<OrderInfo> records = pages.getRecords();
        //订单里面包含详情内容,封装详情数据,根据订单id查询详情
        records.stream().forEach(item -> {
            this.getOrderDetail(item);
        });

        //所有需要数据封装map集合,最终返回
        Map<String,Object> map = new HashMap<>();
        map.put("total",totalCount);
        map.put("pageCount",pageCount);
        map.put("records",records);
        return map;
    }

    //查询订单详情数据
    private OrderInfo getOrderDetail(OrderInfo orderInfo) {
        //订单id
        Long id = orderInfo.getId();
        //查询订单详情
        OrderDetail orderDetail = orderDetailService.getById(id);
        if(orderDetail != null) {
            String courseName = orderDetail.getCourseName();
            orderInfo.getParam().put("courseName",courseName);
        }
        return orderInfo;
    }
}
③:配置网关
1. Nacos注册
(1)service_order启动类添加注解
@SpringBootApplication
@EnableDiscoveryClient
public class ServiceOrderApplication {
  public static void main(String[] args) {
    SpringApplication.run(ServiceOrderApplication.class, args);
  }
}
(2)service_order配置文件
# nacos服务地址
spring.cloud.nacos.discovery.server-addr=127.0.0.1:8848
2. 配置路由规则
(1)service_gateway配置文件
#service-order模块配置
#设置路由id
spring.cloud.gateway.routes[1].id=service-order

#设置路由的uri
spring.cloud.gateway.routes[1].uri=lb://service-order

#设置路由断言,代理servicerId为auth-service的/auth/路径   /order/orderInfo/{page}/{limit}
spring.cloud.gateway.routes[1].predicates= Path= /order/**
④:开发订单列表前端
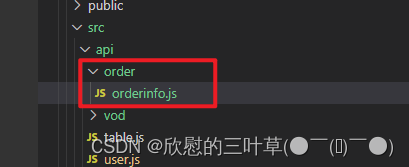
1. 定义接口
(1)创建api -> order -> orderInfo.js
import request from '@/utils/request'

const api_name = '/order/orderInfo'

export default {

  getPageList(page, limit, searchObj) {
    return request({
      url: `${api_name}/${page}/${limit}`,
      method: 'get',
      params: searchObj
    })
  }
}
2. 创建路由
(1)router -> index.js定义路由
  {
    path: '/order',
    component: Layout,
    redirect: '/order/orderInfo/list',
    name: 'Order',
    meta: { title: '订单管理', icon: 'el-icon-truck' },
    alwaysShow: true,
    children: [
      {
        path: 'orderInfo/list',
        name: 'OrderInfo',
        component: () => import('@/views/order/list'),
        meta: { title: '订单列表' }
      }
    ]
  },
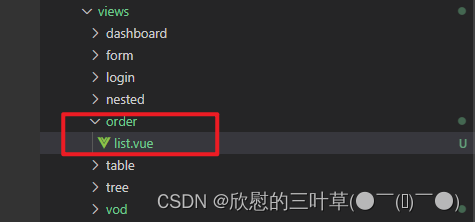
3. 创建vue页面
(1)创建views -> order -> list.vue
<template>
  <div class="app-container">
    <el-card class="operate-container" shadow="never">
      <el-form :inline="true" class="demo-form-inline">
        <el-form-item>
          <el-input v-model="searchObj.outTradeNo" placeholder="订单号"/>
        </el-form-item>
        <el-form-item>
          <el-input v-model="searchObj.phone" placeholder="手机"/>
        </el-form-item>
        <el-form-item>
          <el-date-picker
            v-model="searchObj.createTimeBegin"
            type="date"
            placeholder="选择下单开始日期"
            value-format="yyyy-MM-dd" />
        </el-form-item>
        <el-form-item>
          <el-date-picker
            v-model="searchObj.createTimeEnd"
            type="date"
            placeholder="选择截止日期"
            value-format="yyyy-MM-dd" />
        </el-form-item>
        <el-form-item>
          <el-select v-model="searchObj.orderStatus" placeholder="订单状态" class="v-select patient-select">
            <el-option
              v-for="item in statusList"
              :key="item.status"
              :label="item.name"
              :value="item.status">
            </el-option>
          </el-select>
        </el-form-item>
        <el-button type="primary" icon="el-icon-search" @click="fetchData()">查询</el-button>
        <el-button type="default" @click="resetData()">清空</el-button>
      </el-form>
    </el-card>
    <!-- 列表 -->
    <el-table
      v-loading="listLoading"
      :data="list"
      border
      fit
      highlight-current-row>
      <el-table-column
        label="序号"
        width="60"
        align="center">
        <template slot-scope="scope">
          {{ (page - 1) * limit + scope.$index + 1 }}
        </template>
      </el-table-column>
      <el-table-column prop="outTradeNo" label="订单号" width="160"/>
      <el-table-column prop="courseName" label="课程名称" width="160">
        <template slot-scope="scope">
          {{ scope.row.param.courseName }}
        </template>
      </el-table-column>
      <el-table-column prop="finalAmount" label="订单金额" width="90"/>
      <el-table-column prop="nickName" label="下单用户" />
      <el-table-column prop="phone" label="用户手机" />
      <el-table-column prop="payTime" label="支付时间" width="156"/>
      <el-table-column prop="orderStatus" label="订单状态">
        <template slot-scope="scope">
          {{ scope.row.orderStatus == 0 ? '未支付' : '已支付' }}
        </template>
      </el-table-column>
      <el-table-column prop="createTime" label="下单时间" width="156"/>
    </el-table>
    <!-- 分页组件 -->
    <el-pagination
      :current-page="page"
      :total="total"
      :page-size="limit"
      :page-sizes="[5, 10, 20, 30, 40, 50, 100]"
      style="padding: 30px 0; text-align: center;"
      layout="sizes, prev, pager, next, jumper, ->, total, slot"
      @current-change="fetchData"
      @size-change="changeSize"
    />
  </div>
</template>
<script>
import orderInfoApi from '@/api/order/orderinfo'

export default {
  data() {
    return {
      listLoading: true, // 数据是否正在加载
      list: null, // banner列表
      total: 0, // 数据库中的总记录数
      page: 1, // 默认页码
      limit: 10, // 每页记录数
      searchObj: {}, // 查询表单对象
      statusList: [
        {
          'status': 0,
          'name': '未支付'
        },
        {
          'status': 1,
          'name': '已支付'
        }
      ]
    }
  },
  // 生命周期函数:内存准备完毕,页面尚未渲染
  created() {
    this.fetchData()
  },
  // 生命周期函数:内存准备完毕,页面渲染成功
  mounted() {
    console.log('list mounted......')
  },
  methods: {
    // 当页码发生改变的时候
    changeSize(size) {
      this.limit = size
      this.fetchData(1)
    },
    // 加载banner列表数据
    fetchData(page = 1) {
      // 异步获取远程数据(ajax)
      this.page = page
      orderInfoApi.getPageList(this.page, this.limit, this.searchObj).then(
        response => {
          this.list = response.data.records
          this.total = response.data.total
          // 数据加载并绑定成功
          this.listLoading = false
        }
      )
    },
    // 重置查询表单
    resetData() {
      console.log('重置查询表单')
      this.searchObj = {}
      this.fetchData()
    }
  }
}
</script>
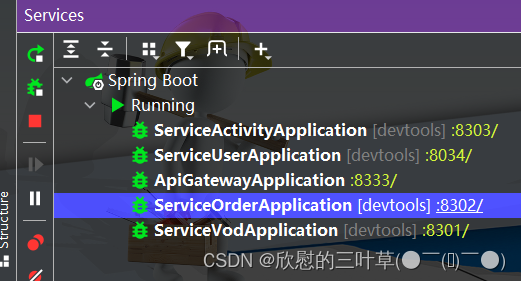
⑤:测试
1.重新启动前端
2.启动后端

五、后台管理系统-营销管理模块
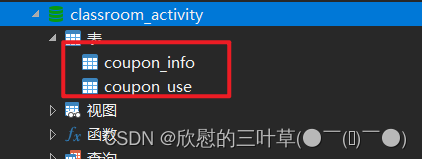
①: 环境准备
1. 创建数据库表
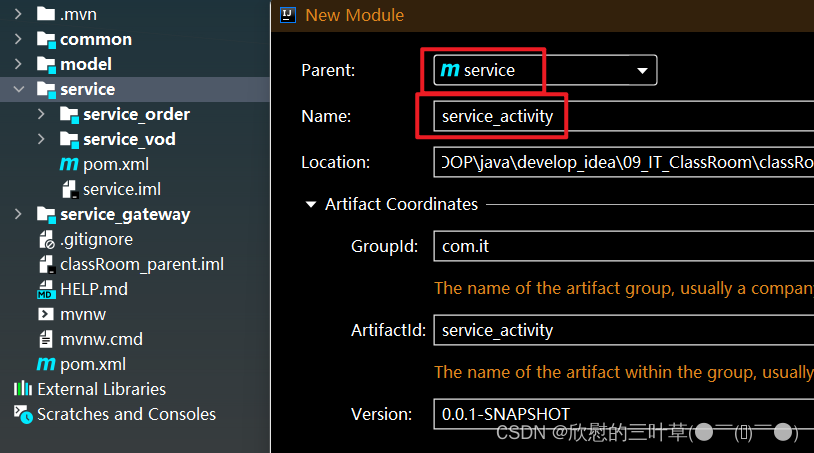
2. 创建营销模块
(1)service模块下创建service_activity模块
3. 生成订单相关代码
4. 创建启动类
@SpringBootApplication
@EnableDiscoveryClient
public class ServiceActivityApplication {

    public static void main(String[] args) {
        SpringApplication.run(ServiceActivityApplication.class, args);
    }
}
5. 创建配置文件
# 服务端口
server.port=8303

# 服务名
spring.application.name=service-activity

# 环境设置:dev、test、prod
spring.profiles.active=dev

# mysql数据库连接
spring.datasource.driver-class-name=com.mysql.cj.jdbc.Driver
spring.datasource.url=jdbc:mysql://localhost:3306/classroom_order?characterEncoding=utf-8&useSSL=false&serverTimezone=GMT%2B8
spring.datasource.username=root
spring.datasource.password=root

#返回json的全局时间格式
spring.jackson.date-format=yyyy-MM-dd HH:mm:ss
spring.jackson.time-zone=GMT+8

#mybatis日志
mybatis-plus.configuration.log-impl=org.apache.ibatis.logging.stdout.StdOutImpl

mybatis-plus.mapper-locations=classpath:com/it/order/mapper/xml/*.xml

# nacos服务地址
spring.cloud.nacos.discovery.server-addr=127.0.0.1:8848
6. 创建配置类
@Configuration
@MapperScan("com.it.activity.mapper")
public class ActivityConfig {

    /**
     * 分页插件
     * @return
     */
    @Bean
    public PaginationInterceptor paginationInterceptor(){
        return new PaginationInterceptor();
    }
}
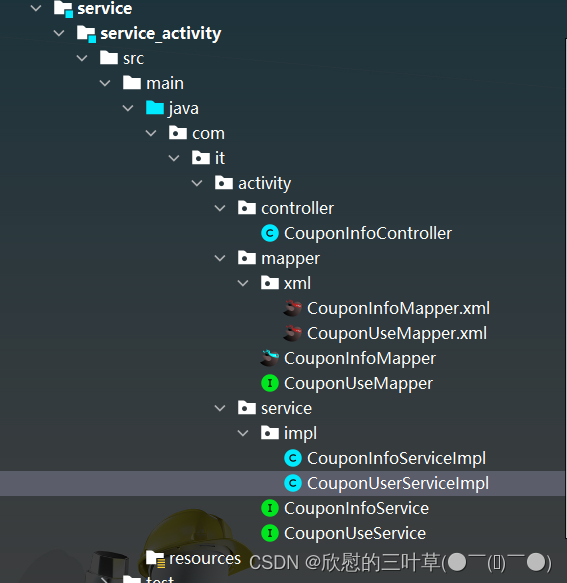
②:开发优惠券相关接口
1. 编写CouponInfoController
@RestController
@RequestMapping("/admin/activity/couponInfo")
public class CouponInfoController {

    @Autowired
    private CouponInfoService couponInfoService;

    @ApiOperation(value = "获取分页列表")
    @GetMapping("{page}/{limit}")
    public Result index(
            @ApiParam(name = "page", value = "当前页码", required = true)
            @PathVariable Long page,
            @ApiParam(name = "limit", value = "每页记录数", required = true)
            @PathVariable Long limit) {
        Page<CouponInfo> pageParam = new Page<>(page, limit);
        IPage<CouponInfo> pageModel = couponInfoService.page(pageParam);
        return Result.ok(pageModel);
    }

    @ApiOperation(value = "获取优惠券")
    @GetMapping("get/{id}")
    public Result get(@PathVariable String id) {
        CouponInfo couponInfo = couponInfoService.getById(id);
        return Result.ok(couponInfo);
    }

    @ApiOperation(value = "新增优惠券")
    @PostMapping("save")
    public Result save(@RequestBody CouponInfo couponInfo) {
        couponInfoService.save(couponInfo);
        return Result.ok();
    }

    @ApiOperation(value = "修改优惠券")
    @PutMapping("update")
    public Result updateById(@RequestBody CouponInfo couponInfo) {
        couponInfoService.updateById(couponInfo);
        return Result.ok();
    }

    @ApiOperation(value = "删除优惠券")
    @DeleteMapping("remove/{id}")
    public Result remove(@PathVariable String id) {
        couponInfoService.removeById(id);
        return Result.ok();
    }

    @ApiOperation(value="根据id列表删除优惠券")
    @DeleteMapping("batchRemove")
    public Result batchRemove(@RequestBody List<String> idList){
        couponInfoService.removeByIds(idList);
        return Result.ok();
    }

    @ApiOperation(value = "获取分页列表")
    @GetMapping("couponUse/{page}/{limit}")
    public Result index(
            @ApiParam(name = "page", value = "当前页码", required = true)
            @PathVariable Long page,

            @ApiParam(name = "limit", value = "每页记录数", required = true)
            @PathVariable Long limit,
            @ApiParam(name = "couponUseVo", value = "查询对象", required = false)
                    CouponUseQueryVo couponUseQueryVo) {
        Page<CouponUse> pageParam = new Page<>(page, limit);
        IPage<CouponUse> pageModel = couponInfoService.selectCouponUsePage(pageParam, couponUseQueryVo);
        return Result.ok(pageModel);
    }
}
2. 编写Service
(1)CouponInfoService定义方法
public interface CouponInfoService extends IService<CouponInfo> {
    //获取已使用优惠券列表
    IPage<CouponUse> selectCouponUsePage(Page<CouponUse> pageParam, CouponUseQueryVo couponUseQueryVo);
}
(2)CouponInfoServiceImpl定义方法
- 具体实现在下面
- 6.3.3 CouponInfoServiceImpl实现方法
六、优惠券列表接口
①:编写获取用户信息接口
- 数据库
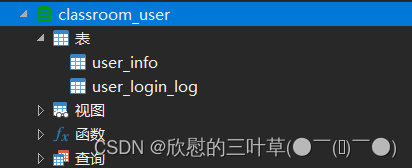
(1)获取优惠券详情时候,需要获取使用者的昵称和手机号,所以使用远程调用实现此功能。
1. 创建service_user模块

2. 生成相关代码

3. 创建启动类
@SpringBootApplication
@EnableDiscoveryClient
@MapperScan("com.it.user.mapper")
public class ServiceUserApplication {
    public static void main(String[] args) {
        SpringApplication.run(ServiceUserApplication.class, args);
    }
}
4. 创建配置文件
# 服务端口
server.port=8034

# 服务名称
spring.application.name=service-user

# 环境设置:dev、test、prod
spring.profiles.active=dev

# MySQL配置
spring.datasource.driver-class-name=com.mysql.cj.jdbc.Driver
spring.datasource.url=jdbc:mysql://localhost:3306/classroom_user?serverTimezone=GMT%2B8&useSSL=false&characterEncoding=utf-8
spring.datasource.username=root
spring.datasource.password=root

# NAcos配置
spring.cloud.nacos.discovery.server-addr=127.0.0.1:8848

# mybatis日志
mybatis-plus.configuration.log-impl=org.apache.ibatis.logging.stdout.StdOutImpl

#返回json的全局时间格式
spring.jackson.date-format=yyyy-MM-dd HH:mm:ss
spring.jackson.time-zone=GMT+8

mybatis-plus.mapper-locations=classpath:com/it/user/mapper/xml/*.xml
5. 编写UserInfocontroller
实现根据用户id获取用户信息接口
@Api(tags = "用户信息管理接口")
@RestController
@RequestMapping("/user/userInfo")
public class UserInfoConntroller {

    @Autowired
    private UserInfoService userInfoService;

    @ApiOperation("获取用户信息")
    @GetMapping("/{id}")
    public UserInfo get(@PathVariable Long id){
        return userInfoService.getById(id);
    }
}
6. 配置网关
在网关配置文件配置路径
#service-user模块配置
#设置路由id
spring.cloud.gateway.routes[2].id=service-user

#设置路由的uri
spring.cloud.gateway.routes[2].uri=lb://service-user

#设置路由断言,代理servicerId为auth-service的/auth/路径   /user/userInfo/{id}
spring.cloud.gateway.routes[2].predicates= Path= /user/**
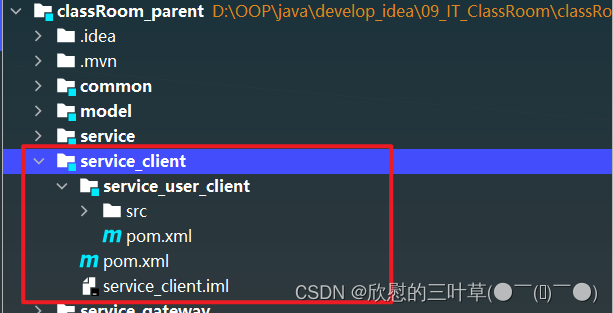
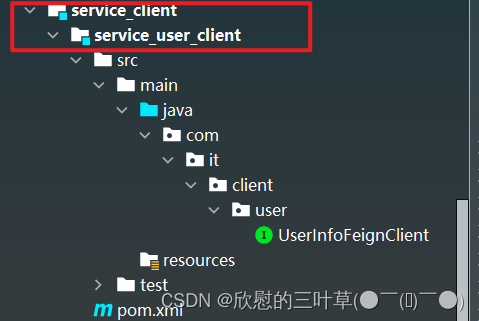
②:创建模块定义远程接口
1. 创建模块
在classRoom_parent -> service_client -> service_user_client
2. service_client引入依赖
        <dependency>
            <groupId>com.it</groupId>
            <artifactId>service_utils</artifactId>
            <version>0.0.1-SNAPSHOT</version>
        </dependency>

        <dependency>
            <groupId>com.it</groupId>
            <artifactId>model</artifactId>
            <version>0.0.1-SNAPSHOT</version>
        </dependency>

        <dependency>
            <groupId>org.springframework.boot</groupId>
            <artifactId>spring-boot-starter-web</artifactId>
            <scope>provided </scope>
        </dependency>

        <!-- 服务调用feign -->
        <dependency>
            <groupId>org.springframework.cloud</groupId>
            <artifactId>spring-cloud-starter-openfeign</artifactId>
            <scope>provided </scope>
        </dependency>
3. 定义远程调用的接口
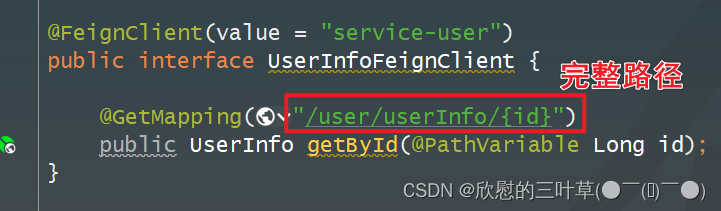
@FeignClient(value = "service-user")
public interface UserInfoFeignClient {

    @GetMapping("/user/userInfo/{id}")
    public UserInfo getById(@PathVariable Long id);
}
③:编写Service实现方法
1. service_activity引入依赖
    <dependencies>
        <dependency>
            <groupId>com.it</groupId>
            <artifactId>service_user_client</artifactId>
            <version>0.0.1-SNAPSHOT</version>
        </dependency>
    </dependencies>
2. service_activity添加注解
@SpringBootApplication
@EnableDiscoveryClient
@EnableFeignClients(basePackages = {"com.it"})
public class ServiceActivityApplication {
    public static void main(String[] args) {
        SpringApplication.run(ServiceActivityApplication.class, args);
    }
}
3. CouponInfoServiceImpl实现方法
远程调用,根据用户id获取用户信息
@Service
public class CouponInfoServiceImpl extends ServiceImpl<CouponInfoMapper, CouponInfo> implements CouponInfoService {

    @Autowired
    private CouponUseService couponUseService;

    @Autowired
    private UserInfoFeignClient userInfoFeignClient;

    //获取已使用优惠券列表
    @Override
    public IPage<CouponUse> selectCouponUsePage(Page<CouponUse> pageParam, CouponUseQueryVo couponUseQueryVo) {
        //获取条件
        Long couponId = couponUseQueryVo.getCouponId();
        String couponStatus = couponUseQueryVo.getCouponStatus();
        String getTimeBegin = couponUseQueryVo.getGetTimeBegin();
        String getTimeEnd = couponUseQueryVo.getGetTimeEnd();
        //封装条件
        QueryWrapper<CouponUse> wrapper = new QueryWrapper<>();
        if(!StringUtils.isEmpty(couponId)) {
            wrapper.eq("coupon_id",couponId);
        }
        if(!StringUtils.isEmpty(couponStatus)) {
            wrapper.eq("coupon_status",couponStatus);
        }
        if(!StringUtils.isEmpty(getTimeBegin)) {
            wrapper.ge("get_time",getTimeBegin);
        }
        if(!StringUtils.isEmpty(getTimeEnd)) {
            wrapper.le("get_time",getTimeEnd);
        }
        //调用方法查询
        IPage<CouponUse> page = couponUseService.page(pageParam, wrapper);
        //封装用户昵称和手机号
        List<CouponUse> couponUseList = page.getRecords();
        couponUseList.stream().forEach(item->{
            this.getUserInfoBycouponUse(item);
        });
        return page;
    }

    //封装用户昵称和手机号
    private CouponUse getUserInfoBycouponUse(CouponUse couponUse) {
        Long userId = couponUse.getUserId();
        if(!StringUtils.isEmpty(userId)) {
            UserInfo userInfo = userInfoFeignClient.getById(userId);
            if(userInfo != null) {
                couponUse.getParam().put("nickName", userInfo.getNickName());
                couponUse.getParam().put("phone", userInfo.getPhone());
            }
        }
        return couponUse;
    }
}
④:配置网关
1. 配置路由规则
(1)service_gateway配置文件
#service-activity模块配置
#设置路由id
spring.cloud.gateway.routes[3].id=service-activity

#设置路由的uri
spring.cloud.gateway.routes[3].uri=lb://service-activity

#设置路由断言,代理servicerId为auth-service的/auth/路径   /activity/couponInfo
spring.cloud.gateway.routes[3].predicates= Path= /activity/**
⑤:整合优惠券前端
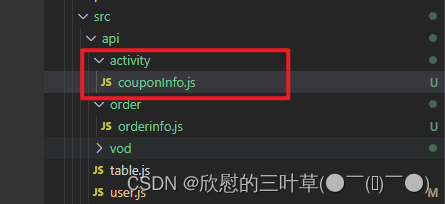
1. 定义接口
(1)创建api -> activity -> couponInfo.js
import request from '@/utils/request'

const api_name = '/activity/couponInfo'

export default {

  getPageList(page, limit) {
    return request({
      url: `${api_name}/${page}/${limit}`,
      method: 'get'
    })
  },
  getById(id) {
    return request({
      url: `${api_name}/get/${id}`,
      method: 'get'
    })
  },

  save(role) {
    return request({
      url: `${api_name}/save`,
      method: 'post',
      data: role
    })
  },

  updateById(role) {
    return request({
      url: `${api_name}/update`,
      method: 'put',
      data: role
    })
  },
  removeById(id) {
    return request({
      url: `${api_name}/remove/${id}`,
      method: 'delete'
    })
  },
  removeRows(idList) {
    return request({
      url: `${api_name}/batchRemove`,
      method: 'delete',
      data: idList
    })
  },

  getPageCouponUseList(page, limit, searchObj) {
    return request({
      url: `${api_name}/couponUse/${page}/${limit}`,
      method: 'get',
      params: searchObj
    })
  }
}
2. 创建路由
(1)router -> index.js定义路由
{
  path: '/activity',
  component: Layout,
  redirect: '/couponInfo/list',
  name: 'Activity',
  meta: { title: '营销活动管理', icon: 'el-icon-football' },
  alwaysShow: true,
  children: [
    {
      path: 'couponInfo/list',
      name: 'CouponInfo',
      component: () => import('@/views/activity/couponInfo/list'),
      meta: { title: '优惠券列表' }
    },
    {
      path: 'couponInfo/add',
      name: 'CouponInfoAdd',
      component: () => import('@/views/activity/couponInfo/form'),
      meta: { title: '添加' },
      hidden: true
    },
    {
      path: 'couponInfo/edit/:id',
      name: 'CouponInfoEdit',
      component: () => import('@/views/activity/couponInfo/form'),
      meta: { title: '编辑', noCache: true },
      hidden: true
    },
    {
      path: 'couponInfo/show/:id',
      name: 'CouponInfoShow',
      component: () => import('@/views/activity/couponInfo/show'),
      meta: { title: '详情', noCache: true },
      hidden: true
    }
  ]
},
3. 创建vue页面
(1)创建views -> activity-> couponInfo-> 页面
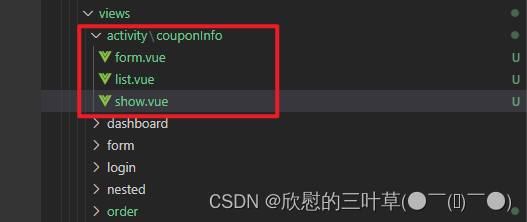
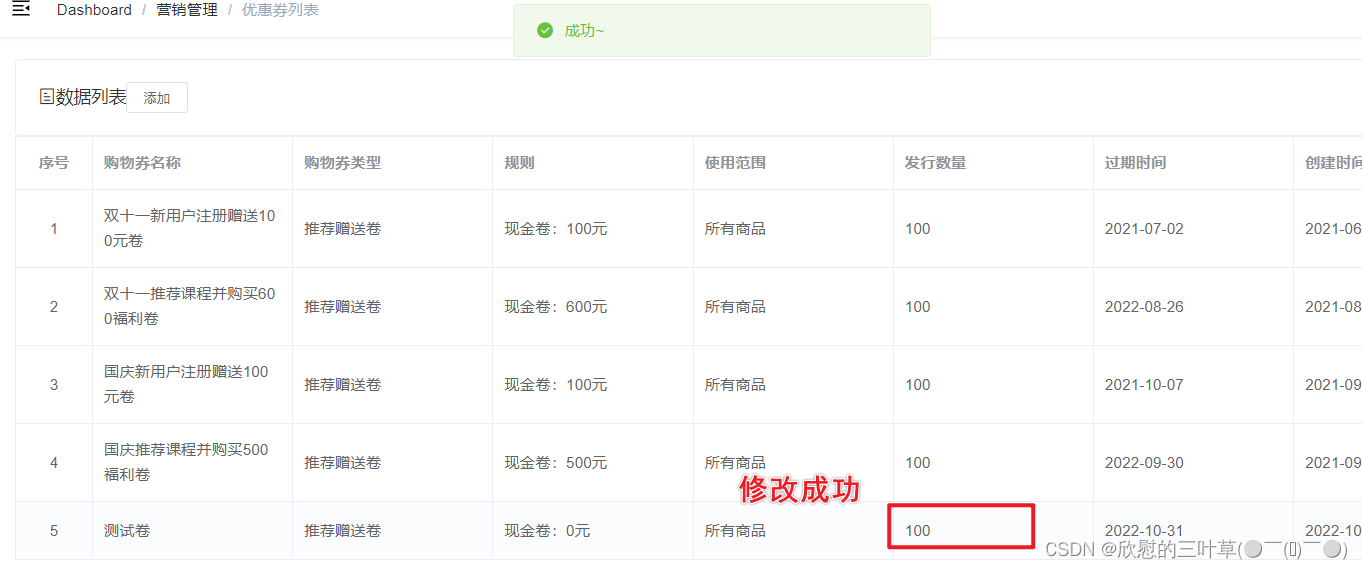
(2)list.vue
<template>
<div class="app-container">
<!-- 工具条 -->
<el-card class="operate-container" shadow="never">
<i class="el-icon-tickets" style="margin-top: 5px"></i>
<span style="margin-top: 5px">数据列表</span>
<el-button class="btn-add" size="mini" @click="add()">添加</el-button>
</el-card>
<!-- banner列表 -->
<el-table
v-loading="listLoading"
:data="list"
element-loading-text="数据正在加载......"
border
fit
highlight-current-row>
<el-table-column
label="序号"
width="70"
align="center">
<template slot-scope="scope">
{{ (page - 1) * limit + scope.$index + 1 }}
</template>
</el-table-column>
<el-table-column prop="couponName" label="购物券名称" />
<el-table-column prop="couponType" label="购物券类型">
<template slot-scope="scope">
{{ scope.row.couponType == 'REGISTER' ? '注册卷' : '推荐赠送卷' }}
</template>
</el-table-column>
<el-table-column label="规则">
<template slot-scope="scope">
{{ '现金卷:' + scope.row.amount + '元' }}
</template>
</el-table-column>
<el-table-column label="使用范围 ">
所有商品
</el-table-column>
<el-table-column prop="publishCount" label="发行数量" />
<el-table-column prop="expireTime" label="过期时间" />
<el-table-column prop="createTime" label="创建时间" />
<el-table-column label="操作" width="150" align="center">
<template slot-scope="scope">
<router-link :to="'/activity/couponInfo/edit/'+scope.row.id">
<el-button size="mini" type="text" >修改</el-button>
</router-link>
<el-button size="mini" type="text" @click="removeDataById(scope.row.id)">删除</el-button>
<router-link :to="'/activity/couponInfo/show/'+scope.row.id">
<el-button size="mini" type="text" >详情</el-button>
</router-link>
</template>
</el-table-column>
</el-table>
<!-- 分页组件 -->
<el-pagination
:current-page="page"
:total="total"
:page-size="limit"
:page-sizes="[5, 10, 20, 30, 40, 50, 100]"
style="padding: 30px 0; text-align: center;"
layout="sizes, prev, pager, next, jumper, ->, total, slot"
@current-change="fetchData"
@size-change="changeSize"
/>
</div>
</template>
<script>
import api from '@/api/activity/couponInfo'
export default {
data() {
return {
listLoading: true, // 数据是否正在加载
list: null, // banner列表
total: 0, // 数据库中的总记录数
page: 1, // 默认页码
limit: 10, // 每页记录数
searchObj: {}, // 查询表单对象
multipleSelection: [] // 批量选择中选择的记录列表
}
},
// 生命周期函数:内存准备完毕,页面尚未渲染
created() {
console.log('list created......')
this.fetchData()
},
// 生命周期函数:内存准备完毕,页面渲染成功
mounted() {
console.log('list mounted......')
},
methods: {
// 当页码发生改变的时候
changeSize(size) {
console.log(size)
this.limit = size
this.fetchData(1)
},
add(){
this.$router.push({ path: '/activity/couponInfo/add' })
},
// 加载banner列表数据
fetchData(page = 1) {
console.log('翻页。。。' + page)
// 异步获取远程数据(ajax)
this.page = page
api.getPageList(this.page, this.limit, this.searchObj).then(
response => {
this.list = response.data.records
this.total = response.data.total
// 数据加载并绑定成功
this.listLoading = false
}
)
},
// 重置查询表单
resetData() {
console.log('重置查询表单')
this.searchObj = {}
this.fetchData()
},
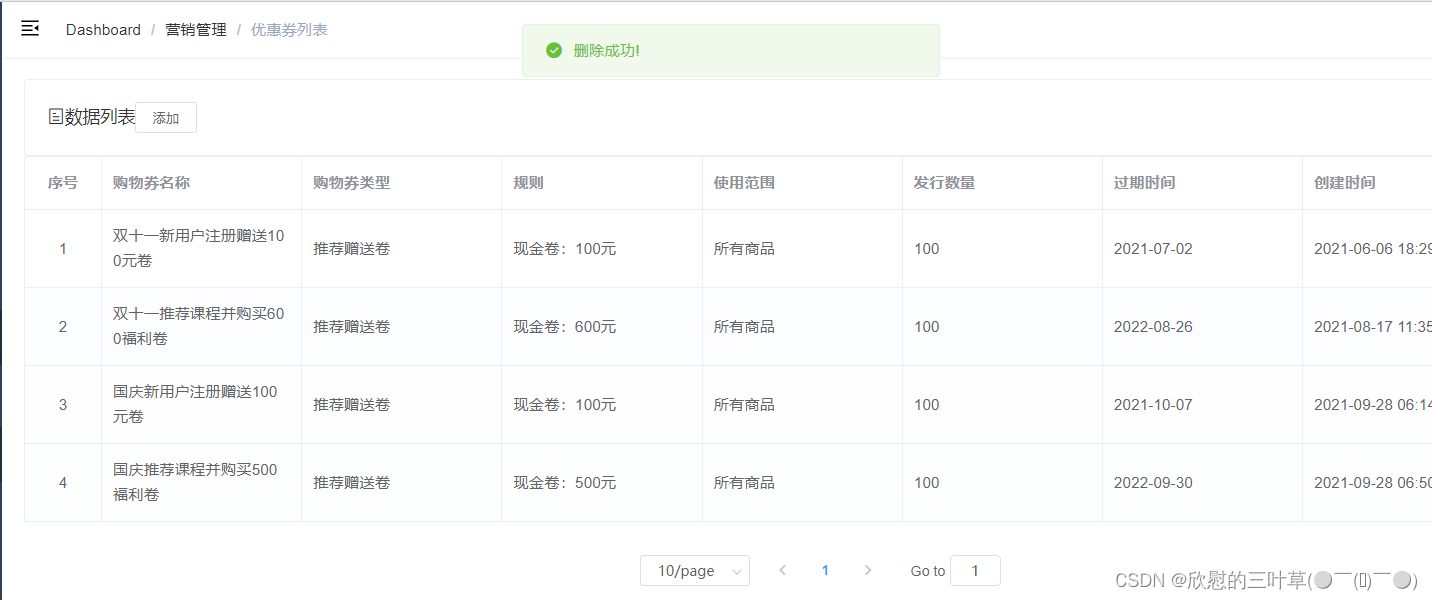
// 根据id删除数据
removeDataById(id) {
// debugger
this.$confirm('此操作将永久删除该记录, 是否继续?', '提示', {
confirmButtonText: '确定',
cancelButtonText: '取消',
type: 'warning'
}).then(() => { // promise
// 点击确定,远程调用ajax
return api.removeById(id)
}).then((response) => {
this.fetchData(this.page)
if (response.code) {
this.$message({
type: 'success',
message: '删除成功!'
})
}
}).catch(() => {
this.$message({
type: 'info',
message: '已取消删除'
})
})
}
}
}
</script>
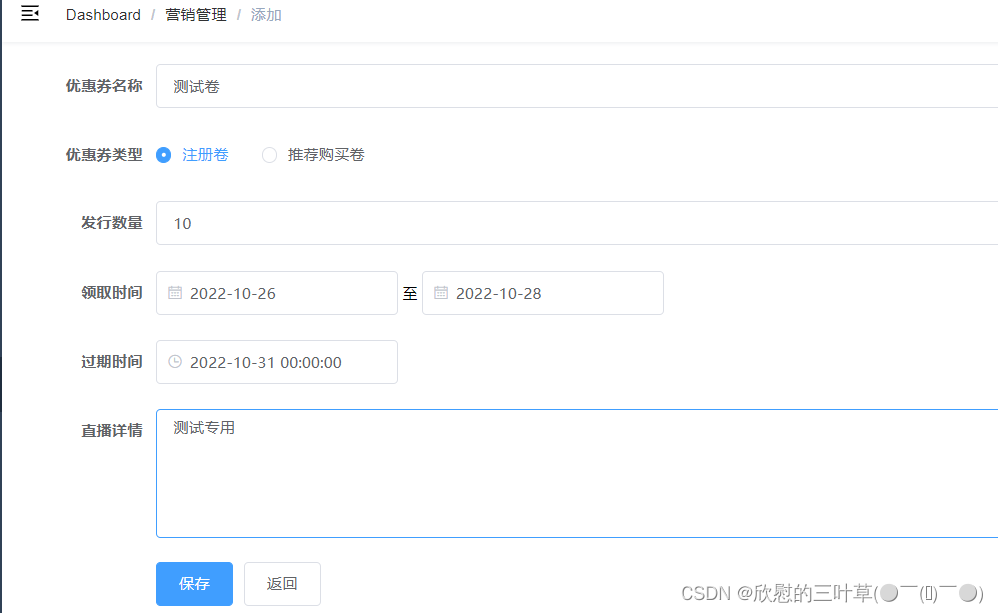
(3)form.vue
<template>
  <div class="app-container">
    <el-form label-width="120px">

      <el-form-item label="优惠券名称">
        <el-input v-model="couponInfo.couponName"/>
      </el-form-item>
      <el-form-item label="优惠券类型">
        <el-radio-group v-model="couponInfo.couponType">
          <el-radio label="1">注册卷</el-radio>
          <el-radio label="2">推荐购买卷</el-radio>
        </el-radio-group>
      </el-form-item>

      <el-form-item label="发行数量">
        <el-input v-model="couponInfo.publishCount"/>
      </el-form-item>
      <el-form-item label="领取时间">
        <el-date-picker
          v-model="couponInfo.startTime"
          type="date"
          placeholder="选择开始日期"
          value-format="yyyy-MM-dd" />
        至
        <el-date-picker
          v-model="couponInfo.endTime"
          type="date"
          placeholder="选择开始日期"
          value-format="yyyy-MM-dd" />
      </el-form-item>
      <el-form-item label="过期时间">
        <el-date-picker
          v-model="couponInfo.expireTime"
          type="datetime"
          placeholder="选择开始日期"
          value-format="yyyy-MM-dd HH:mm:ss" />
      </el-form-item>
      <el-form-item label="直播详情">
        <el-input v-model="couponInfo.ruleDesc" type="textarea" rows="5"/>
      </el-form-item>
      <el-form-item>
        <el-button type="primary" @click="saveOrUpdate">保存</el-button>
        <el-button @click="back">返回</el-button>
      </el-form-item>
    </el-form>
  </div>
</template>

<script>

import api from '@/api/activity/couponInfo'

const defaultForm = {
  id: '',
  couponType: '1',
  couponName: '',
  amount: '0',
  conditionAmount: '0',
  startTime: '',
  endTime: '',
  rangeType: '1',
  ruleDesc: '',
  publishCount: '',
  perLimit: '1',
  useCount: '0',
  receiveCount: '',
  expireTime: '',
  publishStatus: ''
}

export default {
  data() {
    return {
      couponInfo: defaultForm,
      saveBtnDisabled: false,

      keyword: '',
      skuInfoList: []
    }
  },

  // 监听器
  watch: {
    $route(to, from) {
      console.log('路由变化......')
      console.log(to)
      console.log(from)
      this.init()
    }
  },

  // 生命周期方法(在路由切换,组件不变的情况下不会被调用)
  created() {
    console.log('form created ......')
    this.init()
  },

  methods: {

    // 表单初始化
    init() {
      // debugger
      if (this.$route.params && this.$route.params.id) {
        const id = this.$route.params.id
        this.fetchDataById(id)
      } else {
        // 对象拓展运算符:拷贝对象,而不是赋值对象的引用
        this.couponInfo = { ...defaultForm }
      }
    },

    saveOrUpdate() {
      this.saveBtnDisabled = true // 防止表单重复提交
      if (!this.couponInfo.id) {
        this.saveData()
      } else {
        this.updateData()
      }
    },

    // 新增
    saveData() {
      api.save(this.couponInfo).then(response => {
        // debugger
        if (response.code) {
          this.$message({
            type: 'success',
            message: response.message
          })
          this.$router.push({ path: '/activity/couponInfo/list' })
        }
      })
    },

    // 根据id更新记录
    updateData() {
      api.updateById(this.couponInfo).then(response => {
        debugger
        if (response.code) {
          this.$message({
            type: 'success',
            message: response.message
          })
          this.$router.push({ path: '/activity/couponInfo/list' })
        }
      })
    },

    back() {
      this.$router.push({ path: '/activity/couponInfo/list' })
    },

    // 根据id查询记录
    fetchDataById(id) {
      api.getById(id).then(response => {
        // debugger
        this.couponInfo = response.data
      })
    }
  }
}
</script>
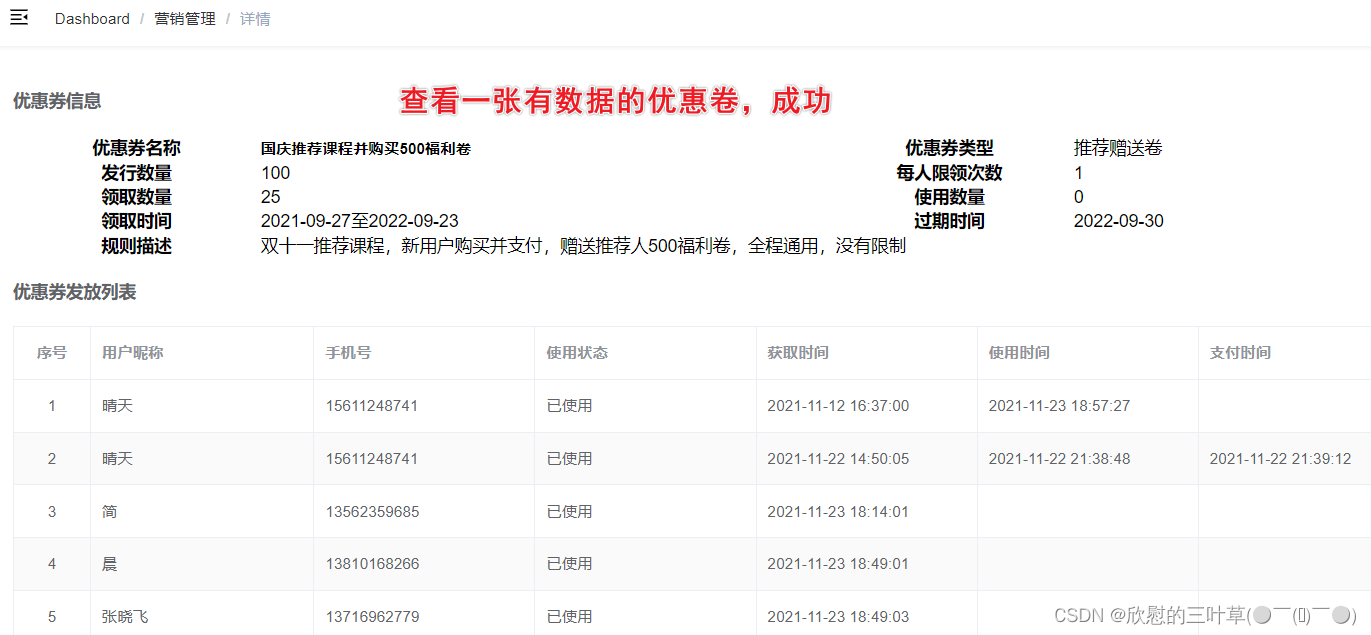
(4)show.vue
<template>
<div class="app-container">
<h4>优惠券信息</h4>
<table class="table table-striped table-condenseda table-bordered" width="100%">
<tbody>
<tr>
<th width="15%">优惠券名称</th>
<td width="35%"><b style="font-size: 14px">{{ couponInfo.couponName }}</b></td>
<th width="15%">优惠券类型</th>
<td width="35%">
{{ couponInfo.couponType == 'REGISTER' ? '注册卷' : '推荐赠送卷' }}
</td>
</tr>
<tr>
<th>发行数量</th>
<td>{{ couponInfo.publishCount }}</td>
<th>每人限领次数</th>
<td>{{ couponInfo.perLimit }}</td>
</tr>
<tr>
<th>领取数量</th>
<td>{{ couponInfo.receiveCount }}</td>
<th>使用数量</th>
<td>{{ couponInfo.useCount }}</td>
</tr>
<tr>
<th>领取时间</th>
<td>{{ couponInfo.startTime }}至{{ couponInfo.endTime }}</td>
<th>过期时间</th>
<td>{{ couponInfo.expireTime }}</td>
</tr>
<tr>
<th>规则描述</th>
<td colspan="3">{{ couponInfo.ruleDesc }}</td>
</tr>
</tbody>
</table>
<h4>
优惠券发放列表
</h4>
<el-table
v-loading="listLoading"
:data="list"
stripe
border
style="width: 100%;margin-top: 10px;">
<el-table-column
label="序号"
width="70"
align="center">
<template slot-scope="scope">
{{ (page - 1) * limit + scope.$index + 1 }}
</template>
</el-table-column>
<el-table-column prop="param.nickName" label="用户昵称" />
<el-table-column prop="param.phone" label="手机号" />
<el-table-column label="使用状态">
<template slot-scope="scope">
{{ scope.row.couponStatus == 'NOT_USED' ? '未使用' : '已使用' }}
</template>
</el-table-column>
<el-table-column prop="getTime" label="获取时间" />
<el-table-column prop="usingTime" label="使用时间" />
<el-table-column prop="usedTime" label="支付时间" />
<el-table-column prop="expireTime" label="过期时间" />
</el-table>
<!-- 分页组件 -->
<el-pagination
:current-page="page"
:total="total"
:page-size="limit"
:page-sizes="[5, 10, 20, 30, 40, 50, 100]"
style="padding: 30px 0; text-align: center;"
layout="sizes, prev, pager, next, jumper, ->, total, slot"
@current-change="fetchData"
@size-change="changeSize"
/>
<div style="margin-top: 15px;">
<el-form label-width="0px">
<el-form-item>
<el-button @click="back">返回</el-button>
</el-form-item>
</el-form>
</div>
</div>
</template>
<script>
import api from '@/api/activity/couponInfo'
export default {
data() {
return {
listLoading: false, // 数据是否正在加载
couponId: null,
couponInfo: {},
list: null, // banner列表
total: 0, // 数据库中的总记录数
page: 1, // 默认页码
limit: 10, // 每页记录数
searchObj: {} // 查询表单对象
}
},
// 监听器
watch: {
$route(to, from) {
console.log('路由变化......')
console.log(to)
console.log(from)
this.init()
}
},
// 生命周期方法(在路由切换,组件不变的情况下不会被调用)
created() {
console.log('form created ......')
this.couponId = this.$route.params.id
// 获取优惠券信息
this.fetchDataById()
this.fetchData()
},
methods: {
// 根据id查询记录
fetchDataById() {
api.getById(this.couponId).then(response => {
//
this.couponInfo = response.data
})
},
// 当页码发生改变的时候
changeSize(size) {
console.log(size)
this.limit = size
this.fetchData(1)
},
// 加载banner列表数据
fetchData(page = 1) {
console.log('翻页。。。' + page)
// 异步获取远程数据(ajax)
this.page = page
this.searchObj.couponId = this.couponId
api.getPageCouponUseList(this.page, this.limit, this.searchObj).then(
response => {
this.list = response.data.records
this.total = response.data.total
// 数据加载并绑定成功
this.listLoading = false
}
)
},
back() {
this.$router.push({ path: '/activity/couponInfo/list' })
}
}
}
</script>
<style>
.app-container h4 {
color: #606266;
}
</style>
4. 测试
1.启动后端
2.启动前端
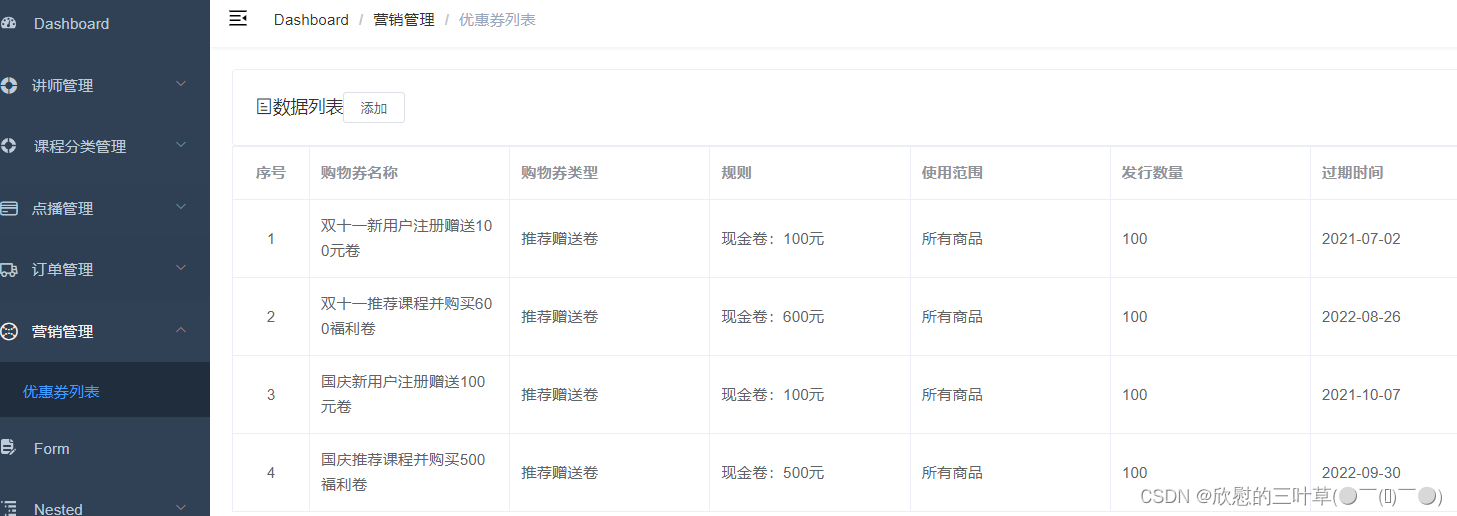
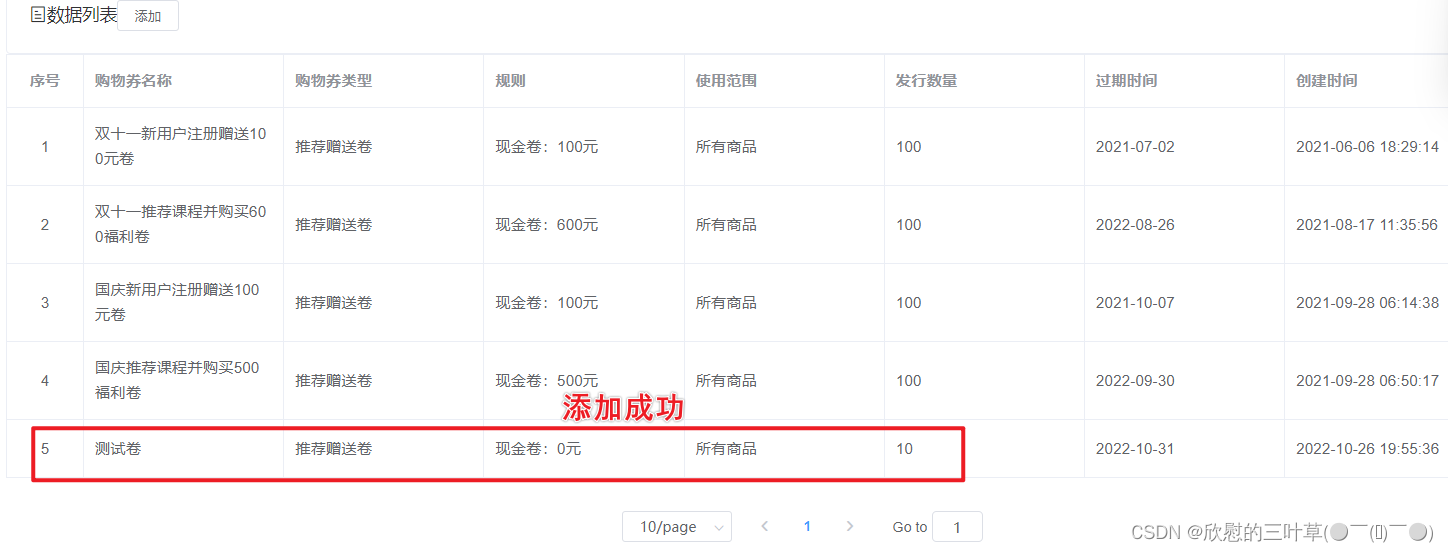
3.测试(添加优惠卷)
4.测试(修改优惠卷)
5.测试(查看优惠卷详情)
6.测试(删除优惠卷)
七、微信公众号
①:注册公众号
微信公众平台:https://mp.weixin.qq.com/

硅谷课堂要求基于H5,具有微信支付等高级功能的,因此需要注册服务号,订阅号不具备支付功能。
注册步骤参考官方注册文档:https://kf.qq.com/faq/120911VrYVrA151013MfYvYV.html
注册过程仅做了解,有公司运营负责申请与认证。
②:公众号功能介绍
我们在微信公众平台扫码登录后可以发现管理页面左侧菜单栏有丰富的功能:

大概可以分为这几大模块:
首页、内容与互动、数据、广告与服务、设置与开发、新功能
作为开发人员,首先应该关注的是设置与开发模块;而作为产品运营人员与数据分析人员,关注的是内容与互动、数据及广告与服务模块。
首先我们不妨各个功能模块都点击看一看,大概了解下我们能做些什么。可以确认的是,这个微信公众平台当然不只是给开发人员使用的,它提供了很多非技术人员可在UI界面上交互操作的功能模块。
如配置消息回复、自定义菜单、发布文章等:
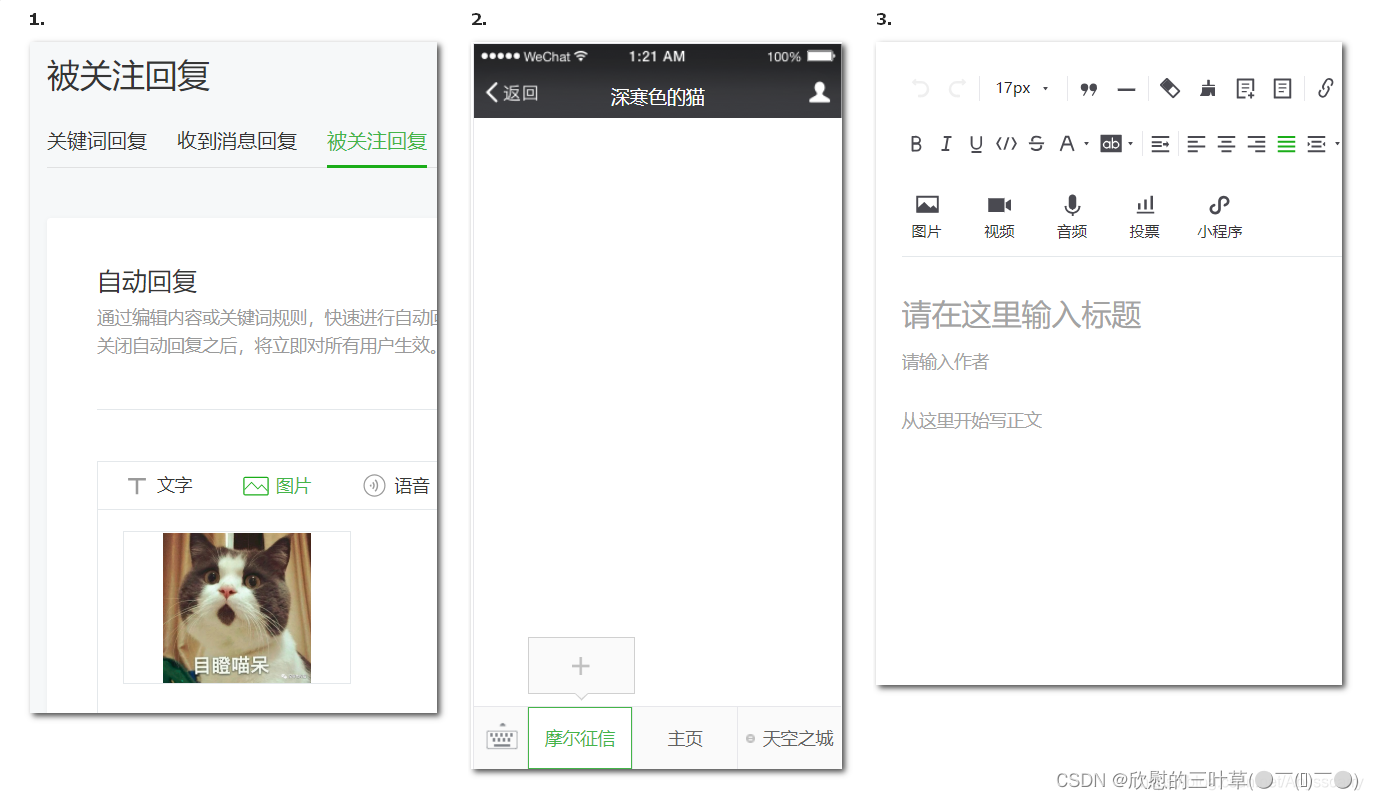
这个时候我们可能会想:这些功能好像非技术人员都能随意操作,那么还需要我们技术人员去开发吗?
答案是: 如果只是日常简单的推送文章,就像我们关注的大多数公众号一样,那确实不需要技术人员去开发;但是,如果你想将你们的网站嵌入进去公众号菜单里(这里指的是把前端项目的首页链接配置在自定义菜单),并且实现微信端的独立登录认证、获取微信用户信息、微信支付等高级功能,或者觉得UI交互的配置方式无法满足你的需求,你需要更加自由、随心所欲的操作,那么我们就必须启用开发者模式了,通过技术人员的手段去灵活控制公众号。
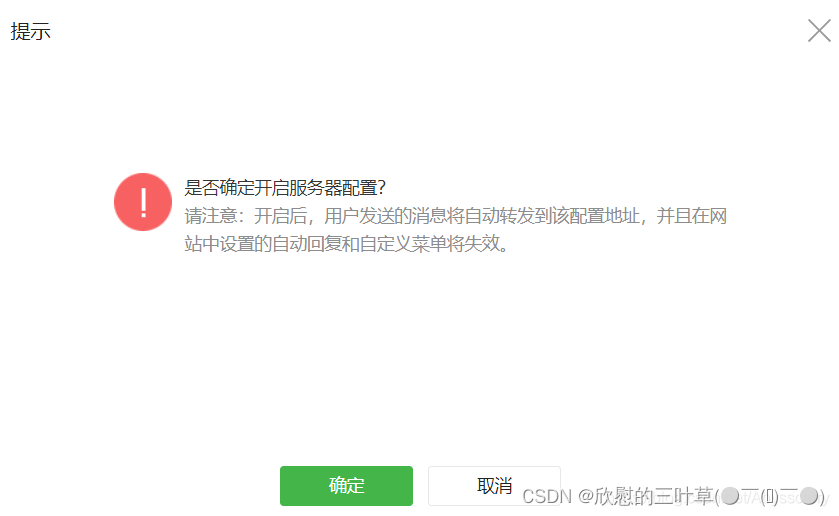
这里有一点需要注意,如果我们决定技术人员开发公众号,必须启用服务器配置,而这将导致UI界面设置的自动回复和自定义菜单失效!
我们在 设置与开发 - 基本配置 - 服务器配置 中点击启用:
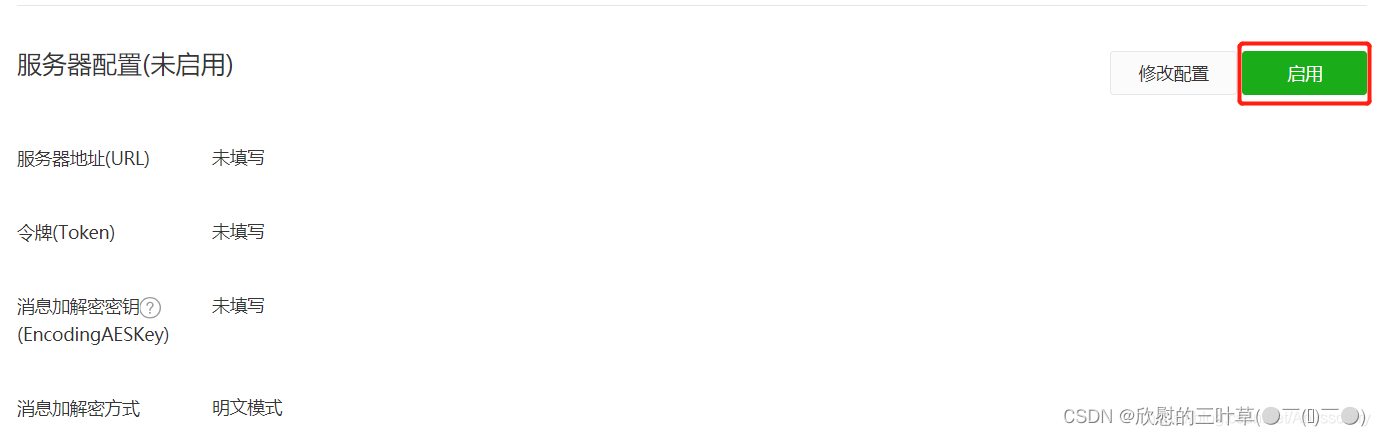
至于服务器配置中的选项代表什么意思、如何填写,我们下面再讲。
③:微信公众平台测试帐号
1. 申请测试帐号
微信公众平台接口测试帐号:https://mp.weixin.qq.com/debug/cgi-bin/sandbox?t=sandbox/login&token=399029368&lang=zh_CN

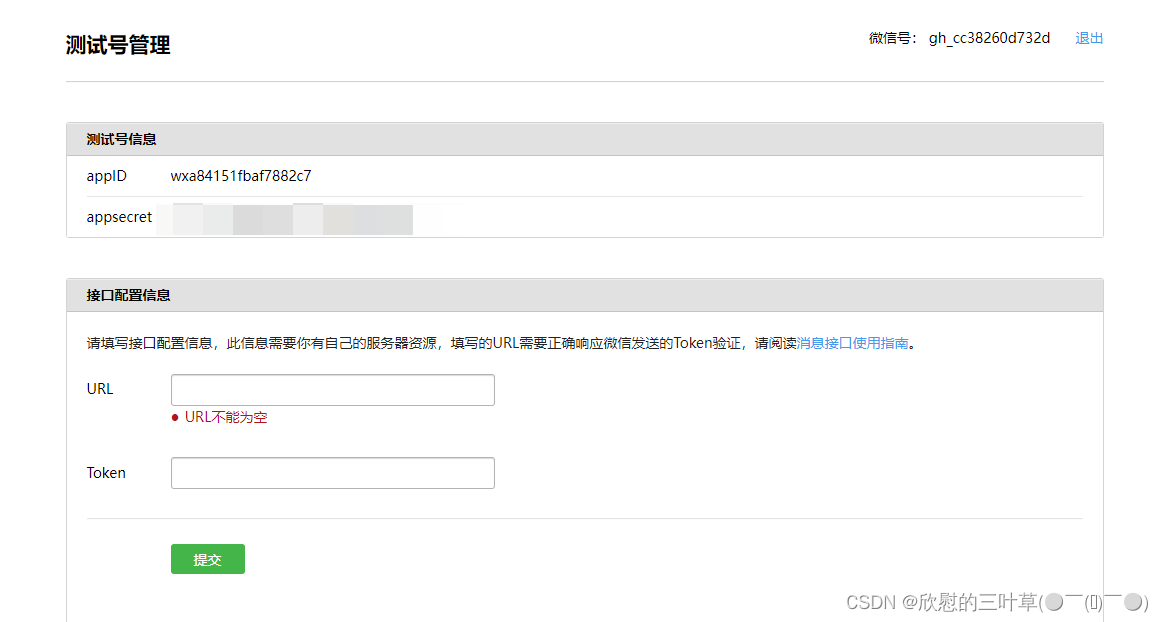
2. 查看测试号管理
(1)其中appID和appsecret用于后面菜单开发使用
(2)其中URL是开发者用来接收微信消息和事件的接口URL。Token可由开发者可以任意填写,用作生成签名(该Token会和接口URL中包含的Token进行比对,从而验证安全性)。本地测试,url改为内网穿透地址。
3. 关注公众号

④:开发业务介绍
硅谷课堂涉及的微信公众号功能模块:自定义菜单、消息、微信支付、授权登录等
八、后台管理系统-公众号菜单管理
①:需求分析
1. 微信自定义菜单说明
微信自定义菜单文档地址:https://developers.weixin.qq.com/doc/offiaccount/Custom_Menus/Creating_Custom-Defined_Menu.html
微信自定义菜单注意事项:
- 自定义菜单最多包括3个一级菜单,每个一级菜单最多包含5个二级菜单。
- 一级菜单最多4个汉字,二级菜单最多8个汉字,多出来的部分将会以“…”代替。
- 创建自定义菜单后,菜单的刷新策略是,在用户进入公众号会话页或公众号profile页时,如果发现上一次拉取菜单的请求在5分钟以前,就会拉取一下菜单,如果菜单有更新,就会刷新客户端的菜单。测试时可以尝试取消关注公众账号后再次关注,则可以看到创建后的效果。
2. 硅谷课堂自定义菜单
一级菜单:直播、课程、我的
二级菜单:根据一级菜单动态设置二级菜单,直播(近期直播课程),课程(课程分类),我的(我的订单、我的课程、我的优惠券及关于我们)
说明:
1、二级菜单可以是网页类型,点击跳转H5页面
2、二级菜单可以是消息类型,点击返回消息
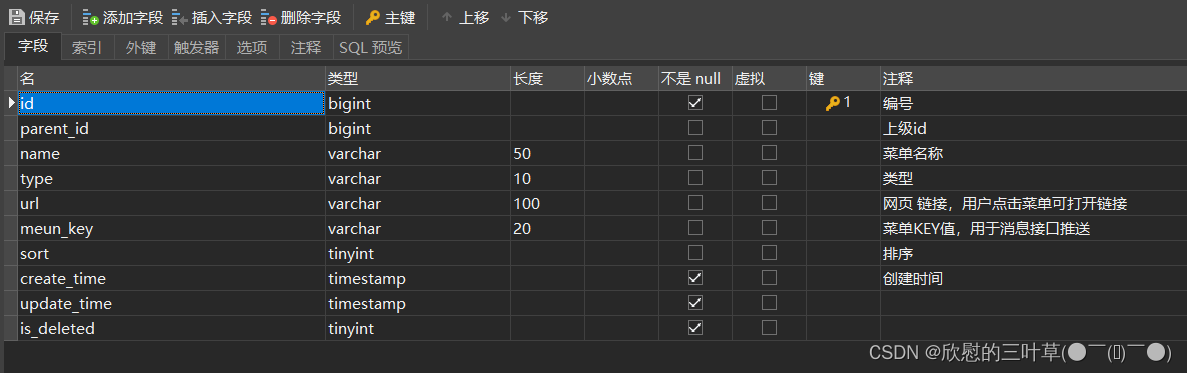
3. 数据格式
自定义菜单通过后台管理设置到数据库表,数据配置好后,通过微信接口推送菜单数据到微信平台。
表结构(menu):
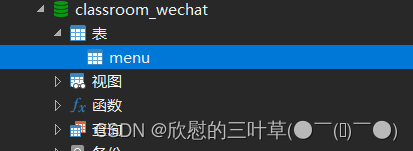
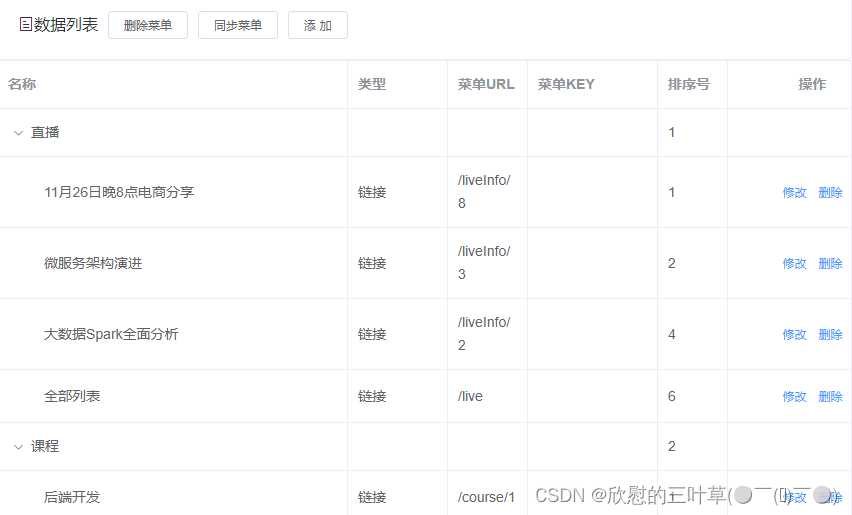
表示例数据:
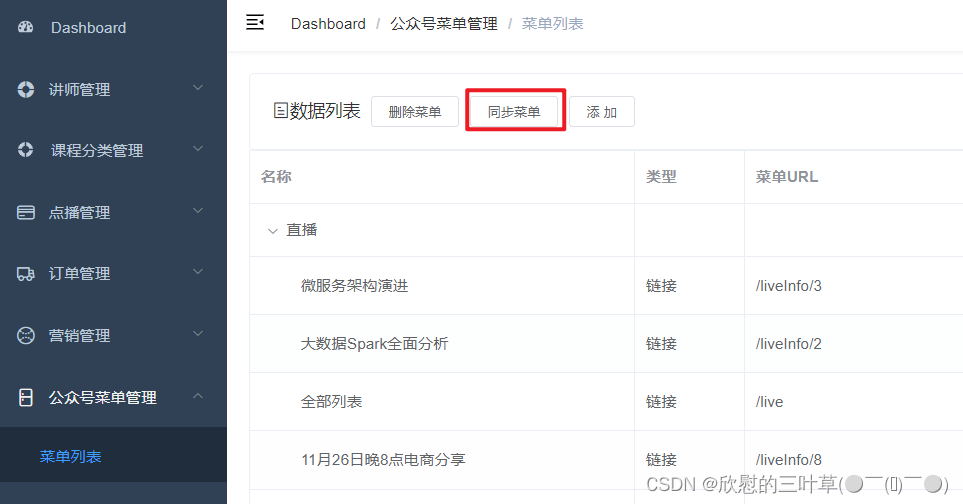
4. 管理页面
(1)页面功能“列表、添加、修改与删除”是对menu表的操作
(2)页面功能“同步菜单与删除菜单”是对微信平台接口操作
②:搭建菜单管理后端环境
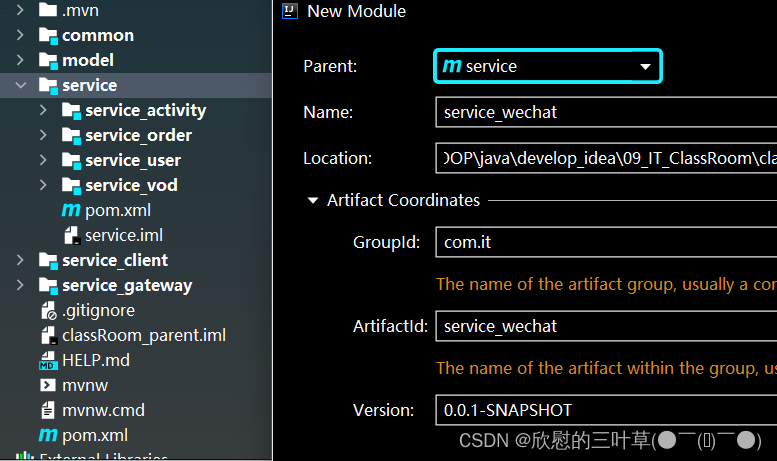
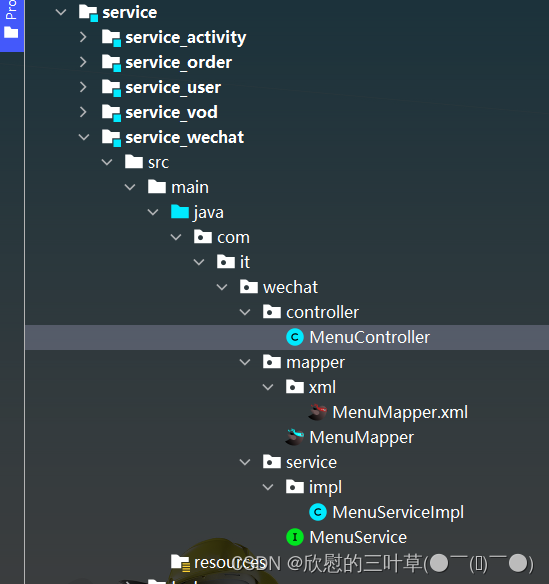
1. 创建模块service_wechat
(1)在service下创建子模块service_wechat
(2)引入依赖(service_wechat)
    <dependencies>
        <dependency>
            <groupId>com.github.binarywang</groupId>
            <artifactId>weixin-java-mp</artifactId>
            <version>4.1.0</version>
        </dependency>
    </dependencies>
2. 生成菜单相关代码
3. 创建启动类和配置文件
(1)启动类
@SpringBootApplication
@EnableDiscoveryClient
@EnableFeignClients(basePackages = {"com.it"})
@MapperScan("com.it.wechat.mapper")
// @ComponentScan(basePackages = {"com.it"})
public class ServiceWechatApplication {
    public static void main(String[] args) {
        SpringApplication.run(ServiceWechatApplication.class, args);
    }
}
(2)配置文件
# 服务端口
server.port=8305
# 服务名
spring.application.name=service-wechat

# 环境设置:dev、test、prod
spring.profiles.active=dev

# mysql数据库连接
spring.datasource.driver-class-name=com.mysql.jdbc.Driver
spring.datasource.url=jdbc:mysql://localhost:3306/classroom_wechat?characterEncoding=utf-8&useSSL=false&serverTimezone=GMT%2B8
spring.datasource.username=root
spring.datasource.password=root

#返回json的全局时间格式
spring.jackson.date-format=yyyy-MM-dd HH:mm:ss
spring.jackson.time-zone=GMT+8

#mybatis日志
mybatis-plus.configuration.log-impl=org.apache.ibatis.logging.stdout.StdOutImpl

mybatis-plus.mapper-locations=classpath:com/it/wechat/mapper/xml/*.xml

# nacos服务地址
spring.cloud.nacos.discovery.server-addr=127.0.0.1:8848

#公众号id和秘钥
# 硅谷课堂微信公众平台appId
wechat.mpAppId: wx09f201e9013e81d8
# 硅谷课堂微信公众平台api秘钥
wechat.mpAppSecret: 6c999765c12c51850d28055e8b6e2eda
4. 配置网关
#service-wechat模块配置
#设置路由id
spring.cloud.gateway.routes[4].id=service-wechat
#设置路由的uri
spring.cloud.gateway.routes[4].uri=lb://service-wechat
#设置路由断言,代理servicerId为auth-service的/auth/路径
spring.cloud.gateway.routes[4].predicates= Path=/*/wechat/**
③:开发菜单管理接口
1. 编写MenuController
@RestController
@RequestMapping("/admin/wechat/menu")
public class MenuController {

    @Autowired
    private MenuService menuService;

    //获取所有菜单,按照一级和二级菜单封装
    @GetMapping("findMenuInfo")
    public Result findMenuInfo() {
        List<MenuVo> list = menuService.findMenuInfo();
        return Result.ok(list);
    }

    //获取所有一级菜单
    @GetMapping("findOneMenuInfo")
    public Result findOneMenuInfo() {
        List<Menu> list = menuService.findMenuOneInfo();
        return Result.ok(list);
    }

    @ApiOperation(value = "获取")
    @GetMapping("get/{id}")
    public Result get(@PathVariable Long id) {
        Menu menu = menuService.getById(id);
        return Result.ok(menu);
    }

    @ApiOperation(value = "新增")
    @PostMapping("save")
    public Result save(@RequestBody Menu menu) {
        menuService.save(menu);
        return Result.ok();
    }

    @ApiOperation(value = "修改")
    @PutMapping("update")
    public Result updateById(@RequestBody Menu menu) {
        menuService.updateById(menu);
        return Result.ok();
    }

    @ApiOperation(value = "删除")
    @DeleteMapping("remove/{id}")
    public Result remove(@PathVariable Long id) {
        menuService.removeById(id);
        return Result.ok();
    }

    @ApiOperation(value = "根据id列表删除")
    @DeleteMapping("batchRemove")
    public Result batchRemove(@RequestBody List<Long> idList) {
        menuService.removeByIds(idList);
        return Result.ok();
    }
}
2. 编写Service
(1)MenuService定义方法
public interface MenuService extends IService<Menu> {
    //获取全部菜单
    List<MenuVo> findMenuInfo();
    //获取一级菜单
    List<Menu> findOneMenuInfo();
}
(2)MenuServiceImpl实现方法
@Service
public class MenuServiceImpl extends ServiceImpl<MenuMapper, Menu> implements MenuService {
    /**
     * 获取一级菜单
     * @return
     */
    @Override
    public List<Menu> findOneMenuInfo() {
        LambdaQueryWrapper<Menu> wrapper = new LambdaQueryWrapper<>();
        wrapper.eq(Menu ::getParentId,0);
        return baseMapper.selectList(wrapper);
    }

    /**
     * 获取所有菜单,按照一级和二级菜单封装
     * @return
     */
    @Override
    public List<MenuVo> findMenuInfo() {
        // 1. 创建集合对象用于封装最终数据
        ArrayList<MenuVo> menuVoArrayList = new ArrayList<>();

        // 2. 获取全部信息(一级和二级)
        List<Menu> menuList = baseMapper.selectList(null);

        // 3. 过滤出所有一级菜单
        List<Menu> oneMenuList = menuList.stream().filter(menu -> menu.getParentId() == 0)
                                         .collect(Collectors.toList());
        // 4. 获取一级菜单下的二级菜单
        // 遍历一级菜单
        for (Menu oneMenu : oneMenuList) {
            MenuVo oneMenuVo = new MenuVo();
            BeanUtils.copyProperties(oneMenu, oneMenuVo);
            ArrayList<MenuVo> twoMenuVoList = new ArrayList<>();
            for (Menu menu : menuList) {
                if (menu.getParentId().equals(oneMenu.getId())) {
                    MenuVo twoMenuVo = new MenuVo();
                    BeanUtils.copyProperties(menu, twoMenuVo);
                    System.err.println("twoMenuVo = " + twoMenuVo);
                    twoMenuVoList.add(twoMenuVo);
                }
            }
            oneMenuVo.setChildren(twoMenuVoList);
            menuVoArrayList.add(oneMenuVo);
        }
        // 5. 封装最终数据,返回
        return menuVoArrayList;
    }
}
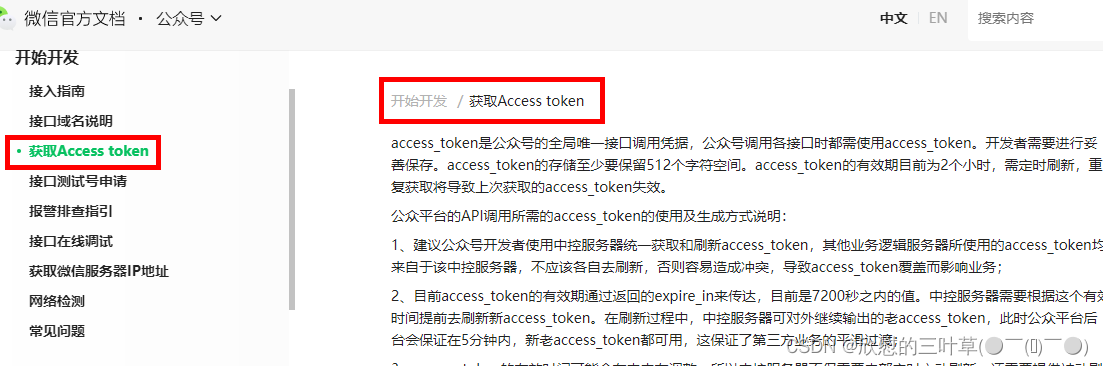
④:同步菜单(获取access_token)
1. 文档查看
(1)进行菜单同步时候,需要获取到公众号的access_token,通过access_token进行菜单同步
接口文档:https://developers.weixin.qq.com/doc/offiaccount/Basic_Information/Get_access_token.html
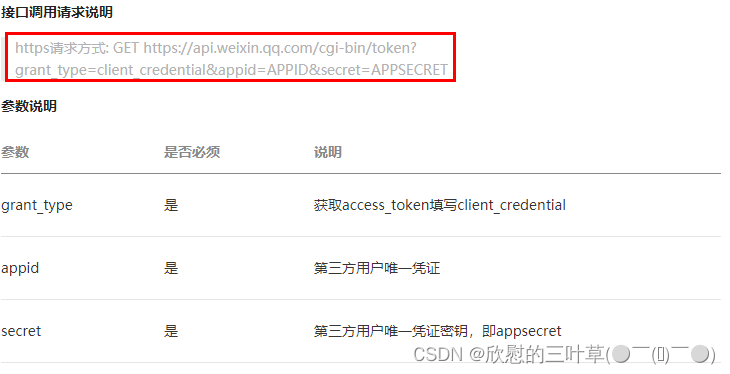
(2)调用方式
2. service_wechat添加配置
# 硅谷课堂微信公众平台appId
wechat.mpAppId: wx09f201e9013e81d8
# 硅谷课堂微信公众平台api秘钥
wechat.mpAppSecret: 6c999765c12c51850d28055e8b6e2eda
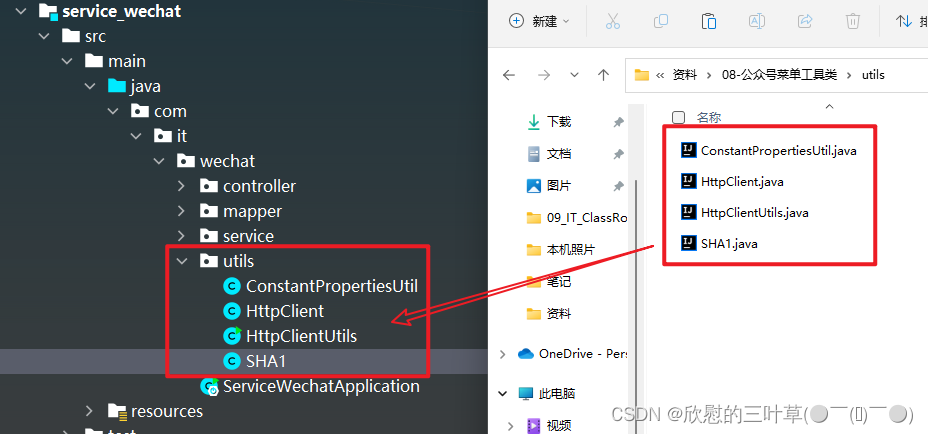
3. 添加工具类
@Component
public class ConstantPropertiesUtil implements InitializingBean {

    @Value("${wechat.mpAppId}")
    private String appid;

    @Value("${wechat.mpAppSecret}")
    private String appsecret;

    public static String ACCESS_KEY_ID;
    public static String ACCESS_KEY_SECRET;

    @Override
    public void afterPropertiesSet() throws Exception {
        ACCESS_KEY_ID = appid;
        ACCESS_KEY_SECRET = appsecret;
    }
}
4. 复制HttpClient工具类
5. 添加Menucontroller方法
//获取access_token
@GetMapping("getAccessToken")
public Result getAccessToken() {
try {
//拼接请求地址
StringBuffer buffer = new StringBuffer();
buffer.append("https://api.weixin.qq.com/cgi-bin/token");
buffer.append("?grant_type=client_credential");
buffer.append("&appid=%s");
buffer.append("&secret=%s");
//请求地址设置参数
String url = String.format(buffer.toString(),
ConstantPropertiesUtil.ACCESS_KEY_ID,
ConstantPropertiesUtil.ACCESS_KEY_SECRET);
//发送http请求
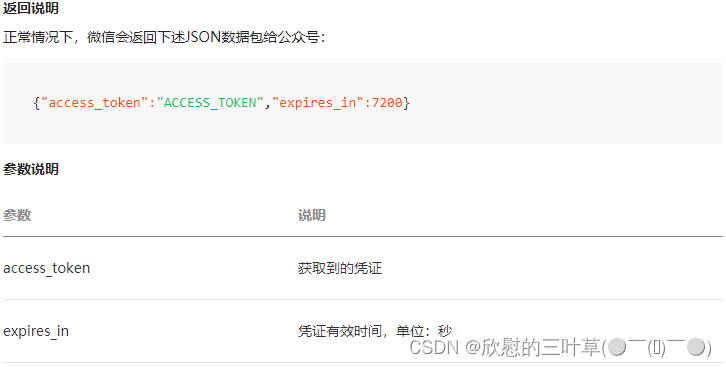
String tokenString = HttpClientUtils.get(url);
//获取access_token
JSONObject jsonObject = JSONObject.parseObject(tokenString);
String access_token = jsonObject.getString("access_token");
//返回
return Result.ok(access_token);
} catch (Exception e) {
e.printStackTrace();
return Result.fail(null);
}
}
6. 测试
⑤:同步菜单(功能实现)
接口文档:https://developers.weixin.qq.com/doc/offiaccount/Custom_Menus/Creating_Custom-Defined_Menu.html
接口调用请求说明
http请求方式:POST(请使用https协议) https://api.weixin.qq.com/cgi-bin/menu/create?access_token=ACCESS_TOKEN
weixin-java-mp是封装好了的微信接口客户端,使用起来很方便,后续我们就使用weixin-java-mp处理微信平台接口。
1. 添加配置类
@Configuration
public class WeChatMpConfig {

    @Autowired
    private ConstantPropertiesUtil constantPropertiesUtil;

    @Bean
    public WxMpService wxMpService(){
        WxMpService wxMpService = new WxMpServiceImpl();
        wxMpService.setWxMpConfigStorage(wxMpConfigStorage());
        return wxMpService;
    }
    @Bean
    public WxMpConfigStorage wxMpConfigStorage(){
        WxMpDefaultConfigImpl wxMpConfigStorage = new WxMpDefaultConfigImpl();
        wxMpConfigStorage.setAppId(ConstantPropertiesUtil.ACCESS_KEY_ID);
        wxMpConfigStorage.setSecret(ConstantPropertiesUtil.ACCESS_KEY_SECRET);
        return wxMpConfigStorage;
    }
}
2. 定义Service方法
MenuService
void syncMenu();
3. 实现Service方法
MenuServiceImpl
    @Autowired
    private WxMpService wxMpService;

    /**
     * 说明:
     * 自定义菜单最多包括3个一级菜单,每个一级菜单最多包含5个二级菜单。
     * 一级菜单最多4个汉字,二级菜单最多8个汉字,多出来的部分将会以“...”代替。
     * 创建自定义菜单后,菜单的刷新策略是,在用户进入公众号会话页或公众号profile页时,如果发现上一次拉取菜单的请求在5分钟以前,就会拉取一下菜单,如果菜单有更新,就会刷新客户端的菜单。测试时可以尝试取消关注公众账号后再次关注,则可以看到创建后的效果。
     */
    /**
     * 同步菜单
     */
    @Override
    @SneakyThrows
    public void syncMenu() {
        // 获取所有菜单
        List<MenuVo> menuList = this.findMenuInfo();

        // 封装button里面结构,数组格式
        JSONArray buttonList = new JSONArray();
        for (MenuVo oneMenuVo : menuList) {
            // Json对象,一级菜单
            JSONObject one = new JSONObject();
            one.put("name", oneMenuVo.getName());
            // 二级菜单
            JSONArray subButton = new JSONArray();
            for (MenuVo twoMenuVO : oneMenuVo.getChildren()) {
                JSONObject view = new JSONObject();
                view.put("type",twoMenuVO.getType());

                if(twoMenuVO.getType().equals("view")) {
                    view.put("name", twoMenuVO.getName());
                    view.put("url", "http://ggkt2.vipgz1.91tunnel.com/#"
                            +twoMenuVO.getUrl());
                } else {
                    view.put("name", twoMenuVO.getName());
                    view.put("key", twoMenuVO.getMeunKey());
                }
                subButton.add(view);
            }
            one.put("sub_button", subButton);
            buttonList.add(one);
        }

        //菜单
        JSONObject button = new JSONObject();
        button.put("button", buttonList);
        try {
            String menuId = this.wxMpService.getMenuService().menuCreate(button.toJSONString());
            System.err.println("menuId = " + menuId);
        } catch (WxErrorException e) {
            e.printStackTrace();
            throw new ClassRoomException(20001,"公众号菜单同步失败!");
        }
    }
4. controller方法
@ApiOperation(value = "同步菜单")
@GetMapping("syncMenu")
public Result createMenu() throws WxErrorException {
    menuService.syncMenu();
    return Result.ok(null);
}
⑥:删除菜单
1. service接口
void removeMenu();
2. service接口实现
    /**
     * 删除菜单
     */
    @Override
    @SneakyThrows
    public void removeMenu() {
        try {
            wxMpService.getMenuService().menuDelete();
        } catch (WxErrorException e) {
            e.printStackTrace();
            throw new ClassRoomException(20001,"公众号菜单删除失败!");
        }
    }
3. controller方法
@ApiOperation(value = "删除菜单")
@DeleteMapping("removeMenu")
public Result removeMenu() {
    menuService.removeMenu();
    return Result.ok(null);
}
⑦:开发菜单管理前端
1. 添加路由
(1)src -> router -> index.js添加路由
{
    path: '/wechat',
    component: Layout,
    redirect: '/wechat/menu/list',
    name: 'Wechat',
    meta: {
      title: '菜单管理',
      icon: 'el-icon-refrigerator'
    },
    alwaysShow: true,
    children: [
      {
        path: 'menu/list',
        name: 'Menu',
        component: () => import('@/views/wechat/menu/list'),
        meta: { title: '菜单列表' }
      }
    ]
},
2. 定义接口
(1)src -> api -> wechat -> menu.js定义接口
import request from '@/utils/request'

const api_name = '/admin/wechat/menu'

export default {

  findMenuInfo() {
    return request({
      url: `${api_name}/findMenuInfo`,
      method: `get`
    })
  },

  findOneMenuInfo() {
    return request({
      url: `${api_name}/findOneMenuInfo`,
      method: `get`
    })
  },

  save(menu) {
    return request({
      url: `${api_name}/save`,
      method: `post`,
      data: menu
    })
  },

  getById(id) {
    return request({
      url: `${api_name}/get/${id}`,
      method: `get`
    })
  },

  updateById(menu) {
    return request({
      url: `${api_name}/update`,
      method: `put`,
      data: menu
    })
  },

  syncMenu() {
    return request({
      url: `${api_name}/syncMenu`,
      method: `get`
    })
  },

  removeById(id) {
    return request({
      url: `${api_name}/remove/${id}`,
      method: 'delete'
    })
  },

  removeMenu() {
    return request({
      url: `${api_name}/removeMenu`,
      method: `delete`
    })
  }
}
3. 编写页面
(1)创建views -> wechat -> menu -> list.vue
<template>
  <div class="app-container">

    <!-- 工具条 -->
    <el-card class="operate-container" shadow="never">
      <i class="el-icon-tickets" style="margin-top: 5px"></i>
      <span style="margin-top: 5px">数据列表</span>
      <el-button class="btn-add" size="mini" @click="remove" style="margin-left: 10px;">删除菜单</el-button>
      <el-button class="btn-add" size="mini" @click="syncMenu">同步菜单</el-button>
      <el-button class="btn-add" size="mini" @click="add">添 加</el-button>
    </el-card>

    <el-table
      :data="list"
      style="width: 100%;margin-bottom: 20px;"
      row-key="id"
      border
      default-expand-all
      :tree-props="{children: 'children'}">

      <el-table-column label="名称" prop="name" width="350"></el-table-column>
      <el-table-column label="类型" width="100">
        <template slot-scope="scope">
          {{ scope.row.type == 'view' ? '链接' : scope.row.type == 'click' ? '事件' : '' }}
        </template>
      </el-table-column>
      <el-table-column label="菜单URL" prop="url" ></el-table-column>
      <el-table-column label="菜单KEY" prop="meunKey"  width="130"></el-table-column>
      <el-table-column label="排序号" prop="sort"  width="70"></el-table-column>
      <el-table-column label="操作" width="170" align="center">
        <template slot-scope="scope">
          <el-button v-if="scope.row.parentId > 0" type="text" size="mini" @click="edit(scope.row.id)">修改</el-button>
          <el-button v-if="scope.row.parentId > 0" type="text" size="mini" @click="removeDataById(scope.row.id)">删除</el-button>
        </template>
      </el-table-column>
    </el-table>

    <el-dialog title="添加/修改" :visible.sync="dialogVisible" width="40%" >
      <el-form ref="flashPromotionForm" label-width="150px" size="small" style="padding-right: 40px;">

        <el-form-item label="选择一级菜单">
          <el-select
            v-model="menu.parentId"
            placeholder="请选择">
            <el-option
              v-for="item in list"
              :key="item.id"
              :label="item.name"
              :value="item.id"/>
          </el-select>
        </el-form-item>
        <el-form-item v-if="menu.parentId == 1" label="菜单名称">
          <el-select
            v-model="menu.name"
            placeholder="请选择"
            @change="liveCourseChanged">
            <el-option
              v-for="item in liveCourseList"
              :key="item.id"
              :label="item.courseName"
              :value="item"/>
          </el-select>
        </el-form-item>
        <el-form-item v-if="menu.parentId == 2" label="菜单名称">
          <el-select
            v-model="menu.name"
            placeholder="请选择"
            @change="subjectChanged">
            <el-option
              v-for="item in subjectList"
              :key="item.id"
              :label="item.title"
              :value="item"/>
          </el-select>
        </el-form-item>
        <el-form-item v-if="menu.parentId == 3" label="菜单名称">
          <el-input v-model="menu.name"/>
        </el-form-item>
        <el-form-item label="菜单类型">
          <el-radio-group v-model="menu.type">
            <el-radio label="view">链接</el-radio>
            <el-radio label="click">事件</el-radio>
          </el-radio-group>
        </el-form-item>
        <el-form-item v-if="menu.type == 'view'" label="链接">
          <el-input v-model="menu.url"/>
        </el-form-item>
        <el-form-item v-if="menu.type == 'click'" label="菜单KEY">
          <el-input v-model="menu.meunKey"/>
        </el-form-item>
        <el-form-item label="排序">
          <el-input v-model="menu.sort"/>
        </el-form-item>
      </el-form>
      <span slot="footer" class="dialog-footer">
        <el-button @click="dialogVisible = false" size="small">取 消</el-button>
        <el-button type="primary" @click="saveOrUpdate()" size="small">确 定</el-button>
      </span>
    </el-dialog>
  </div>
</template>
<script>
import menuApi from '@/api/wechat/menu'
//import liveCourseApi from '@/api/live/liveCourse'
import subjectApi from '@/api/vod/subject'
const defaultForm = {
  id: null,
  parentId: 1,
  name: '',
  nameId: null,
  sort: 1,
  type: 'view',
  meunKey: '',
  url: ''
}
export default {

  // 定义数据
  data() {
    return {
      list: [],

      liveCourseList: [],
      subjectList: [],

      dialogVisible: false,
      menu: defaultForm,
      saveBtnDisabled: false
    }
  },

  // 当页面加载时获取数据
  created() {
    this.fetchData()
   // this.fetchLiveCourse()
    this.fetchSubject()
  },

  methods: {
    // 调用api层获取数据库中的数据
    fetchData() {
      console.log('加载列表')
      menuApi.findMenuInfo().then(response => {
        this.list = response.data
        console.log(this.list)
      })
    },

    // fetchLiveCourse() {
    //   liveCourseApi.findLatelyList().then(response => {
    //     this.liveCourseList = response.data
    //     this.liveCourseList.push({'id': 0, 'courseName': '全部列表'})
    //   })
    // },

    fetchSubject() {
      console.log('加载列表')
      subjectApi.getChildList(0).then(response => {
        this.subjectList = response.data
      })
    },

    syncMenu() {
      this.$confirm('你确定上传菜单吗, 是否继续?', '提示', {
        confirmButtonText: '确定',
        cancelButtonText: '取消',
        type: 'warning'
      }).then(() => {
        return menuApi.syncMenu();
      }).then((response) => {
        this.fetchData()
        this.$message.success(response.message)
      }).catch(error => {
        console.log('error', error)
        // 当取消时会进入catch语句:error = 'cancel'
        // 当后端服务抛出异常时:error = 'error'
        if (error === 'cancel') {
          this.$message.info('取消上传')
        }
      })
    },

    // 根据id删除数据
    removeDataById(id) {
      // debugger
      this.$confirm('此操作将永久删除该记录, 是否继续?', '提示', {
        confirmButtonText: '确定',
        cancelButtonText: '取消',
        type: 'warning'
      }).then(() => { // promise
        // 点击确定,远程调用ajax
        return menuApi.removeById(id)
      }).then((response) => {
        this.fetchData(this.page)
        if (response.code) {
          this.$message({
            type: 'success',
            message: '删除成功!'
          })
        }
      }).catch(() => {
        this.$message({
          type: 'info',
          message: '已取消删除'
        })
      })
    },

    // -------------
    add(){
      this.dialogVisible = true
      this.menu = Object.assign({}, defaultForm)
    },

    edit(id) {
      this.dialogVisible = true
      this.fetchDataById(id)
    },

    fetchDataById(id) {
      menuApi.getById(id).then(response => {
        this.menu = response.data
      })
    },

    saveOrUpdate() {
      this.saveBtnDisabled = true // 防止表单重复提交

      if (!this.menu.id) {
        this.saveData()
      } else {
        this.updateData()
      }
    },

    // 新增
    saveData() {
      menuApi.save(this.menu).then(response => {
        if (response.code) {
          this.$message({
            type: 'success',
            message: response.message
          })
          this.dialogVisible = false;
          this.fetchData(this.page)
        }
      })
    },

    // 根据id更新记录
    updateData() {
      menuApi.updateById(this.menu).then(response => {
        if (response.code) {
          this.$message({
            type: 'success',
            message: response.message
          })
          this.dialogVisible = false;
          this.fetchData(this.page)
        }
      })
    },

    // 根据id查询记录
    fetchDataById(id) {
      menuApi.getById(id).then(response => {
        this.menu = response.data
      })
    },

    subjectChanged(item) {
      console.info(item)
      this.menu.name = item.title
      this.menu.url = '/course/' + item.id
    },

    liveCourseChanged(item) {
      console.info(item)
      this.menu.name = item.courseName
      if(item.id == 0) {
        this.menu.url = '/live'
      } else {
        this.menu.url = '/liveInfo/' + item.id
      }

    }
  }
}
</script>
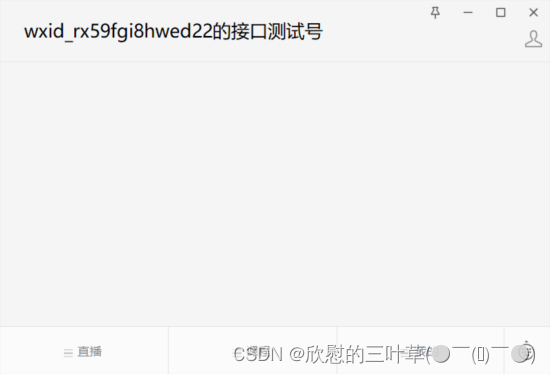
⑧:公众号菜单功能测试
(1)在手机公众号可以看到同步之后的菜单


 380
380

 被折叠的 条评论
为什么被折叠?
被折叠的 条评论
为什么被折叠?
 到【灌水乐园】发言


