


PS:可能写的有点乱,将就看看吧!!!
序言:
1、在实现这个功能的时候首先需要知道怎么进行以太网的开关;
2、怎么获取路由器的MAC地址
3、存储和获取拿到的MAC地址以及判断
正文:
1、我开始在Android12源码上试了很多方法都没有找到关闭以太网连接的方法,只找到了禁止以太网模块的方法,但是禁止了以太网模块就不能获取网线拔出或者网线插入的动作,后来我找到了源码中的ConnectivityService类,在这个类里面实现路由器MAC地址获取,判断,以太网开关等操作,位置:packages/modules/Connectivity/service/src/com/android/server/ConnectivityService.java
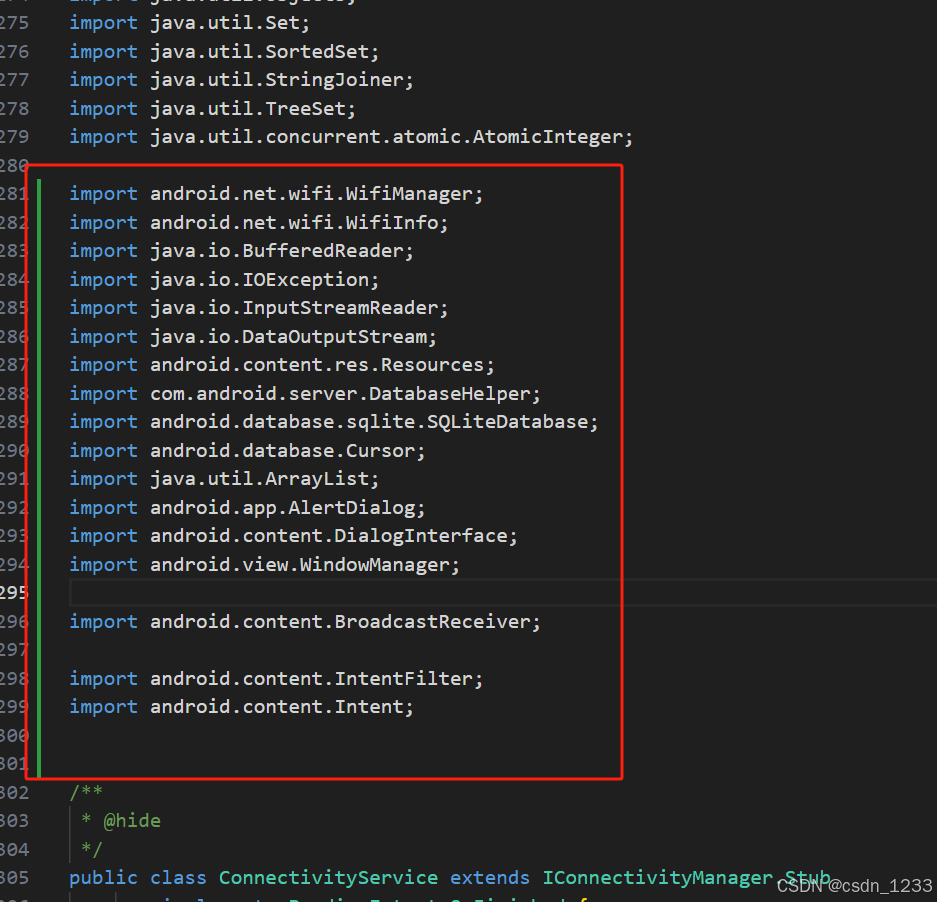
1-1、需要用到的依赖类
import android.net.wifi.WifiManager;
import android.net.wifi.WifiInfo;
import java.io.BufferedReader;
import java.io.IOException;
import java.io.InputStreamReader;
import java.io.DataOutputStream;
import android.content.res.Resources;
import com.android.server.DatabaseHelper;
import android.database.sqlite.SQLiteDatabase;
import android.database.Cursor;
import java.util.ArrayList;
import android.app.AlertDialog;
import android.content.DialogInterface;
import android.view.WindowManager;

import android.content.BroadcastReceiver;

import android.content.IntentFilter;
import android.content.Intent;
1-2、最后我发现在ConnectivityService里面的registerNetworkAgent方法里只要返回null,就可以让以太网连接不上网,同时也不影响以太网模块识别网线的插拔。
1-3、知道了可以关闭以太网连接的方法,就需要在这里拿到路由器的MAC地址,这里采用的是使用命令的方式去拿MAC地址,然后去筛选出来MAC地址。
//获取路由器MAC地址
    public String getRouterMacAddress(String substring) {
        try {
            WifiManager wifiManager = (WifiManager)
            mContext.getSystemService(Context.WIFI_SERVICE);
            WifiInfo connectionInfo = wifiManager.getConnectionInfo();
            String macAddress = connectionInfo.getMacAddress();
            Runtime runtime = Runtime.getRuntime();
            // 使用ip命令获取路由器IP地址
            java.lang.Process process = runtime.exec("ip neigh");
            BufferedReader reader = new BufferedReader(new
            InputStreamReader(process.getInputStream()));
            Log.d("------------------","reader: " + reader);

            String line;
            String routerIp = null;
            while ((line = reader.readLine()) != null) {
                Log.d("-----------------------","-------------------------line != null");
                String[] a = line.split(" ");
                int c = 0;
                Log.d("---------------","a:"+a);
                for(int i = 0 ; i < a.length ; i++){
                    String b = a[i];
                    c++;
                    Log.d("------------------","b"+"["+c+"]" + b);
                }
                if (line.contains(substring)) {
                    Log.d("-----------------------","-------------------------
                    line.contains(substring)");
                    routerIp = line.split(" ")[4];
                    Log.d("------------------","line: " + line);
                    break;
                }

            }


            reader.close();
            Log.d("------------------","Router MAC: " + routerIp);

            // 返回路由器信息
            return routerIp;
        } catch (IOException e) {
            e.printStackTrace();
            return "Error getting router info";
        }
    }
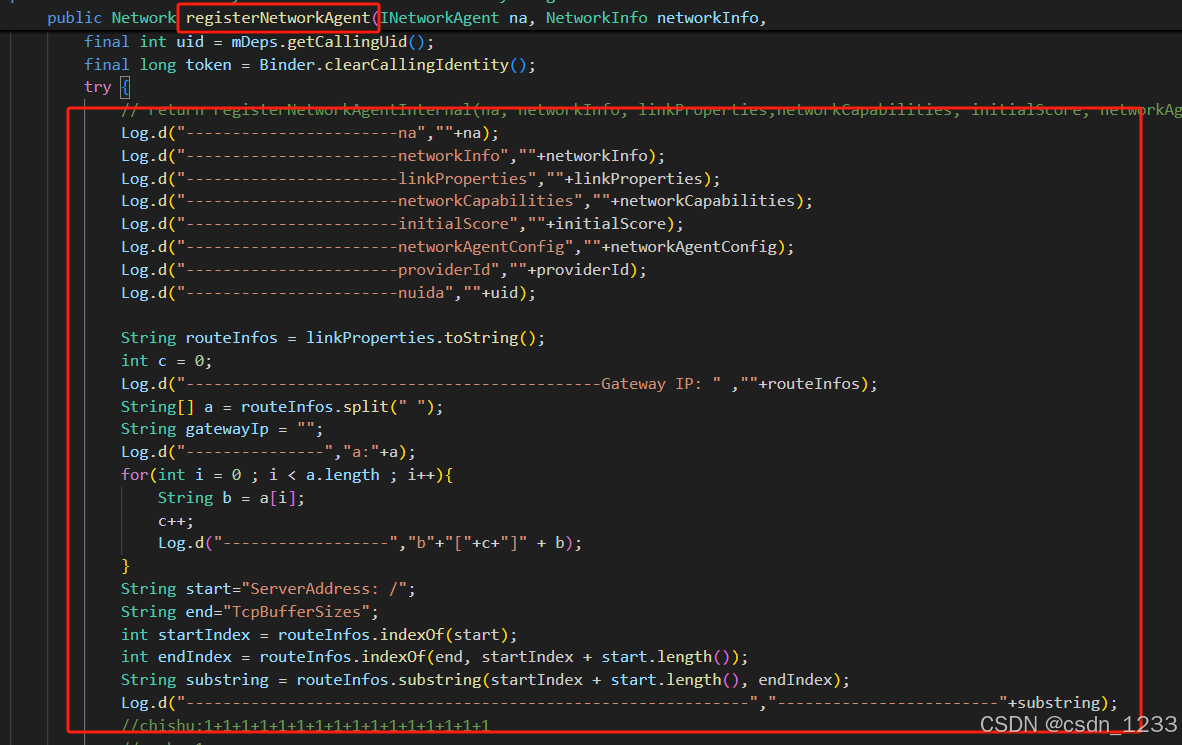
1-4、拿到了MAC 地址之后就可以进行判断了,但是出现了一个新的问题,有的时候命令使用之后会出现两个网关IP和两个MAC地址,这个时候就要我们通过网关IP来判断需要用到的MAC地址,需要的网关我就可以直接在ConnectivityService.java里面registerNetworkAgent方法中的linkProperties里面拿到。
            Log.d("-----------------------na",""+na);
            Log.d("-----------------------networkInfo",""+networkInfo);
            Log.d("-----------------------linkProperties",""+linkProperties);
            Log.d("-----------------------networkCapabilities",""+networkCapabilities);
            Log.d("-----------------------initialScore",""+initialScore);
            Log.d("-----------------------networkAgentConfig",""+networkAgentConfig);
            Log.d("-----------------------providerId",""+providerId);
            Log.d("-----------------------nuida",""+uid);

            String routeInfos = linkProperties.toString();
            int c = 0;
            Log.d("---------------------------------------------Gateway IP: " ,""+routeInfos);
            String[] a = routeInfos.split(" ");
            String gatewayIp = "";
            Log.d("---------------","a:"+a);
            for(int i = 0 ; i < a.length ; i++){
                String b = a[i];
                c++;
                Log.d("------------------","b"+"["+c+"]" + b);
            }
            String start="ServerAddress: /";
            String end="TcpBufferSizes";
            int startIndex = routeInfos.indexOf(start);
            int endIndex = routeInfos.indexOf(end, startIndex + start.length());
            String substring = routeInfos.substring(startIndex + start.length(), endIndex);
            Log.d("-------------------------------------------------------------","------------------------"+substring);
1-5、这个时候就可以根据网关IP拿到自己需要使用的路由器MAC地址。
final String res1 = getRouterMacAddress(substring);
1-6、添加公共使用的字符串等,这些放在
public class ConnectivityService extends IConnectivityManager.Stub implements PendingIntent.OnFinished下。
//网络第一次连接为true 第二次连接为false
boolean isRunning = false;
//路由器MAC地址
String res2 = null;
//数据库数据
List<String> dataList = new ArrayList<>();
//弹窗类定义
private static AlertDialog.Builder builder;
private static AlertDialog alert;
//是否要强制连接
boolean istanchuang = false;
//没什么用,但是不敢删,怕报错
private BroadcastReceiver broadcastreceiver;
1-7、开关以太网的方法知道了,路由器的MAC地址拿到了,可以开始进行判断了,但是在使用的过程中发现只有先连接了网络才能拿到MAC地址,拿到了MAC地址才能进行判断去关网络,而我采用的是去截断registerNetworkAgent方法来关闭网络,因为网络已经连接再截断已经没有意义了,这就没办法走下去了,我采用了笨办法,当我第一次连接的时候我让网络正常连,当我拿到路由器MAC地址的时候我立马重启一下网络,让网络重新去连接,让网络二次连接,这个时候我就可以用我第一次网络连接拿到的MAC地址来做判断,如果这个MAC地址是我黑名单里面的MAC地址我就让registerNetworkAgent方法返回null,如果不是就正常返回配置信息内容。
//开局默认不允许连接黑名单网络
            if(!istanchuang){
                //连接数据库
                DataBase();
                //以太网启动后第一次连接为false
                if(!isRunning){
                    Log.d("-------------------------isRunning",""+isRunning);
                    //延时操作,不然在还没有连接网络的时候拿不到路由mac地址
                    Handler handler = new Handler();
                    Runnable runnable = new Runnable() {
                        @Override
                        public void run() {
                            // 需要执行的代码
                            Log.d("-----------------------substring","---------------------------"+substring);
                            //获取路由mac地址
                            final String res1 = getRouterMacAddress(substring);
                            res2 = res1;
                            Log.d("-----------------------res1",""+res1);
                            if(res2 != null){
                                //网络第一次连接必须要连接上了之后才能获取到路由MAC,所以必须重启以太网再来判断mac地址对不对
                                openEth0();
                                //以太网启动后第二次连接为true
                                isRunning = true;
                            }
                        }
                    };
                    handler.postDelayed(runnable, 100); // 延时100毫秒执行
                    return registerNetworkAgentInternal(na, networkInfo, linkProperties,networkCapabilities, initialScore, networkAgentConfig, providerId, uid);
                }else{
                    //网线插上后第二次连接网络就会走这里,并判断是否拿到mac地址
                    if(res2 != null){
                        Log.d("---------------------------","res2 != null");
                        //循环遍历数据库里的mac地址
                        for(int i = 0; i < dataList.size(); i++){
                            //判断是否包含这个mac地址
                            if(res2.toString().contains(dataList.get(i))){
                                Log.d("---------------------------","res2.toString().equals");
                                //恢复插网线后的第一次连接
                                isRunning = false;
                                //开启弹窗
                                tanchuang();
                                dataList.clear();
                                //不允许连接这mac地址的网络
                                return null;
                            }
                        }
                    }
                    // isRunning = false;
                    // return registerNetworkAgentInternal(na, networkInfo, linkProperties,networkCapabilities, initialScore, networkAgentConfig, providerId, uid);
                }
                Log.d("----------------------------","-------------------------------------");
                isRunning = false;
                return registerNetworkAgentInternal(na, networkInfo, linkProperties,networkCapabilities, initialScore, networkAgentConfig, providerId, uid);
            }else{
                Log.d("===============================","-------------------------------------");
                isRunning = false;
                istanchuang = false;
                return registerNetworkAgentInternal(na, networkInfo, linkProperties,networkCapabilities, initialScore, networkAgentConfig, providerId, uid);
            }
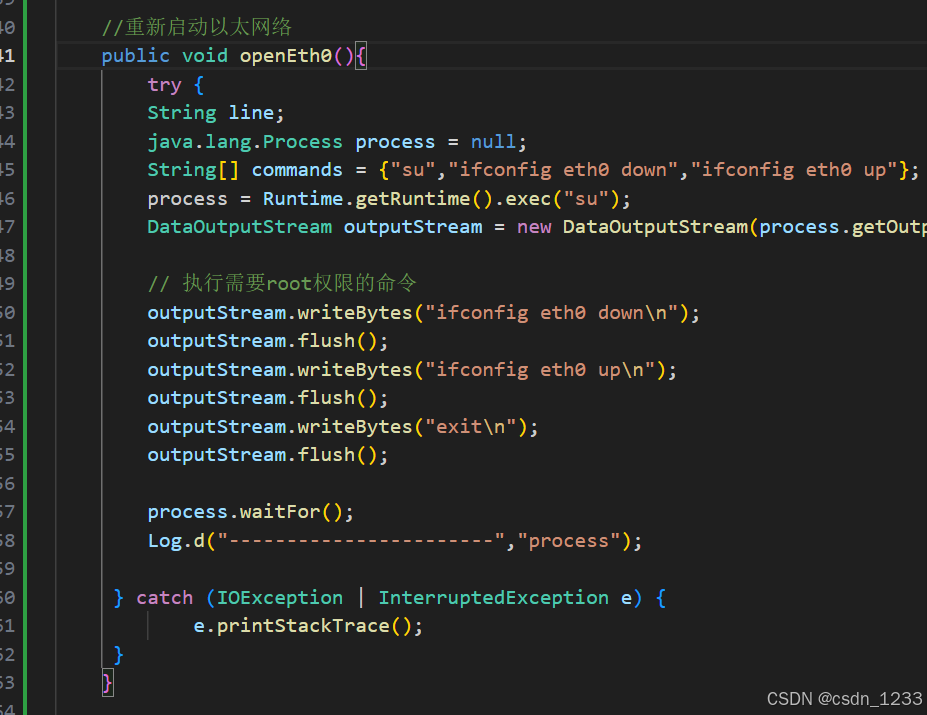
1-8、因为需要重启以太网网络,试了一些方法都感觉不太保险,最后还是采用了命令的方式来重启以太网网络。
//重新启动以太网络
    public void openEth0(){
        try {
        String line;
        java.lang.Process process = null;
        String[] commands = {"su","ifconfig eth0 down","ifconfig eth0 up"};
        process = Runtime.getRuntime().exec("su");
        DataOutputStream outputStream = new DataOutputStream(process.getOutputStream());

        // 执行需要root权限的命令
        outputStream.writeBytes("ifconfig eth0 down\n");
        outputStream.flush();
        outputStream.writeBytes("ifconfig eth0 up\n");
        outputStream.flush();
        outputStream.writeBytes("exit\n");
        outputStream.flush();

        process.waitFor();
        Log.d("-----------------------","process");

     } catch (IOException | InterruptedException e) {
            e.printStackTrace();
     }
    }
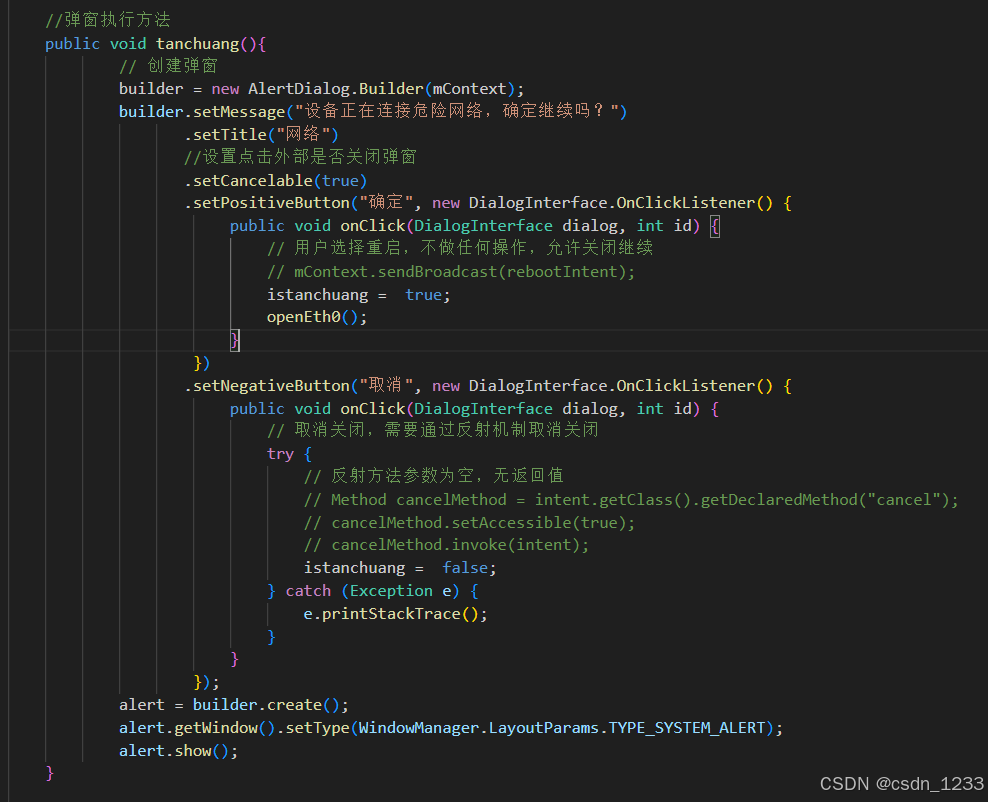
1-9、在使用的过程中万一一些犟种非要使用黑名单里面的网络那也没办法,只有给个弹窗提示,提示给到位,要用我也没办法,如果要连接我就再重启一次以太网网络,这次我就不在判断MAC地址,直接让它连接。
//弹窗执行方法
    public void tanchuang(){
            // 创建弹窗
            builder = new AlertDialog.Builder(mContext);
            builder.setMessage("设备正在连接危险网络,确定继续吗?")
                   .setTitle("网络")
                   //设置点击外部是否关闭弹窗
                   .setCancelable(true)
                   .setPositiveButton("确定", new DialogInterface.OnClickListener() {
                        public void onClick(DialogInterface dialog, int id) {
                            // 用户选择重启,不做任何操作,允许关闭继续
                            // mContext.sendBroadcast(rebootIntent);
                            istanchuang =  true;
                            openEth0();
                        }
                    })
                   .setNegativeButton("取消", new DialogInterface.OnClickListener() {
                        public void onClick(DialogInterface dialog, int id) {
                            // 取消关闭,需要通过反射机制取消关闭
                            try {
                                // 反射方法参数为空,无返回值
                                // Method cancelMethod = intent.getClass().getDeclaredMethod("cancel");
                                // cancelMethod.setAccessible(true);
                                // cancelMethod.invoke(intent);
                                istanchuang =  false;
                            } catch (Exception e) {
                                e.printStackTrace();
                            }
                        }
                    });
            alert = builder.create();
            alert.getWindow().setType(WindowManager.LayoutParams.TYPE_SYSTEM_ALERT);
            alert.show();
    }
1-10、现在就轮到MAC地址的存储了,因为这个是在service里面判断的,设置界面里需要展示黑名单,还需要在设置里进行黑名单的增加和删除,最好的方式就是使用数据库来存储和增删查改。
1-10-1、首先需要创建数据库,我在packages/modules/Connectivity/service/src/com/android/server下创建了一个数据库DatabaseHelper.java
package com.android.server;


import android.content.Context;
import android.database.sqlite.SQLiteDatabase;
import android.database.sqlite.SQLiteOpenHelper;
import android.database.Cursor;
import android.database.DatabaseUtils;
import android.util.Log;

public class DatabaseHelper extends SQLiteOpenHelper {

    // 数据库名称
    private static final String DATABASE_NAME = "/data/mydatabase.db";
    // 数据库版本
    private static final int DATABASE_VERSION = 1;

    public DatabaseHelper(Context context) {
        super(context, DATABASE_NAME, null, DATABASE_VERSION);
    }

    @Override
    public void onCreate(SQLiteDatabase db) {
        if (!isTableExists("mytable",db)) {
            Log.d("++++++++++++++++++++++++","--------------------------------");
            // 创建表的操作
            String CREATE_TABLE = "CREATE TABLE " + "mytable" + "("
                + "ID" + " INTEGER PRIMARY KEY AUTOINCREMENT," + "NAME" + " TEXT"
                + ")";
            db.execSQL(CREATE_TABLE);
        }
        // db.execSQL(CREATE_TABLE);
        // setDefaultLabel(db); // 传递当前的数据库实例
    }

    @Override
    public void onUpgrade(SQLiteDatabase db, int oldVersion, int newVersion) {
        // 更新数据库
        db.execSQL("DROP TABLE IF EXISTS " + "mytable");
        onCreate(db);
    }

    public boolean isTableExists(String tableName,SQLiteDatabase db) {

        Cursor cursor = db.rawQuery("SELECT name FROM sqlite_master WHERE type='table' AND name=?", new String[] {tableName});
        Log.d("++++++++++++++++++++++++++++++++++++++","isTableExists");
        if (cursor != null) {
            if(cursor.getCount() > 0) {
                cursor.close();
                Log.d("++++++++++++++++++++++++++++++++++++++","isTableExists=true");
                return true;
            }
            cursor.close();
        }
        Log.d("++++++++++++++++++++++++++++++++++++++","isTableExists=false");
        return false;
    }
}
1-10-2、在ConnectivityService里面调用数据库吧数据拿出来进行网络连接判断。
//启动数据库
    public void DataBase(){
        DatabaseHelper dbHelper = new DatabaseHelper(mContext);
        // 获取可读数据库
        SQLiteDatabase db = dbHelper.getReadableDatabase();
        // 执行查询
        Cursor cursor = db.query("mytable", null, null, null, null, null, null);
        // 创建一个List来保存数据
        // List<String> dataList = new ArrayList<>();
        // 遍历Cursor
        while (cursor.moveToNext()) {
            int id = cursor.getInt(cursor.getColumnIndexOrThrow("ID"));
            Log.d("-------------------------------ID","---------------------------"+id);
            String name = cursor.getString(cursor.getColumnIndexOrThrow("NAME"));
            Log.d("-------------------------------NAME","---------------------------"+name);
            // 创建数据模型并添加到List
            dataList.add(name);
        }
        Log.d("-------------------------------DataBase","---------------------------"+dataList);
        // for(int i = 0; i<=dataList.size(); i++){
        //     DataBaseName[i]=dataList.get(i);
        // }
        // 关闭Cursor
        cursor.close();

        // 关闭数据库连接
        db.close();
    }
1-2-1、service里面的内容写完了,就该在设置里面写一个可以增加黑名单的界面,首先我先在top_level_settings.xml里面增加了一个选项,位置:packages/apps/Settings/res/xml/top_level_settings.xml
<com.android.settings.widget.HomepagePreference
        android:fragment="com.android.settings.myceshi.MySettingsCeshi"
        android:icon="@drawable/ic_help"
        android:key="top_level_my_setting"
        android:order="40"
        android:title="无标题"
        android:summary="无标题"/>

1-2-2、然后我在packages/apps/Settings/src/com/android/settings下新建了一个文件夹myceshi,在myceshi文件夹里新建了一个MySettingsCeshi.java。
package com.android.settings.myceshi;

import android.app.settings.SettingsEnums;
import android.content.Context;
import android.content.Intent;
import android.content.res.Resources;
import android.graphics.Canvas;
import android.graphics.Color;
import android.graphics.Paint;
import android.graphics.PixelFormat;
import android.graphics.PorterDuff;
import android.graphics.Typeface;
import android.os.Handler;
import android.os.Bundle;
import android.provider.Settings;
import android.util.Log;
import android.view.Gravity;
import android.view.WindowManager;
import android.view.ViewGroup.LayoutParams;
import android.widget.TextView;

import androidx.preference.ListPreference;
import androidx.preference.Preference;
import androidx.preference.SwitchPreference;

import com.android.settings.R;
import com.android.settings.SettingsActivity;
import com.android.settings.dashboard.DashboardFragment;
import com.android.settings.search.BaseSearchIndexProvider;
import com.android.settingslib.search.SearchIndexable;
import android.widget.Toast;
import android.app.Dialog;

@SearchIndexable
public class MySettingsCeshi extends DashboardFragment implements Preference.OnPreferenceClickListener,Preference.OnPreferenceChangeListener{

    private static final String TAG = "mysettingsceshi";
    private Toast mDevHitToast;
    private SwitchPreference mShow;

     @Override
    public void onCreate(Bundle icicle) {
        super.onCreate(icicle);
        mDevHitToast = null;

        mShow = (SwitchPreference) findPreference("myFunction2");
        mShow.setOnPreferenceChangeListener(this);
        Preference mPreference = findPreference("myFunction1");
        mPreference.setOnPreferenceClickListener(this);
    }

    @Override
    public boolean onPreferenceClick(Preference preference) {
        Log.e("onPreferenceClick","走了点击时间2");
        Toast.makeText(getActivity(), "Preference Clicked", Toast.LENGTH_SHORT).show();
        return true;
    }

    @Override
    public boolean onPreferenceChange(Preference preference, Object newValue) {
        boolean show = (boolean)newValue;
        if(show==true){
            Toast.makeText(getActivity(), "已打开", Toast.LENGTH_SHORT).show();
        }else{
            Toast.makeText(getActivity(), "已关闭", Toast.LENGTH_SHORT).show();
        }
         return true;
    }

    @Override
    protected String getLogTag() {
        return TAG;
    }

    @Override
    protected int getPreferenceScreenResId() {
        return R.xml.my_settings_ceshi;
    }

    @Override
    public int getMetricsCategory() {
        return 5;
    }

    /**
     * For Search.
     */
    public static final BaseSearchIndexProvider SEARCH_INDEX_DATA_PROVIDER =
            new BaseSearchIndexProvider(R.xml.my_settings_ceshi);

}
1-2-3、还需要建一个给MySettingsCeshi.java使用的xml文件视图,在packages/apps/Settings/res/xml下建立my_settings_ceshi.xml文件。
<?xml version="1.0" encoding="utf-8"?>
<PreferenceScreen
    xmlns:android="http://schemas.android.com/apk/res/android"
    xmlns:settings="http://schemas.android.com/apk/res-auto"
    android:title="展示内容">

        <Preference
            android:key="myFunction1"
            android:order="44"
            android:title="功能其一"
            android:summary="功能其一"/>

        <SwitchPreference
            android:key="myFunction2"
            android:order="45"
            android:title="功能其二"
            android:summary="功能其二"/>

        <com.android.settings.myceshi.PrivateDialogPreference
            android:key="myFunction3"
            android:order="46"
            android:title="功能其三"
            android:summary="功能其三"
            android:dialogLayout="@layout/my_dialog"/>

        <com.android.settings.myceshi.PrivateDialogPreference2
            android:key="myFunction4"
            android:order="47"
            android:title="功能其四"
            android:summary="功能其四"
            android:dialogLayout="@layout/my_dialog2"/>

        <com.android.settings.myceshi.PrivateDialogPreference3
            android:key="myFunction5"
            android:order="48"
            android:title="网络黑名单"
            android:summary="以太网络控制"
            android:dialogLayout="@layout/my_dialog3"/>

    </PreferenceScreen>
1-2-4、因为service里面建的数据库设置里面没办法直接调用,所以需要再这里面再建立一个数据库,只需要调用同一个xxx.db文件就行,所以我在packages/apps/Settings/src/com/android/settings/myceshi下新建了一个数据库DatabaseHelper.java
package com.android.server;


import android.content.Context;
import android.database.sqlite.SQLiteDatabase;
import android.database.sqlite.SQLiteOpenHelper;
import android.database.Cursor;
import android.database.DatabaseUtils;
import android.util.Log;

public class DatabaseHelper extends SQLiteOpenHelper {

    // 数据库名称
    private static final String DATABASE_NAME = "/data/mydatabase.db";
    // 数据库版本
    private static final int DATABASE_VERSION = 1;

    public DatabaseHelper(Context context) {
        super(context, DATABASE_NAME, null, DATABASE_VERSION);
    }

    @Override
    public void onCreate(SQLiteDatabase db) {
        if (!isTableExists("mytable",db)) {
            Log.d("++++++++++++++++++++++++","--------------------------------");
            // 创建表的操作
            String CREATE_TABLE = "CREATE TABLE " + "mytable" + "("
                + "ID" + " INTEGER PRIMARY KEY AUTOINCREMENT," + "NAME" + " TEXT"
                + ")";
            db.execSQL(CREATE_TABLE);
            db.execSQL("INSERT INTO " + "mytable" + " VALUES(1, 'a0:df:15:50:86:68')");
            db.execSQL("INSERT INTO " + "mytable" + " VALUES(2, 'a2:dg:15:56:86:68')");
        }
        // db.execSQL(CREATE_TABLE);
        // setDefaultLabel(db); // 传递当前的数据库实例
    }

    @Override
    public void onUpgrade(SQLiteDatabase db, int oldVersion, int newVersion) {
        // 更新数据库
        db.execSQL("DROP TABLE IF EXISTS " + "mytable");
        onCreate(db);
    }

    public boolean isTableExists(String tableName,SQLiteDatabase db) {

        Cursor cursor = db.rawQuery("SELECT name FROM sqlite_master WHERE type='table' AND name=?", new String[] {tableName});
        Log.d("++++++++++++++++++++++++++++++++++++++","isTableExists");
        if (cursor != null) {
            if(cursor.getCount() > 0) {
                cursor.close();
                Log.d("++++++++++++++++++++++++++++++++++++++","isTableExists=true");
                return true;
            }
            cursor.close();
        }
        Log.d("++++++++++++++++++++++++++++++++++++++","isTableExists=false");
        return false;
    }
}
1-2-5、因为要展示数据库里数据,数据库里面的数据属于多条数据,并要进行界面刷新来实时展示,所以要用到Adapter类,所以我建了一个自己使用的Adapter类,在packages/apps/Settings/src/com/android/settings/myceshi下新建了一个MyAdapter.java
package com.android.settings.myceshi;

import android.app.settings.SettingsEnums;
import android.content.ActivityNotFoundException;
import android.content.ContentResolver;
import android.content.Context;
import android.content.DialogInterface;
import android.content.Intent;
import android.net.ConnectivitySettingsManager;
import android.os.UserHandle;
import android.os.UserManager;
import android.provider.Settings;
import android.text.Editable;
import android.text.TextWatcher;
import android.text.method.LinkMovementMethod;
import android.util.AttributeSet;
import android.util.Log;
import android.view.View;
import android.widget.Button;
import android.widget.EditText;
import android.widget.RadioButton;
import android.widget.RadioGroup;

import android.widget.CheckBox;

import android.widget.TextView;

import androidx.annotation.VisibleForTesting;
import androidx.appcompat.app.AlertDialog;
import androidx.preference.PreferenceViewHolder;

import com.android.settings.R;
import com.android.settings.overlay.FeatureFactory;
import com.android.settings.utils.AnnotationSpan;
import com.android.settingslib.CustomDialogPreferenceCompat;
import com.android.settingslib.HelpUtils;
import com.android.settingslib.RestrictedLockUtils;
import com.android.settingslib.RestrictedLockUtilsInternal;

import com.google.common.net.InternetDomainName;

import java.util.HashMap;
import java.util.Map;
import android.widget.Toast;

import android.widget.CompoundButton;

import java.util.List;
import androidx.recyclerview.widget.RecyclerView;

import android.view.ViewGroup;
import android.view.LayoutInflater;
import android.view.View;
import android.widget.TextView;
import java.util.ArrayList;


public class MyAdapter extends RecyclerView.Adapter<MyAdapter.MyViewHolder> {


    private String[] mDataset;

    // 提供一个构造器来传入数据集
    public MyAdapter(String[] myDataset) {
        mDataset = myDataset;
    }

    // 创建新的ViewHolder(在布局文件中定义的视图)
    @Override
    public MyViewHolder onCreateViewHolder(ViewGroup parent, int viewType) {
        View view = LayoutInflater.from(parent.getContext())
                .inflate(R.layout.my_text_view, parent, false);

        return new MyViewHolder(view);
    }

    // 绑定数据到ViewHolder
    @Override
    public void onBindViewHolder(MyViewHolder holder, int position) {
        holder.textView.setText(mDataset[position]);
    }

    // 返回数据的数量
    @Override
    public int getItemCount() {
        return mDataset.length;
    }

    // 自定义的ViewHolder,持有每个Item的所有界面元素
    public static class MyViewHolder extends RecyclerView.ViewHolder {
        public TextView textView;

        public MyViewHolder(View itemView) {
            super(itemView);
            textView = itemView.findViewById(R.id.text_view);
        }
    }
}
1-2-6、根据我前面写的my_settings_ceshi.xml说,功能其一就是一个点击事件,功能其二是一个Switch开关,功能其三是一个单选按钮,需要在packages/apps/Settings/src/com/android/settings/myceshi下新建一个PrivateDialogPreference.java来实现
package com.android.settings.myceshi;

import android.app.settings.SettingsEnums;
import android.content.ActivityNotFoundException;
import android.content.ContentResolver;
import android.content.Context;
import android.content.DialogInterface;
import android.content.Intent;
import android.net.ConnectivitySettingsManager;
import android.os.UserHandle;
import android.os.UserManager;
import android.provider.Settings;
import android.text.Editable;
import android.text.TextWatcher;
import android.text.method.LinkMovementMethod;
import android.util.AttributeSet;
import android.util.Log;
import android.view.View;
import android.widget.Button;
import android.widget.EditText;
import android.widget.RadioButton;
import android.widget.RadioGroup;
import android.widget.TextView;

import androidx.annotation.VisibleForTesting;
import androidx.appcompat.app.AlertDialog;
import androidx.preference.PreferenceViewHolder;

import com.android.settings.R;
import com.android.settings.overlay.FeatureFactory;
import com.android.settings.utils.AnnotationSpan;
import com.android.settingslib.CustomDialogPreferenceCompat;
import com.android.settingslib.HelpUtils;
import com.android.settingslib.RestrictedLockUtils;
import com.android.settingslib.RestrictedLockUtilsInternal;

import com.google.common.net.InternetDomainName;

import java.util.HashMap;
import java.util.Map;
import android.widget.Toast;

public class PrivateDialogPreference extends CustomDialogPreferenceCompat implements RadioGroup.OnCheckedChangeListener,View.OnClickListener{

    private EditText mEditText;
    private RadioGroup mRadioGroup;
    private Button Button1,Button2;


    public PrivateDialogPreference(Context context, AttributeSet attrs) {
        super(context, attrs);
        // 初始化设置
    }

     @Override
    protected void onBindDialogView(View view) {
        mEditText = view.findViewById(R.id.private_dns_mode_provider_hostname);
        mRadioGroup = view.findViewById(R.id.private_dns_radio_group);
        mRadioGroup.setOnCheckedChangeListener(this);

        final RadioButton offRadioButton = view.findViewById(R.id.private_dns_mode_off);
        offRadioButton.setText("单选按钮一");

        final RadioButton opportunisticRadioButton = view.findViewById(R.id.private_dns_mode_opportunistic);
        opportunisticRadioButton.setText("单选按钮二");

        final RadioButton providerRadioButton = view.findViewById(R.id.private_dns_mode_provider);
        providerRadioButton.setText("单选按钮三");

        final TextView helpTextView = view.findViewById(R.id.private_dns_help_info);
        helpTextView.setMovementMethod(LinkMovementMethod.getInstance());

        Button1 = view.findViewById(R.id.button1);
        Button1.setOnClickListener(this);

        Button2 = view.findViewById(R.id.button2);
        Button2.setOnClickListener(this);
    }

	public void onClick(View v) {
        int viewId = v.getId();
        if (viewId == R.id.button1) {
            Toast.makeText(getContext(), "点击了取消", Toast.LENGTH_SHORT).show();
            // getContext().dismiss();
        } else if (viewId == R.id.button2) {
            Toast.makeText(getContext(), mEditText.getText().toString(), Toast.LENGTH_SHORT).show();

        }
    }

    @Override
    public void onCheckedChanged(RadioGroup group, int checkedId) {
        if (checkedId == R.id.private_dns_mode_off) {
            Toast.makeText(getContext(), "选择了单选按钮一", Toast.LENGTH_SHORT).show();
        } else if (checkedId == R.id.private_dns_mode_opportunistic) {
            Toast.makeText(getContext(), "选择了单选按钮二", Toast.LENGTH_SHORT).show();
        } else if (checkedId == R.id.private_dns_mode_provider) {
            Toast.makeText(getContext(), "选择了单选按钮三", Toast.LENGTH_SHORT).show();
        }else if (checkedId == R.id.button1) {
            Toast.makeText(getContext(), "点击了取消", Toast.LENGTH_SHORT).show();
            // mMode = PRIVATE_DNS_MODE_PROVIDER_HOSTNAME;
        }else if (checkedId == R.id.button2) {
            Toast.makeText(getContext(), "点击了确认", Toast.LENGTH_SHORT).show();
            // if(mEditText.getText().toString() == ""){
            //     Toast.makeText(getContext(), "无内容", Toast.LENGTH_SHORT).show();
            // }else{
            //     Toast.makeText(getContext(),mEditText.getText().toString(), Toast.LENGTH_SHORT).show();
            // }
        }
    }
}
1-2-7、 PrivateDialogPreference.java布局文件需要在packages/apps/Settings/res/layout下新建一个my_dialog.xml。
<?xml version="1.0" encoding="utf-8"?>
<ScrollView
    xmlns:android="http://schemas.android.com/apk/res/android"
    android:layout_width="match_parent"
    android:layout_height="wrap_content">

    <LinearLayout
        android:layout_width="match_parent"
        android:layout_height="wrap_content"
        android:orientation="vertical"
        android:padding="8dp">

        <RadioGroup
            android:id="@+id/private_dns_radio_group"
            android:layout_width="match_parent"
            android:layout_height="wrap_content"
            android:layout_marginStart="@dimen/developer_option_dialog_margin_start">

            <include
                android:id="@+id/private_dns_mode_off"
                layout="@layout/preference_widget_dialog_radiobutton"/>

            <include
                android:id="@+id/private_dns_mode_opportunistic"
                layout="@layout/preference_widget_dialog_radiobutton"/>

            <include
                android:id="@+id/private_dns_mode_provider"
                layout="@layout/preference_widget_dialog_radiobutton"/>

            <EditText
                android:id="@+id/private_dns_mode_provider_hostname"
                android:hint="随便输入什么内容,仅测试使用"
                style="@android:style/Widget.CompoundButton.RadioButton"
                android:imeOptions="actionDone"
                android:inputType="textFilter|textUri"
                android:layout_width="match_parent"
                android:layout_height="wrap_content"
                android:layout_marginStart="3dp"
                android:layout_marginEnd="8dp"
                android:minHeight="@dimen/developer_option_dialog_min_height"/>
        </RadioGroup>

        <LinearLayout
            android:layout_width="match_parent"
            android:layout_height="wrap_content"
            android:orientation="horizontal"
            android:padding="8dp">
            <Button
                android:id="@+id/button1"
                android:layout_width="wrap_content"
                android:layout_height="wrap_content"
                android:text="取消"/>
            <Button
                android:id="@+id/button2"
                android:layout_width="wrap_content"
                android:layout_height="wrap_content"
                android:text="确认"/>
        </LinearLayout>

        <include
            android:id="@+id/private_dns_help_info"
            layout="@layout/preference_widget_dialog_summary"/>
    </LinearLayout>

</ScrollView>
1-2-8、那么功能其四就是一个多选弹窗,需要在packages/apps/Settings/src/com/android/settings/myceshi下新建一个PrivateDialogPreference2.java
package com.android.settings.myceshi;

import android.app.settings.SettingsEnums;
import android.content.ActivityNotFoundException;
import android.content.ContentResolver;
import android.content.Context;
import android.content.DialogInterface;
import android.content.Intent;
import android.net.ConnectivitySettingsManager;
import android.os.UserHandle;
import android.os.UserManager;
import android.provider.Settings;
import android.text.Editable;
import android.text.TextWatcher;
import android.text.method.LinkMovementMethod;
import android.util.AttributeSet;
import android.util.Log;
import android.view.View;
import android.widget.Button;
import android.widget.EditText;
import android.widget.RadioButton;
import android.widget.RadioGroup;

import android.widget.CheckBox;

import android.widget.TextView;

import androidx.annotation.VisibleForTesting;
import androidx.appcompat.app.AlertDialog;
import androidx.preference.PreferenceViewHolder;

import com.android.settings.R;
import com.android.settings.overlay.FeatureFactory;
import com.android.settings.utils.AnnotationSpan;
import com.android.settingslib.CustomDialogPreferenceCompat;
import com.android.settingslib.HelpUtils;
import com.android.settingslib.RestrictedLockUtils;
import com.android.settingslib.RestrictedLockUtilsInternal;

import com.google.common.net.InternetDomainName;

import java.util.HashMap;
import java.util.Map;
import android.widget.Toast;

import android.widget.CompoundButton;

public class PrivateDialogPreference2 extends CustomDialogPreferenceCompat implements CheckBox.OnCheckedChangeListener,View.OnClickListener{

    private EditText mEditText;
    private CheckBox offCheckBox,opportunisticCheckBox,providerCheckBox;
    private Button Button1,Button2;

    public PrivateDialogPreference2(Context context, AttributeSet attrs) {
        super(context, attrs);
        // 初始化设置
    }

    @Override
    protected void onBindDialogView(View view) {
        mEditText = view.findViewById(R.id.private_mode_provider_hostname);

        offCheckBox = view.findViewById(R.id.private_mode_off);
        offCheckBox.setOnCheckedChangeListener(this);
        offCheckBox.setText("复选按钮一");

        opportunisticCheckBox = view.findViewById(R.id.private_mode_opportunistic);
        opportunisticCheckBox.setOnCheckedChangeListener(this);
        opportunisticCheckBox.setText("复选按钮二");

        providerCheckBox = view.findViewById(R.id.private_mode_provider);
        providerCheckBox.setOnCheckedChangeListener(this);
        providerCheckBox.setText("复选按钮三");

        Button1 = view.findViewById(R.id.button1_check);
        Button1.setOnClickListener(this);

        Button2 = view.findViewById(R.id.button2_check);
        Button2.setOnClickListener(this);
    }

    @Override
	public void onClick(View v) {
        int viewId = v.getId();
        if (viewId == R.id.button1_check) {
            Toast.makeText(getContext(), "点击了取消", Toast.LENGTH_SHORT).show();
            // getContext().dismiss();
        } else if (viewId == R.id.button2_check) {
            Toast.makeText(getContext(), mEditText.getText().toString(), Toast.LENGTH_SHORT).show();
        }
    }

    @Override
    public void onCheckedChanged(CompoundButton checkedId, boolean isChecked){
        if (checkedId.getId() == R.id.private_mode_off) {
            if(isChecked){
                Toast.makeText(getContext(), "选择了复选框一", Toast.LENGTH_SHORT).show();
            }else{
                Toast.makeText(getContext(), "取消选择了复选框一", Toast.LENGTH_SHORT).show();
            }
        }
        if (checkedId.getId() == R.id.private_mode_opportunistic) {
            if(isChecked){
                Toast.makeText(getContext(), "选择了复选框二", Toast.LENGTH_SHORT).show();
            }else{
                Toast.makeText(getContext(), "取消选择了复选框二", Toast.LENGTH_SHORT).show();
            }
        }
        if (checkedId.getId() == R.id.private_mode_provider) {
            if(isChecked){
                Toast.makeText(getContext(), "选择了复选框三", Toast.LENGTH_SHORT).show();
            }else{
                Toast.makeText(getContext(), "取消选择了复选框三", Toast.LENGTH_SHORT).show();
            }
        }
    }
}
1-2-9、 PrivateDialogPreference2.java布局文件需要在packages/apps/Settings/res/layout下新建一个my_dialog2.xml。
<?xml version="1.0" encoding="utf-8"?>
<ScrollView
    xmlns:android="http://schemas.android.com/apk/res/android"
    android:layout_width="match_parent"
    android:layout_height="wrap_content">

    <LinearLayout
        android:layout_width="match_parent"
        android:layout_height="wrap_content"
        android:orientation="vertical"
        android:padding="8dp">

        <LinearLayout
            android:id="@+id/private_dns_radio_group"
            android:layout_width="match_parent"
            android:layout_height="wrap_content"
            android:layout_marginStart="@dimen/developer_option_dialog_margin_start">

            <CheckBox
                android:id="@+id/private_mode_off"
                android:layout_width="wrap_content"
                android:layout_height="wrap_content"
                android:minHeight="@dimen/developer_option_dialog_min_height"/>

            <CheckBox
                android:id="@+id/private_mode_opportunistic"
                android:layout_width="wrap_content"
                android:layout_height="wrap_content"
                android:minHeight="@dimen/developer_option_dialog_min_height"/>

            <CheckBox
                android:id="@+id/private_mode_provider"
                android:layout_width="wrap_content"
                android:layout_height="wrap_content"
                android:minHeight="@dimen/developer_option_dialog_min_height"/>
        </LinearLayout>

        <EditText
            android:id="@+id/private_mode_provider_hostname"
            android:hint="随便输入什么内容,仅测试使用"
            style="@android:style/Widget.CompoundButton.RadioButton"
            android:imeOptions="actionDone"
            android:inputType="textFilter|textUri"
            android:layout_width="match_parent"
            android:layout_height="wrap_content"
            android:layout_marginStart="3dp"
            android:layout_marginEnd="8dp"
            android:minHeight="@dimen/developer_option_dialog_min_height"/>


        <LinearLayout
            android:layout_width="match_parent"
            android:layout_height="wrap_content"
            android:orientation="horizontal"
            android:padding="8dp">
            <Button
                android:id="@+id/button1_check"
                android:layout_width="wrap_content"
                android:layout_height="wrap_content"
                android:text="取消"/>
            <Button
                android:id="@+id/button2_check"
                android:layout_width="wrap_content"
                android:layout_height="wrap_content"
                android:text="确认"/>
        </LinearLayout>

        <include
            android:id="@+id/private_dns_help_info"
            layout="@layout/preference_widget_dialog_summary"/>
    </LinearLayout>

</ScrollView>
1-2-10、同理那么网络黑名单就需要在packages/apps/Settings/src/com/android/settings/myceshi下新建一个PrivateDialogPreference3.java
package com.android.settings.myceshi;

import android.app.settings.SettingsEnums;
import android.content.ActivityNotFoundException;
import android.content.ContentResolver;
import android.content.Context;
import android.content.DialogInterface;
import android.content.Intent;
import android.net.ConnectivitySettingsManager;
import android.os.UserHandle;
import android.os.UserManager;
import android.provider.Settings;
import android.text.Editable;
import android.text.TextWatcher;
import android.text.method.LinkMovementMethod;
import android.util.AttributeSet;
import android.util.Log;
import android.view.View;
import android.widget.Button;
import android.widget.EditText;
import android.widget.RadioButton;
import android.widget.RadioGroup;

import android.widget.CheckBox;

import android.widget.TextView;

import androidx.annotation.VisibleForTesting;
import androidx.appcompat.app.AlertDialog;
import androidx.preference.PreferenceViewHolder;

import com.android.settings.R;
import com.android.settings.overlay.FeatureFactory;
import com.android.settings.utils.AnnotationSpan;
import com.android.settingslib.CustomDialogPreferenceCompat;
import com.android.settingslib.HelpUtils;
import com.android.settingslib.RestrictedLockUtils;
import com.android.settingslib.RestrictedLockUtilsInternal;

import com.google.common.net.InternetDomainName;

import java.util.HashMap;
import java.util.Map;
import android.widget.Toast;

import android.widget.CompoundButton;

import java.util.List;
import androidx.recyclerview.widget.RecyclerView;

import android.view.ViewGroup;
import android.view.LayoutInflater;
import android.view.View;
import android.widget.TextView;
import java.util.ArrayList;
import androidx.recyclerview.widget.LinearLayoutManager;

import android.database.sqlite.SQLiteDatabase;
import android.database.Cursor;
import android.net.ConnectivityManager;
import com.android.server.DatabaseHelper;
import android.content.ContentValues;

public class PrivateDialogPreference3 extends CustomDialogPreferenceCompat implements View.OnClickListener{

    List<String> dataList = new ArrayList<>();
    RecyclerView recyclerView;
    MyAdapter adapter;
    private String[] mDataset;
    private EditText mEditText;
    private Button Button1,Button2,Button3;

    public PrivateDialogPreference3(Context context, AttributeSet attrs) {
        super(context, attrs);
        // 初始化设置
    }

    @Override
    protected void onBindDialogView(View view) {
        mEditText = view.findViewById(R.id.private_dns_mode_provider_hostname);

        Button1 = view.findViewById(R.id.button1);
        Button1.setOnClickListener(this);

        Button2 = view.findViewById(R.id.button2);
        Button2.setOnClickListener(this);

        Button3 = view.findViewById(R.id.button3);
        Button3.setOnClickListener(this);

        recyclerView = view.findViewById(R.id.my_recycler_view);
        recyclerView.setLayoutManager(new LinearLayoutManager(getContext()));
        DataBase();

    }

    @Override
    public void onClick(View v) {
        int viewId = v.getId();
        if (viewId == R.id.button1) {
            Toast.makeText(getContext(), "点击了取消", Toast.LENGTH_SHORT).show();
            // getContext().dismiss();
        } else if (viewId == R.id.button2) {
            if(!mEditText.getText().toString().isEmpty()){
                int valdataunber = mEditText.getText().toString().length();
                if(valdataunber == 17){
                    if(countA(mEditText.getText().toString()) == 5){
                        Log.d("----------------------------------------","!!!!!!!!valdataunber");
                        if(isDataExists(mEditText.getText().toString())) {
                            // 数据存在
                            Log.d("----------------------------------------","!!!!!!!!cursor.moveToFirst()");
                            Toast.makeText(getContext(), "数据存在", Toast.LENGTH_SHORT).show();
                        } else {
                            // 数据不存在
                            //写入数据库
                            witeData(mEditText.getText().toString());
                            DataBase();
                            Log.d("----------------------------------------","!!!!!!!!cursor.moveToFirst()!");
                        }
                    }else{
                        Toast.makeText(getContext(), "格式不对", Toast.LENGTH_SHORT).show();
                        Log.d("----------------------------------------","!!!!!!!!countA"+countA(mEditText.getText().toString()));
                    }
                }else{
                    Toast.makeText(getContext(), ""+valdataunber, Toast.LENGTH_SHORT).show();
                    Log.d("----------------------------------------",""+valdataunber);
                }
                Log.d("----------------------------------------","!!!!!!!!mEditText.getText().toString().isEmpty()");

            }else{
                Toast.makeText(getContext(), "数据为空", Toast.LENGTH_SHORT).show();
                Log.d("----------------------------------------","mEditText.getText().toString().isEmpty()");
            }

            // ConnectivityManager cm = (ConnectivityManager) getSystemService(Context.CONNECTIVITY_SERVICE);
            // cm.DataBase();
        }else if (viewId == R.id.button3){
            if(!mEditText.getText().toString().isEmpty()){
                int valdataunber = mEditText.getText().toString().length();
                if(valdataunber == 17){
                    if(countA(mEditText.getText().toString()) == 5){
                        Log.d("----------------------------------------","!!!!!!!!valdataunber");
                        if(isDataExists(mEditText.getText().toString())) {
                            // 数据存在
                            delData(mEditText.getText().toString());
                            Log.d("----------------------------------------","!!!!!!!!cursor.moveToFirst()");
                            DataBase();
                        } else {
                            // 数据不存在
                            Toast.makeText(getContext(), "数据不存在", Toast.LENGTH_SHORT).show();
                            Log.d("----------------------------------------","!!!!!!!!cursor.moveToFirst()!");
                        }

                    }else{
                        Toast.makeText(getContext(), "格式不对", Toast.LENGTH_SHORT).show();
                        Log.d("----------------------------------------","!!!!!!!!countA"+countA(mEditText.getText().toString()));
                    }
                }else{
                    Toast.makeText(getContext(), ""+valdataunber, Toast.LENGTH_SHORT).show();
                    Log.d("----------------------------------------",""+valdataunber);
                }


                Log.d("----------------------------------------","!!!!!!!!mEditText.getText().toString().isEmpty()");

            }else{
                Toast.makeText(getContext(), "数据为空", Toast.LENGTH_SHORT).show();
                Log.d("----------------------------------------","mEditText.getText().toString().isEmpty()");
            }
        }
    }


    //启动数据库
    public void DataBase(){
        DatabaseHelper dbHelper = new DatabaseHelper(getContext());
        // 获取可读数据库
        SQLiteDatabase db = dbHelper.getReadableDatabase();
        // 执行查询
        Cursor cursor = db.query("mytable", null, null, null, null, null, null);
        // 创建一个List来保存数据
        // List<String> dataList = new ArrayList<>();
        // 遍历Cursor
        while (cursor.moveToNext()) {
            int id = cursor.getInt(cursor.getColumnIndexOrThrow("ID"));
            Log.d("-------------------------------ID","---------------------------"+id);
            String name = cursor.getString(cursor.getColumnIndexOrThrow("NAME"));
            Log.d("-------------------------------NAME","---------------------------"+name);
            // 创建数据模型并添加到List
            dataList.add(name);
        }
        Log.d("-------------------------------DataBase","---------------------------"+dataList);
        mDataset = dataList.toArray(new String[0]);
        adapter = new MyAdapter(mDataset);
        recyclerView.setAdapter(adapter);
        dataList.clear();
        // for(int i = 0; i<=dataList.size(); i++){
        //     DataBaseName[i]=dataList.get(i);
        // }
        // 关闭Cursor
        cursor.close();

        // 关闭数据库连接
        db.close();
        //刷新适配器
        adapter.notifyDataSetChanged();
    }

    //数据库添加数据
    public void witeData(String data){
        DatabaseHelper dbHelper = new DatabaseHelper(getContext());
        SQLiteDatabase db = dbHelper.getWritableDatabase();
        ContentValues values = new ContentValues();
        values.put("NAME", data); // 将column1替换为你的列名,value1替换为你想插入的值
        db.insert("mytable", null, values);
        db.close();
    }

    public void delData(String data){
        DatabaseHelper dbHelper = new DatabaseHelper(getContext());
        SQLiteDatabase db = dbHelper.getWritableDatabase();
        db.delete("mytable", "NAME = ?", new String[]{data});
        db.close();
    }

    //判断数据库里是否存在已有的数据
    public boolean isDataExists(String name){
        DatabaseHelper dbHelper = new DatabaseHelper(getContext());
        SQLiteDatabase db = dbHelper.getReadableDatabase();
        Cursor cursor = db.query("mytable", null, "NAME = ?", new String[]{name}, null, null, null);
        int cursorCount = cursor.getCount();
        Log.d("++++++++++++++++++++++++++++",""+cursorCount);
        if(cursor.moveToFirst()) {
            // 数据存在
            cursor.close();
            db.close();
            return true;
        } else {
            // 数据不存在
            cursor.close();
            db.close();
            return false;
        }
    }

    //判断字符串里包含的 ":" 的个数
    public int countA(String str) {
    int count = 0;
    for (int i = 0; i < str.length(); i++) {
        if (str.charAt(i) == ':') {
            count++;
        }
    }
    return count;
}

}
1-2-11、 PrivateDialogPreference3.java布局文件需要在packages/apps/Settings/res/layout下新建一个my_dialog3.xml。
<?xml version="1.0" encoding="utf-8"?>
<ScrollView
    xmlns:android="http://schemas.android.com/apk/res/android"
    android:layout_width="match_parent"
    android:layout_height="wrap_content">

    <LinearLayout
        android:layout_width="match_parent"
        android:layout_height="wrap_content"
        android:orientation="vertical"
        android:padding="8dp">

        <androidx.recyclerview.widget.RecyclerView
            android:id="@+id/my_recycler_view"
            android:layout_width="match_parent"
            android:layout_height="wrap_content">
        </androidx.recyclerview.widget.RecyclerView>

        <EditText
                android:id="@+id/private_dns_mode_provider_hostname"
                android:hint="随便输入什么内容,仅测试使用"
                style="@android:style/Widget.CompoundButton.RadioButton"
                android:imeOptions="actionDone"
                android:inputType="textFilter|textUri"
                android:layout_width="match_parent"
                android:layout_height="wrap_content"
                android:layout_marginStart="3dp"
                android:layout_marginEnd="8dp"
                android:minHeight="@dimen/developer_option_dialog_min_height"/>

        <LinearLayout
            android:layout_width="match_parent"
            android:layout_height="wrap_content"
            android:orientation="horizontal"
            android:padding="8dp">
            <Button
                android:id="@+id/button1"
                android:layout_width="wrap_content"
                android:layout_height="wrap_content"
                android:text="取消"/>
            <Button
                android:id="@+id/button2"
                android:layout_width="wrap_content"
                android:layout_height="wrap_content"
                android:text="确认"/>
            <Button
                android:id="@+id/button3"
                android:layout_width="wrap_content"
                android:layout_height="wrap_content"
                android:text="删除"/>
        </LinearLayout>

        <include
            android:id="@+id/private_dns_help_info"
            layout="@layout/preference_widget_dialog_summary"/>
    </LinearLayout>

</ScrollView>
最后大致流程就是这样了
我最后复制一份ConnectivityService.java里面修改增加的代码以作备份
import android.net.wifi.WifiManager;
import android.net.wifi.WifiInfo;
import java.io.BufferedReader;
import java.io.IOException;
import java.io.InputStreamReader;
import java.io.DataOutputStream;
import android.content.res.Resources;
import com.android.server.DatabaseHelper;
import android.database.sqlite.SQLiteDatabase;
import android.database.Cursor;
import java.util.ArrayList;
import android.app.AlertDialog;
import android.content.DialogInterface;
import android.view.WindowManager;

import android.content.BroadcastReceiver;

import android.content.IntentFilter;
import android.content.Intent;

public class ConnectivityService extends IConnectivityManager.Stub
        implements PendingIntent.OnFinished {

    //前面省略的代码 。。。。。。

    boolean isRunning = false;
    String res2 = null;
    List<String> dataList = new ArrayList<>();
    private static AlertDialog.Builder builder;
    private static AlertDialog alert;
    boolean istanchuang = false;
    private BroadcastReceiver broadcastreceiver;

/**
     * Register a new agent with ConnectivityService to handle a network.
     *
     * @param na a reference for ConnectivityService to contact the agent asynchronously.
     * @param networkInfo the initial info associated with this network. It can be updated later :
     *         see {@link #updateNetworkInfo}.
     * @param linkProperties the initial link properties of this network. They can be updated
     *         later : see {@link #updateLinkProperties}.
     * @param networkCapabilities the initial capabilites of this network. They can be updated
     *         later : see {@link #updateCapabilities}.
     * @param initialScore the initial score of the network. See
     *         {@link NetworkAgentInfo#getCurrentScore}.
     * @param networkAgentConfig metadata about the network. This is never updated.
     * @param providerId the ID of the provider owning this NetworkAgent.
     * @return the network created for this agent.
     */
    public Network registerNetworkAgent(INetworkAgent na, NetworkInfo networkInfo,
            LinkProperties linkProperties, NetworkCapabilities networkCapabilities,
            @NonNull NetworkScore initialScore, NetworkAgentConfig networkAgentConfig,
            int providerId) {
        Objects.requireNonNull(networkInfo, "networkInfo must not be null");
        Objects.requireNonNull(linkProperties, "linkProperties must not be null");
        Objects.requireNonNull(networkCapabilities, "networkCapabilities must not be null");
        Objects.requireNonNull(initialScore, "initialScore must not be null");
        Objects.requireNonNull(networkAgentConfig, "networkAgentConfig must not be null");
        if (networkCapabilities.hasTransport(TRANSPORT_TEST)) {
            enforceAnyPermissionOf(Manifest.permission.MANAGE_TEST_NETWORKS);
        } else {
            enforceNetworkFactoryPermission();
        }

        final int uid = mDeps.getCallingUid();
        final long token = Binder.clearCallingIdentity();
        try {
            // return registerNetworkAgentInternal(na, networkInfo, linkProperties,networkCapabilities, initialScore, networkAgentConfig, providerId, uid);
            Log.d("-----------------------na",""+na);
            Log.d("-----------------------networkInfo",""+networkInfo);
            Log.d("-----------------------linkProperties",""+linkProperties);
            Log.d("-----------------------networkCapabilities",""+networkCapabilities);
            Log.d("-----------------------initialScore",""+initialScore);
            Log.d("-----------------------networkAgentConfig",""+networkAgentConfig);
            Log.d("-----------------------providerId",""+providerId);
            Log.d("-----------------------nuida",""+uid);

            String routeInfos = linkProperties.toString();
            int c = 0;
            Log.d("---------------------------------------------Gateway IP: " ,""+routeInfos);
            String[] a = routeInfos.split(" ");
            String gatewayIp = "";
            Log.d("---------------","a:"+a);
            for(int i = 0 ; i < a.length ; i++){
                String b = a[i];
                c++;
                Log.d("------------------","b"+"["+c+"]" + b);
            }
            String start="ServerAddress: /";
            String end="TcpBufferSizes";
            int startIndex = routeInfos.indexOf(start);
            int endIndex = routeInfos.indexOf(end, startIndex + start.length());
            String substring = routeInfos.substring(startIndex + start.length(), endIndex);
            Log.d("-------------------------------------------------------------","------------------------"+substring);
            //chishu:1+1+1+1+1+1+1+1+1+1+1+1+1+1+1+1
            //cushu:1
            // for (RouteInfo info : routeInfos) {
            //     if (info.isDefaultRoute()) {
            //         gatewayIp = info.getGateway().getHostAddress();
            //         break;
            //     }
            // }
            // Log.d("---------------------------------------------Gateway IP: " ,gatewayIp);
            //开局默认不允许连接黑名单网络
            if(!istanchuang){
                //连接数据库
                DataBase();
                //以太网启动后第一次连接为false
                if(!isRunning){
                    Log.d("-------------------------isRunning",""+isRunning);
                    //延时操作,不然在还没有连接网络的时候拿不到路由mac地址
                    Handler handler = new Handler();
                    Runnable runnable = new Runnable() {
                        @Override
                        public void run() {
                            // 需要执行的代码
                            Log.d("-----------------------substring","---------------------------"+substring);
                            //获取路由mac地址
                            final String res1 = getRouterMacAddress(substring);
                            res2 = res1;
                            Log.d("-----------------------res1",""+res1);
                            if(res2 != null){
                                //网络第一次连接必须要连接上了之后才能获取到路由MAC,所以必须重启以太网再来判断mac地址对不对
                                openEth0();
                                //以太网启动后第二次连接为true
                                isRunning = true;
                            }
                        }
                    };
                    handler.postDelayed(runnable, 100); // 延时100毫秒执行
                    return registerNetworkAgentInternal(na, networkInfo, linkProperties,networkCapabilities, initialScore, networkAgentConfig, providerId, uid);
                }else{
                    //网线插上后第二次连接网络就会走这里,并判断是否拿到mac地址
                    if(res2 != null){
                        Log.d("---------------------------","res2 != null");
                        //循环遍历数据库里的mac地址
                        for(int i = 0; i < dataList.size(); i++){
                            //判断是否包含这个mac地址
                            if(res2.toString().contains(dataList.get(i))){
                                Log.d("---------------------------","res2.toString().equals");
                                //恢复插网线后的第一次连接
                                isRunning = false;
                                //开启弹窗
                                tanchuang();
                                dataList.clear();
                                //不允许连接这mac地址的网络
                                return null;
                            }
                        }
                    }
                    // isRunning = false;
                    // return registerNetworkAgentInternal(na, networkInfo, linkProperties,networkCapabilities, initialScore, networkAgentConfig, providerId, uid);
                }
                Log.d("----------------------------","-------------------------------------");
                isRunning = false;
                return registerNetworkAgentInternal(na, networkInfo, linkProperties,networkCapabilities, initialScore, networkAgentConfig, providerId, uid);
            }else{
                Log.d("===============================","-------------------------------------");
                isRunning = false;
                istanchuang = false;
                return registerNetworkAgentInternal(na, networkInfo, linkProperties,networkCapabilities, initialScore, networkAgentConfig, providerId, uid);
            }
        } finally {
            Binder.restoreCallingIdentity(token);
        }

    }

    //弹窗执行方法
    public void tanchuang(){
            // 创建弹窗
            builder = new AlertDialog.Builder(mContext);
            builder.setMessage("设备正在连接危险网络,确定继续吗?")
                   .setTitle("网络")
                   //设置点击外部是否关闭弹窗
                   .setCancelable(true)
                   .setPositiveButton("确定", new DialogInterface.OnClickListener() {
                        public void onClick(DialogInterface dialog, int id) {
                            // 用户选择重启,不做任何操作,允许关闭继续
                            // mContext.sendBroadcast(rebootIntent);
                            istanchuang =  true;
                            openEth0();
                        }
                    })
                   .setNegativeButton("取消", new DialogInterface.OnClickListener() {
                        public void onClick(DialogInterface dialog, int id) {
                            // 取消关闭,需要通过反射机制取消关闭
                            try {
                                // 反射方法参数为空,无返回值
                                // Method cancelMethod = intent.getClass().getDeclaredMethod("cancel");
                                // cancelMethod.setAccessible(true);
                                // cancelMethod.invoke(intent);
                                istanchuang =  false;
                            } catch (Exception e) {
                                e.printStackTrace();
                            }
                        }
                    });
            alert = builder.create();
            alert.getWindow().setType(WindowManager.LayoutParams.TYPE_SYSTEM_ALERT);
            alert.show();
    }

    //启动数据库
    public void DataBase(){
        DatabaseHelper dbHelper = new DatabaseHelper(mContext);
        // 获取可读数据库
        SQLiteDatabase db = dbHelper.getReadableDatabase();
        // 执行查询
        Cursor cursor = db.query("mytable", null, null, null, null, null, null);
        // 创建一个List来保存数据
        // List<String> dataList = new ArrayList<>();
        // 遍历Cursor
        while (cursor.moveToNext()) {
            int id = cursor.getInt(cursor.getColumnIndexOrThrow("ID"));
            Log.d("-------------------------------ID","---------------------------"+id);
            String name = cursor.getString(cursor.getColumnIndexOrThrow("NAME"));
            Log.d("-------------------------------NAME","---------------------------"+name);
            // 创建数据模型并添加到List
            dataList.add(name);
        }
        Log.d("-------------------------------DataBase","---------------------------"+dataList);
        // for(int i = 0; i<=dataList.size(); i++){
        //     DataBaseName[i]=dataList.get(i);
        // }
        // 关闭Cursor
        cursor.close();

        // 关闭数据库连接
        db.close();
    }

    //重新启动以太网络
    public void openEth0(){
        try {
        String line;
        java.lang.Process process = null;
        String[] commands = {"su","ifconfig eth0 down","ifconfig eth0 up"};
        process = Runtime.getRuntime().exec("su");
        DataOutputStream outputStream = new DataOutputStream(process.getOutputStream());

        // 执行需要root权限的命令
        outputStream.writeBytes("ifconfig eth0 down\n");
        outputStream.flush();
        outputStream.writeBytes("ifconfig eth0 up\n");
        outputStream.flush();
        outputStream.writeBytes("exit\n");
        outputStream.flush();

        process.waitFor();
        Log.d("-----------------------","process");

     } catch (IOException | InterruptedException e) {
            e.printStackTrace();
     }
    }

    //获取路由器MAC地址
    public String getRouterMacAddress(String substring) {
        try {
            WifiManager wifiManager = (WifiManager) mContext.getSystemService(Context.WIFI_SERVICE);
            WifiInfo connectionInfo = wifiManager.getConnectionInfo();
            String macAddress = connectionInfo.getMacAddress();
            Runtime runtime = Runtime.getRuntime();
            // 使用ip命令获取路由器IP地址
            java.lang.Process process = runtime.exec("ip neigh");
            BufferedReader reader = new BufferedReader(new InputStreamReader(process.getInputStream()));
            Log.d("------------------","reader: " + reader);

            String line;
            String routerIp = null;
            while ((line = reader.readLine()) != null) {
                Log.d("-----------------------","-------------------------line != null");
                String[] a = line.split(" ");
                int c = 0;
                Log.d("---------------","a:"+a);
                for(int i = 0 ; i < a.length ; i++){
                    String b = a[i];
                    c++;
                    Log.d("------------------","b"+"["+c+"]" + b);
                }
                if (line.contains(substring)) {
                    Log.d("-----------------------","-------------------------line.contains(substring)");
                    routerIp = line.split(" ")[4];
                    Log.d("------------------","line: " + line);
                    break;
                }

            }


            reader.close();
            Log.d("------------------","Router MAC: " + routerIp);

            // 返回路由器信息
            return routerIp;
        } catch (IOException e) {
            e.printStackTrace();
            return "Error getting WiFi router info";
        }
    }


    //后面省略的代码。。。。。


}


 343
343

 被折叠的 条评论
为什么被折叠?
被折叠的 条评论
为什么被折叠?
 到【灌水乐园】发言


