


 本文详细介绍了React组件的创建,包括函数组件和类组件,以及它们之间的区别,如有状态和无状态组件。接着讨论了事件处理,包括事件注册、事件对象和this指向问题。此外,文章还涵盖了如何使用setState修改状态,以及表单处理的非控组件和受控组件。最后,重点讲解了组件间的通讯,包括父子、子父、兄弟和跨级组件的通讯方式,展示了实际代码示例。
文章目录
一、组件创建
组件创建有两种:一种是函数组件、一种是类组件
1.1 函数组件
函数组件就是使用JS的函数或者箭头函数创建的组件
函数组件创建:
// 普通构造函数
function Hello() {
  return <div>普通构造函数!</div>
}

// 使用箭头函数创建组件:
const Hello = () => <div>箭头组件!</div>
函数组件使用:
// 使用 双标签 渲染组件:
<Hello></Hello>
// 使用 单标签 渲染组件:
<Hello />
- 约定1:函数名称必须以大写字母开头,区分组件和普通的 HTML标签
- 约定2:函数组件必须有返回值,表示该组件的 UI 结构;如果不需要渲染任何内容,则返回
null
1.2 类组件
类组件就是ES6的class语法创建的组件
创建组件:
// 导入 React
import React from 'react'  // 也可以解构只导入Component  import { Component } from 'react'
// 需要继承React.Component
class Hello extends React.Component {
  render() {
    return <div>Hello Class Component!</div>
  }
}
使用组件和函数组件一样,可以使用单/双标签
- 约定1:类名称也必须以大写字母开头
- 约定2:类组件应该继承 React.Component 父类,从而使用父类中提供的方法或属性
- 约定3:类组件必须提供 render 方法
- 约定4:render 方法必须有返回值,表示该组件的 UI 结构
二、组件区别
2.1 有状态和无状态组件
- 函数组件又叫做无状态组件 函数组件是不能自己提供数据【不考虑 hooks 的情况下】
- 类组件又叫做有状态组件 类组件可以自己提供数据
2.2 类组件的状态
- 状态
state,也就是数据,是组件内部的私有数据,只能在组件内部使用- 状态
state的值是对象,表示一个组件中可以有多个数据- 通过
this.state.xxx来获取状态
class Hello extends Component {
  // 为组件提供状态
  state = {
    count: 0
  }

  render() {
    return (
      <div>类组件的状态:{this.state.count}</div> //读取状态

    )
  }
}
三、事件处理
3.1 注册事件
语法:on+事件名 ={事件处理程序} 比如onClick={this.handleClick}
import { Component } from 'react'
class App extends Component {
  handleClick() {
    console.log('点击事件')
  }

  render() {
    return (
      <div>
        <button onClick={this.handleClick}>点击触发</button>
      </div>
    )
  }
}
3.2 事件对象
import { Component } from 'react'
class App extends Component {
  handleClick(e) {
  console.log('事件对象', e)
  }

  render() {
    return (
      <div>
        <button onClick={()=>this.handleClick(e)}>点击触发</button>

      </div>
    )
  }
}
3.3 this指向问题
- 事件处理程序中的this指向的是
undefined - render方法中的this指向的是当前react组件。只有事件处理程序中的this有问题
- 原因
- 事件处理程序的函数式函数调用模式,在严格模式下,this指向
undefined - render函数是被组件实例调用的,因此render函数中的this指向当前组件
- 事件处理程序的函数式函数调用模式,在严格模式下,this指向
解决方法:
- 箭头函数
<button onClick={() => this.handleClick()}>点我</button>
- bind
<button onClick={this.handleClick.bind(this)}>点我</button>
- 箭头函数形式的实例方法 - 推荐使用
handleClick = () => {
    console.log(this.state.msg)
  }

  <button onClick={this.handleClick}>点我</button>
四、setState修改状态
react的核心就是状态不可变,在后续的学习中也要一直记住这一点
我们可以通过setState进行数据的修改
语法:this.setState({ 要修改的部分数据 })
class Hello extends Component {
  state = {
    count: 0
  }

	handleClick = () => {
  // 在 count 当前值的基础上加 1
      this.setState({
             count: this.state.count + 1
      })
  }

  render() {
    return (
      <div>
        <h1>计数器:{this.state.count}</h1>
        <button onClick={this.handleClick}>点击+1</button>
      </div>
    )
  }
}
这几种都是直接修改当前值,是不能使用的
- this.state.count++
- ++this.state.count
- this.state.count += 1
- this.state.count = 1
还有数组中直接修改当前数组的方法也不能用
五、表单处理
包括非控组件、受控组件
5.1 非控组件
非受控组件借助于ref,使用原生DOM的方式来获取表单元素的值
// 1 导入 createRef 函数
import { createRef } from 'react'

class Hello extends Component {
  // 2 调用 createRef 函数来创建一个 ref 对象
  //   ref 对象的名称(txtRef)可以是任意值
  //   命名要规范: txt(DOM 元素的自己标识) + Ref
  ClickRef = createRef()

  handleClick = () => {
    // 4 获取文本框的值:
    console.log(this.ClickRef.current.value)
  }

  render() {
    return (
      <div>
        {/*
        	3 将创建好的 ref 对象,设置为 input 标签的 ref 属性值
        */}
        <input ref={this.txtRef} />
        <button onClick={this.handleClick}>获取文本框的值</button>
      </div>
    )
  }
}
5.2 受控组件
value值受到了react状态控制的表单元素
class App extends React.Component {
  state = {
    msg: '受控组件'
  }

  handleChange = (e) => {
    this.setState({
      msg: e.target.value
    })
  }
  render() {
    return (
      <div>
        <input type="text" value={this.state.msg} onChange={this.handleChange}/>
      </div>
    )
  }
}
六、组件通讯
6.1 什么是组件通讯
组件是独立且封闭的单元,默认情况下,只能使用组件自己的数据,在实际情况中,多个组件之间不可避免的要共享某些数据,为了实现这些功能,就需要打破组件的独立封闭性,让其与外界沟通。这个过程就是组件通讯。
6.2 父子通讯
6.2.1 父传子
通过props接收父组件传来的数据
父组件:
import React, { Component } from 'react'

class APP extends Component {
  state = {
    age: 18,
  }
  render() {
    return (
      <div>
        <h1>父子通讯——父组件</h1>
        <hr />
        <Fn  test={this.state.age}  />
      </div>
    )
  }
}
函数组件获取props:
const Fn = (props) => {
  return (
    <div>
      <p>组件通信-子组件</p>
      <p>父组件传来的数据:{props.test}</p>
    </div>
  )
}
类组件获取props:
// 接收数据:
// class 组件需要通过 this.props 来获取
// 注意:this.porps 属性名是固定的!!!
class Fn extends Component {
  render() {
    return (
      <div>接收到的数据:{this.props.test}</div>
    )
  }
}
练习:
通过父子通信完成以下案例
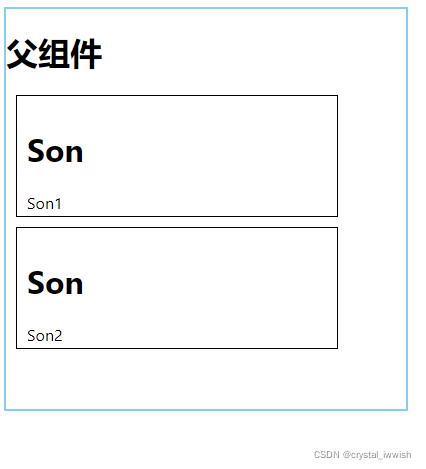
父组件:
import React, { Component } from 'react'
import './index.scss'
import Son from './component/son.jsx'
class App extends Component {
  state = {
    list: [
      {
        id: 1,
        name: 'Son1',
      },
      {
        id: 2,
        name: 'Son2',
      },
    ],
  }
  render() {
    return (
      <div className="box">
        <h1>父组件</h1>
        {this.state.list.map((item) => (
          <Son list={item} key={item.id} />
        ))}
      </div>
    )
  }
}

export default App
子组件:
function Son(props) {
  console.log(props)
  return (
    <div className="son">
      <h1>Son</h1>
      <p>{props.list.name}</p>
    </div>
  )
}

export default Son
样式:
.box {
  height: 400px;
  width: 400px;
  border: 2px solid skyblue;
  margin: 10px;
}

.son {
  height: 100px;
  width: 300px;
  border: 1px solid black;
  margin: 10px;
  padding: 10px;
}
6.2.2 子传父
利用回调函数来实现,父组件提供回调,子组件调用回调,将要传递的数据作为回调函数的参数代码实现:
父组件:
class Parent extends React.Component {
  state = {
   num: 10000
  }
	// 回调函数
	Hello =(Sonnum)=> {
    this.setState({
      num: this.state.num - Sonnum
    })
  }
  render() {
    const { num } = this.state
    return (
      <div>
        <h1>我是父组件:{money}</h1>
        <Child num={num} Hello={this.Hello} />
      </div>
    )
  }
}
子组件:
const Child = (props) => {
  const handleClick = () => {
    // 子组件调用父组件传递过来的回调函数
		props.Hello(100)
  }
  return (
    <div>
      <h3>我是子组件 -- {props.num}</h3>
      <button onClick={handleClick}>点击回调</button>
    </div>
  )
}
6.3 兄弟组件通讯
将共享状态提升到最近的公共父组件中,由公共父组件管理这个状态,要通讯的子组件只需通过 props 接收状态或操作状态的方法(本质上就是父子通讯)

代码实现:
import React, { Component } from 'react'

class APP extends Component {
  state = {
    APPvalue: '',
  }
  getValue = (value) => {
    this.setState({
      APPvalue: value,
    })
  }
  render() {
    return (
      <div>
        <h1>兄弟组件-父组件</h1>
        <p>{this.state.APPvalue}</p>
        <hr />
        <One data={this.getValue} />
        <Two getData={this.state.APPvalue} />
      </div>
    )
  }
}
class One extends Component {
  state = {
    value: 199,
  }
  render() {
    return (
      <div>
        <h1>兄弟1</h1>
        <p>{this.state.value}</p>
        <button onClick={() => this.props.data(10000)}>点击</button>
      </div>
    )
  }
}

const Two = (props) => {
  return (
    <div>
      <h1>兄弟2</h1>
      <p>兄弟1传来的数据:{props.getData}</p>
    </div>
  )
}

export default APP
6.4 跨级组件通讯
也就是两个组件之间间隔较远,使用 Context 来实现跨组件传递数据
import { createContext } from 'react'  // 0 导入创建 context 的函数

const { Provider, Consumer } = createContext()// 1 创建 Context 对象
//	 对象中包含了两个组件,分别是: Provider 状态的提供者组件(提供状态)  Consumer 状态的消费者组件(使用状态)

<Provider value="blue"> // 2 使用 Provider 组件包裹整个应用,并通过 value 属性提供要共享的数据
  <div className="App">
    <Node />
  </div>
</Provider>

<Consumer>  // 3 使用 Consumer 组件接收要共享的数据
  {color => <span>data参数表示接收到的数据 -- {color}</span>}
</Consumer>


 1390
1390

 被折叠的 条评论
为什么被折叠?
被折叠的 条评论
为什么被折叠?
 到【灌水乐园】发言


