


 本文介绍如何使用RabbitMQ的死信队列特性实现消息的延迟消费,通过设置消息的TTL(Time To Live)来达到延迟效果,适用于如支付超时取消订单等场景。
TTL实现方式
背景:
很多时候我们用rabbitmq作为消息中间件时,不希望消息立马被消费,而是希望在一定时间后消费,比如支付超时取消订单,30分钟之内没有支付就会取消订单,取消订单可以认为是一个消费动作(当然可以用定时任务实现超时取消订单),类似这种场景下我们需要设计延迟消费的逻辑。
目前相关mq本身不带有延迟消费的功能,需要借助一些特性进行实现,以下是rabbitmq的根据设置ttl的方式实现,即死信队列实现延迟队列
方式
- 生产者将需要延迟消费的消息发送到一个临时队列Q1,并且设置消息存活时间,即为延迟消费时间
- 消息死亡后会成为死信,再为Q1队列设置死信交换机、死信路由,转发到真正消费的队列Q2
代码实现
启动类配置相关bean
import org.springframework.amqp.core.Binding;
import org.springframework.amqp.core.BindingBuilder;
import org.springframework.amqp.core.DirectExchange;
import org.springframework.amqp.core.Queue;
import org.springframework.boot.SpringApplication;
import org.springframework.boot.autoconfigure.SpringBootApplication;
import org.springframework.boot.autoconfigure.jdbc.DataSourceAutoConfiguration;
import org.springframework.context.ConfigurableApplicationContext;
import org.springframework.context.annotation.Bean;
import org.springframework.web.servlet.config.annotation.WebMvcConfigurer;

import java.util.HashMap;
import java.util.Map;


/**
 * @Description 启动类
 * @Author cdbMeng
 * @Date 2020/4/306:52 下午
 * @Version$ 1.0
 **/
@SpringBootApplication(exclude = DataSourceAutoConfiguration.class)
public class SamplesApp implements WebMvcConfigurer {

    /**
     * 真正消费队列Q2
     * @return
     */
    @Bean
    Queue msgQueue() {
        return new Queue("Q2");
    }

    /**
     * 创建交换机
     * @return
     */
    @Bean
    DirectExchange directExchange() {
        return new DirectExchange("exchange");
    }

    /**
     * 交换机绑定Q1
     * @return
     */
    @Bean
    public Binding bindCacheQueue() {
        return BindingBuilder.bind(putShipCacheQueue()).to(directExchange()).with("Q1");
    }

    /**
     * 交换机绑定Q2
     * @return
     */
    @Bean
    public Binding bindRealQueue() {
        return BindingBuilder.bind(msgQueue()).to(directExchange()).with("Q2");
    }

    /**
     * 配置死信对列
     * @return
     */
    @Bean
    Queue putShipCacheQueue() {
        Map<String, Object> map = new HashMap<>();
        //配置队列过期时间,队列里的所有消息存活时间,如果不设置则可以设置每条消息的存活时间,如果两者都设置了,则以小的那个为准
        map.put("x-message-ttl", 10000);
        //绑定到一个交换机
        map.put("x-dead-letter-exchange", "exchange");
        //路由到真正消费的对列Q2
        map.put("x-dead-letter-routing-key", "Q2");
        return new Queue("Q1", true, false, false, map);
    }

    public static void main(String[] args) {
        ConfigurableApplicationContext run = new SpringApplication(SamplesApp.class).run(args);
    }
}
生产者
/**
* @Description 生产者
* @Author cdbMeng
* @Date 2020/5/910:53 上午
* @Version$ 1.0
**/
@Component
@Slf4j
public class MqProducer {
@Resource
private RabbitTemplate rabbitTemplate;
/**
* 发送消息,
*
* @param msg
*/
public void sendDelayMsg(String msg) {
System.out.println("cache-queue 发送时间:" + System.currentTimeMillis() + ",msg:" + msg );
rabbitTemplate.convertAndSend("exchange","Q1", msg);
}
/**
* 设置消息有效期时间
*
* @param msg
*/
public void sendDelayMsg(String msg, Long delayTime) {
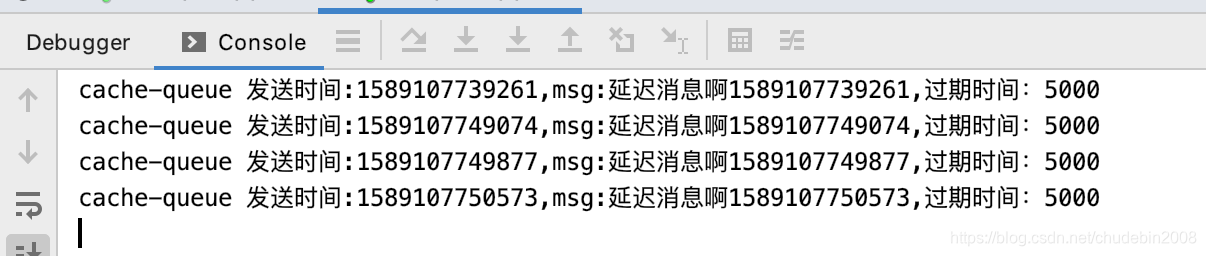
System.out.println("cache-queue 发送时间:" + System.currentTimeMillis() + ",msg:" + msg + ",过期时间:" + delayTime);
MessagePostProcessor postProcessor = new MessagePostProcessor() {
@Override
public Message postProcessMessage(Message message) throws AmqpException {
message.getMessageProperties().setExpiration(delayTime + "");
return message;
}
};
rabbitTemplate.convertAndSend("Q1", (Object) msg, postProcessor);
}
}
消费者
@Component
public class Consumer {

    @RabbitListener(bindings = @QueueBinding(value = @Queue(value = "Q2", durable = "true"),
            exchange = @Exchange(value = "exchange"),
            key = "msg.*"))
    @RabbitHandler
    public void consumeDelayMsg(@Payload String msg, @Headers Map<String, Object> headers, Channel channel) throws IOException {
        //消费者消费
        System.out.println("repeat msg is :" + msg + ",收到消息时间:" + System.currentTimeMillis());

        //手动签收
        channel.basicAck((Long) headers.get(AmqpHeaders.DELIVERY_TAG), false);
    }
}
测试结果
- 生产者
- 消费者


 270
270

 被折叠的 条评论
为什么被折叠?
被折叠的 条评论
为什么被折叠?
 到【灌水乐园】发言


