


MySQL安装开源审计插件 mysql-audit
MySQL 5.7.38安装审计插件 mysql-audit
MySQL版本众多, 同样审计的软件众多,为什么使用 mysql-audit ,原因:老外的弄得,一直在维护,支持的MySQL版本多
安装MySQL
1.查看Linux服务器版本和glibc版本
[root@localhost ~]# cat /etc/centos-release
CentOS Linux release 7.9.2009 (Core)


[root@localhost ~]# ldd --version
ldd (GNU libc) 2.17
Copyright (C) 2012 Free Software Foundation, Inc.
This is free software; see the source for copying conditions.  There is NO
warranty; not even for MERCHANTABILITY or FITNESS FOR A PARTICULAR PURPOSE.
Written by Roland McGrath and Ulrich Drepper.
2.根据自己的系统下载对应的MySQL版本,由于mysql-audit并不支持所有版本的MySQL,所以在确定MySQL版本之前请注意下插件支持的MySQL版本
mysql-audit : https://github.com/trellix-enterprise/mysql-audit/releases
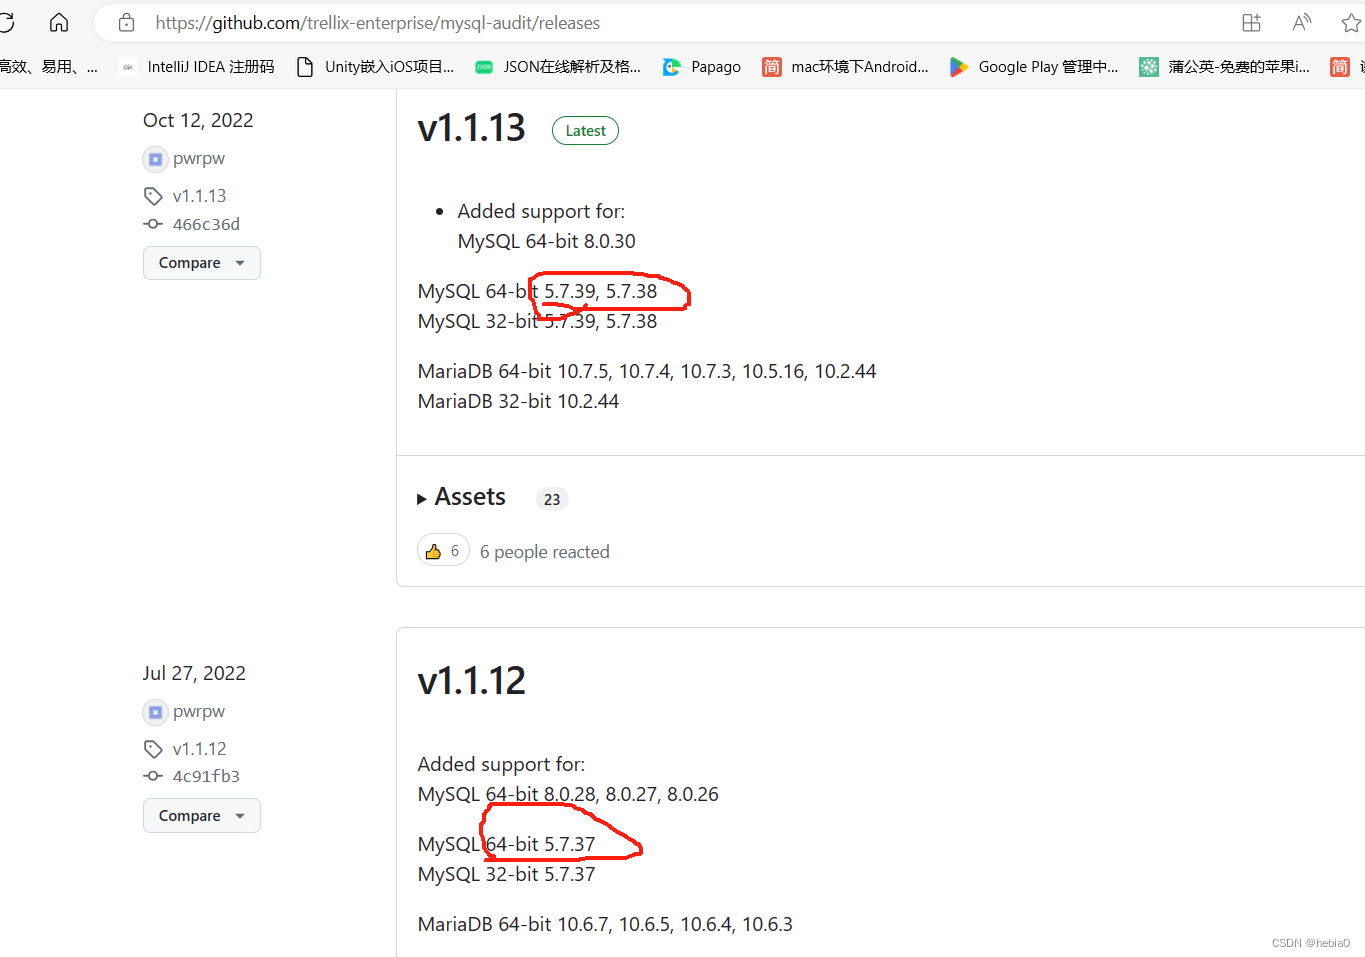
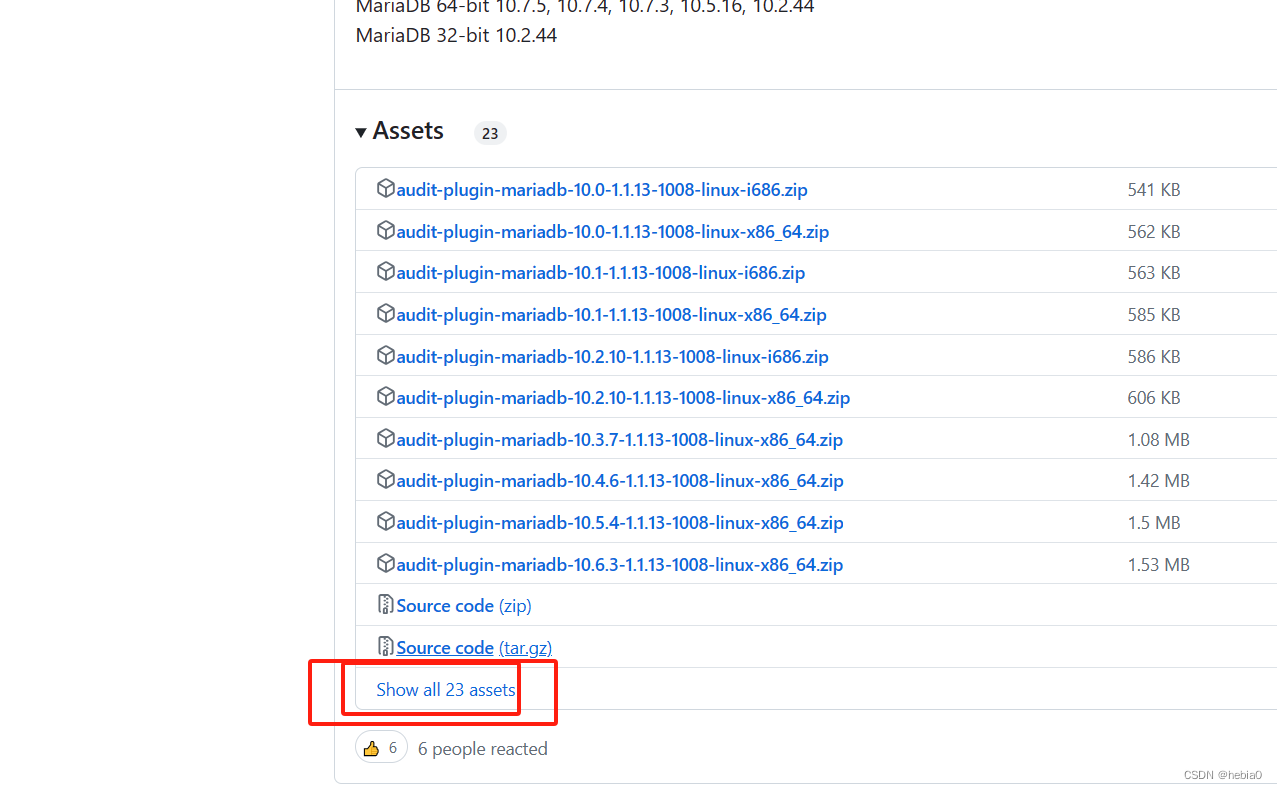
显示所有可用的插件 , 比如我的系统是64为的,我要用5.7.38的MySQL,我就下载对应的插件
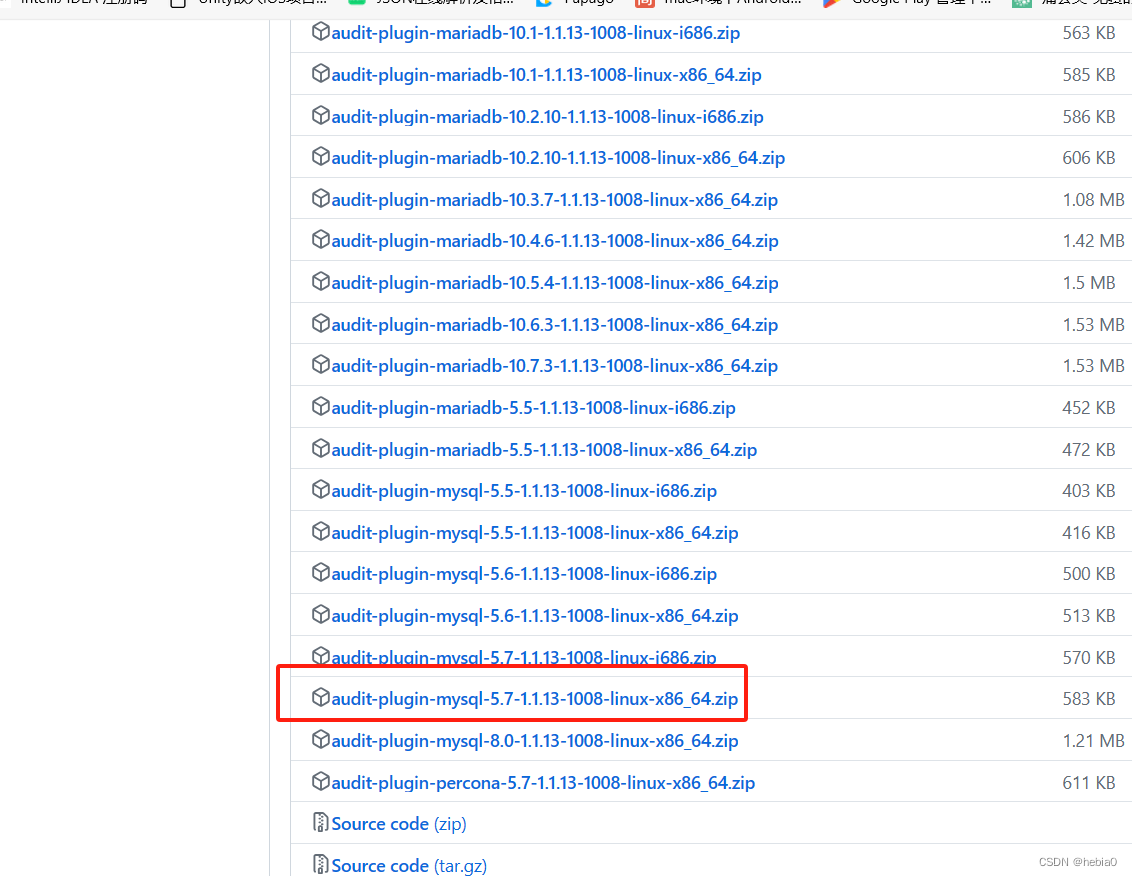
[root@localhost ~]# cd ~/Desktop/
[root@localhost Desktop]# wget  https://github.com/trellix-enterprise/mysql-audit/releases/download/v1.1.13/audit-plugin-mysql-5.7-1.1.13-1008-linux-x86_64.zip
--2024-05-15 14:08:08--  https://github.com/trellix-enterprise/mysql-audit/releases/download/v1.1.13/audit-plugin-mysql-5.7-1.1.13-1008-linux-x86_64.zip
Resolving github.com (github.com)... 20.205.243.166
Connecting to github.com (github.com)|20.205.243.166|:443... connected.
HTTP request sent, awaiting response... 302 Found
Location: https://objects.githubusercontent.com/github-production-release-asset-2e65be/3552521/18e50e6c-aa02-413b-a796-61cbcb3ee58a?X-Amz-Algorithm=AWS4-HMAC-SHA256&X-Amz-Credential=releaseassetproduction%2F20240515%2Fus-east-1%2Fs3%2Faws4_request&X-Amz-Date=20240515T060813Z&X-Amz-Expires=300&X-Amz-Signature=6d74005dbfa59d69565d309c5d7b1ef64d62811c3b715976d9506b5108c2ee83&X-Amz-SignedHeaders=host&actor_id=0&key_id=0&repo_id=3552521&response-content-disposition=attachment%3B%20filename%3Daudit-plugin-mysql-5.7-1.1.13-1008-linux-x86_64.zip&response-content-type=application%2Foctet-stream [following]
--2024-05-15 14:08:13--  https://objects.githubusercontent.com/github-production-release-asset-2e65be/3552521/18e50e6c-aa02-413b-a796-61cbcb3ee58a?X-Amz-Algorithm=AWS4-HMAC-SHA256&X-Amz-Credential=releaseassetproduction%2F20240515%2Fus-east-1%2Fs3%2Faws4_request&X-Amz-Date=20240515T060813Z&X-Amz-Expires=300&X-Amz-Signature=6d74005dbfa59d69565d309c5d7b1ef64d62811c3b715976d9506b5108c2ee83&X-Amz-SignedHeaders=host&actor_id=0&key_id=0&repo_id=3552521&response-content-disposition=attachment%3B%20filename%3Daudit-plugin-mysql-5.7-1.1.13-1008-linux-x86_64.zip&response-content-type=application%2Foctet-stream
Resolving objects.githubusercontent.com (objects.githubusercontent.com)... 185.199.109.133, 185.199.108.133, 185.199.110.133, ...
Connecting to objects.githubusercontent.com (objects.githubusercontent.com)|185.199.109.133|:443... connected.
HTTP request sent, awaiting response... 200 OK
Length: 596787 (583K) [application/octet-stream]
Saving to: ‘audit-plugin-mysql-5.7-1.1.13-1008-linux-x86_64.zip’

100%[======================================>] 596,787     1.80MB/s   in 0.3s

2024-05-15 14:08:14 (1.80 MB/s) - ‘audit-plugin-mysql-5.7-1.1.13-1008-linux-x86_64.zip’ saved [596787/596787]

[root@localhost Desktop]#

[root@localhost Desktop]# ls -al
total 588
drwxr-xr-x.  2 root root     65 May 15 14:08 .
dr-xr-x---. 14 root root   4096 May 11 16:13 ..
-rw-r--r--.  1 root root 596787 Oct 12  2022 audit-plugin-mysql-5.7-1.1.13-1008-linux-x86_64.zip
3.下载MySQL
MySQL下载地址: https://downloads.mysql.com/archives/community/
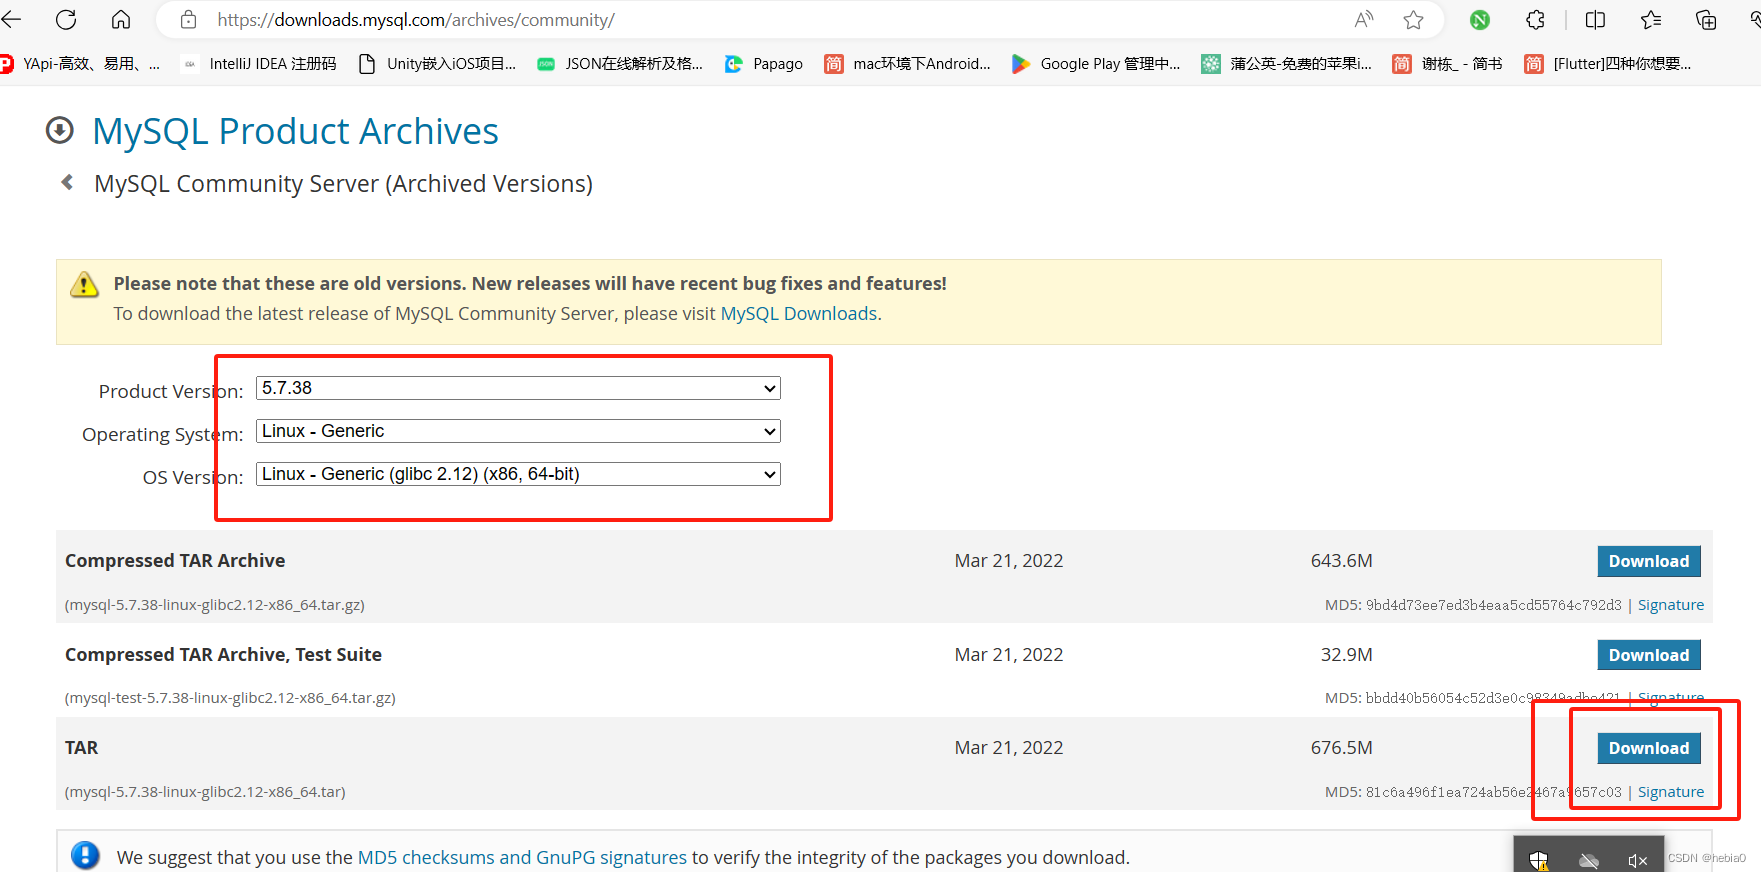
我的服务器版本是centos7的64位操作系统, 根据自己情况选择自己的版本 ,下载选择 tar源码包
[root@localhost Desktop]# wget https://downloads.mysql.com/archives/get/p/23/file/mysql-5.7.38-linux-glibc2.12-x86_64.tar
--2024-05-15 14:15:02--  https://downloads.mysql.com/archives/get/p/23/file/mysql-5.7.38-linux-glibc2.12-x86_64.tar
Resolving downloads.mysql.com (downloads.mysql.com)... 23.15.136.176, 2600:140b:a00:6af::2e31, 2600:140b:a00:6b2::2e31
Connecting to downloads.mysql.com (downloads.mysql.com)|23.15.136.176|:443... connected.
HTTP request sent, awaiting response... 302 Moved Temporarily
Location: https://cdn.mysql.com/archives/mysql-5.7/mysql-5.7.38-linux-glibc2.12-x86_64.tar [following]
--2024-05-15 14:15:08--  https://cdn.mysql.com/archives/mysql-5.7/mysql-5.7.38-linux-glibc2.12-x86_64.tar
Resolving cdn.mysql.com (cdn.mysql.com)... 23.77.214.217, 2600:140b:a00:6a1::1d68, 2600:140b:a00:6b7::1d68
Connecting to cdn.mysql.com (cdn.mysql.com)|23.77.214.217|:443... connected.
HTTP request sent, awaiting response... 200 OK
Length: 709361152 (676M) [application/x-tar]
Saving to: ‘mysql-5.7.38-linux-glibc2.12-x86_64.tar’

14% [========================>                                                                                                                                                ] 105,386,474 10.9MB/s  eta 55s
4.安装MySQL
1.安装之前看是否安装过MySQL数据库
[root@localhost Desktop]# yum remove mysql
Loaded plugins: fastestmirror, langpacks
No Match for argument: mysql
No Packages marked for removal
2.查看是否有MySQL依赖
[root@localhost Desktop]# rpm -qa | grep mysql
[root@localhost Desktop]#
若有就卸载
//普通删除模式
rpm -e xxx(mysql_libs)
//强力删除模式,如果上述命令删除时,提示有依赖其他文件,则可以用该命令对其进行强力删除
rpm -e --nodeps xxx(mysql_libs)
4.检查是否有mariadb
[root@localhost Desktop]# rpm -qa | grep mariadb
mariadb-libs-5.5.68-1.el7.x86_64
[root@localhost Desktop]#
若有就卸载
[root@localhost Desktop]# rpm -qa | grep mariadb
mariadb-libs-5.5.68-1.el7.x86_64
[root@localhost Desktop]# rpm -e --nodeps mariadb-libs
[root@localhost Desktop]# rpm -e --nodeps mariadb-libs-5.5.68-1.el7.x86_64
error: package mariadb-libs-5.5.68-1.el7.x86_64 is not installed
[root@localhost Desktop]#
5.安装mysql依赖包
[root@localhost Desktop]# yum install libaio
Loaded plugins: fastestmirror, langpacks
Loading mirror speeds from cached hostfile
 * base: mirrors.ustc.edu.cn
 * extras: mirrors.ustc.edu.cn
 * updates: mirrors.ustc.edu.cn
base                                                     | 3.6 kB     00:00
extras                                                   | 2.9 kB     00:00
updates                                                  | 2.9 kB     00:00
(1/4): base/7/x86_64/group_gz                              | 153 kB   00:05
(2/4): extras/7/x86_64/primary_db                          | 253 kB   00:05
(3/4): updates/7/x86_64/primary_db                         |  27 MB   00:08
(4/4): base/7/x86_64/primary_db                            | 6.1 MB   00:11
Package libaio-0.3.109-13.el7.x86_64 already installed and latest version
Nothing to do
[root@localhost Desktop]#
6.解压MySQL的tar文件 安装准备
  clear
[root@localhost Desktop]# tar -xvf mysql-5.7.38-linux-glibc2.12-x86_64.tar
mysql-test-5.7.38-linux-glibc2.12-x86_64.tar.gz
mysql-5.7.38-linux-glibc2.12-x86_64.tar.gz
[root@localhost Desktop]# tar -zxvf mysql-5.7.38-linux-glibc2.12-x86_64.tar.gz
mysql-5.7.38-linux-glibc2.12-x86_64/bin/myisam_ftdump
mysql-5.7.38-linux-glibc2.12-x86_64/bin/myisamchk
mysql-5.7.38-linux-glibc2.12-x86_64/bin/myisamlog
mysql-5.7.38-linux-glibc2.12-x86_64/bin/myisampack

 .......

mysql-5.7.38-linux-glibc2.12-x86_64/support-files/mysql.server
mysql-5.7.38-linux-glibc2.12-x86_64/docs/INFO_BIN
mysql-5.7.38-linux-glibc2.12-x86_64/docs/INFO_SRC
[root@localhost Desktop]#
修改解压后路径名称
 [root@localhost Desktop]# ls
audit-plugin-mysql-5.7-1.1.13-1008-linux-x86_64.zip
mysql-5.7.38-linux-glibc2.12-x86_64
mysql-5.7.38-linux-glibc2.12-x86_64.tar
mysql-5.7.38-linux-glibc2.12-x86_64.tar.gz
mysql-test-5.7.38-linux-glibc2.12-x86_64.tar.gz
[root@localhost Desktop]# mv mysql-5.7.38-linux-glibc2.12-x86_64 mysql
[root@localhost Desktop]#
[root@localhost Desktop]#
安装习惯把MySQL 移动到 /usr/local目录
 [root@localhost Desktop]# ls /usr/local/
bin  etc  games  include  lib  lib64  libexec  sbin  share  src
[root@localhost Desktop]#


 [root@localhost Desktop]# mv mysql /usr/local/
[root@localhost Desktop]# ls /usr/local/
bin  etc  games  include  lib  lib64  libexec  mysql  sbin  share  src
[root@localhost Desktop]# ls /usr/local/mysql/
bin  docs  include  lib  LICENSE  man  README  share  support-files
[root@localhost Desktop]#
切换到MySQL目录 ,创建相关用户名密码
  [root@localhost Desktop]# cd /usr/local/mysql/
[root@localhost mysql]# pwd
/usr/local/mysql
[root@localhost mysql]# ls
bin  docs  include  lib  LICENSE  man  README  share  support-files
[root@localhost mysql]# mkdir mysqld
[root@localhost mysql]# ls
bin  docs  include  lib  LICENSE  man  mysqld  README  share  support-files
[root@localhost mysql]#
mysql安装目录赋予权限
[root@localhost mysql]# ls
bin  docs  include  lib  LICENSE  man  mysqld  README  share  support-files
[root@localhost mysql]#  chmod -R 777 /usr/local/mysql/
[root@localhost mysql]# ls -al
total 272
drwxrwxrwx. 10 root root     143 May 16 18</
最低0.47元/天 解锁文章


 1万+
1万+

 被折叠的 条评论
为什么被折叠?
被折叠的 条评论
为什么被折叠?
 到【灌水乐园】发言


