


 本文介绍如何在Spring Boot项目中使用Spring Cloud Feign实现微服务间的负载均衡调用。从搭建基础工程到定义Feign客户端,再到实现服务调用,最后测试负载均衡效果,详细步骤助您快速上手。
一 新建一个Spring boot基础工程,取名feign-consumer,在pom.xml中增加相关依赖
<dependencies>
    <dependency>
        <groupId>org.springframework.boot</groupId>
        <artifactId>spring-boot-starter-web</artifactId>
    </dependency>

    <dependency>
        <groupId>org.springframework.cloud</groupId>
        <artifactId>spring-cloud-starter-eureka</artifactId>
    </dependency>

    <dependency>
        <groupId>org.springframework.cloud</groupId>
        <artifactId>spring-cloud-starter-feign</artifactId>
    </dependency>
</dependencies>
二 创建应用主类,并通过@EnableFeignClients注解开启Spring Cloud Feign的支持功能
package com.didispace;

import feign.Logger;
import org.springframework.boot.SpringApplication;
import org.springframework.boot.autoconfigure.SpringBootApplication;
import org.springframework.cloud.client.discovery.EnableDiscoveryClient;
import org.springframework.cloud.netflix.feign.EnableFeignClients;
import org.springframework.context.annotation.Bean;

@EnableFeignClients
@EnableDiscoveryClient
@SpringBootApplication
public class ConsumerApplication {
    public static void main(String[] args) {
        SpringApplication.run(ConsumerApplication.class, args);
    }

}
三 定义HelloService接口,通过@FeignClient指定服务名类绑定服务
package com.didispace.web;

import org.springframework.cloud.netflix.feign.FeignClient;
import org.springframework.web.bind.annotation.*;

@FeignClient(name="HELLO-SERVICE", fallback = HelloServiceFallback.class)
public interface HelloService {

    //绑定具体服务的REST接口
    @RequestMapping("/hello")
    String hello();
}
四 创建ConsumerController来实现对Feign客户端的调用
package com.didispace.web;

import org.springframework.beans.factory.annotation.Autowired;
import org.springframework.web.bind.annotation.RequestMapping;
import org.springframework.web.bind.annotation.RequestMethod;
import org.springframework.web.bind.annotation.RestController;

@RestController
public class ConsumerController {
    //使用@Autowired直接注入上面定义的HelloService的实例
    @Autowired
    HelloService helloService;

    @RequestMapping(value = "/feign-consumer", method = RequestMethod.GET)
    public String helloConsumer() {
        //调用了绑定HELLO-SERVICE服务接口的客户端向服务发起/hello接口的调用
        return helloService.hello();
    }
}
五 新增配置文件
spring.application.name=feign-consumer
server.port=9001

eureka.client.serviceUrl.defaultZone=http://localhost:1111/eureka/
六 测试
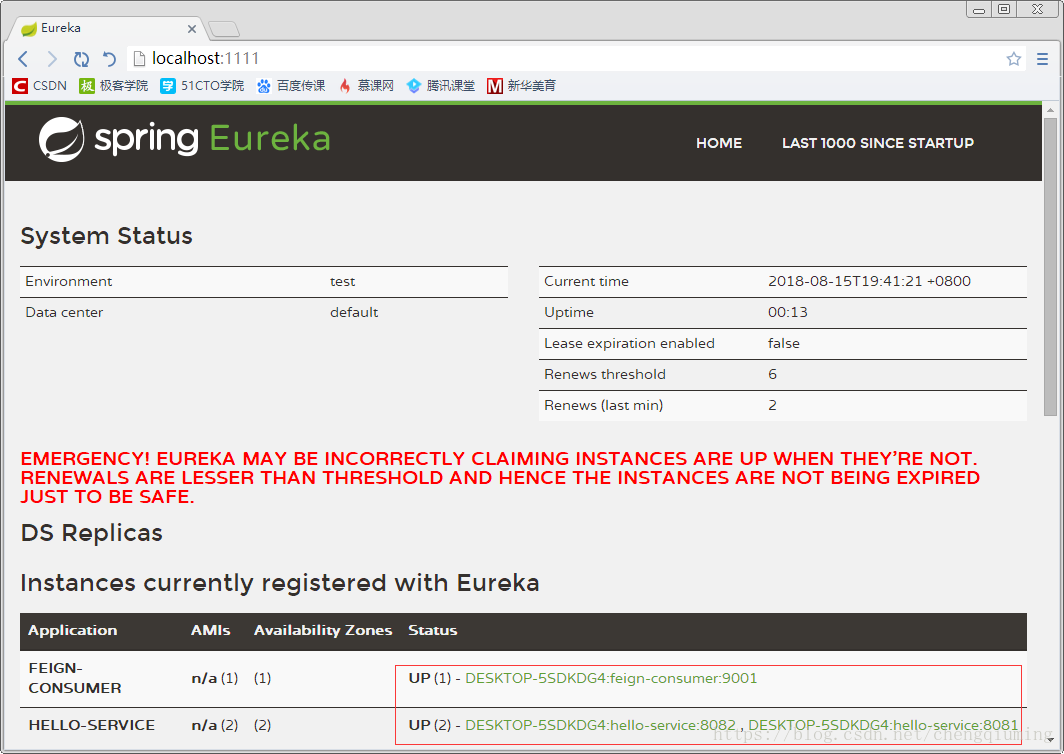
1 启动Eureka,两个Hello-service,然后启动Feign-consumer。
2 观察Eureka面板
3 发送http://localhost:9001/feign-consumer
第一个Hello-service的控制台打印:
2018-08-15 19:42:53.550 INFO 8028 --- [nio-8082-exec-1] com.didispace.web.HelloController : /hello, host:DESKTOP-5SDKDG4, service_id:hello-service
2018-08-15 19:43:24.924 INFO 8028 --- [nio-8082-exec-3] com.didispace.web.HelloController : /hello, host:DESKTOP-5SDKDG4, service_id:hello-service
第二个Hello-service的控制台打印:
2018-08-15 19:43:08.548 INFO 12088 --- [nio-8081-exec-3] com.didispace.web.HelloController : /hello, host:DESKTOP-5SDKDG4, service_id:hello-service
2018-08-15 19:43:14.169 INFO 12088 --- [nio-8081-exec-5] com.didispace.web.HelloController : /hello, host:DESKTOP-5SDKDG4, service_id:hello-service
实现了客户端的负载均衡。


 780
780

 被折叠的 条评论
为什么被折叠?
被折叠的 条评论
为什么被折叠?
 到【灌水乐园】发言


