


 本文介绍如何从Spring Cloud 1.2.0版本开始使用属性配置来定制Ribbon客户端,提供了通过YAML文件配置负载均衡策略的具体方法,并展示了通过ConsumerMovieApplication和MovieController实现服务消费的应用实例。
一 介绍
从版本1.2.0开始,Spring Cloud支持使用属性来自定义Ribbon客户端。
这种方式比使用Java代码配置的方式更方便。
支持的属性如下,应以<clientName>.ribbon.为前缀:
NFLoadBalancerClassName:应配置ILoadBalancer
NFLoadBalancerRuleClassName:应配置IRule
NFLoadBalancerPingClassName:应配置IPing
NIWSServerListClassName:应配置ServerList
NIWSServerListFilterClassName应配置ServerListFilter
二 ConsumerMovieApplication代码
package com.itmuch.cloud.study;

import org.springframework.boot.SpringApplication;
import org.springframework.boot.autoconfigure.SpringBootApplication;
import org.springframework.cloud.client.discovery.EnableDiscoveryClient;
import org.springframework.cloud.client.loadbalancer.LoadBalanced;
import org.springframework.context.annotation.Bean;
import org.springframework.web.client.RestTemplate;

@EnableDiscoveryClient
@SpringBootApplication
public class ConsumerMovieApplication {
  @Bean
  @LoadBalanced
  public RestTemplate restTemplate() {
    return new RestTemplate();
  }

  public static void main(String[] args) {
    SpringApplication.run(ConsumerMovieApplication.class, args);
  }
}
三 MovieController代码
package com.itmuch.cloud.study.user.controller;

import org.slf4j.Logger;
import org.slf4j.LoggerFactory;
import org.springframework.beans.factory.annotation.Autowired;
import org.springframework.cloud.client.ServiceInstance;
import org.springframework.cloud.client.loadbalancer.LoadBalancerClient;
import org.springframework.web.bind.annotation.GetMapping;
import org.springframework.web.bind.annotation.PathVariable;
import org.springframework.web.bind.annotation.RestController;
import org.springframework.web.client.RestTemplate;

import com.itmuch.cloud.study.user.entity.User;

@RestController
public class MovieController {
  private static final Logger LOGGER = LoggerFactory.getLogger(MovieController.class);
  @Autowired
  private RestTemplate restTemplate;
  @Autowired
  private LoadBalancerClient loadBalancerClient;

  @GetMapping("/user/{id}")
  public User findById(@PathVariable Long id) {
    return this.restTemplate.getForObject("http://microservice-provider-user/" + id, User.class);
  }

  @GetMapping("/log-user-instance")
  public void logUserInstance() {
    ServiceInstance serviceInstance = this.loadBalancerClient.choose("microservice-provider-user");
    // 打印当前选择的是哪个节点
    MovieController.LOGGER.info("{}:{}:{}", serviceInstance.getServiceId(), serviceInstance.getHost(), serviceInstance.getPort());
  }
}
四 application.yml配置
server:
  port: 8010
spring:
  application:
    name: microservice-consumer-movie
eureka:
  client:
    serviceUrl:
      defaultZone:http://localhost:8761/eureka/
  instance:
    prefer-ip-address: true
microservice-provider-user:
  ribbon:
    NFLoadBalancerRuleClassName:com.netflix.loadbalancer.RandomRule
五 测试
1 启动eureka
2 启动两user微服务
3 启动movie微服务
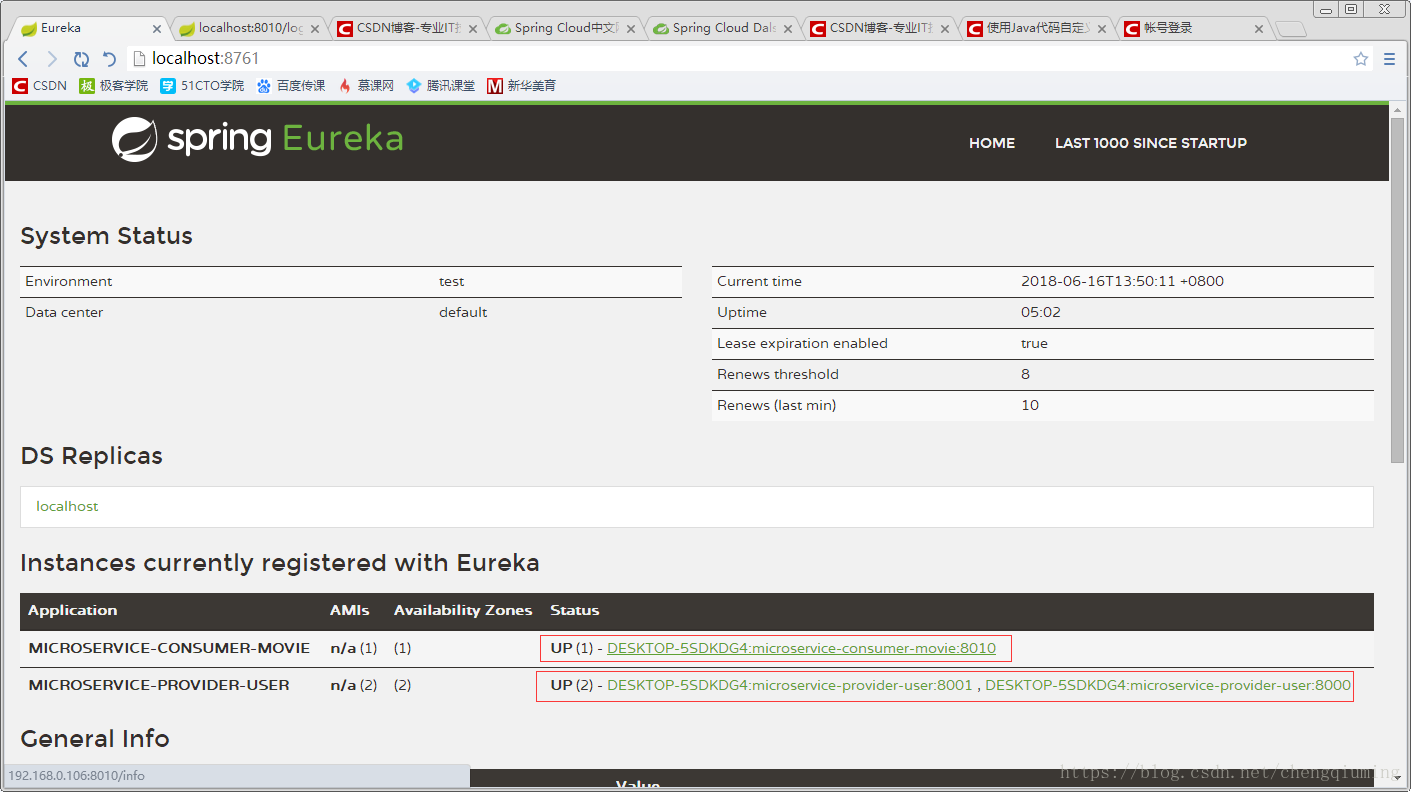
4 多次访问
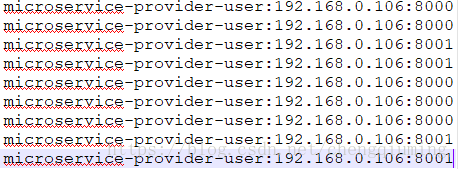
http://localhost:8010/log-user-instance,查看日志,会发现此时请求是随机分布到两个用户微服务节点上。


 823
823

 被折叠的 条评论
为什么被折叠?
被折叠的 条评论
为什么被折叠?
 到【灌水乐园】发言


