


 本文深入讲解Android中Activity的创建流程,生命周期,跳转与数据传递方式,以及四种启动模式的特性与测试方法。
目录
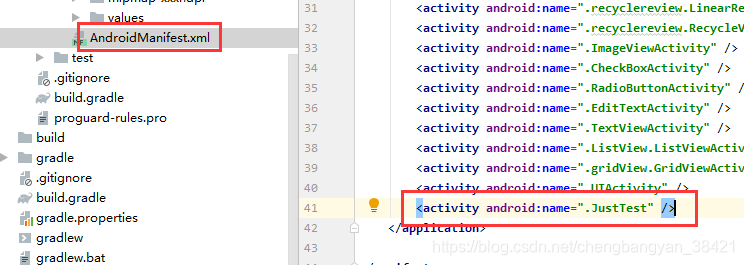
二.在AndroidManifest文件中声明。"."代表包名
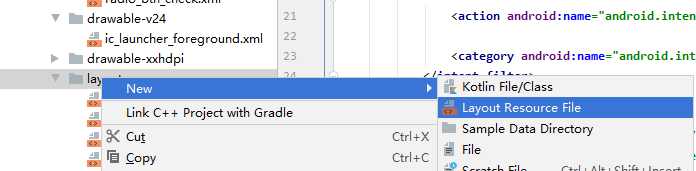
三.创建layout并在Activity中的onCreate方法中设置
Activity创建三部曲
一.新建类继承Activity或其子类
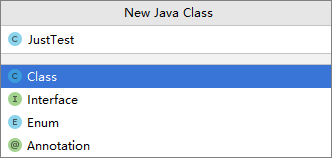
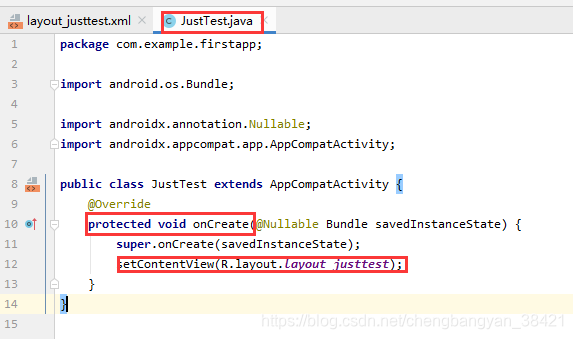
1.创建一个Java类,JustTest.java
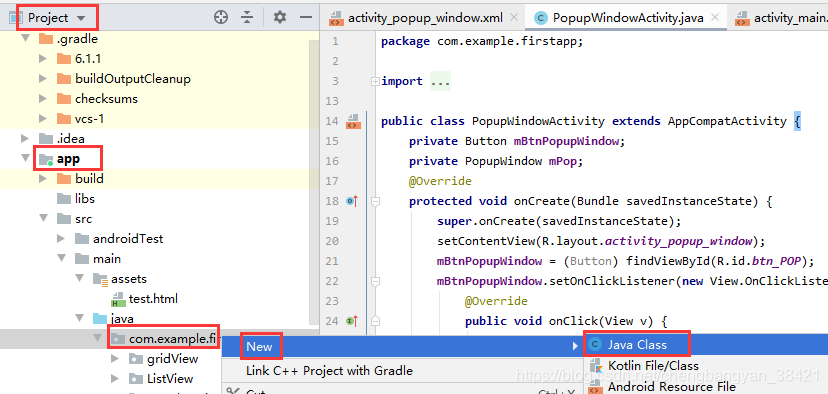
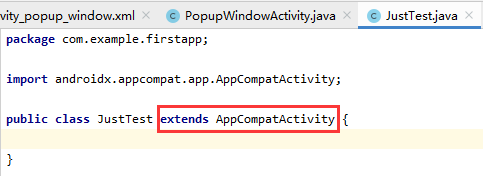
2.JustTest.java继承自AppCompatActivity
二.在AndroidManifest文件中声明。"."代表包名
三.创建layout并在Activity中的onCreate方法中设置
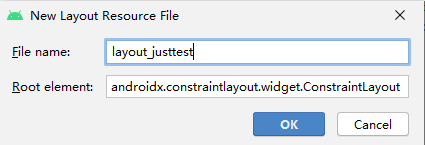
1.创建layout文件

2.在Activity(JustTest)中设置,创建onCreate方法,以及设置Activity的布局。
补充:
1.去掉标题栏
AndroidManifest.xml文件里面的<application>标签里面设置
<android:theme="@style/theme.getAppCompat.Light.NoActionBar">
2.设置横屏还是竖屏显示,在Activity文件里面设置
Android:screenOrientation="portrait"
3.设置默认的启动Activity
一般的Activity-> <Activity android:....../>
启动项Activity的设置
<activity android:name=".MainActivity">
    <intent-filter>
        <action android:name="android.intent.action.MAIN" />

        <category android:name="android.intent.category.LAUNCHER" />
</intent-filter></activity>Activity的生命周期
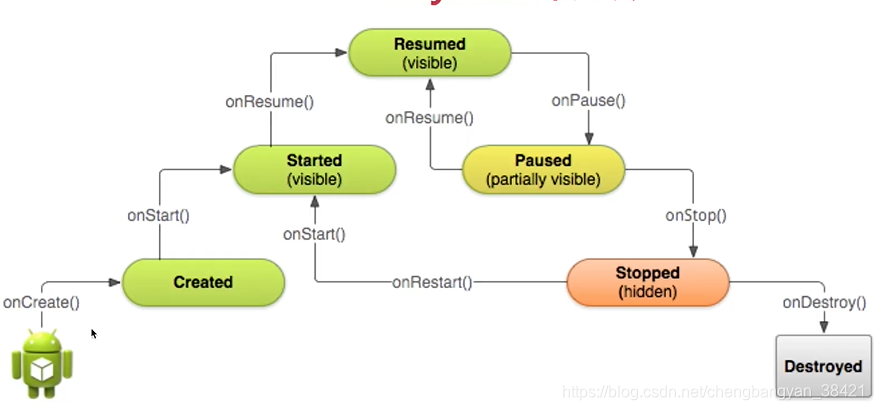
通过写一个测试类来观察Activity的生命周期
package com.example.firstapp;

import androidx.annotation.Nullable;
import androidx.appcompat.app.AppCompatActivity;

import android.os.Bundle;
import android.os.PersistableBundle;
import android.util.Log;

public class TestActivity extends AppCompatActivity {

    @Override
    protected void onCreate(Bundle savedInstanceState) {
        super.onCreate(savedInstanceState);
        setContentView(R.layout.activity_test);
        Log.d("lifecycle","-----onCreate");
    }
    @Override
    protected void onStart(){
        super.onStart();
        Log.d("lifecycle","-----onStart");
    }
    @Override
    protected void onResume(){
        super.onResume();
        Log.d("lifecycle","------onResume");
    }
    @Override
    protected void onPause() {
        super.onPause();
        Log.d("lifecycle", "------onResume");
    }
    protected void onStop() {
        super.onStop();
        Log.d("lifecycle", "------onStop");
    }
    protected void onRestart() {
        super.onRestart();
        Log.d("lifecycle", "------onRestart");
    }
    protected void onDestroy() {
        super.onDestroy();
        Log.d("lifecycle", "------onDestroy");
    }
}
运行之后在控制台收到的结果:
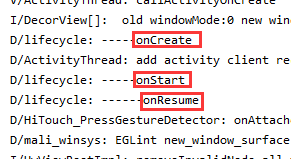
分别经历了:onCreate,onStart,onResume三个步骤
点击app页面的返回键
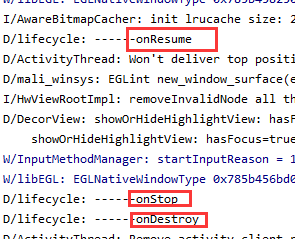
最后经历了:onResume,onStop,onDestory。
Activity跳转,数据传递
一.Avtivity之间的跳转
1.显式的跳转,一共有四种,通过intent
如下
Intent intent = new Intent(AActivity.this, BActivity.class);//(起点,目标)startActivity(intent);或者是
Intent intent = new Intent();
intent.setClass(AActivity.this,BActivity.class);
startActivity(intent);
或者是
Intent intent = new Intent();
intent.setClassName(MainActivity.this,"com.example.firstapp.BActivity");
startActivity(intent);
或者是
intent = new Intent();
intent.setComponent(new ComponentName(MainActivity.this,"com.example.firstapp.UIActivity"));
startActivity(intent);
2.隐式的跳转
intent = new Intent();
intent.setAction("com.example.firstapp.JustTest");
startActivity(intent);
同时在AndroidManifest.xml文件里把下面标签填在对应的Activity里,这里跳转到的Activity是B
<intent-filter>
    <action android:name="android.intent.action.BAactivity" />
    <category android:name="android.intent.category.DEFAULT" />
</intent-filter>
二.数据传递
数据传出方:
Intent intent = new Intent(MainActivity.this, UIActivity.class);
Bundle bundle = new Bundle();
bundle.putString("name",小李);
bundle.putInt("number",88);
intent.putExtras(bundle);
startActivity(intent);
数据接收方
Bundle bundle = getIntent().getExtras();
String name = bundle.getString("name");
int number = bundle.getInt("number");
如果想要接收方再返回结果,需要用到
startActivityForResult(,);
下面用A和B两个Activity来演示
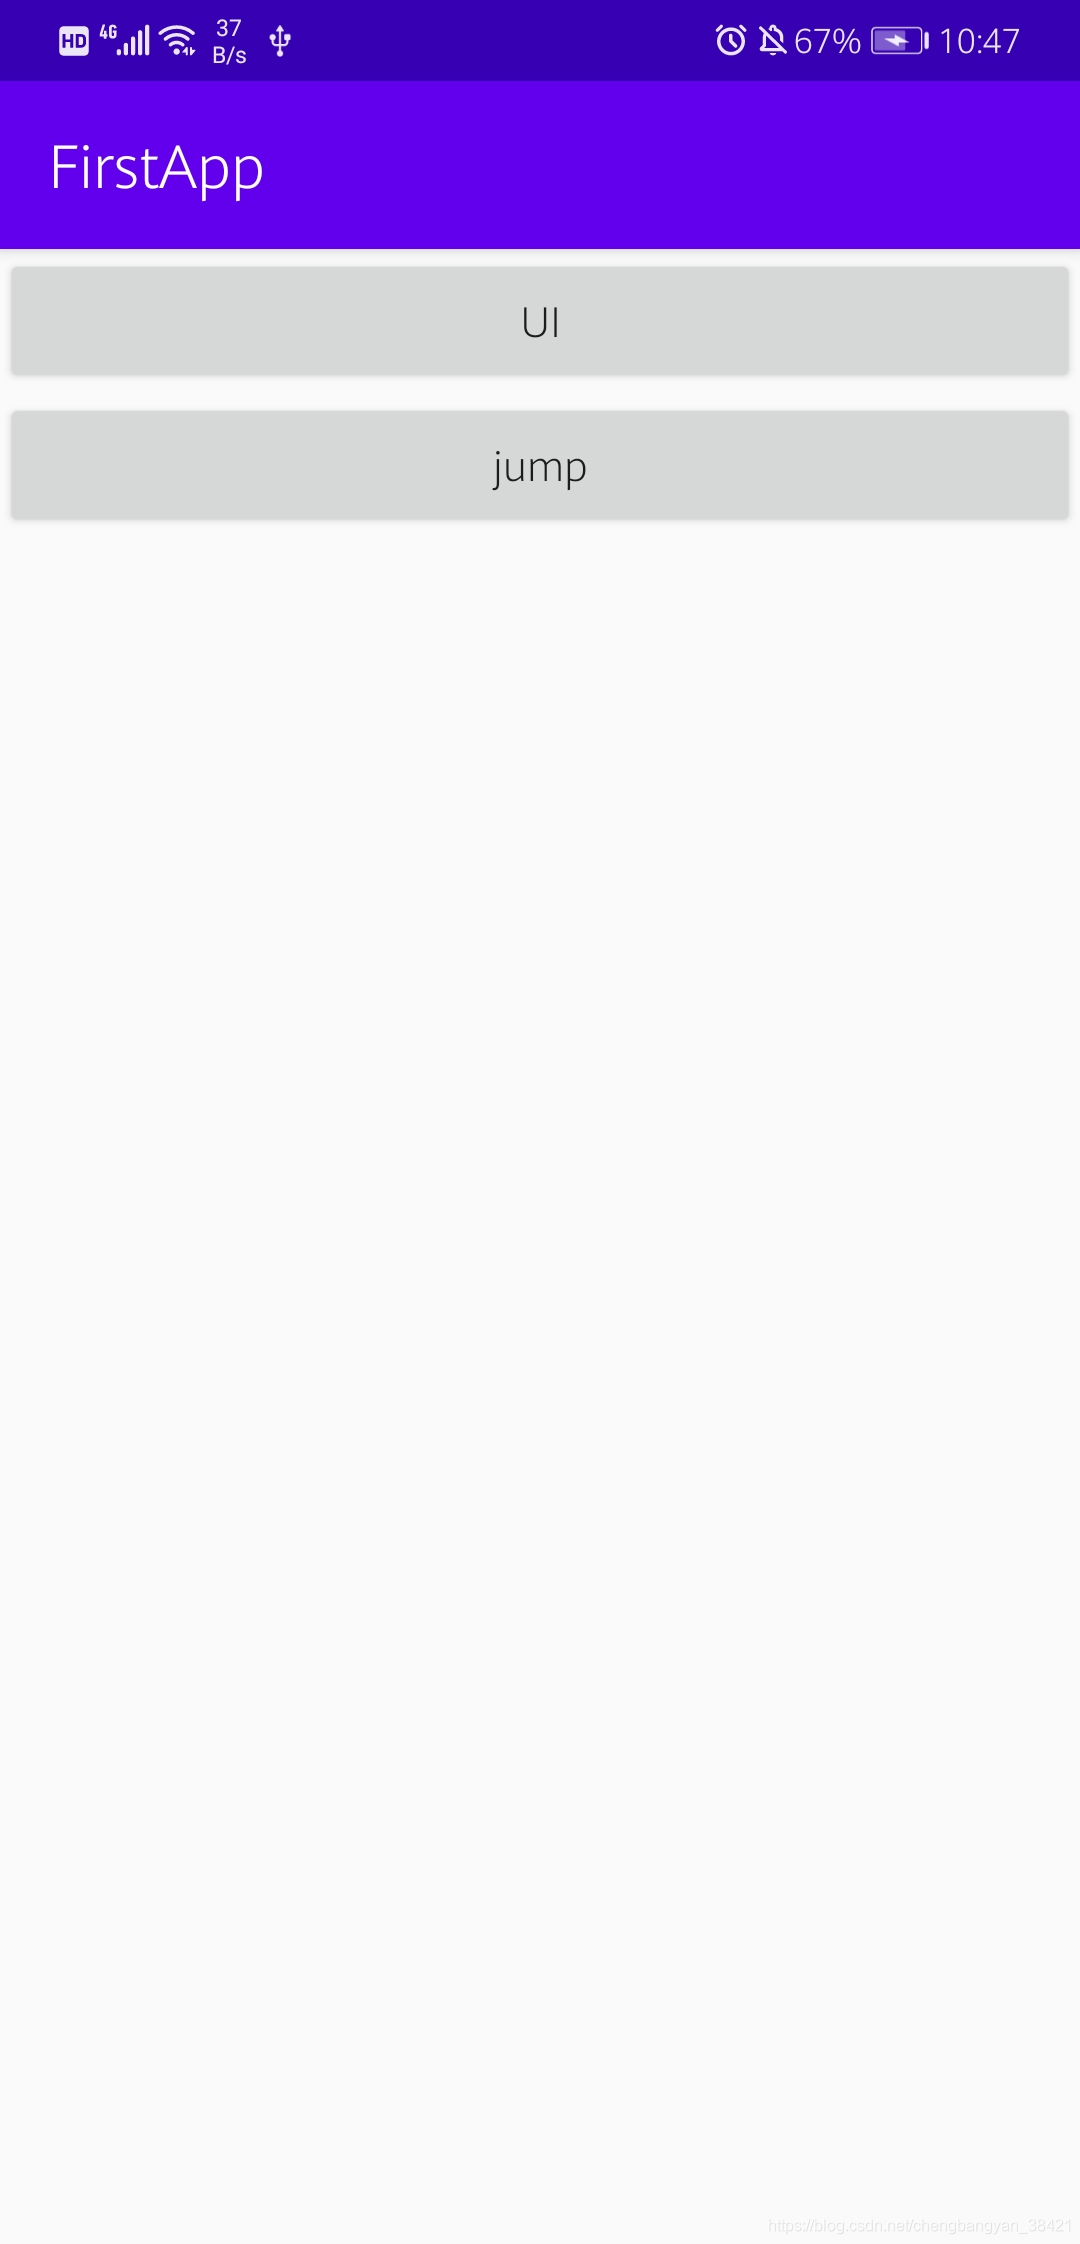
在程序的入口处设置一个跳转到AActivity的按钮
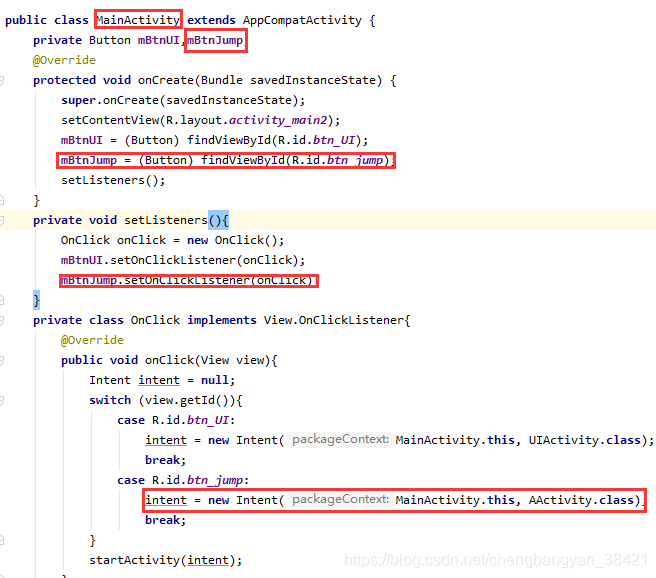
入口布局文件,UIButton负责跳转到控件Activity
<?xml version="1.0" encoding="utf-8"?>
<LinearLayout xmlns:android="http://schemas.android.com/apk/res/android"
    xmlns:app="http://schemas.android.com/apk/res-auto"
    xmlns:tools="http://schemas.android.com/tools"
    android:layout_width="match_parent"
    android:layout_height="match_parent"
    android:orientation="vertical">
<Button
    android:id="@+id/btn_UI"
    android:layout_width="match_parent"
    android:layout_height="wrap_content"
    android:text="UI"
    android:textAllCaps="false"/>
    <Button
        android:id="@+id/btn_jump"
        android:layout_width="match_parent"
        android:layout_height="wrap_content"
        android:text="jump"
        android:textAllCaps="false"
        />
</LinearLayout>
AActivity的布局activity_a.xml
<?xml version="1.0" encoding="utf-8"?>
<LinearLayout xmlns:android="http://schemas.android.com/apk/res/android"
    xmlns:app="http://schemas.android.com/apk/res-auto"
    xmlns:tools="http://schemas.android.com/tools"
    android:layout_width="match_parent"
    android:layout_height="match_parent"
    tools:context=".AActivity">
<Button
    android:id="@+id/btn_jp"
    android:layout_width="match_parent"
    android:layout_height="wrap_content"
    android:text="jump"/>
</LinearLayout>
AActivity.java关于跳转的部署
public class AActivity extends AppCompatActivity {
    private Button mBtnJump;

    @Override
    protected void onCreate(Bundle savedInstanceState) {
        super.onCreate(savedInstanceState);
        setContentView(R.layout.activity_a);
        Intent intent = new Intent(AActivity.this,BActivity.class);
        Bundle bundle = new Bundle();
        bundle.putString("name","小李");
        bundle.putInt("number",88);
        intent.putExtras(bundle);
        startActivityForResult(intent,0);
    }
    @Override
    protected void onActivityResult(int requestCode, int resultCode, @Nullable Intent data) {
        super.onActivityResult(requestCode, resultCode, data);
        Toast.makeText(AActivity.this,data.getExtras().getString("title"),Toast.LENGTH_LONG).show();
    }
}
BActivity的布局文件activity_b.xml
<?xml version="1.0" encoding="utf-8"?>
<LinearLayout xmlns:android="http://schemas.android.com/apk/res/android"
    xmlns:app="http://schemas.android.com/apk/res-auto"
    xmlns:tools="http://schemas.android.com/tools"
    android:layout_width="match_parent"
    android:layout_height="match_parent"
    android:orientation="vertical">
    <TextView
        android:id="@+id/tv_title"
        android:layout_width="match_parent"
        android:layout_height="wrap_content"
        android:textSize="20sp"
        android:background="@color/colorTransparent"/>
    <Button
        android:id="@+id/btn_finish"
        android:layout_width="match_parent"
        android:layout_height="wrap_content"
        android:text="finish"/>
</LinearLayout>
BActivity.java文件
public class BActivity extends AppCompatActivity {
private TextView mTvTitle;
private Button mBtnFinish;
@Override
protected void onCreate(Bundle savedInstanceState) {
super.onCreate(savedInstanceState);
setContentView(R.layout.activity_b);
mTvTitle = findViewById(R.id.tv_title);
mBtnFinish = findViewById(R.id.btn_finish);
Bundle bundle = getIntent().getExtras();
String name = bundle.getString("name");
int number = bundle.getInt("number");
mTvTitle.setText(name+","+number);
mBtnFinish.setOnClickListener(new View.OnClickListener(){
@Override
public void onClick(View view){
Intent intent = new Intent();
Bundle bundle1 = new Bundle();
bundle1.putString("title","我回来了");
intent.putExtras(bundle1);
setResult(Activity.RESULT_OK,intent);
finish();
}
});
}
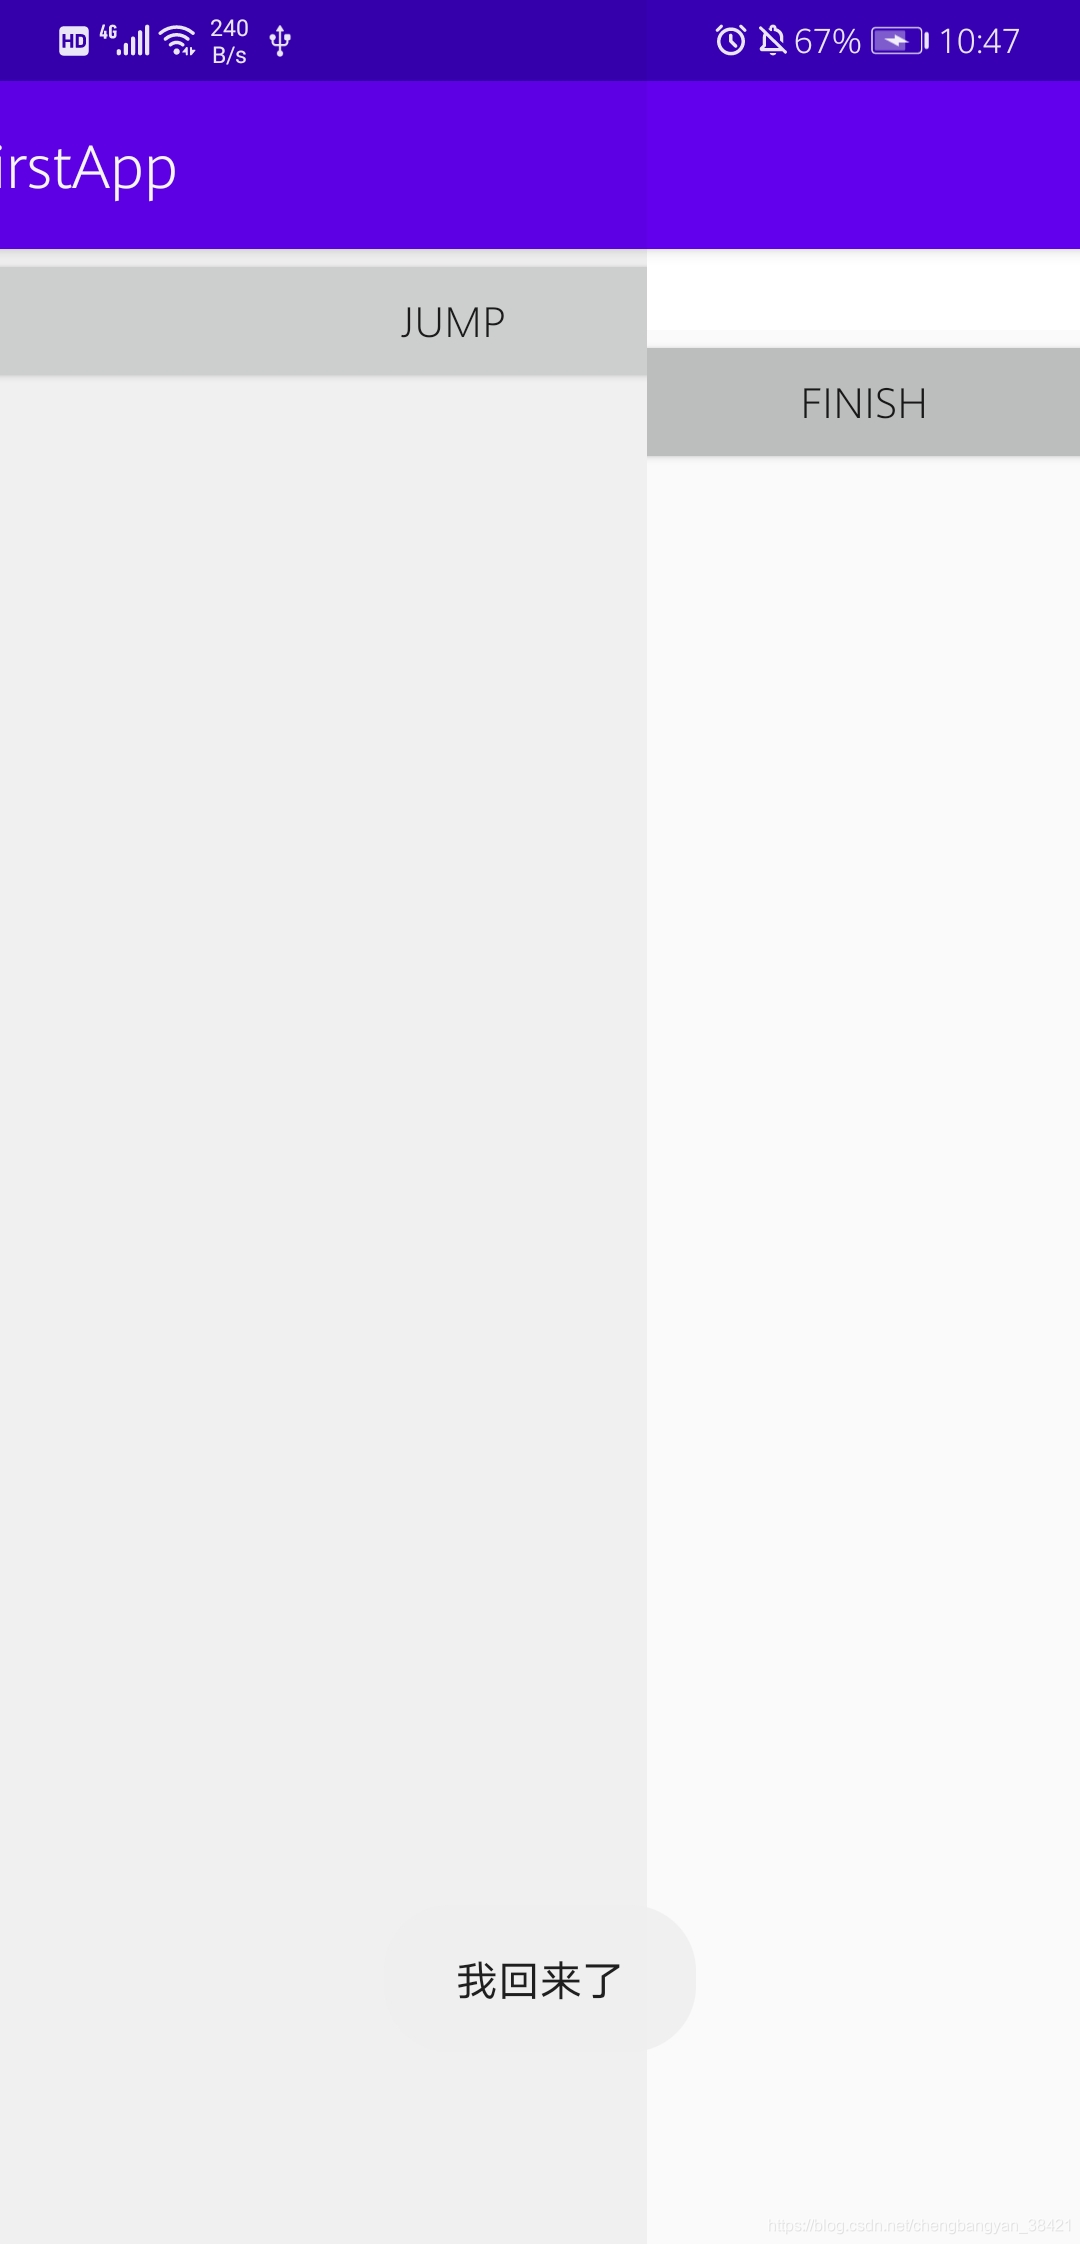
}最终演示结果
依次点击jump——>finish
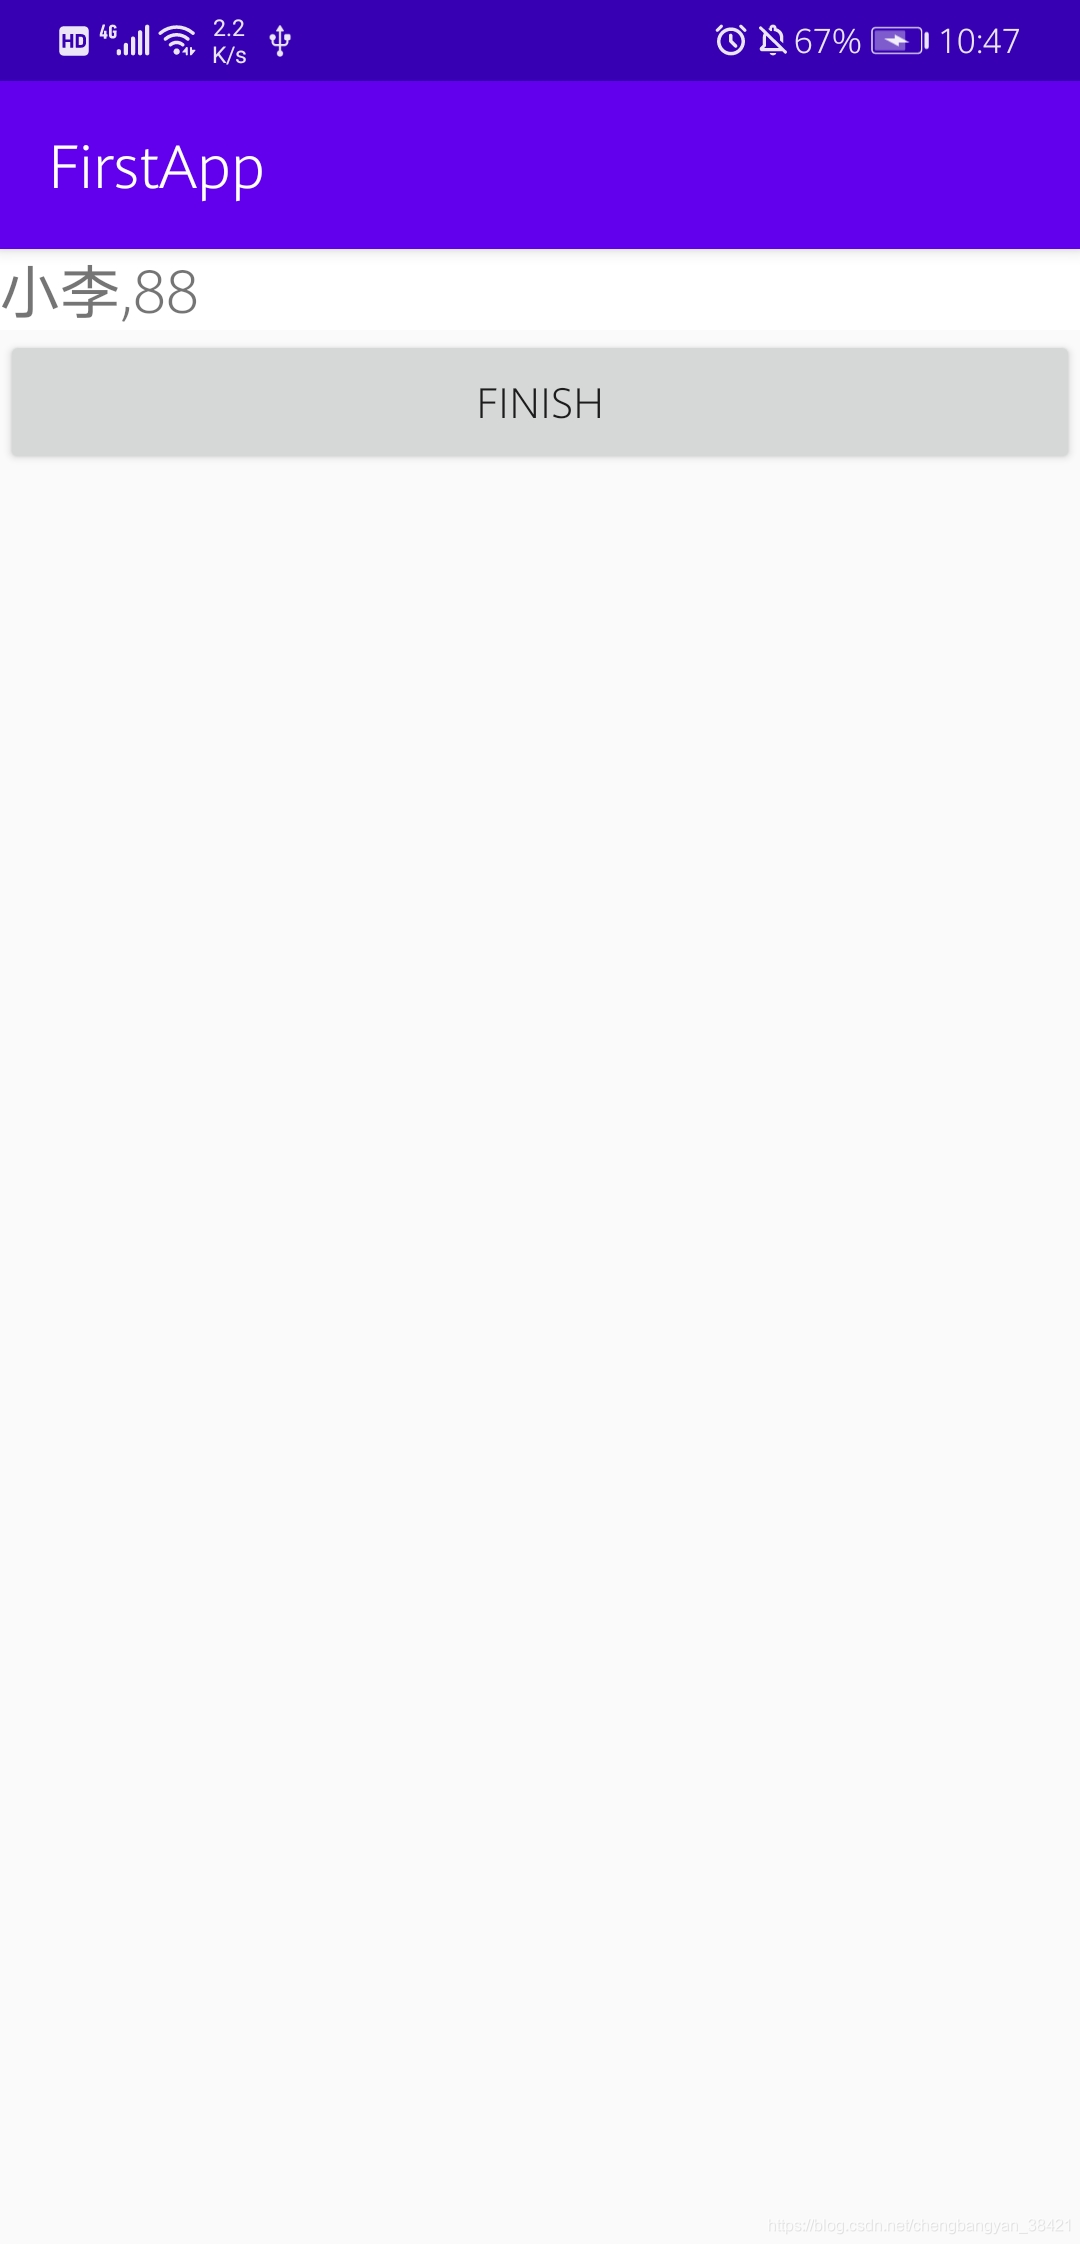
点击finish之后,BActivity结束就会回到原来的AActivity,截图如下,页面在跳转,Toast显示“我回来了”
Activity的四种启动模式
Activity的Android:launchmode属性
1.standard:标准模式,默认
2.singleTop:task栈顶复用模式
3.singleTask:task栈内复用模式
4.singleInstance:全局单例模式
Activity是由任务栈管理的,每启动一个Activity,就会被放入栈中,按返回键就是从栈顶移除一个Activity
standard是默认的启动模式,即标准模式,每启动一个Activity都会创建一个新的实例
测试
Standard
在AActivity里面设置按钮jump2,jump2跳转到AActivity本身,BActivity里面设置按钮jumpAActivity,jumpAActivity跳转到AActivity,用来测试
首先需要设置AndroidManifest.xml文件中的lunchmode,为standard
<activity android:name=".BActivity"
    android:label="B"
    android:launchMode="standard"/>
<activity android:name=".AActivity"
    android:label="A"
    android:launchMode="standard"/>
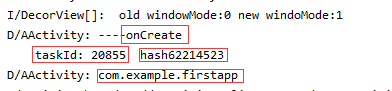
在AActivity里面的onCreate方法中添加设置控制窗台打印,打印出taskid,hashcode
Log.d("AActivity","----onCreate");
Log.d("AActivity","taskId: "+getTaskId()+"  hash"+hashCode());
logtaskName();
测试步骤:分别点击jump2,jumpAActivity按钮,分别出现三次,一次是第一次进去AActivity页面,一次是点击jump2跳转到AActicity本身,一次是点击jumpAActivity跳转到AActivity
1
2

3
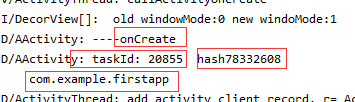
在没有设置任务栈的时候,默认的任务栈就是所在的包名,这里就是com.example.firstapp,可以看到1,2,3的taskid一样,代表任务栈没有改变,hashcode改变了说明每次都创建了新的Activity。
singleTop
如果想要改成栈顶复用模式,首先还是修改AndroidManifest.xml文件中的lunchmode,为singleTop
<activity android:name=".BActivity"
    android:label="B"
    android:launchMode="singleTop"/>
<activity android:name=".AActivity"
    android:label="A"
    android:launchMode="singleTop"/>
在上面的基础之上,同样设置BActivity里面的窗台打印如下
Log.d("BActivity","----onNewIntent----");
Log.d("BActivity","taskId: "+getTaskId()+"  hash  "+hashCode());
logtaskName();
其中上面提到的logtaskName方法如下
private void logtaskName(){
    try {
        ActivityInfo info = getPackageManager().getActivityInfo(getComponentName(), PackageManager.GET_META_DATA);
        Log.d("AActivity",info.taskAffinity);                     //打印当前所在任务栈的名称
    } catch (PackageManager.NameNotFoundException e) {
        e.printStackTrace();
    }
}
测试步骤:分别点击jump2,jumpAActivity按钮,分别出现两次,一次是第一次进去AActivity页面,点击jump2跳转到AActicity本身时,栈顶仍然是AActivity,因为启用了栈顶复用模式,就不会再创建一次新的AActivity(此时控制台不打印,无变化),一次是从B页面点击jumpAActivity跳转到AActivity
1 第一次进入AActivity
D/AActivity: ----onCreate----
taskId: 20874 hash 62214523
com.example.firstapp
点击A页面的jump2,无变化,此时复用
2 点击A页面的jump,从A跳转到B
D/BActivity: ----onNewIntent----
D/BActivity: taskId: 20874 hash 153401833 //taskid没变说明此时仍然在同一个任务栈,从A跳转到B,hashcode改变,创建了一个新的实例
D/BActivity: com.example.firstapp
3 从BActivity里面的jumpAActivity跳转到A页面
D/AActivity: ----onCreate----
taskId: 20874 hash 232282338 //taskid没有改变,仍然在同一个任务栈,hashcode改变,B跳转到A说明创建了新的Activity
com.example.firstapp
singleTask
在同一个任务栈中,如果要启动的Activity已经在栈中,则会复用Activity,并调用onNewIntent()方法,并且该activity上面的activity会被清除掉;如果栈中没有,则会创建新的实例。
singleInstance
全局复用,不管哪个task栈,只要存在目标Activity,就复用,每个Activity占有一个新的Task栈。
全局复用应用的的移动开发场景比较少,或者是被用在特殊场合。


 被折叠的 条评论
为什么被折叠?
被折叠的 条评论
为什么被折叠?
 到【灌水乐园】发言


