


 本文详细介绍了如何在S4HANAon-premise环境中创建自定义CDS视图,配置ChangeDataCapture和GenericDate/TimestampDelta,然后在SAPDataSphere中使用InitialplusDelta方式消费这些视图,实现实时材料主数据更新的监控和同步。
Introduction
In this article I will share some experiences of using a custom CDS view on MARA table in S4HANA (onpremise SAP_BASIS 755) and consuming it in SAP Datasphere (version 2024.2.79) for delta enabled replication (Change Data Capture). I will showcase the following :
- Create a Custom CDS view using ADT ( Abap Development Tools) in Eclipse Studio.
- Define CDS annotations for "dataExtraction" and "changeDataCapture".
- Consume the CDS view in Datasphere using "Initial plus Delta" option.
- Create a new Material master in S/4HANA & see the updated delta in SAP Datasphere.
Prerequisties
Please note before using any CDS view from S4HANA for replication in Datasphere you should ascertain that data replication prerequisites are installed in the S4HANA system. Please refer the following sapnote :
SAP ABAP Integration Central note
Note : It is recommended to use a standalone SLT server for replicating Tables from S4HANA into datasphere as highlighted in the Abap Integration Central note.
I highly recommend reading this excellent blog post by Simon - CDS based data extraction - Part II Delta Handling.
This blog presents conceptual understanding on the two common mechanisms of capturing Delta and the core concepts around Delta Handling :
- Generic Date/Timestamp Delta
<span style="background-color:#f5f2f0"><span style="color:#000000"><code class="language-abap"><span style="color:#999999">:</span><span style="color:#999999">{</span>
  dataCategory<span style="color:#999999">:</span> #FACT<span style="color:#999999">,</span>
  dataExtraction<span style="color:#999999">:</span> <span style="color:#999999">{</span>
	<span style="color:#0077aa">enabled</span><span style="color:#999999">:</span> true
	delta<span style="color:#999999">.</span>byElement<span style="color:#999999">:</span> <span style="color:#999999">{</span>
	   <span style="color:#0077aa">name</span><span style="color:#999999">:</span> <span style="color:#669900">'LastChangeDateTime'</span>
	   <span style="color:#999999">}</span>
    <span style="color:#999999">}</span>
  <span style="color:#999999">}</span></code></span></span>
- Change Data Capture Delta
<span style="background-color:#f5f2f0"><span style="color:#000000"><code class="language-abap"><span style="color:#999999">:</span><span style="color:#999999">{</span>
    dataCategory<span style="color:#999999">:</span> #DIMENSION
    dataExtraction<span style="color:#999999">:</span> <span style="color:#999999">{</span>
       <span style="color:#0077aa">enabled</span><span style="color:#999999">:</span> true<span style="color:#999999">,</span>
       delta<span style="color:#999999">.</span>changeDataCapture<span style="color:#999999">:</span> <span style="color:#999999">{</span>
	 automatic <span style="color:#999999">:</span> true
         <span style="color:#999999">}</span>
      <span style="color:#999999">}</span>
<span style="color:#999999">}</span></code></span></span>
1. Create a Custom CDS View : ADT on Eclipse
First step here is to install Eclipse Studio & Abap Development tools(ADT) plugin on the Eclipse Studio. Follow the SAP Development Tools page for detailed instructions.
You can also follow instructions from developers tutorial to install ADT.
- Create new Abap Project and connect to your S4 system
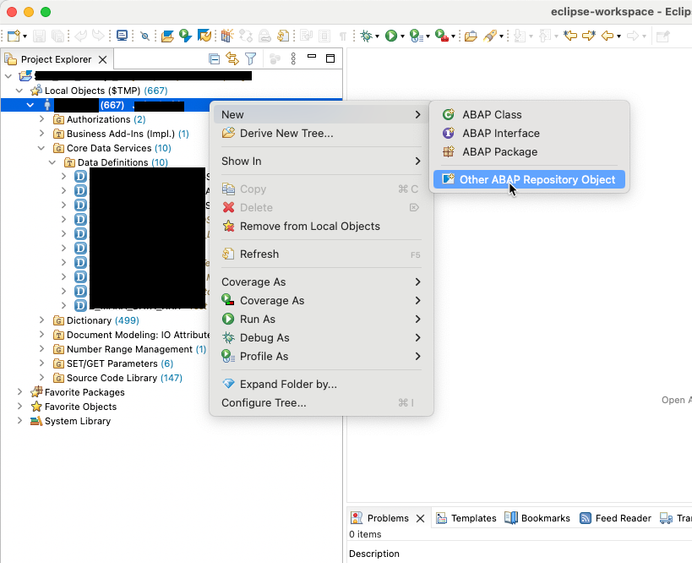
- Create new Abap Repository Object
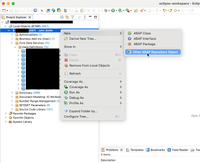
Click on the drop down for Core Data Services and click on Data Definitions :
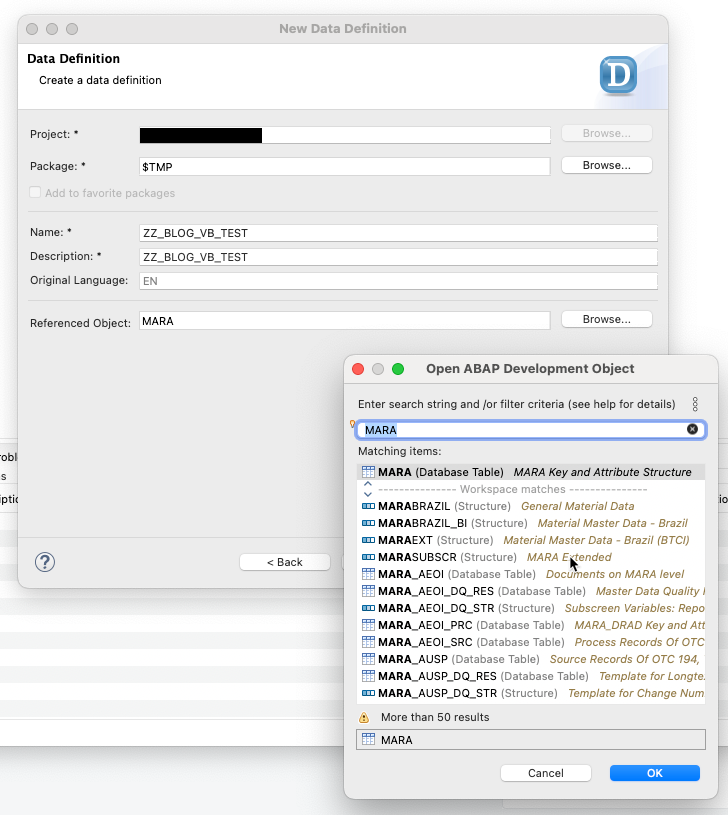
Choose a name for the object and then select a Referenced Object from the data dictionary , this can be another CDS view or other Objects like a physical table. Here I have selected MARA table :
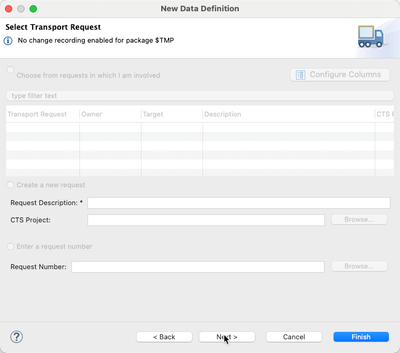
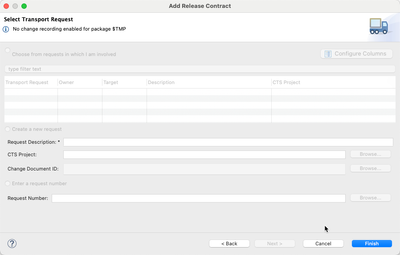
Fill a change request :
Here we select a Template view : Define View , this step will generate the CDS code along with needed annotations and also using the selected Referenced Object and its data structure for example MARA table will have many different Fields/Columns, all of these will be available to use in the CDS view
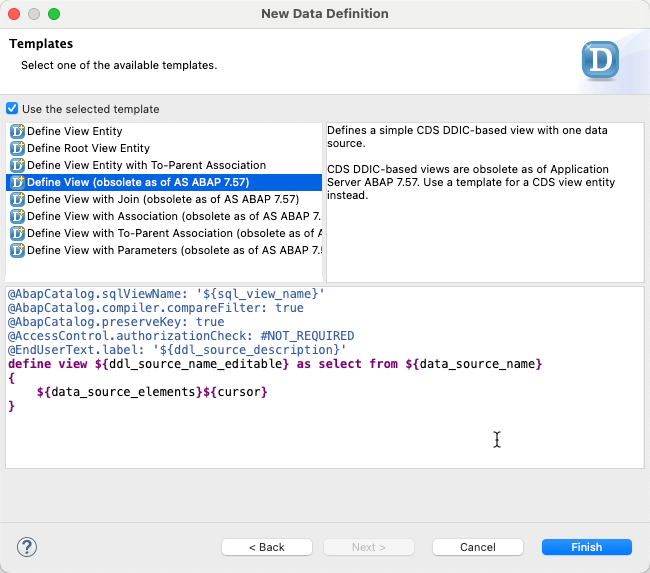
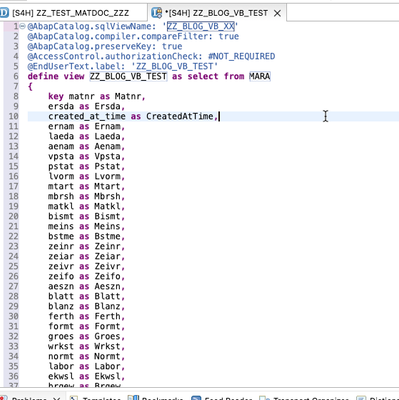
As we see below the CDS code is generated , enter a name for the SQL view and note here that all needed Fields can be selected and new label names can be assigned to standard fields for example : ERNAM field contains name of the person who changed the entry, we can assign a better label here if needed.
Also note we can use Where clause here to futher filter the data, please follow the developer guide linked above which contains detailed steps.
2. Define CDS annotations
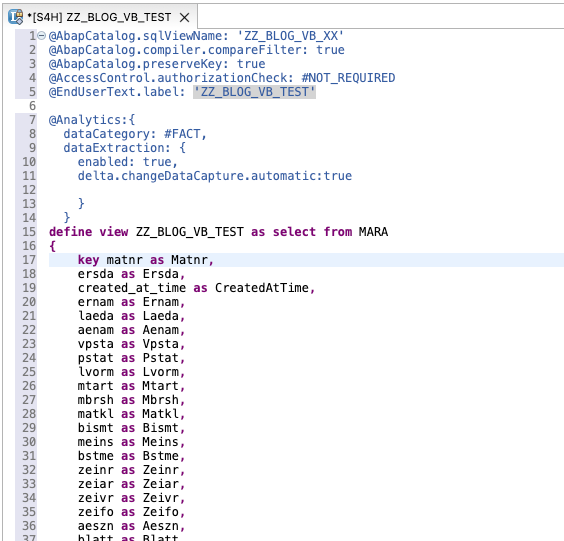
Put in below annotations for "dataExtraction" and "changeDataCapture" :
<span style="background-color:#f5f2f0"><span style="color:#000000"><code class="language-abap"><span style="color:#999999">:</span><span style="color:#999999">{</span>
  dataCategory<span style="color:#999999">:</span> #FACT<span style="color:#999999">,</span>
  dataExtraction<span style="color:#999999">:</span> <span style="color:#999999">{</span>
    <span style="color:#0077aa">enabled</span><span style="color:#999999">:</span> true<span style="color:#999999">,</span>
    delta<span style="color:#999999">.</span>changeDataCapture<span style="color:#999999">.</span>automatic<span style="color:#999999">:</span>true

    <span style="color:#999999">}</span>
  <span style="color:#999999">}</span></code></span></span>
This is how the CDS view looks now :
Save & Activate the View.
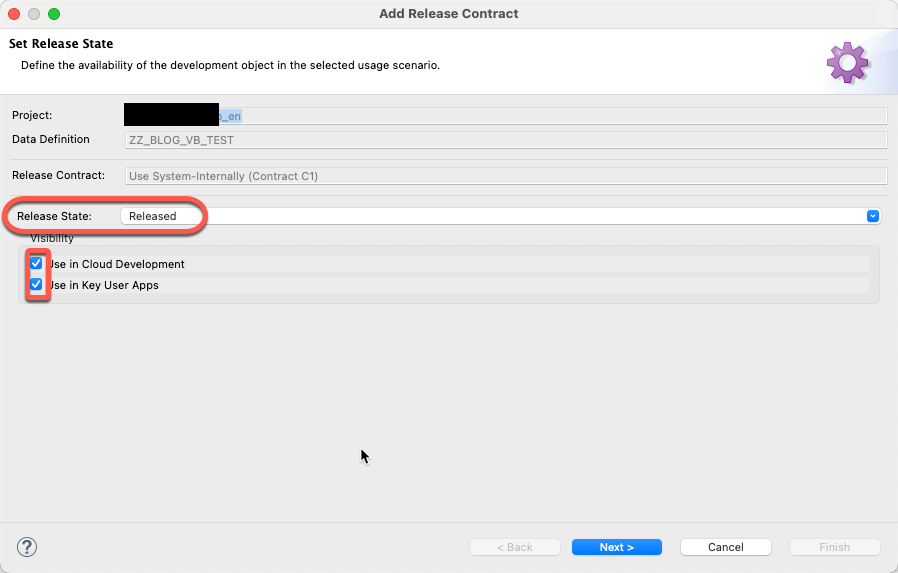
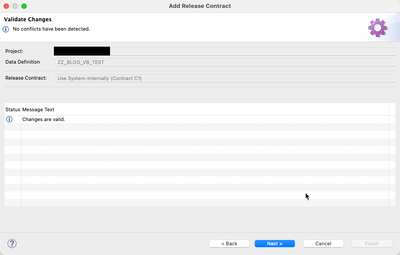
Right click the view to change the API state :

3. Consume the CDS View in SAP Datasphere
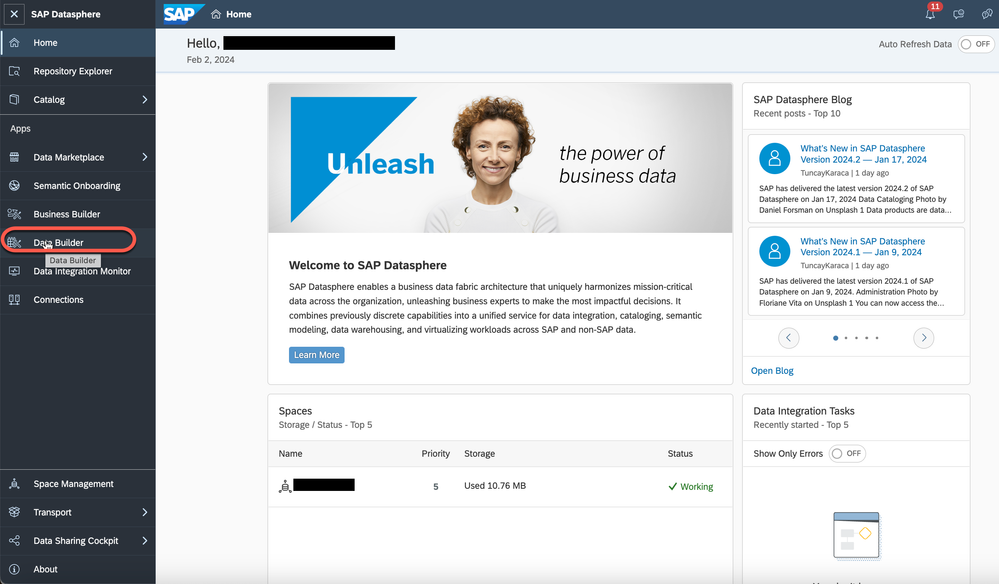
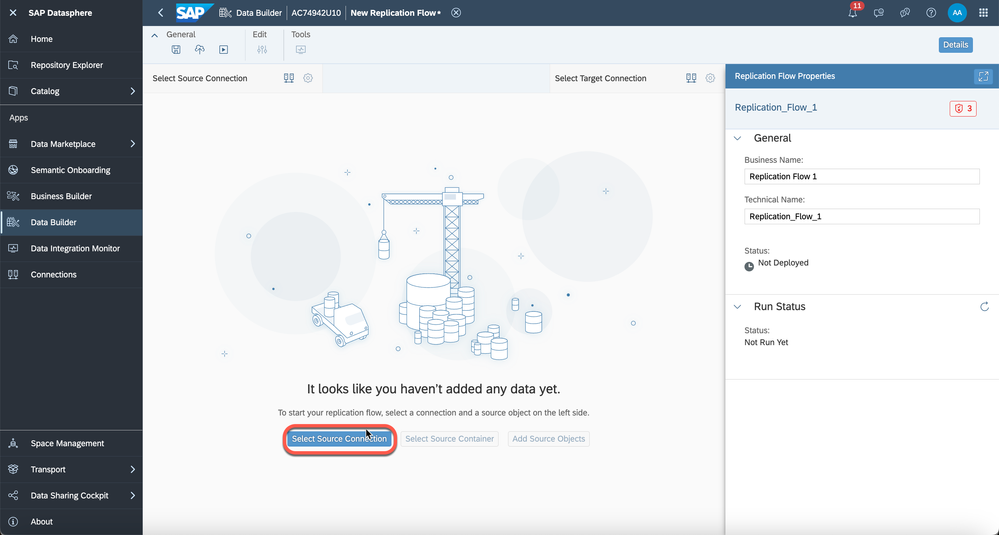
In SAP datasphere goto the Data Builder & Click on new Replication flow.

Select source connection & from the drop down select your S4 HANA system connection.
Select CDS as "container".
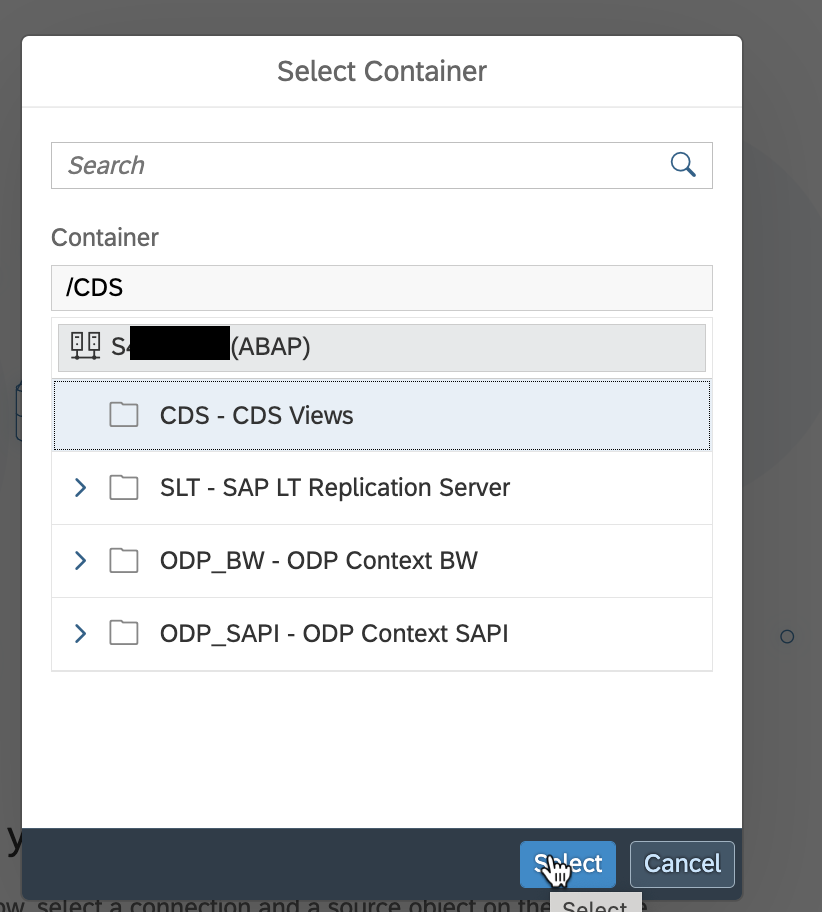
Select the CDS view developed in Eclipse :
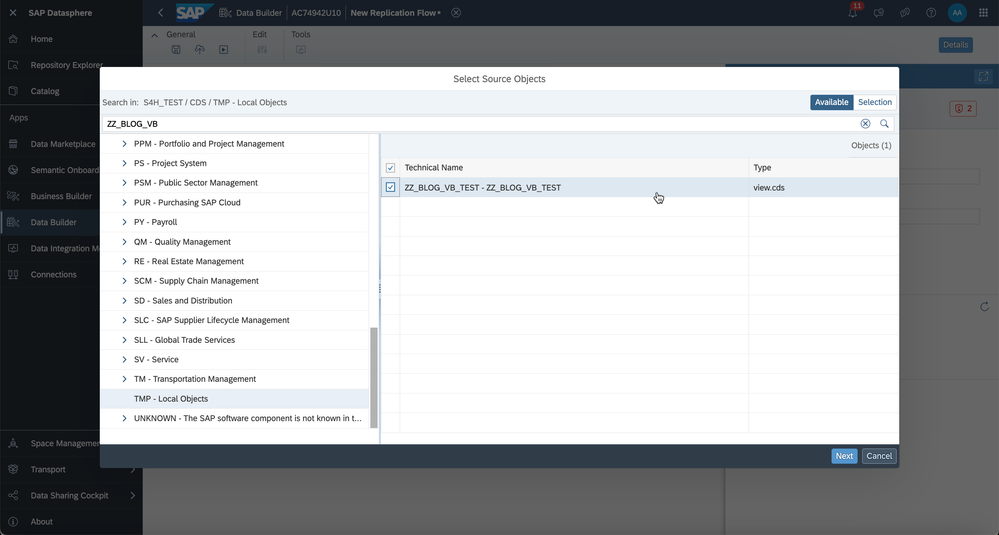
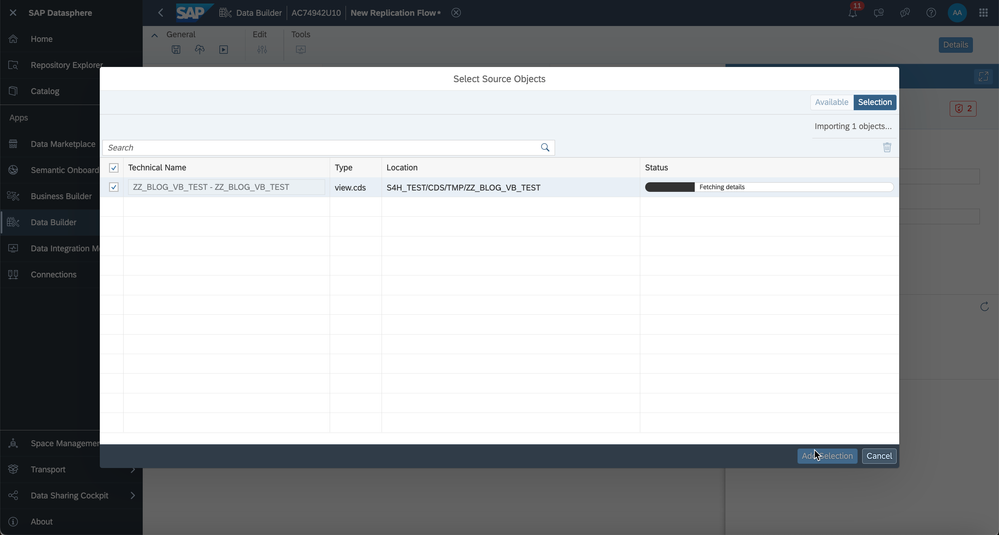
Click Add Selection :
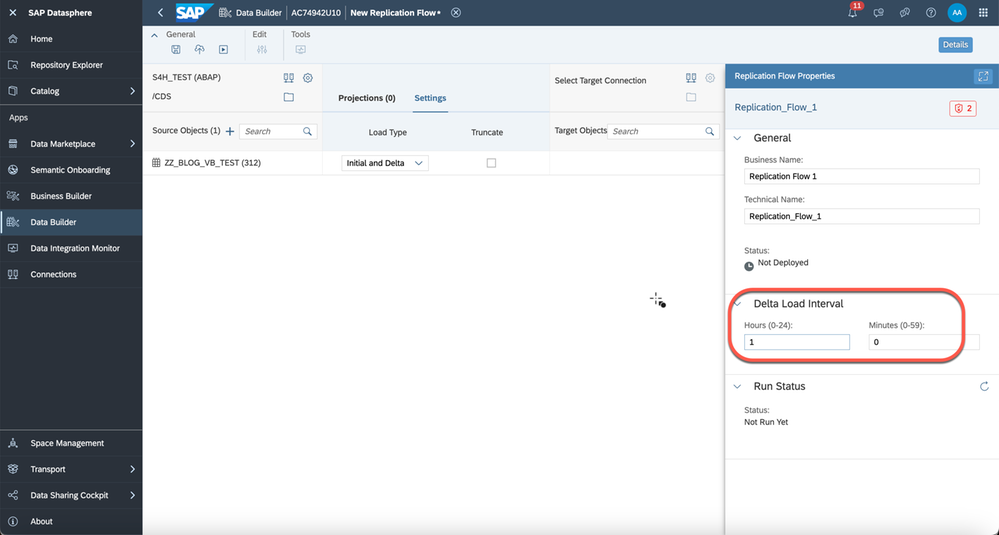
Go to the Settings Tab, here you can now see the Delta Option Available :
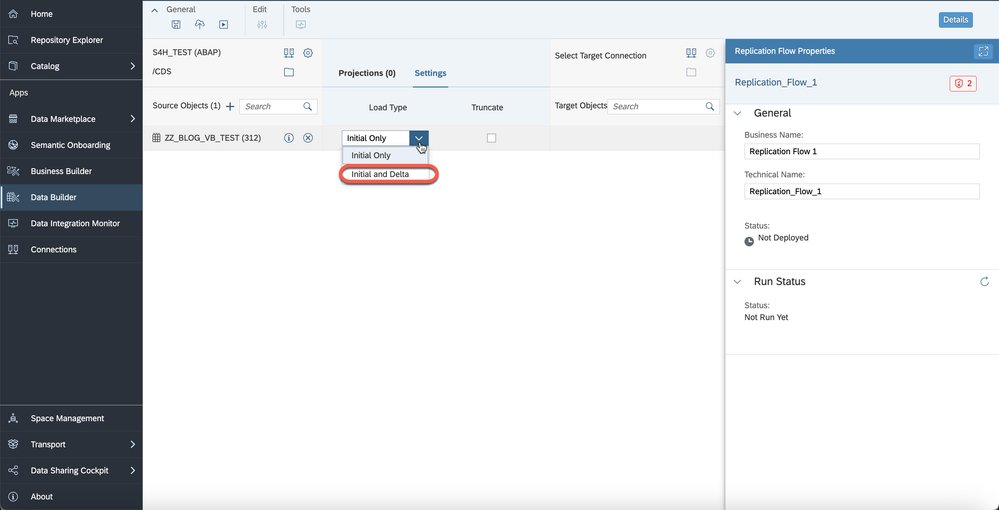
Select Delta load Frequency :
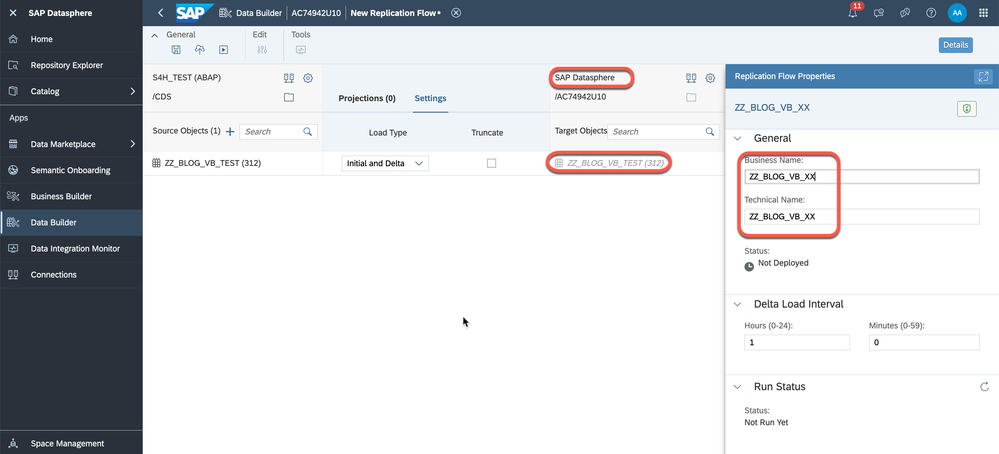
Select a Target - in this case I have selected a Table in Datasphere, Table name is by default the same as the source name. Finally, give a name fo the Replication Flow (Business Name and Technical Name):
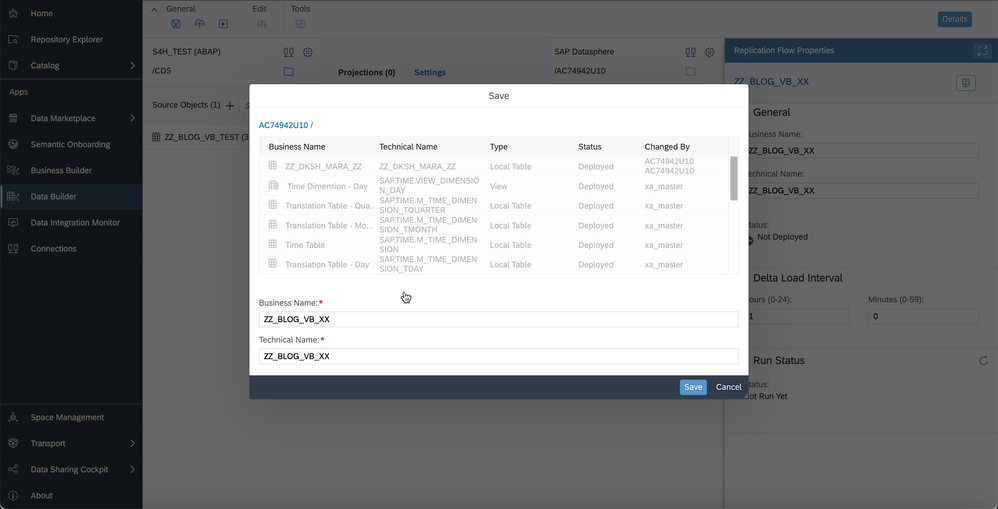
Save & Deploy the Replication view :


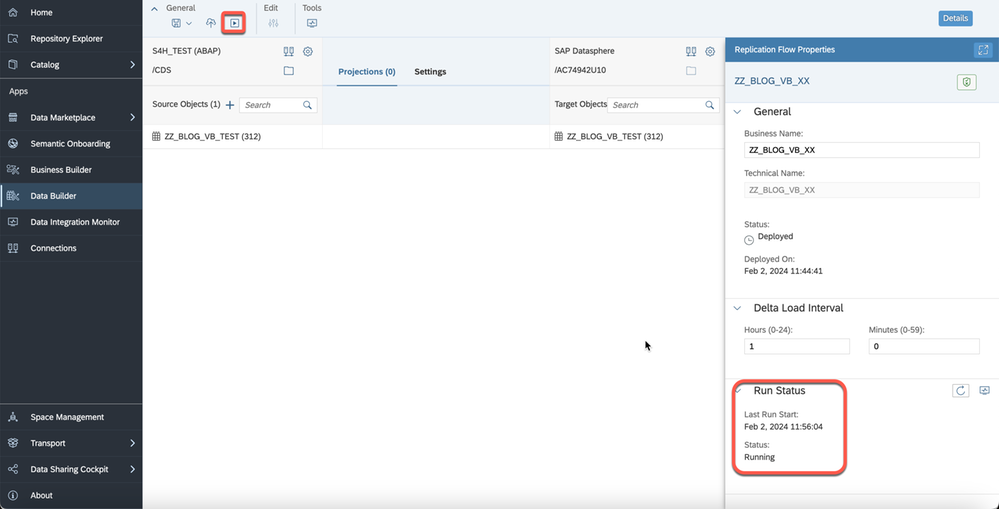
Run the Replication Flow :
When we run the Replication flow the first step is that the Initial load will be started and then based on the delta load frequency a subsequent run will start to copy over the delta.
Monitor the Run :
Here we can monitor the Initial Load progress and also check for any errors being reported.
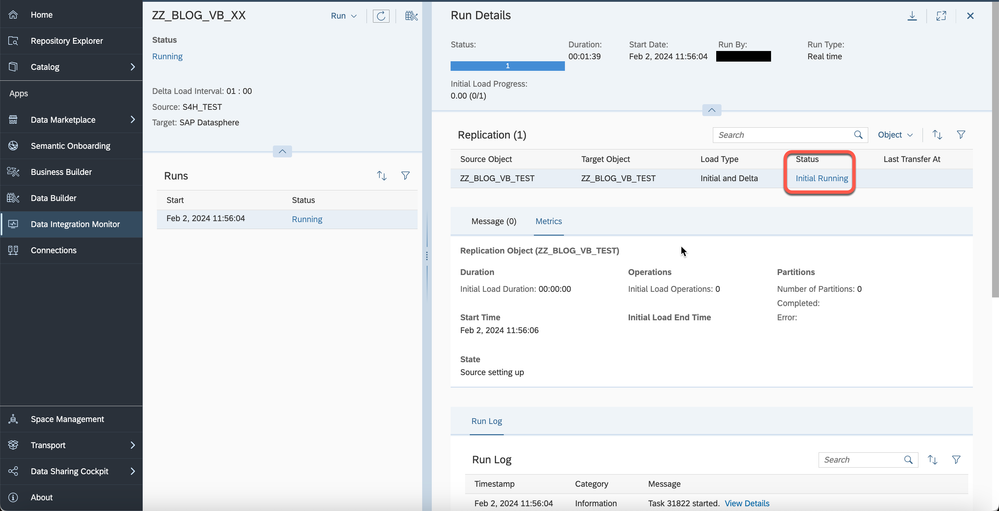
Initial load has finished & now the Replication flow waits for the next Delta run, which will depend on the Frequency selected during the configuration of the Replication Flow :

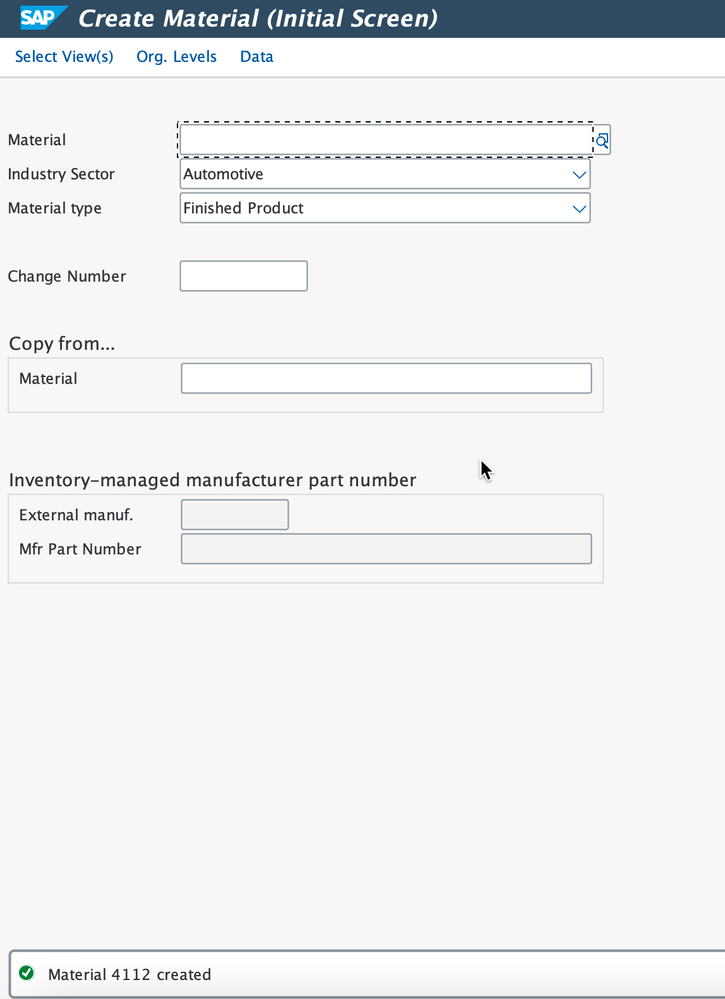
4. Create a new Material master in S4HANA
Now we create a new Material in S4HANA and wait for it to be replicated in SAP Datasphere table using the replication flow that we have deployed.

Replication Flow in Datasphere will start the next run to consume the delta in few mins, but lets check the data in the Replicated Table and filter with this new Material Record :
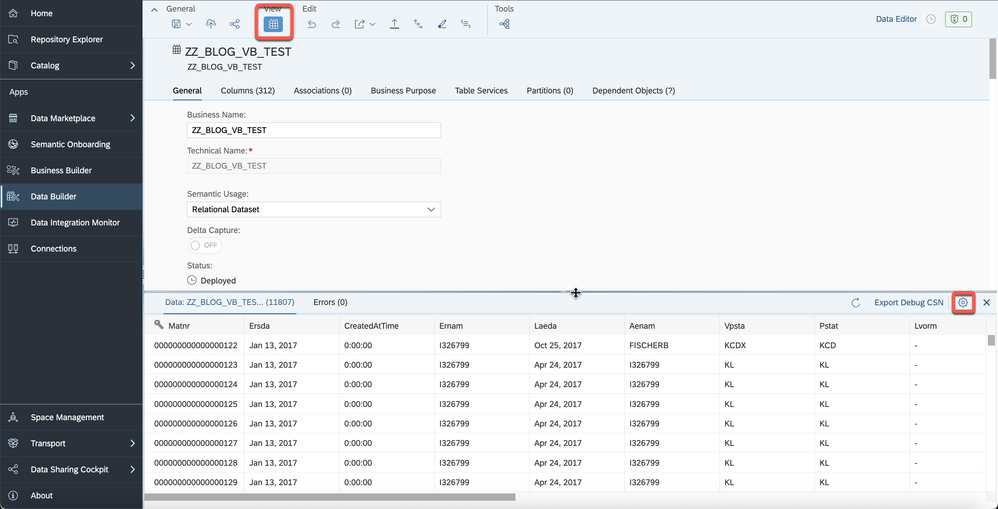
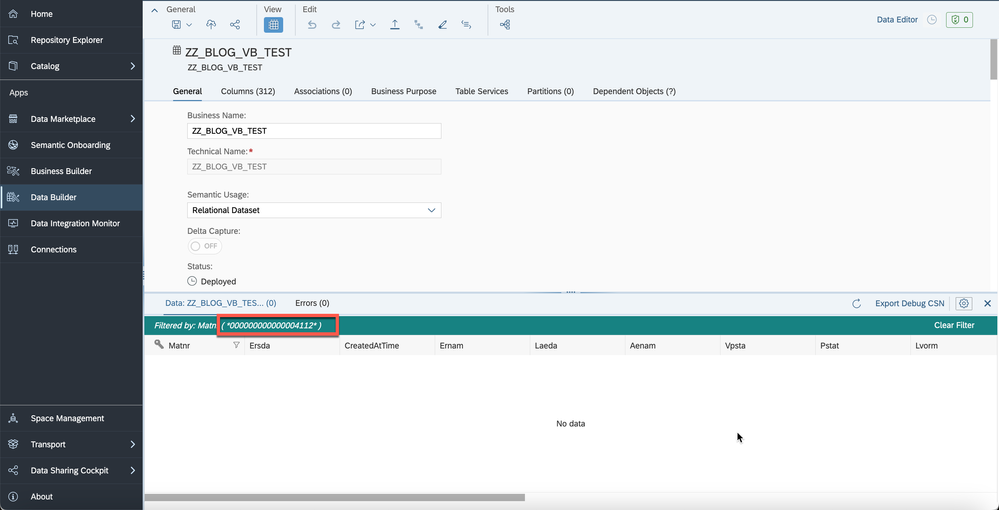
Filter the new record :
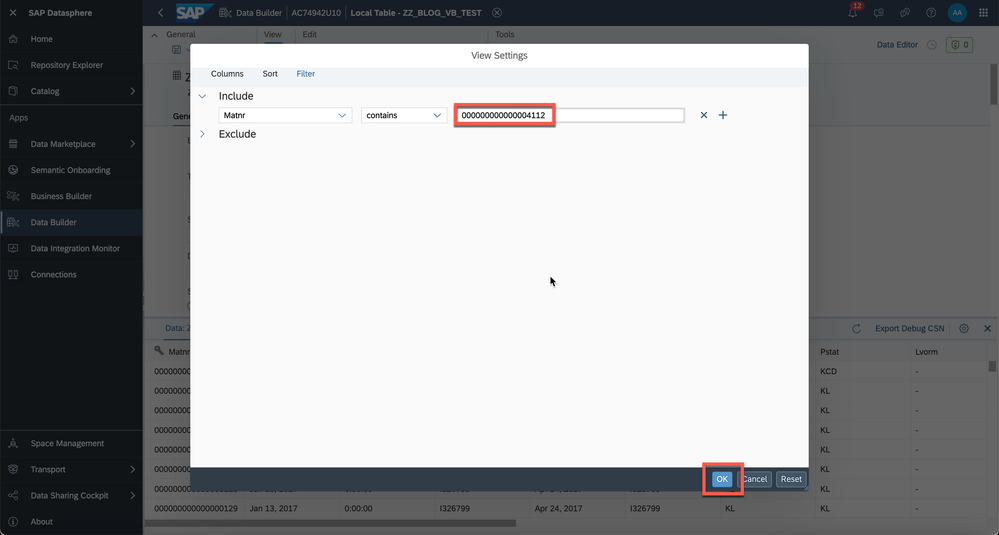
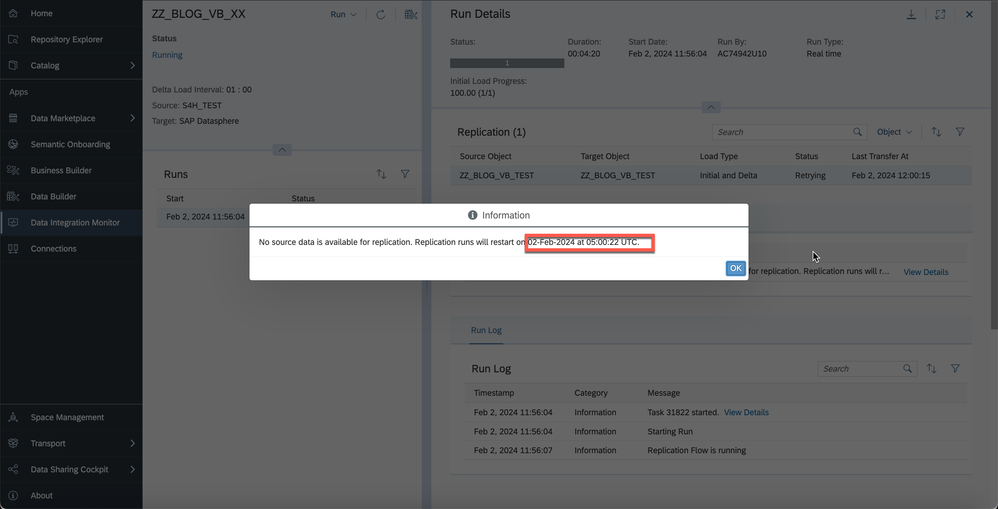
The New Material is not available yet, let's wait for the delta run ( 05:00 UTC time as seen previously ) :
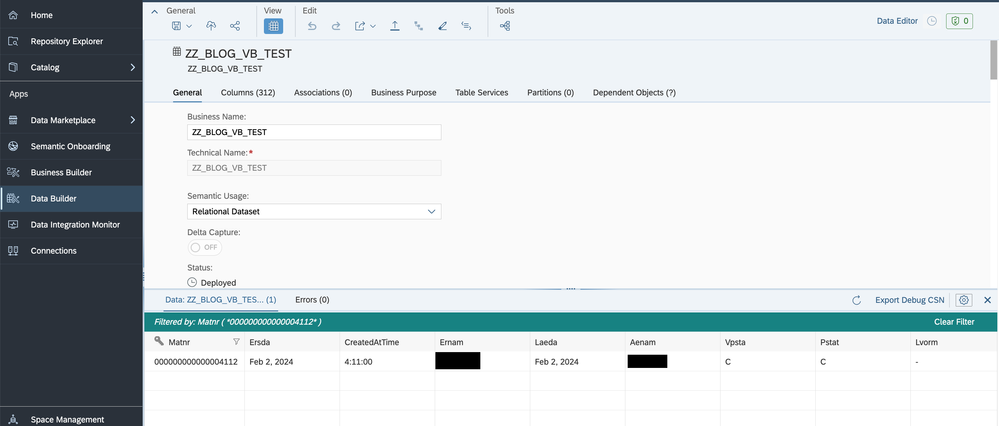
New Delta Run was performed at 05:00 UTC :

Let's look at the record in the replicated Table and as we see below the new data record is now available :
Conclusion
This article is an attempt to showcase the various features available in SAP Datasphere and also how some of the S4 CDS views (extraction enabled) can be consumed in SAP Datasphere. Please note the CDS based extraction will be limited based on the S4 version being used and the scenario/tables being used.
This article only covers an example scenario from S4HANA onpremise system (SAP_BASIS 755).


 3598
3598

 被折叠的 条评论
为什么被折叠?
被折叠的 条评论
为什么被折叠?
 到【灌水乐园】发言


