


 本文详细介绍TensorFlow的基础概念,包括张量、计算图、会话模式等,并演示了如何使用TensorFlow执行基本运算,创建变量,使用占位符以及可视化计算图。
在此之前需要自学python3基础
TensorFlow入门之Hello World
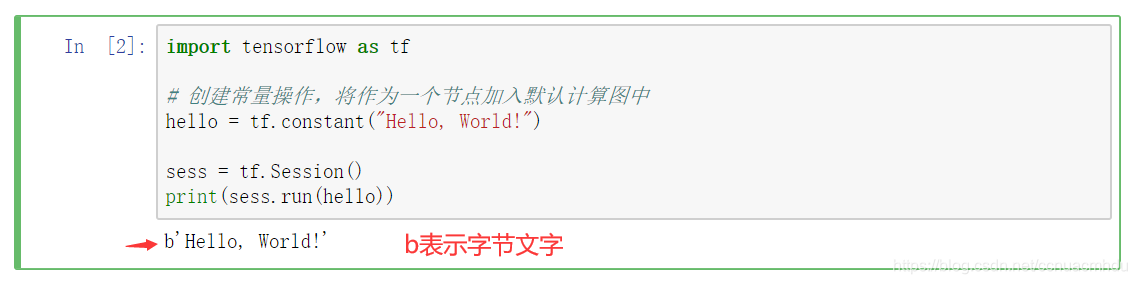
import tensorflow as tf

# 创建常量操作,将作为一个节点加入默认计算图中
hello = tf.constant("Hello, World!")

sess = tf.Session()
print(sess.run(hello))
TensorFlow计算模型– –计算图
TensorFlow = Tensor (张量)+ Flow(流)
张量,是一种数据结构,内容是多维数组。
TensorFlow是一个通过 计算图的形式表述计算的编程系统,每一个计算都是计算图上的一个节点,节点之间的边描述了计算之间的关系。
计算图(数据流图)的概念
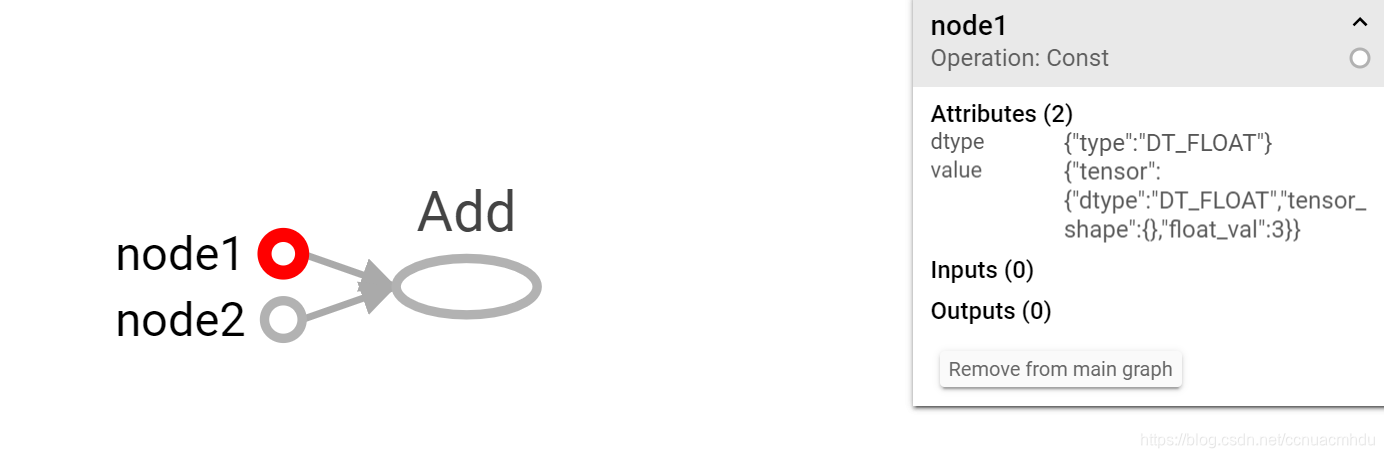
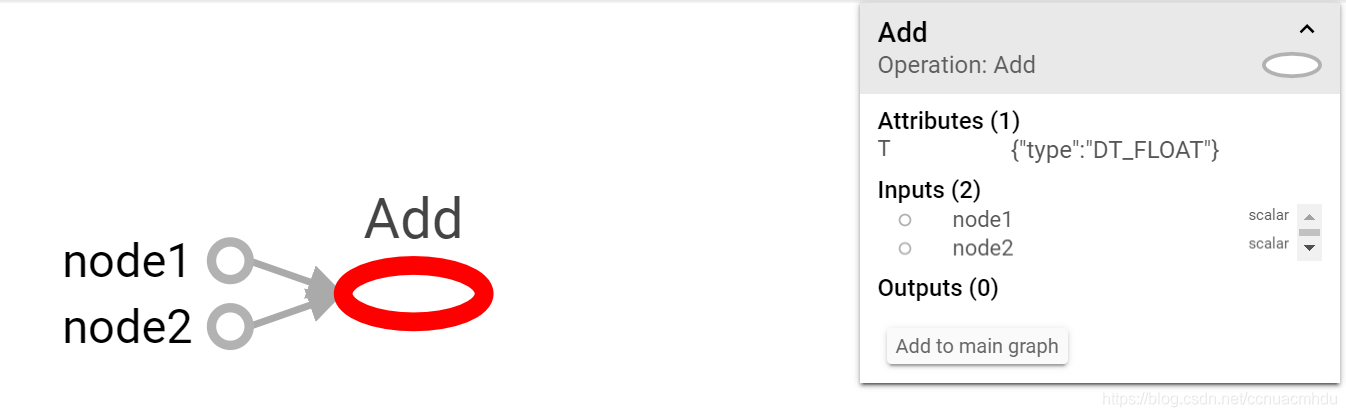
计算图是一个有向图。每个 节点(Tensor)都代表一个 操作,是一种运算。每条边代表节点之间的关系(数据传递和控制依赖)。
TensorFlow有两种边:
- 常规边(实线):代表数据依赖关系。一个节点的运算输出成为另一个节点的输入,两个节点之间有tensor流动( 值传递)。
- 特殊边(虚线):不携带值,表示两个节点之间的 控制相关性。比如, happens- - before关系,源节点必须在目的节点执行前完成执行。
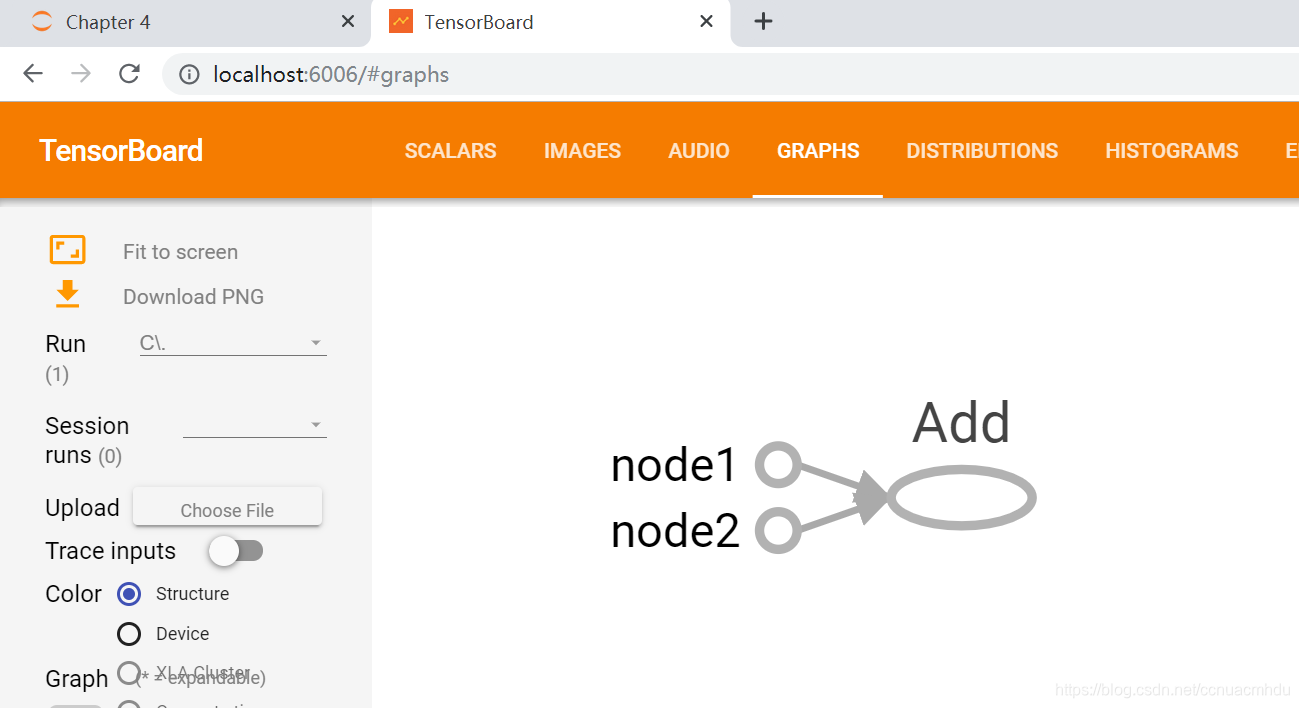
计算图实例及TensorBoard可视化计算图
上面定义了三个节点node1, node2, node3组成一个计算图,TensorBoard可以自动生成这个计算图。我们用TensorFlow写的上面代码,可以指定运行后输出到某个日志文件,再让TensorBoard进程拿到这个日志文件进行可视化显示。
下面就先介绍如何可视化计算图。
import tensorflow as tf
# 清除默认图
tf.reset_default_graph()
# 输出日志地址
logDir = "C:\\Users\\20191027\\Documents\\log"
# 定义简单的计算图,两个数求和
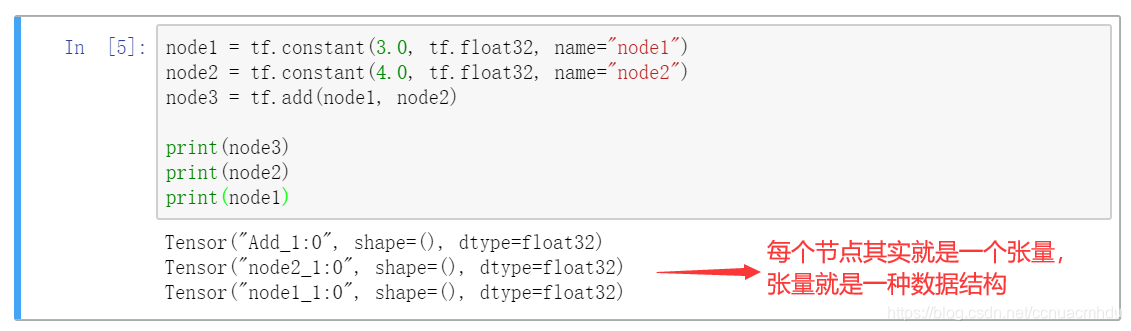
node1 = tf.constant(3.0, tf.float32, name="node1")
node2 = tf.constant(4.0, tf.float32, name="node2")
node3 = tf.add(node1, node2)
# 把计算图写入日志文件
writer = tf.summary.FileWriter(logDir, tf.get_default_graph())
writer.close()
在设定的日志目录生成了日志文件如下:

进入Anaconda Prompt命令行界面,切换到刚刚设定的日志目录,然后告诉TensorBoard日志目录在哪,就启动好TensorBoard了。

在浏览器输入http://localhost:6006/,如下,
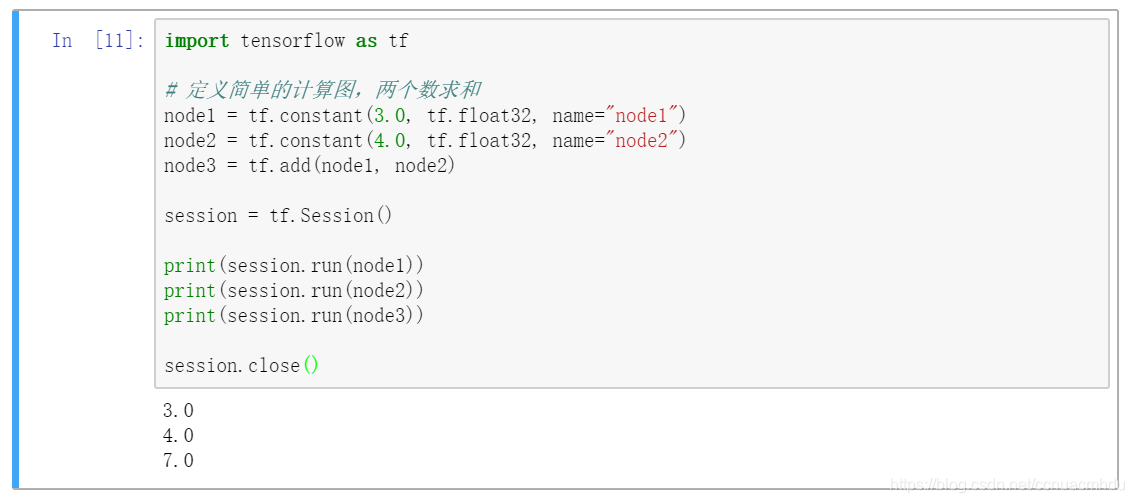
计算图执行
import tensorflow as tf

# 定义简单的计算图,两个数求和
node1 = tf.constant(3.0, tf.float32, name="node1")
node2 = tf.constant(4.0, tf.float32, name="node2")
node3 = tf.add(node1, node2)

session = tf.Session()

print(session.run(node1))
print(session.run(node2))
print(session.run(node3))

session.close()
Tensor 张量
张量的属性
上面代码可以执行print(node3)得到:
Tensor("Add_3:0", shape=(), dtype=float32)
“Add_3:0”, Add_3是节点的名字,0是来自该节点的第0个输出。
shape=(),张量的形状(维度信息),()代表标量(0维)。
dtype=float32,数据类型。
张量的类型
TensorFlow支持14种不同的类型
实数 tf.float32, tf.float64
整数 tf.int8, tf.int16, tf.int32, tf.int64, tf.uint8
布尔 tf.bool
复数 tf.complex64, tf.complex128
默认类型:
不带小数点的数会被默认为int32
带小数点的会被默认为float32
两张量之间进行运算,要严格保证类型相同,否则报错。
张量的形状
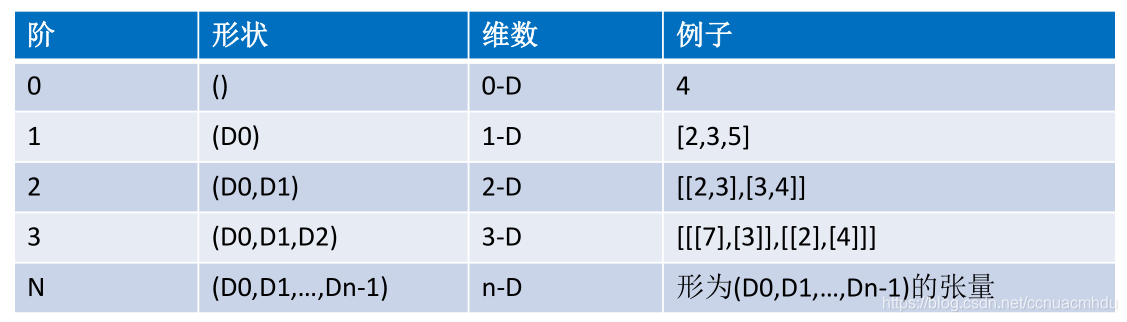
0阶张量-标量(Scalar),1阶张量-向量(Vector),2阶张量-矩阵(Matrix),……
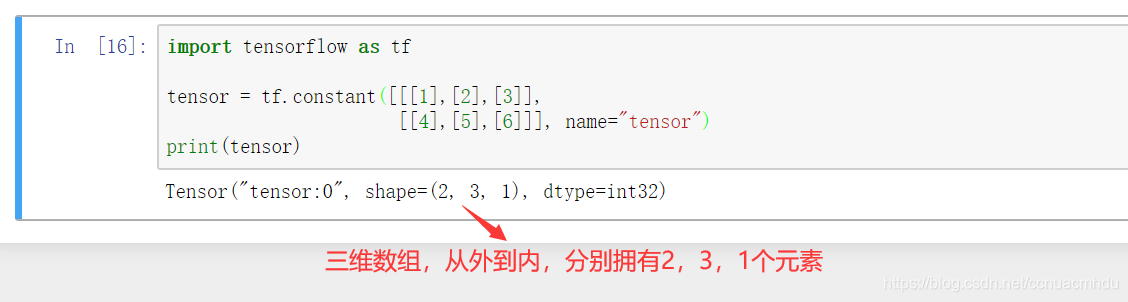
获取张量的元素
获取方式和多维数组通过索引获取类似。
import tensorflow as tf

tensor = tf.constant([[[1],[2],[3]],
                      [[4],[5],[6]]], name="tensor")

session = tf.Session()
print(session.run(tensor)[1,2,0]) # 6
session.close()
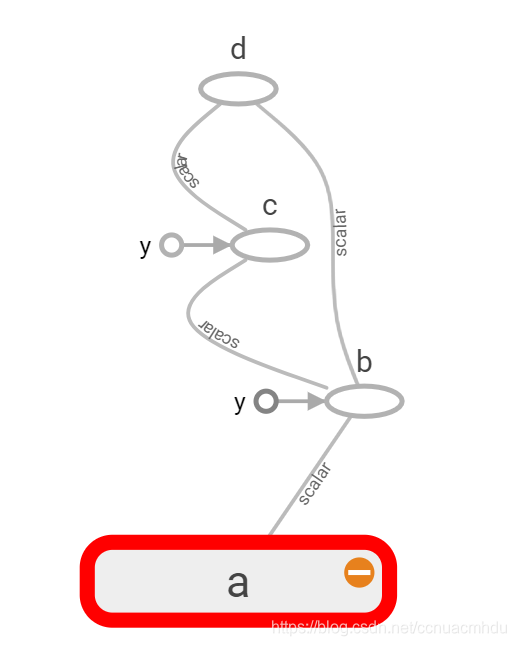
例子
import tensorflow as tf

tf.reset_default_graph()

# 定义变量a
a = tf.Variable(1, name="a")

b = tf.add(a, 1, name="b")
c = tf.multiply(b, 4, name="c")
d = tf.subtract(c, b, name="d")

# 注意地址用的是双斜杠
logdir = "C:\\Users\\20191027\\Documents\\log"

writer = tf.summary.FileWriter(logdir, tf.get_default_graph())
writer.close()
Session
会话模式 1
tensor1 = tf.constant([1,2,3])

session = tf.Session()
try:
    print(session.run(tensor1))
except:
    print("Exception...")
finally:
    session.close()
会话模式2(python上下文管理器)
node1 = tf.constant(3.0, tf.float32, name="node1")
node2 = tf.constant(4.0, tf.float32, name="node2")
result = tf.add(node1, node2)

# 上下文退出后会话自动关闭
with tf.Session() as sess:
    print(sess.run(result))
指定默认的会话
当默认的会话被指定之后可以通过 tf.Tensor.eval 函数来计算一个张量的取值。
node1 = tf.constant(3.0, tf.float32, name="node1")
node2 = tf.constant(4.0, tf.float32, name="node2")
result = tf.add(node1, node2)

# 上下文退出后会话自动关闭
sess = tf.Session()
with sess.as_default():
    print(result.eval())
node1 = tf.constant(3.0, tf.float32, name="node1")
node2 = tf.constant(4.0, tf.float32, name="node2")
result = tf.add(node1, node2)

sess = tf.Session()

print(sess.run(result))
print(result.eval(session=sess)) # 指定会话

sess.close()
node1 = tf.constant(3.0, tf.float32, name="node1")
node2 = tf.constant(4.0, tf.float32, name="node2")
result = tf.add(node1, node2)

sess = tf.InteractiveSession() # 指定默认会话

print(result.eval()) # 由于前面已经指定默认会话,此处可以省去session=sess

sess.close()
常量与变量
变量定义及初始化
# 变量定义
name_variable  =  tf.Variable (value, name)
# 个别变量初始化:
init_op  =  name_variable.initializer ()
# 所有变量初始化:
init_op  =  tf.global_variables_initializer()
node1 = tf.Variable(1.0, tf.float32, name="node1")
node2 = tf.Variable(2.0, tf.float32, name="node2")
result = tf.add(node1, node2, name="result")

sess = tf.Session()

init = tf.global_variables_initializer()
sess.run(init) # 如果没有这句,会报错
print(sess.run(result))

sess.close()
变量赋值
- 与传统编程语言不同,TensorFlow中的变量定义后,一般 无需人工赋值, 系统会根据算法模型,训练优化过程中 自动调整变量对应的数值。不让算法自动调整的话:
epoch = tf.Variable(0,name='epoch',trainable=False)。 - 特殊情况需要人工更新的,可用变量赋值语句变量更新语句:
update_op = tf.assign(variable_to_be_updated, new_value)
# 依次输出1,2,3,4,5,6,7,8,9, 10

import tensorflow as tf

tf.reset_default_graph()

value = tf.Variable(0, name="vlaue")
one = tf.constant(1)
new_value = tf.add(value, one)
update_value = tf.assign(value, new_value)

init = tf.global_variables_initializer()

with tf.Session() as sess:
    sess.run(init)
    for _ in range(10):
        sess.run(update_value)
        print(sess.run(value))

# 注意地址用的是双斜杠
logdir = "C:\\Users\\20191027\\Documents\\log"

writer = tf.summary.FileWriter(logdir, tf.get_default_graph())
writer.close()
上述代码可以打印出1-10,但是笔者发现含有tf.assign就无法用tensorboard可视化。。尚未解决这个问题。。。
占位符 placeholder
import tensorflow as tf

a = tf.placeholder(tf.float32, name="a")
b = tf.placeholder(tf.float32, name="b")
c = tf.multiply(a, b, name="c")

with tf.Session() as sess:
    result = sess.run(c, feed_dict={a:8.0, b:3.5})
    print(result)
import tensorflow as tf

a = tf.placeholder(tf.float32, name="a")
b = tf.placeholder(tf.float32, name="b")
c = tf.multiply(a, b, name="c")
d = tf.subtract(a, b, name="d")

with tf.Session() as sess:
    result = sess.run([c, d], feed_dict={a:[8.0,2.0,3.5], b:[1.5,2.0,4.]})
    print(result)
    print(result[0])
import tensorflow as tf

a = tf.placeholder(tf.float32, name="a")
b = tf.placeholder(tf.float32, name="b")
c = tf.multiply(a, b, name="c")
d = tf.subtract(a, b, name="d")

with tf.Session() as sess:
    result0, result1 = sess.run([c, d], feed_dict={a:[8.0,2.0,3.5], b:[1.5,2.0,4.]})
    print(result0, result1)


《深度学习应用开发-TensorFlow实践》(第4讲---TensorFlow编程基础)&spm=1001.2101.3001.5002&articleId=103142905&d=1&t=3&u=dedb9ed9f4194821977b9ad80925a0b1)
 3331
3331

 被折叠的 条评论
为什么被折叠?
被折叠的 条评论
为什么被折叠?
 到【灌水乐园】发言


