


Hive是基于Hadoop的一个数据仓库工具,用来进行数据提取、转化、加载,这是一种可以存储、查询和分析存储在Hadoop中的大规模数据的机制。hive数据仓库工具能将结构化的数据文件映射为一张数据库表,并提供SQL查询功能,能将SQL语句转变成MapReduce任务来执行。Hive的优点是学习成本低,可以通过类似SQL语句实现快速MapReduce统计,使MapReduce变得更加简单,而不必开发专门的MapReduce应用程序。
下面我们来实现一下Hadoop环境下Hive的安装与实践。
目录
(1)软件环境准备
(2)MySQL下载安装
(3)Hive安装部署
(4)HIVE测试使用
(1)软件环境准备
Hadoop运行环境:即环境中已经能运行Hadoop。可以参见我的上一篇博文:超详细的Hadoop3.1.2架构单机、伪分布式、完全分布式安装和配置:https://blog.youkuaiyun.com/caojianhua2018/article/details/99174958
Mysql安装包:可以直接从mysql官方网站上下载,也可以使用wget方式先下载安装源,然后使用yum来实现安装。
Hive安装包:可以在http://mirror.bit.edu.cn/apache/hive/下载)
(2)MySQL下载安装
1.下载mysql yum包:
[root@master ~]# wget http://repo.mysql.com/mysql57-community-release-el7-10.noarch.rpm如果wget未安装,则先使用yum install -y wget安装一下。
2. 安装mysql源:
[root@master ~]# rpm -Uvh mysql57-community-release-el7-10.noarch.rpm3.安装mysql服务端:
[root@master ~]# yum install -y mysql-community-server4. 启动mysql:
[root@master ~]# systemctl start mysqld.service
如果设置成开机自启动,输入如下命令即可:
[root@master ~]# systemctl enable mysqld
[root@master ~]# systemctl daemon-reload
5.查看mysql启动状态:
[root@master ~]# systemctl status mysqld.service
6.修改mysql服务root账户密码:
mysql服务配置文件默认存放路径为:/etc/my.conf,可以打开该文件进行相应的修改。其日志文件存放位置为:/var/log/mysqld.log,这是log文件,可以直接more查看。
首先获取系统自动生成的随机密码(从上述的log文件夹中寻找):
[root@master ~]# grep "password" /var/log/mysqld.log
2020-02-05T12:08:30.659856Z 1 [Note] A temporary password is generated for root@localhost: JQ;PG0%UrrF0
后面那一串复杂字符就是随机生成的密码,我们需要将其修改成自己的密码,这样容易记住。
接下来开始修改密码。使用这个密码登录进入mysql:
[root@master ~]# mysql -uroot -p
Enter password:
Welcome to the MySQL monitor.  Commands end with ; or \g.
Your MySQL connection id is 2
Server version: 5.7.29

Copyright (c) 2000, 2020, Oracle and/or its affiliates. All rights reserved.

Oracle is a registered trademark of Oracle Corporation and/or its
affiliates. Other names may be trademarks of their respective
owners.

Type 'help;' or '\h' for help. Type '\c' to clear the current input statement.

mysql>
进入后,在mysql>后输入如下代码来修改root密码:
mysql> ALTER USER 'root'@'localhost' IDENTIFIED BY 'new password'这里的new password是代指字符串,即新密码字符串,修改时要求密码不能过于简单,包括大小写、其他字符等。例如我们修改为Root-123,记住mysql这种命令行操作时每一行语句结尾要使用分号表示结束。
mysql> alter user 'root'@'localhost' identified by 'Root-123';
Query OK, 0 rows affected (0.19 sec)
如此便修改成功了,可以退出当前命令行重新登录测试一下。
如果想设置远程连接该mysql数据库,就可以使用grant 权限方式来设置,如下:
mysql> grant all privileges on *.* to 'root'@'%' identified by 'Root-123' with grant option;
Query OK, 0 rows affected, 1 warning (0.00 sec)

mysql> flush privileges;
Query OK, 0 rows affected (0.06 sec)
为了后续的HIVE 测试成功,可以先在mysql里创建一个数据库mydb。后面再hive-site.xml文件中就可以直接配置了。
mysql> create database mydb;
(3)Hive安装部署
1.将安装包解压,解压完成后将文件夹重命名为hive-3.1.2-bin:
[hadoop@master ~]$ tar -zxvf apache-hive-3.1.2-bin.gz
[hadoop@master ~]$ mv apache-hive-3.1.2-bin hive-3.1.2-bin
2. 下载mysql的java驱动并拷贝到hive的lib路径下:
[hadoop@master ~]$ cp mysql-connector-java-8.0.16.jar hive-3.1.2-bin/lib
3. 配置Hive环境变量,如果设置为所有用户的环境变量,则需使用root用户登录,编辑/etc/profile文件即可,如果仅为当前用户的环境变量,则可以使用当期用户目录下的~/.bash_profile文件编辑,最后都是用source命令来使得环境变量设置生效。
#setting for hive
export HIVE_HOME=/home/hadoop/hive-3.1.2
export PATH=$PATH:$HIVE_HOME/bin
使用source命令使得环境变量设置生效:
[root@master ~]# source /etc/profile
此时可以正常启动Hive了,系统默认使用自带的derby数据库:
[hadoop@master ~]$ hive -version
which: no hbase in (/usr/local/bin:/usr/bin:/usr/local/sbin:/usr/sbin:/home/hadoop/jdk1.8.0_11/bin:/home/hadoop/hadoop-3.1.2/bin:/home/hadoop/.local/bin:/home/hadoop/bin:/home/hadoop/jdk1.8.0_11/bin:/home/hadoop/hadoop-3.1.2/bin:/home/hadoop/hive-3.1.2/bin)
SLF4J: Class path contains multiple SLF4J bindings.
SLF4J: Found binding in [jar:file:/home/hadoop/hive-3.1.2/lib/log4j-slf4j-impl-2.10.0.jar!/org/slf4j/impl/StaticLoggerBinder.class]
SLF4J: Found binding in [jar:file:/home/hadoop/hadoop-3.1.2/share/hadoop/common/lib/slf4j-log4j12-1.7.25.jar!/org/slf4j/impl/StaticLoggerBinder.class]
SLF4J: See http://www.slf4j.org/codes.html#multiple_bindings for an explanation.
SLF4J: Actual binding is of type [org.apache.logging.slf4j.Log4jLoggerFactory]
Hive Session ID = e25762a6-6e9c-4361-b12b-4de0fe10818b

Logging initialized using configuration in jar:file:/home/hadoop/hive-3.1.2/lib/hive-common-3.1.2.jar!/hive-log4j2.properties Async: true
Hive-on-MR is deprecated in Hive 2 and may not be available in the future versions. Consider using a different execution engine (i.e. spark, tez) or using Hive 1.X releases.
hive>
4. 修改Hive配置文件,进入hive安装目录下的conf文件夹,这里就是配置文件存放的地方。将需要修改的配置文件模板拷贝并重命名即可,包括hive-env.sh和hive-site.xml文件
[hadoop@master hive-3.1.2]$ cd conf
[hadoop@master conf]$ ll
total 332
-rw-r--r--. 1 hadoop hadoop   1596 Aug 23 05:44 beeline-log4j2.properties.template
-rw-r--r--. 1 hadoop hadoop 300482 Aug 23 06:01 hive-default.xml.template
-rw-r--r--. 1 hadoop hadoop   2365 Aug 23 05:44 hive-env.sh.template
-rw-r--r--. 1 hadoop hadoop   2274 Aug 23 05:45 hive-exec-log4j2.properties.template
-rw-r--r--. 1 hadoop hadoop   3086 Aug 23 05:44 hive-log4j2.properties.template
-rw-r--r--. 1 hadoop hadoop   2060 Aug 23 05:44 ivysettings.xml
-rw-r--r--. 1 hadoop hadoop   3558 Aug 23 05:44 llap-cli-log4j2.properties.template
-rw-r--r--. 1 hadoop hadoop   7163 Aug 23 05:44 llap-daemon-log4j2.properties.template
-rw-r--r--. 1 hadoop hadoop   2662 Aug 23 05:44 parquet-logging.properties
[hadoop@master conf]$ cp hive-env.sh.template hive-env.sh
[hadoop@master conf]$ cp hive-default.xml.template hive-site.xml
然后修改hive-env.sh文件,添加如下内容:
# Set HADOOP_HOME to point to a specific hadoop install directory
export HADOOP_HOME=/home/hadoop/hadoop-3.1.2

# Hive Configuration Directory can be controlled by:
export HIVE_CONF_DIR=/home/hadoop/hive-3.1.2/conf
export JAVA_HOME=/home/hadoop/jdk1.8.0_11
# Folder containing extra libraries required for hive compilation/execution can be controlled by:
export HIVE_AUX_JARS_PATH=/home/hadoop/hive-3.1.2/lib
使用source命令使其更新生效:
[hadoop@master conf]$ source hive-env.sh
接下来修改hive-site.xml,这个文件内容很多,由于涉及到hive执行时有关数据存放路径,所以可以先去创建好目录,然后将路径复制出来放到这个xml文件中。
[hadoop@master hive-3.1.2]$ hdfs dfs -mkdir -p /user/hive/warehouse
[hadoop@master hive-3.1.2]$ hdfs dfs -mkdir -p /tmp
[hadoop@master hive-3.1.2]$ hdfs dfs -chmod g+w /tmp
[hadoop@master hive-3.1.2]$ hdfs dfs -chmod g+w /user
[hadoop@master hive-3.1.2]$ hdfs dfs -chmod g+w /user/hive
[hadoop@master hive-3.1.2]$ hdfs dfs -chmod g+w /user/hive/warehouse
建好后,开始修改hive-site.xml文件:(注释可删除)
<configuration>
#选用jdbc连接mysql
<property>
    <name>javax.jdo.option.ConnectionDriverName</name>
    <value>com.mysql.jdbc.Driver</value>
    <description>Driver class name for a JDBC metastore</description>
</property>
#配置jdbc连接mysql中的数据表,用于存放数据
<property>
    <name>javax.jdo.option.ConnectionURL</name>
    <value>jdbc:mysql://big01:3306/mydb?createDatabaseIfNotExist=true</value>
    <description>JDBC connect string for a JDBC metastore.</description>
</property>
#这里配置登录mysql的用户名,我这里用的root
<property>
    <name>javax.jdo.option.ConnectionUserName</name>
    <value>root</value>
    <description>username to use against metastore database</description>
 </property>
#这里配置登录mysql的密码
<property>
    <name>javax.jdo.option.ConnectionPassword</name>
    <value>Root-123</value>
    <description>password to use against metastore database</description>
</property>
#这里配置保存hive仓库路径,需要提前创建
<property>
    <name>hive.metastore.warehouse.dir</name>
    <value>/user/hive/warehouse</value>
    <description>location of default database for the warehouse</description>
</property>
</configuration>
5. 初始化元数据库
[hadoop@master hive-3.1.2]$ schematool -dbType mysql -initSchema
初始化完成后,就可以开始使用了。
6. hive测试使用
命令行输入hive,出现hive>命令行就表明启动成功了。
[hadoop@master hive-3.1.2]$ hive
SLF4J: Class path contains multiple SLF4J bindings.
SLF4J: Found binding in [jar:file:/home/hadoop/hive-3.1.2/lib/log4j-slf4j-impl-2.10.0.jar!/org/slf4j/impl/StaticLoggerBinder.class]
SLF4J: Found binding in [jar:file:/home/hadoop/hadoop-3.1.2/share/hadoop/common/lib/slf4j-log4j12-1.7.25.jar!/org/slf4j/impl/StaticLoggerBinder.class]
SLF4J: See http://www.slf4j.org/codes.html#multiple_bindings for an explanation.
SLF4J: Actual binding is of type [org.apache.logging.slf4j.Log4jLoggerFactory]
which: no hbase in (/usr/local/bin:/usr/bin:/usr/local/sbin:/usr/sbin:/home/hadoop/jdk1.8.0_11/bin:/home/hadoop/hadoop-3.1.2/bin:/home/hadoop/.local/bin:/home/hadoop/bin:/home/hadoop/jdk1.8.0_11/bin:/home/hadoop/hadoop-3.1.2/bin:/home/hadoop/hive-3.1.2/bin)
SLF4J: Class path contains multiple SLF4J bindings.
SLF4J: Found binding in [jar:file:/home/hadoop/hive-3.1.2/lib/log4j-slf4j-impl-2.10.0.jar!/org/slf4j/impl/StaticLoggerBinder.class]
SLF4J: Found binding in [jar:file:/home/hadoop/hadoop-3.1.2/share/hadoop/common/lib/slf4j-log4j12-1.7.25.jar!/org/slf4j/impl/StaticLoggerBinder.class]
SLF4J: See http://www.slf4j.org/codes.html#multiple_bindings for an explanation.
SLF4J: Actual binding is of type [org.apache.logging.slf4j.Log4jLoggerFactory]
Hive Session ID = 467045bd-1840-424f-a66b-5d4d7e3ebf25

Logging initialized using configuration in jar:file:/home/hadoop/hive-3.1.2/lib/hive-common-3.1.2.jar!/hive-log4j2.properties Async: true
Loading class `com.mysql.jdbc.Driver'. This is deprecated. The new driver class is `com.mysql.cj.jdbc.Driver'. The driver is automatically registered via the SPI and manual loading of the driver class is generally unnecessary.
Hive-on-MR is deprecated in Hive 2 and may not be available in the future versions. Consider using a different execution engine (i.e. spark, tez) or using Hive 1.X releases.
Hive Session ID = ae782d20-647b-4565-a694-e612b5f7539c
hive>
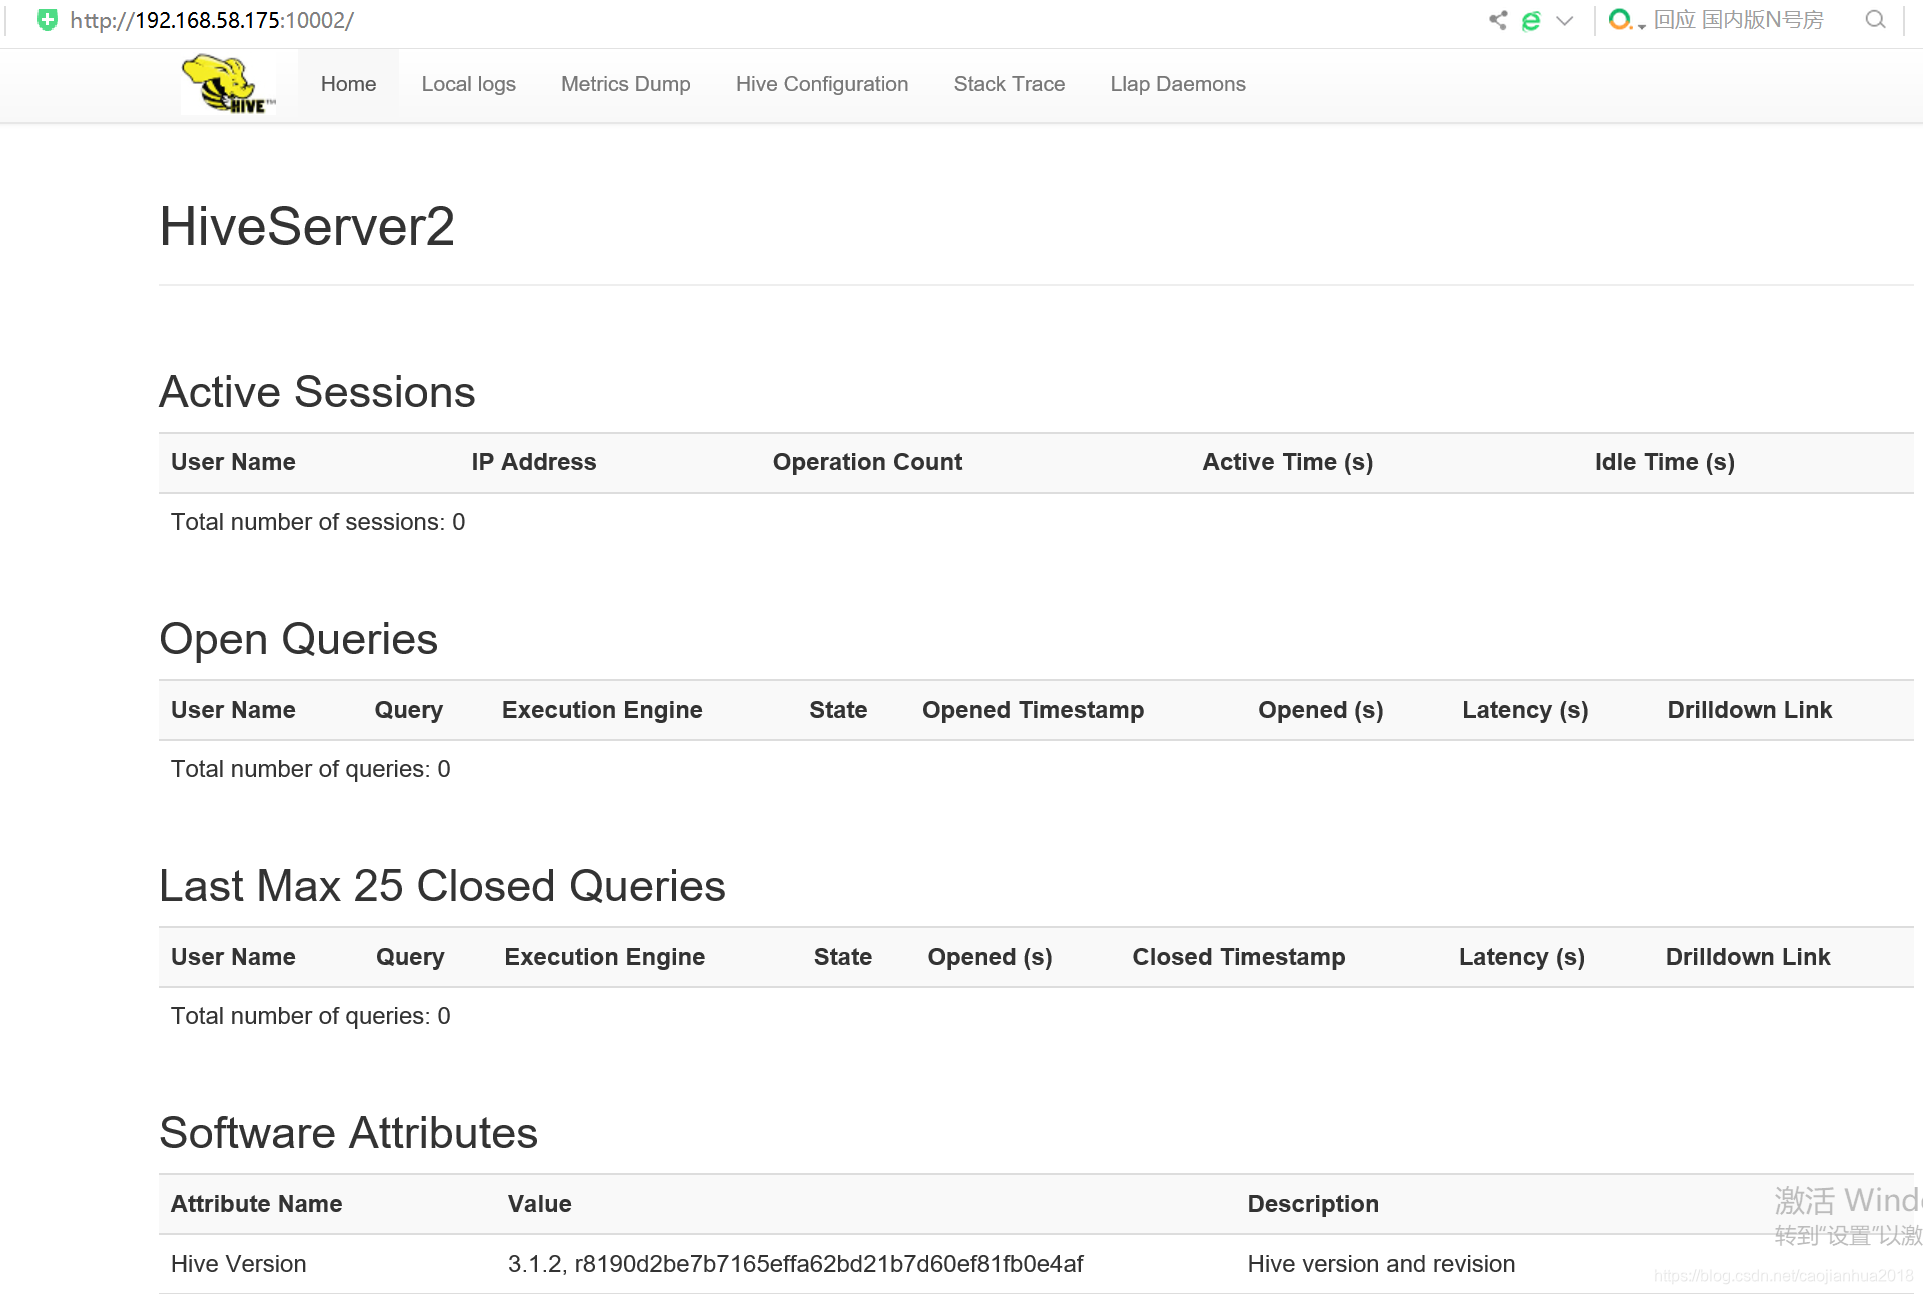
7. 启动hiveserver2,在bin目录下输入./hiveserver2,启动hive服务:

hive默认web的端口为10002,此时在浏览器地址栏输入:ip:10002,就可以看到web监控页面:
(4)HIVE测试使用
1. 首先使用create database命令创建一个数据库myhive:
hive> create database myhive;
OK
Time taken: 1.753 seconds
这些语法与sql类似,如果对sql比较熟悉的话,这些shell命令基本上差不多。如使用show databases命令可以查看当前目录下的数据库:
hive> show databases;
OK
default
myhive
Time taken: 0.732 seconds, Fetched: 2 row(s)
2. 然后我们使用myhive数据库:
hive> use myhive;
OK
Time taken: 0.372 seconds
3. 在myhive数据库里新建一个user表,语法也是create table这种,不过注意不能使用hive使用的关键字,比如user就不能作为表名。
hive> create table user(stuid int,name string,age int) row format delimited fields terminated by ',' stored as textfile;
NoViableAltException(334@[212:1: tableName : (db= identifier DOT tab= identifier -> ^( TOK_TABNAME $db $tab) |tab= identifier -> ^( TOK_TABNAME $tab) );])
        at org.antlr.runtime.DFA.noViableAlt(DFA.java:158)
上述语句提示有错误就是因为使用了user作为表名,修改为stuinfo后就可以了。
hive> create table stuinfo(stuid int,name string,age int) row format delimited fields terminated by ',' stored as textfile;
OK
Time taken: 2.673 seconds
可以使用desc tablename来看一下表结构:
hive> desc stuinfo;
OK
stuid                   int
name                    string
age                     int
Time taken: 5.245 seconds, Fetched: 3 row(s)
建表还有几种方式,如下实践:
hive> create table t1(fdate string,name string,age int) row format delimited fields terminated by ',';
OK
Time taken: 3.817 seconds
hive> create table t2(fdate string,name string,age int) row format delimited fields terminated by ',';
OK
Time taken: 0.37 seconds
hive> create table t3(fdate string,name string,age int) partitioned by (dt string)  row format delimited fields terminated by ',';
OK
Time taken: 0.103 seconds
hive> create table t4(fdate string,name string,age int) clustered by (fdate) into 3 buckets;
OK
Time taken: 0.146 seconds
4. 新增记录,老的hive版本不支持用insert语句一条一条的进行插入操作,也不支持update操作,新版本已经支持,不过因为是专门用于大数据处理,适合批量导入处理。数据可以load的方式加载到建立好的表中,数据一旦导入就不可以修改。insert命令主要用于将hive中的数据导出,导出的目的地可以是hdfs或本地filesysytem,导入什么数据在于书写的select语句。
因此这里使用load语句,将数据记录以txt文件的方式导入进来。测试的时候可以现在本地用户目录下新建一个txt文件,然后输入如下内容:
1 caojianhua 40
2 topher 7
3 sophie 13
4 baby 2
然后保存为test.txt。接下来就导入到hive中去:
hive> load data local inpath '/home/hadoop/test.txt' into table stuinfo;
Loading data to table myhive.stuinfo
OK
Time taken: 3.894 seconds
这里使用的是local inpath,就是本地文件。如果要从hadoop中导入,就需要将inpath后面的路径修改一下。
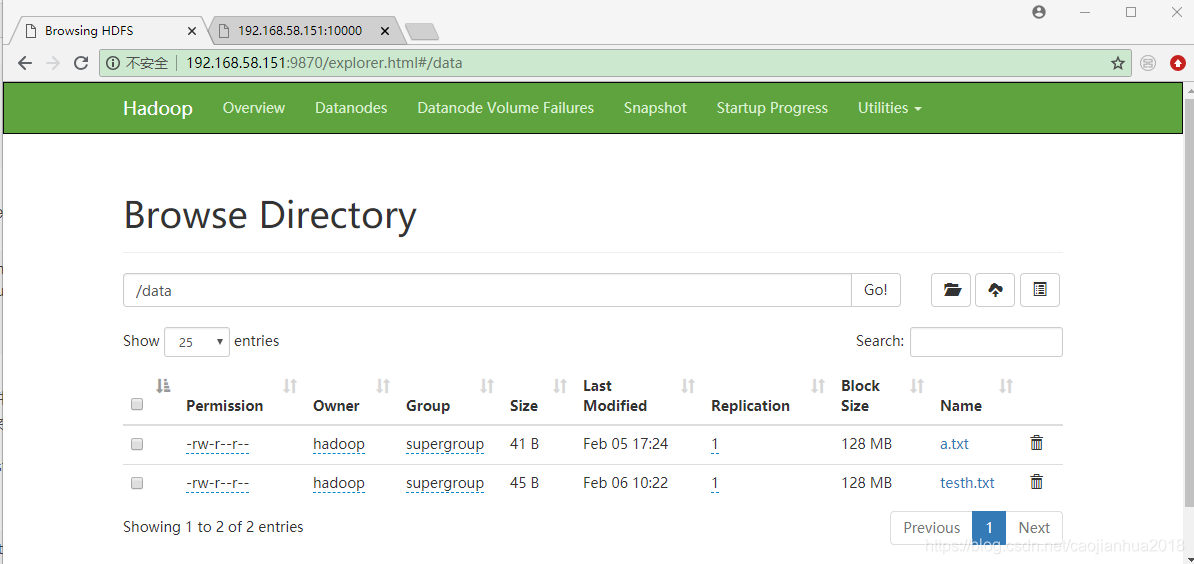
先在hadoop本地用户目录下新建一个testh.txt文本文件,内容与上述的test.txt类似。然后使用hdfs dfs -put命令将其上传到hdfs中。
[hadoop@master ~]$ hdfs dfs -put testh.txt /data
[hadoop@master ~]$ hdfs dfs -ls /data
Found 2 items
-rw-r--r--   1 hadoop supergroup         41 2020-02-05 17:24 /data/a.txt
-rw-r--r--   1 hadoop supergroup         45 2020-02-06 10:22 /data/testh.txt
接下来在hive中进行导入操作:
hive> load data inpath "/data/testh.txt" into table stuinfo;
Loading data to table myhive.stuinfo
OK
Time taken: 1.8 seconds
注意到load导入操作时hive不会对数据格式进行检查,只有当后续进行分析查询的时候如果格式有问题就会出错。继续采用load path方式导入hdfs中的数据到表t1中,然后使用select方式查询内容,这个与sql是一模一样的操作:
hive> load data inpath '/data/t1.txt' into table t1;
Loading data to table myhive.t1
OK
Time taken: 2.324 seconds
hive> select * from t1;
OK
2020-02-07      caojianhua      40
2020-02-07      caozhifeng      7
2020-02-08      caoyiling       13
2020-02-09      caolina 40
Time taken: 2.786 seconds, Fetched: 4 row(s)
如果要查询有多少行记录,使用select count(*) from t1这种分析操作的时候,就会调用mapreduce进程来处理。此时对于内存要求也是挺高的,我们可以使用free -m来查询。受限于虚拟机内存只有1G太小,所以我提前终止了进程。当内存在2G左右时,就可以得到结果,不过速度还是比较慢的。统计数据行数一共耗时200多秒,接近4分钟。
hive> select count(*) from t1;
Query ID = hadoop_20200208231125_d893f7bc-eaa6-410b-bdba-3b9f7cc193fb
Total jobs = 1
Launching Job 1 out of 1
Number of reduce tasks determined at compile time: 1
In order to change the average load for a reducer (in bytes):
  set hive.exec.reducers.bytes.per.reducer=<number>
In order to limit the maximum number of reducers:
  set hive.exec.reducers.max=<number>
In order to set a constant number of reducers:
  set mapreduce.job.reduces=<number>
Starting Job = job_1581167611828_0002, Tracking URL = http://master:8088/proxy/application_1581167611828_0002/
Kill Command = /home/hadoop/hadoop-3.1.2/bin/mapred job  -kill job_1581167611828_0002
Hadoop job information for Stage-1: number of mappers: 1; number of reducers: 1
2020-02-08 23:12:38,383 Stage-1 map = 0%,  reduce = 0%
2020-02-08 23:13:56,078 Stage-1 map = 0%,  reduce = 0%
2020-02-08 23:14:14,089 Stage-1 map = 100%,  reduce = 0%, Cumulative CPU 2.47 sec
2020-02-08 23:14:48,117 Stage-1 map = 100%,  reduce = 100%, Cumulative CPU 4.38 sec
MapReduce Total cumulative CPU time: 4 seconds 380 msec
Ended Job = job_1581167611828_0002
MapReduce Jobs Launched:
Stage-Stage-1: Map: 1  Reduce: 1   Cumulative CPU: 4.38 sec   HDFS Read: 12298 HDFS Write: 101 SUCCESS
Total MapReduce CPU Time Spent: 4 seconds 380 msec
OK
4
Time taken: 215.677 seconds, Fetched: 1 row(s)
5.查询操作。使用select 操作即可。这里面我从本地以及hdfs中分别导入了记录,记录一共有8个,详细如下:
hive> select * from stuinfo;
OK
1       caojianhua      40
2       topher  7
3       sophie  13
4       baby    2
1       caojia  40
2       zhifeng 7
3       yiling  13
4       lina    2
Time taken: 2.79 seconds, Fetched: 8 row(s)


 被折叠的 条评论
为什么被折叠?
被折叠的 条评论
为什么被折叠?
 到【灌水乐园】发言


