


文章目录
一、elasticsearch 简介
ElasticSearch是一个基于Lucene的搜索服务器。它提供了一个分布式多用户能力的全文搜索引擎,基于RESTful web接口。Elasticsearch是用Java语言开发的,并作为Apache许可条款下的开放源码发布,是一种流行的企业级搜索引擎。ElasticSearch用于云计算中,能够达到实时搜索,稳定,可靠,快速,安装使用方便。官方客户端在Java、.NET(C#)、PHP、Python、Apache Groovy、Ruby和许多其他语言中都是可用的。根据DB-Engines的排名显示,Elasticsearch是最受欢迎的企业搜索引擎,其次是Apache Solr,也是基于Lucene。
ElasticSearch 是一个分布式、高扩展、高实时的搜索与数据分析引擎。它能很方便的使大量数据具有搜索、分析和探索的能力。充分利用ElasticSearch的水平伸缩性,能使数据在生产环境变得更有价值。ElasticSearch 的实现原理主要分为以下几个步骤,首先用户将数据提交到Elastic Search 数据库中,再通过分词控制器去将对应的语句分词,将其权重和分词结果一并存入数据,当用户搜索数据时候,再根据权重将结果排名,打分,再将返回结果呈现给用户。
二、安装 elasticsearch
1、安装jdk
此处省略安装jdk步骤 详细步骤请参考博主另一篇博客:
jdk安装教程
2、安装 elasticsearch
配置 编译环境
所以首先安装nodejs 主要是利用npm
如果没有 wget 先下载安装
# yum  install -y wget
[root@hw opt]# wget https://npm.taobao.org/mirrors/node/v11.0.0/node-v11.0.0.tar.gz
// 将node 解压到 opt文件夹下的soft文件夹
[root@hw opt]# tar -zxvf node-v11.0.0.tar.gz
[root@hw opt]# mv node-v11.0.0 soft/node11
[root@hw opt]# cd soft/node11
//配置编译环境 并运行
[root@hw node11]# yum install gcc gcc-c++
[root@hw node11]# ./configure
// 此步骤 安装半小时左右 可先来解压 elasticsearch
[root@hw node11]# make
// 编译完毕
[root@hw node11]# Make install
通过 xftp 上传压缩包

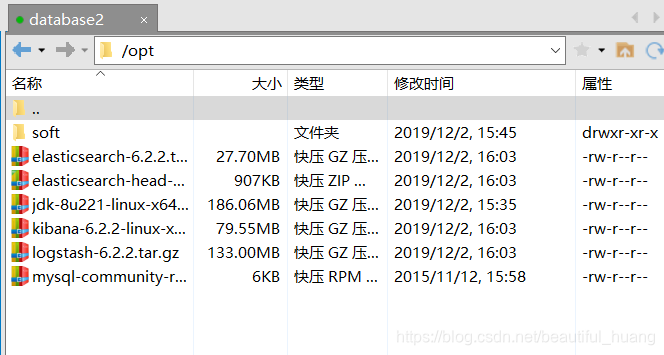
解压 elasticsearch
[root@hw opt]# tar -zxvf elasticsearch-6.2.2.tar.gz
// 将解压文件夹 放到soft里
[root@hw opt]# mv elasticsearch-6.2.2 soft/elasticsearch622
配置 elasticsearch 环境变量
// 修改config/elasticsearch.yml
[root@hw soft]# vi elasticsearch622/config/elasticsearch.yml
// 打开并更改这四个属性
cluster.name: hw2
node.name: hw2-1
network.host: 192.168.56.119
http.port: 9200
// 尾部加入 注意空格
http.cors.enabled: true
http.cors.allow-origin: "*"
修改最大文件数
[root@hw soft]# vi /etc/security/limits.conf
// 加入
* soft nofile 65536    // 外部调用最大文件数
* hard nofile 131072   // 本机调用最大文件数
* soft nproc 4096      // 文件夹默认大小
* hard nproc 4096
修改虚拟内存大小
[root@hw soft]# vi /etc/sysctl.conf
vm.max_map_count=655360
激活
[root@hw soft]# sysctl -p
切换用户 su cm(elasticsearch 不能在root用户下启动)
创建用户 并对 root 用户赋权
[root@hw soft]# useradd hw
[root@hw soft]# passwd hw
Changing password for user hw.
New password:
BAD PASSWORD: The password is shorter than 8 characters
Retype new password:
passwd: all authentication tokens updated successfully.
// 赋权
[root@hw soft]# chmod u+w /etc/sudoers
// 进入到 sudoers 对root 用户进行赋权
## Allow root to run any commands anywhere
root    ALL=(ALL)       ALL
hw      ALL=(ALL)       ALL
// 退出切换到用户 并启动
[root@hw ~]# su hw
[hw@hw elasticsearch622]$ cd bin
[hw@hw bin]$ ls
elasticsearch          elasticsearch-keystore      elasticsearch-service.bat      elasticsearch-translog.bat
elasticsearch.bat      elasticsearch-keystore.bat  elasticsearch-service-mgr.exe
elasticsearch-env      elasticsearch-plugin        elasticsearch-service-x64.exe
elasticsearch-env.bat  elasticsearch-plugin.bat    elasticsearch-translog
[hw@hw bin]$ ./elasticsearch
这里一般会报错 指用户权限不够 进行赋权
Exception in thread "main" java.nio.file.AccessDeniedException: /opt/soft/elasticsearch622/config/jvm.options

// 赋权 切回root 用户
[root@hw ~]# chown hw -R /opt/soft/elasticsearch622/
// 再次切入创建的用户启动
[hw@hw bin]$ ./elasticsearch
三、安装 elasticsearch-head-master
1、上传文件
通过 xftp 上传压缩包


2、安装解压文件并解压
[root@hw opt]# yum install unzip zip
[root@hw opt]# unzip elasticsearch-head-master.zip
[root@hw opt]# mv elasticsearch-head-master soft/elasticsearchhead
下载 elasticsearch-head-master 本地运行的云库
[root@hw opt]# mv elasticsearch-head-master soft/elasticsearchhead
[root@hw opt]# cd soft/elasticsearchhead
[root@hw elasticsearchhead]# ls
Dockerfile                          Gruntfile.js       LICENCE                       proxy           src
Dockerfile-alpine                   grunt_fileSets.js  package.json                  README.textile  test
elasticsearch-head.sublime-project  index.html         plugin-descriptor.properties  _site
[root@hw elasticsearchhead]# npm install
这个时候下载一般会报错
tar (child): bzip2: Cannot exec: No such file or directory
tar (child): Error is not recoverable: exiting now
tar: Child returned status 2
tar: Error is not recoverable: exiting now
下载 bzip2 启动
[root@hw elasticsearchhead]# yum install bzip2
[root@hw elasticsearchhead]# npm install
[root@hw elasticsearchhead]# npm run start
三、kibana 安装
解压
[root@hw opt]# tar -zxvf kibana-6.2.2-linux-x86_64.tar.gz
[root@hw opt]# mv kibana-6.2.2-linux-x86_64 soft/kibana622
环境配置
[root@hw soft]# cd kibana622/
[root@hw kibana622]# cd config/
[root@hw config]# vi kibana.yml

// 放开端口
server.port: 5601
server.host: "192.168.56.119"
elasticsearch.url: "http://192.168.56.119:9200"
运行
[root@hw kibana622]# cd bin
[root@hw bin]# ls
kibana  kibana-keystore  kibana-plugin
[root@hw bin]# ./kibana


 1205
1205

 被折叠的 条评论
为什么被折叠?
被折叠的 条评论
为什么被折叠?
 到【灌水乐园】发言


