


 本文介绍了一个使用HTML、JavaScript和SpringBoot实现的文件上传功能。通过前端的form表单收集文件,利用FormData对象发送POST请求,并在后端进行文件的保存处理。
formData web页面上传单(多)文件到服务器并本地保存
html代码
<div style="margin-top: 20px;">
	<span class="input-title">文件1:</span>
	<input id="file1" type="file" style="display:inline-block; margin-left:10px;">
</div>

<div style="margin-top: 20px;">
	<span class="input-title">文件2:</span>
	<input id="file2" type="file" style="display:inline-block; margin-left:10px;">
</div>

<div style="margin-top: 20px;">
	<span class="input-title"></span>
	<button type="button" class="btn button-blue" style="color: #ffffff;margin-left: 10px;" id="submit_btn">提交</button>
</div>
js代码
$("#submit_wxsh_bind_btn").click(function () {
	var param = "testStr";
	var formData = new FormData();
	formData.append('files', $('#file1')[0].files[0]);
	formData.append('files', $('#file2')[0].files[0]);
	formData.append('param', param); // 其他参数

	var url = reqUrl + '?key=' + skit.get('key');

	$.ajax({
        url: url,
        type: 'POST',
        data: formData,
        cache: false,
        processData: false,
        contentType: false
    }).done(function(resp) {
    	// do something
    }).fail(function(resp) {
    	//do something
    });
});
java代码(SpringBoot)
public String wxoabind(String key, @RequestParam MultipartFile[] files, @RequestParam String param) throws IOException {
	// @RequestParam MultipartFile[] files---单个文件时 @RequestParam MultipartFile file接收即可
	String realPath = CommonUtil.getRealPath();

	for(MultipartFile file:files) {
		String fileName = file.getOriginalFilename();
		File outputFile = new File(realPath + File.separator + ".." + File.separator +
	            ".." + File.separator + "testDir" + File.separator + fileName);

		if(!outputFile.getParentFile().exists()) {
			outputFile.getParentFile().mkdirs();
	    }

		outputFile.createNewFile();
		file.transferTo(outputFile);
	}

	JSONObject respObj = null;
    String respContent = "{'errcode': 0,'errmsg':\"success\"}";

    respObj = JSONObject.fromObject(respContent);
    return respObj.toString();
}
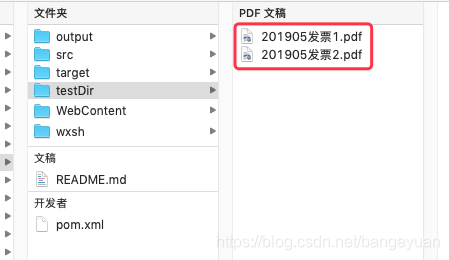
效果图


 1211
1211

 被折叠的 条评论
为什么被折叠?
被折叠的 条评论
为什么被折叠?
 到【灌水乐园】发言


