 地图多点位跳转高亮卡顿问题解决


需求:外部指定多个点位进行跳转到地图并高亮。
1.如果存在聚合状态下的点位,需要放大地图到所有高亮点均不处于聚合(或者放大到最大层级依然聚合,这种情况不去考虑,无实际物理意义)
2.大量高亮点要求不卡顿。
3.其他业务逻辑不再展开说明。
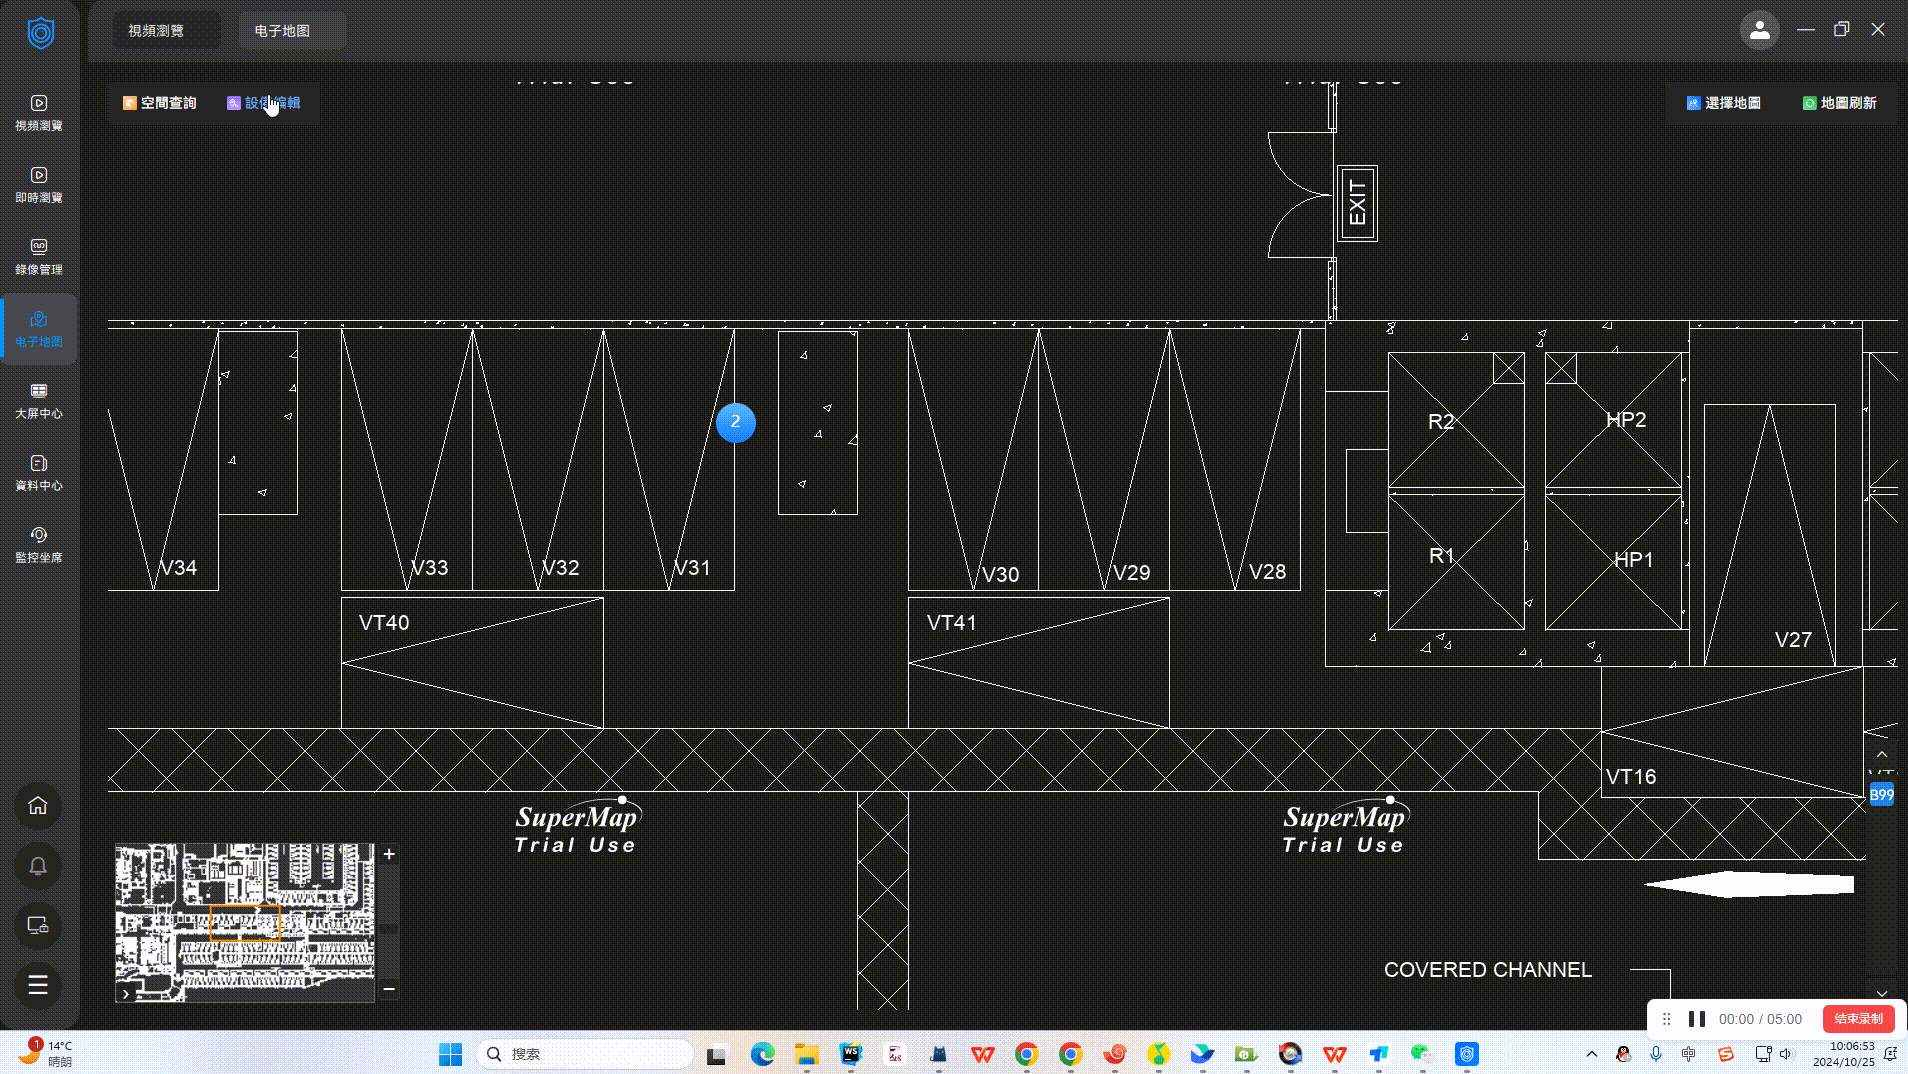
先不比比,先上图
分析:
1.只分析这批设备的点位是当前地图的情况下,并且解决卡顿的思路,其他业务逻辑不必赘述。
2. 思路:用当前层级判断点位是否聚合,如果聚合,则放大地图层级,再次验证,直至不聚合或者到达最大缩放层级。
(能实现但是解决不了点位多时卡顿问题,而且这种方式比较挫,属于赶时间强行实现,不需要的同学可以去后面看方案优化!!!!!)
Day1实现:
/*
     * @param devList Array 设备数组 包含deviceId
     * @param mapHierarchy Number|String 地图层级
     * */
    async locateToCamera(devList, mapHierarchy){
       // 定义检查某个设备是否为聚合状态
       const isDeviceNoClustered = item => {
           const cluster = this.findClusterByDeviceId(item.deviceId)
           // 非聚合状态时 features 长度为 1
           return !cluster || cluster.get('features').length === 1
       }
       // 等待渲染稳定的函数
       const waitForStability = () => new Promise(resolve => setTimeout(resolve, 500))

       // 更新视图并等待渲染完成的函数
       const updateViewAndWaitForRender = (zoomLevel, devList) => {
        return new Promise(resolve => {
          // 随便用一个点位更新视图,放大过程中用任意点即可
          const firstDeviceId = devList[0].deviceId
          const marker = this.cadMap.getMarkerById(firstDeviceId)
          if (marker) {
            const { pointX, pointY } = marker.get('payload')
            this.cadMap.viewAnimate({
              center: [pointX, pointY],
              zoom: zoomLevel
            })

            // 使用 requestAnimationFrame 确保渲染完成
            const checkRenderComplete = () => {
              requestAnimationFrame(() => {
                this.cadMap.map.once('rendercomplete', resolve)
              })
            }

            checkRenderComplete()
          }
        })
      }
      let allDevicesNoClustered = false
      let zoom
      let currentZoom = this.cadMap.getView().getZoom()
      let defaultZoom = parseFloat(mapHierarchy)
      if (devList.length > 0) {
        // 确保默认层级小于当前层级时,直接跳转到当前层级
        zoom = currentZoom >= defaultZoom ? currentZoom : defaultZoom
        // 循环增加层级,直到所有点位都非聚合
        while (!allDevicesNoClustered && zoom < 16) {
          // 更新视图并等待渲染完成
          await updateViewAndWaitForRender(zoom, devList)
          // 等待视图稳定
          await waitForStability()
          // 检查是否所有点位已经非聚合
          allDevicesNoClustered = devList.every(isDeviceNoClustered)
          if (!allDevicesNoClustered) {
            zoom += 1 // 放大层级
          }
        }
        // 查找第一个达到非聚合状态的点位
        const nonClusteredDeviceId = devList.find(isDeviceNoClustered)

        // 最终定位到该点位
        if (nonClusteredDeviceId) {
          const marker = this.cadMap.getMarkerById(nonClusteredDeviceId)
          if (marker) {
            const { pointX, pointY } = marker.get('payload')
            this.cadMap.viewAnimate({
              center: [pointX, pointY],
              zoom
            })
          }
        }
      }
     }
其中cadMap是 CadMap类生成的对象,部分方法如下:
export default class CadMap extends Emitter {
  constructor(url, options = {}) {
    super()
    if (!url) {
      throw new Error('ImageMap need url option')
    }
    this._mapServiceUrl = url
    this._options = {
      cluster: true,
      ...options
    }
    this.map = null
    this.layer = null
    this.source = null
    this.marker = null
    this.popup = null
    this.overviewMapControl = null
    this.featureDraggable = false
    this.clickTimeout = null
  }

    ...
    // 通过设备id获取到指定设备对应的要素feature
    getMarkerById(id) {
        const source = this.getSource()
        return source.getFeatureById(id)
    }
    // 获取数据源
    getSource() {
        // isCluster 代表是否开启聚合
        const { cluster: isCluster } = this.options_
        if (isCluster && this.clusterLayer.getVisible()) {
          return this.clusterLayer.getSource().getSource()
        } else {
          return this.vectorLayer.getSource()
        }
    }
    // 动画
    viewAnimate(AnimationOptions) {
        this.map.getView().animate({
          ...AnimationOptions,
          duration: 500
        })
    }
    // 设置点位高亮状态
    setActive(value, changeImmediate = true) {
        this.active_ = value
        changeImmediate && this.changed()
    }
    ...
}
当数据量正常时正常展示,当数据量大时这个具体的卡顿程度就不展示了,大概需要几分钟甚至更久。
对需求时只是说上限50个点位进行跳转,本机测试大概3-4s,还能接受,但是现网上面100甚至更多点位,这个时长就非常感人了
就着手分析一下卡顿原因
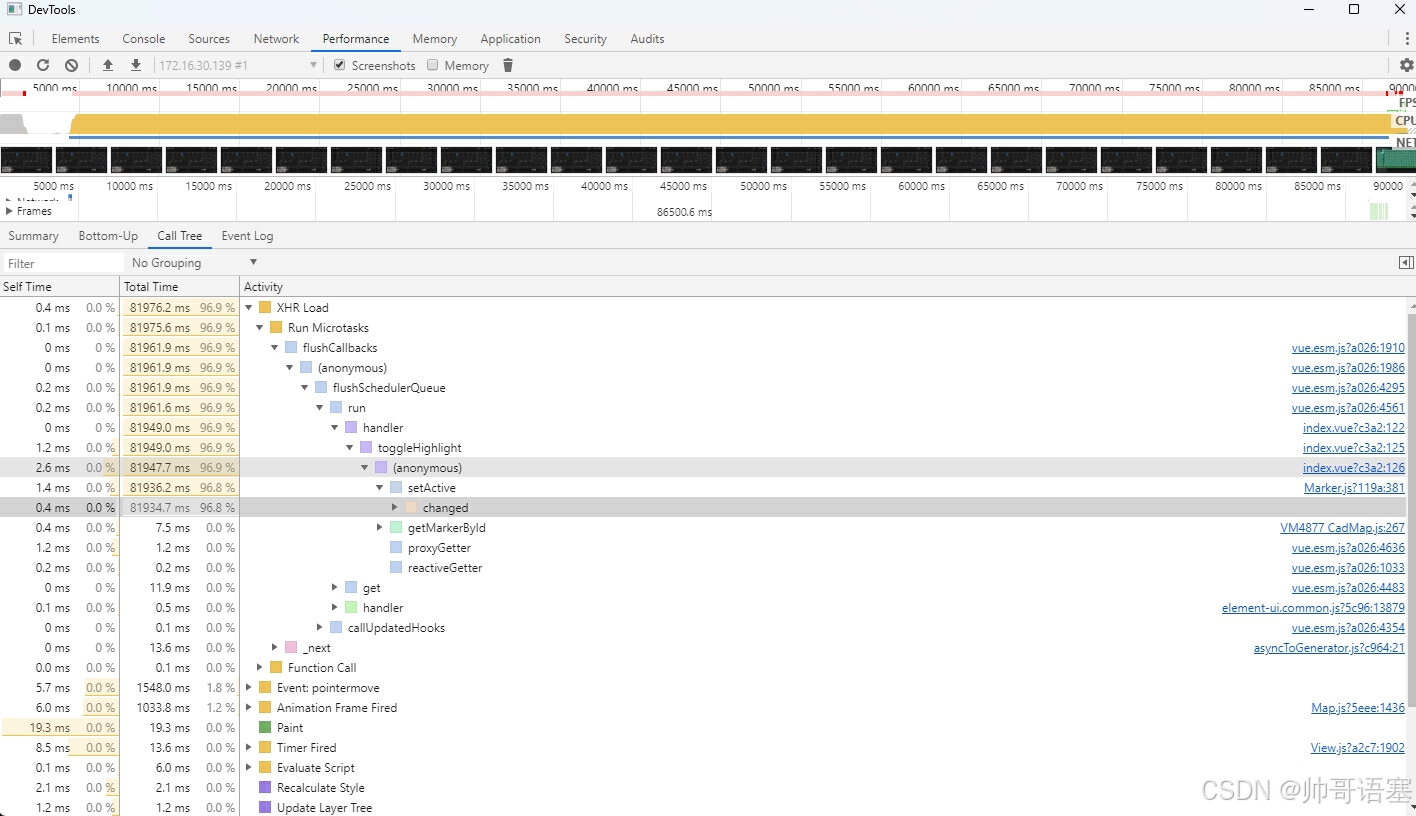
通过定位可知是 监听设置需要高亮的点位会设置每个要素的active,然后地图上每一个点位变更都会引起重绘,也就是openlayer内部的changed方法,所以我们可以试着最后一次性再设置acitve
activeDeviceList: {
      handler(newVal, oldVal) {
        const toggleHighlight = (info, isActive) => {
          info.forEach((item, index) => {
            const feature = this.cadMap.getMarkerById(item.deviceId)
            feature && feature.setActive(isActive, index === info.length - 1)
          })
        }
        if (!this.cadMap?.map) return
        // 如果旧值为空,则只需要高亮新值
        if (!oldVal.length) {
          if (newVal.length) toggleHighlight(newVal, true)
        }
        // 如果有旧值,则取消旧值的高亮,再高亮新值
        else {
          toggleHighlight(oldVal, false)
          if (newVal.length) toggleHighlight(newVal, true)
        }
      },
      deep: true,
      immediate: true
    }
解决了卡顿问题,然后还有高亮点在聚合内部该如何展现呢?
当前的聚合代码如下:
...
import { Cluster as ClusterSource, Vector as VectorSource } from 'ol/source'
...
if (isCluster) {
      const clusterSource = new ClusterSource({
        distance: 40,
        source: new VectorSource()
      })
      this.clusterLayer = new VectorLayer({
        source: clusterSource,
        zIndex: 100,
        style: clusterStyle
      })
      this.vectorLayer.setVisible(true)
      this.map.addLayer(this.clusterLayer)
    }
试着从样式回调
function clusterStyle(feature) {
  const features = feature.get('features')
  const size = features.length
  if (size > 1) {
    const activeFeatures = features.filter(f => f.getActive())
    return new Style({
      image: new Icon({
        crossOrigin: 'anonymous',
        src: require('@/assets/img/cadMap/cluster_bg.png'),
        size: [40, 40]
      }),
      text: new Text({
        text: (size - activeFeatures.length).toString(),
        fill: new Fill({
          color: '#ffffff'
        }),
        font: '16px Inter-Regular'
      })
    })
  } else {
    const originalFeature = feature.get('features')[0]
    const active = originalFeature.getActive()
    return createStyle(originalFeature.get('payload'), {
      alarm: false,
      active
    })
  }
}
在这边可以按照聚合点内部的高亮点位的数量,去计算剩余聚合的数量,但是发现好像不生效,聚合点仍然包含高亮点,只是数量对上了,所以就想办法改造一下这个方法,结果发现该方法只支持返回一种类型,要么正常点位样式,要么聚合点位样式,不支持组合点位,所以想办法从openlayer的Cluster 入手
import { Cluster } from 'ol/source'
import { createEmpty, createOrUpdateFromCoordinate, buffer } from 'ol/extent'
import { getUid } from 'ol'

export default class CustomCluster extends Cluster {
  /**
   * @param {Options} options Cluster options, with an additional canCluster function.
   * @param {function(Feature): boolean} options.canCluster A function that determines whether
   * the feature should be clustered. It should return true to allow clustering and false to prevent it.
   */
  constructor(options) {
    super(options)

    /**
     * @type {function(Feature): boolean}
     * @private
     */
    this.canCluster =
      options.canCluster ||
      function () {
        return true // Default is to allow clustering.
      }
  }

  /**
   * @protected
   */
  cluster() {
    if (this.resolution === undefined || !this.source) {
      return
    }
    const extent = createEmpty()
    const mapDistance = this.distance * this.resolution
    const features = this.source.getFeatures()

    /** @type {Object<string, true>} */
    const clustered = {}

    for (let i = 0, ii = features.length; i < ii; i++) {
      const feature = features[i]
      if (!(getUid(feature) in clustered)) {
        const geometry = this.geometryFunction(feature)
        if (geometry) {
          const coordinates = geometry.getCoordinates()
          createOrUpdateFromCoordinate(coordinates, extent)
          buffer(extent, mapDistance, extent)
          if (this.canCluster(feature)) {
            const neighbors = this.source.getFeaturesInExtent(extent).filter(neighbor => {
              if (!this.canCluster(neighbor)) {
                return false
              }
              const uid = getUid(neighbor)
              if (uid in clustered) {
                return false
              }
              clustered[uid] = true
              return true
            })
            this.features.push(this.createCluster(neighbors, extent))
          } else {
            const uid = getUid(feature)
            clustered[uid] = true
            this.features.push(this.createCluster([feature], extent))
          }
        }
      }
    }
  }
}
继承一下原来的Cluster类,扩展 canCluster 方法,代表是否聚合,此时外部生成聚合图层时加上刚刚判断的高亮状态即可
const clusterSource = new CustomCluster({
        distance: 40,
        source: new VectorSource(),
        canCluster: feature => {
          return !feature.getActive()
        }
      })
此时当我处于高亮状态时,无论缩放地图,高亮点不会进入聚合点。
到此功能已经完全实现。


 3696
3696

 被折叠的 条评论
为什么被折叠?
被折叠的 条评论
为什么被折叠?
 到【灌水乐园】发言


