


 本文介绍SpringBoot的基础知识,包括环境搭建、项目构建、依赖配置及简单应用开发。SpringBoot简化了Spring应用程序的初始搭建以及开发过程,提供开箱即用的体验。
SpringBoot入门介绍
springboot优点:
1.为所有spring开发者更快的入门
2.开箱即用,提供各种默认配置来简化项目配置
3.内嵌式容器简化Web项目 4.没有用于代码生成和xml配置的要求
本次我们先做一个springboot的入门程序
实现
1.环境
java8以上
springboot 2.0.4
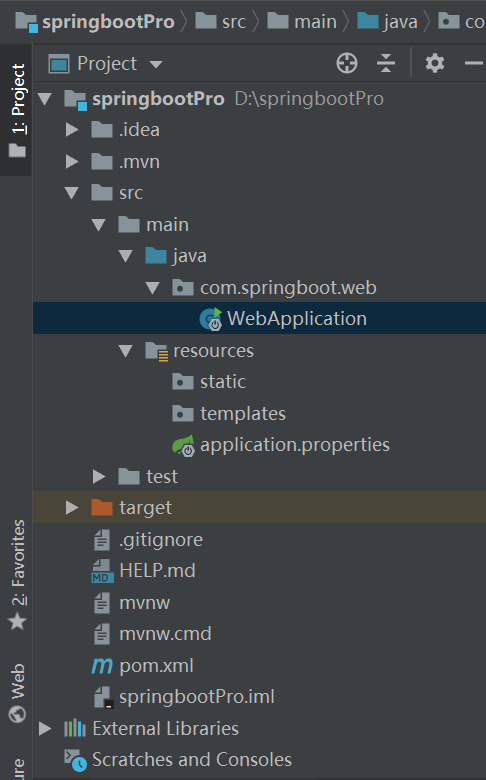
2.idea构建项目
3.在pom文件中添加依赖
<?xml version="1.0" encoding="UTF-8"?>
<project xmlns="http://maven.apache.org/POM/4.0.0" xmlns:xsi="http://www.w3.org/2001/XMLSchema-instance"
xsi:schemaLocation="http://maven.apache.org/POM/4.0.0 http://maven.apache.org/xsd/maven-4.0.0.xsd">
<modelVersion>4.0.0</modelVersion>
<parent>
<groupId>org.springframework.boot</groupId>
<artifactId>spring-boot-starter-parent</artifactId>
<version>2.1.3.RELEASE</version>
<relativePath/> <!-- lookup parent from repository -->
</parent>
<groupId>com.springboot</groupId>
<artifactId>web</artifactId>
<version>0.0.1-SNAPSHOT</version>
<name>web</name>
<description>Demo project for Spring Boot</description>
<properties>
<java.version>1.8</java.version>
</properties>
<dependencies>
<dependency>
<groupId>org.springframework.boot</groupId>
<artifactId>spring-boot-starter-web</artifactId>
</dependency>
<dependency>
<groupId>org.springframework.boot</groupId>
<artifactId>spring-boot-starter-test</artifactId>
<scope>test</scope>
</dependency>
</dependencies>
<build>
<plugins>
<plugin>
<groupId>org.springframework.boot</groupId>
<artifactId>spring-boot-maven-plugin</artifactId>
</plugin>
</plugins>
</build>
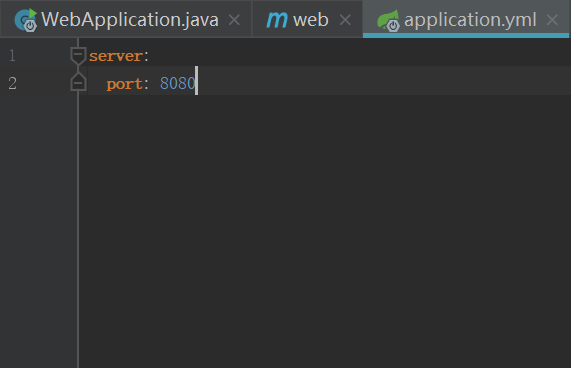
</project>4.application.yml中配置端口号
5.查看启动类
import org.springframework.boot.SpringApplication;
import org.springframework.boot.autoconfigure.SpringBootApplication;
import org.springframework.web.bind.annotation.RequestMapping;
import org.springframework.web.bind.annotation.RequestMethod;
import org.springframework.web.bind.annotation.RestController;

@SpringBootApplication
@RestController
public class WebApplication {

    public static void main(String[] args) {
        SpringApplication.run(WebApplication.class, args);
    }
    @RequestMapping(value = "hello",method = RequestMethod.GET)
    public String hello(){
        return  "hello java4all";
    }
}
@SpringBootApplication是@Configuration,EnableAutoConfiguration,@ComponentScan的组合。
我们查看一下源码
import java.lang.annotation.Documented;
import java.lang.annotation.ElementType;
import java.lang.annotation.Inherited;
import java.lang.annotation.Retention;
import java.lang.annotation.RetentionPolicy;
import java.lang.annotation.Target;
import org.springframework.boot.SpringBootConfiguration;
import org.springframework.boot.context.TypeExcludeFilter;
import org.springframework.context.annotation.ComponentScan;
import org.springframework.context.annotation.FilterType;
import org.springframework.context.annotation.ComponentScan.Filter;
import org.springframework.core.annotation.AliasFor;

@Target({ElementType.TYPE})
@Retention(RetentionPolicy.RUNTIME)
@Documented
@Inherited
@SpringBootConfiguration
@EnableAutoConfiguration
@ComponentScan(
    excludeFilters = {@Filter(
    type = FilterType.CUSTOM,
    classes = {TypeExcludeFilter.class}
), @Filter(
    type = FilterType.CUSTOM,
    classes = {AutoConfigurationExcludeFilter.class}
)}
)
public @interface SpringBootApplication {
    @AliasFor(
        annotation = EnableAutoConfiguration.class
    )
    Class<?>[] exclude() default {};

    @AliasFor(
        annotation = EnableAutoConfiguration.class
    )
    String[] excludeName() default {};

    @AliasFor(
        annotation = ComponentScan.class,
        attribute = "basePackages"
    )
    String[] scanBasePackages() default {};

    @AliasFor(
        annotation = ComponentScan.class,
        attribute = "basePackageClasses"
    )
    Class<?>[] scanBasePackageClasses() default {};
}
从源码中,可以看出,SpringBoot 提供了统一的注解来替代以上三个注解,简化程序的配置。这个注解很重要,后面会有详细的介绍。
@Controller和@RestController的区别?
使用@RestController注解,则Controller中的方法无法返回jsp页面,配置的视图解析器InternalResourceViewResolver不起作用,返回的内容就是Return 里的内容。
例如:本来应该到success.jsp页面的,则其显示success.WebApplication是项目的启动类。
如果需要返回到指定页面,则需要用 @Controller配合视图解析器InternalResourceViewResolver才行。
如果需要返回JSON,XML或自定义mediaType内容到页面,则需要在对应的方法上加上@ResponseBody注解。
@RequestMapping(value = "hello",method = RequestMethod.GET)@RequestMapping()这个方法后面会有详细的介绍,是个方法级别的注解。目前只要知道是访问路径。value="hello"是访问的关键字,method=RequestMethod.GET表示数据是通过get方式提交。
另一种方式是RequestMethod.POST
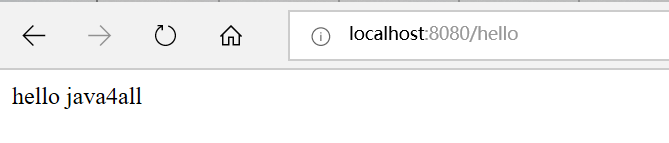
6.启动项目
执行main方法后,这个项目就会进入运行状态。在浏览器中输入http://localhost:8080/hello后,查看结果
总结:
java文件夹下,是放我们的java文件的;application.properties文件,是我们的配置文件,在里面做各种配置非常简单;templates是放前端文件的;这些后面会做专门的讲解。


 7126
7126

 被折叠的 条评论
为什么被折叠?
被折叠的 条评论
为什么被折叠?
 到【灌水乐园】发言


