


 本文介绍了如何不使用Maven或Gradle,仅通过下载特定jar包来入门Spring Boot。详细步骤包括创建Java Web项目,引入Spring Boot相关jar,编写带有@Component和@SpringBootApplication注解的HelloWorld和Application类,以及如何运行和测试应用。文章强调了Spring Boot集成的内嵌Tomcat和版本匹配的重要性。
使用Spring Boot不象使用普通Spring一样要繁琐的xml配置文件。
本篇入门介绍重在学习,不需要使用Maven及Gradle那样的依赖配置管理工具,因此读者需要自行下载17个所需的相关jar包(下载springboot相关jar的链接JFrog,下载内嵌tomcat的链接https://downloads.apache.org/tomcat/tomcat-9/v9.0.62/bin/embed/apache-tomcat-9.0.62-embed.zip),包括annotations-api,commons-logging-1.2,spring-aop-5.2.9.RELEASE,spring-beans-5.2.9.RELEASE,spring-boot-2.3.9.RELEASE,spring-boot-autoconfigure-2.3.9.RELEASE,spring-boot-starter-2.3.9.RELEASE,spring-boot-starter-logging-2.3.9.RELEASE,spring-boot-starter-tomcat-2.3.9.RELEASE,spring-boot-starter-web-2.3.9.RELEASE,spring-context-5.2.9.RELEASE,spring-core-5.2.9.RELEASE,spring-expression-5.2.9.RELEASE,spring-web-5.2.9.RELEASE,spring-webmvc-5.2.9.RELEASE,tomcat-embed-core,tomcat-embed-websocket。
开发环境为Eclipse Oxygen.3a Release (4.7.3a),jdk版本为1.8.0_221。
1. 新建名为SpringbootTest的Java Web项目。
2. 引入前述springboot相关jar包。
3. 新建an.ru.ao包。
4. 编写HelloWorld类,并加上@Component注解,该类只有一个sayHi方法,该方法向输出Hello World!,代码如下。
package an.ru.ao;

import org.springframework.stereotype.Component;

@Component
public class HelloWorld {

	public void sayHi() {
		System.out.println("Hello World!");
	}
}
5. 编写Application类,并加上@SpringBootApplication注解,该类只有一个main方法,该方法为spring boot程序的入口,在该方法中启动spring boot,然后查找HelloWorld类的实例,并调用sayHi方法。
package an.ru.ao;
import org.springframework.boot.SpringApplication;
import org.springframework.boot.autoconfigure.SpringBootApplication;
import org.springframework.context.ConfigurableApplicationContext;
@SpringBootApplication
public class Application {
public static void main(String[] args) throws Exception {
ConfigurableApplicationContext cac = SpringApplication.run(Application.class, args);
System.out.println("This is my first spring boot application!");
HelloWorld hw = cac.getBean(HelloWorld.class);
hw.sayHi();
}
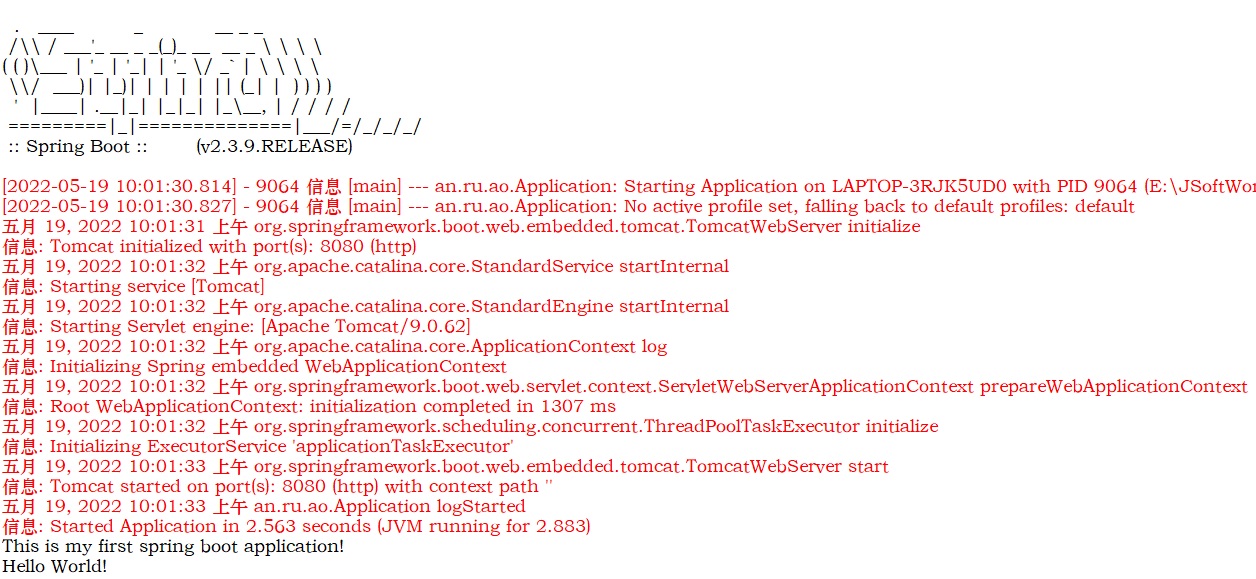
}6. 在打开第五步中类文件的窗口中,单击鼠标右键,选择“Run As”中的“Java Application”,控制台出现如下图所示的信息,表示成功启动应用。
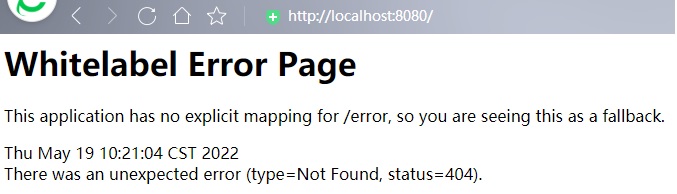
7. 在浏览器中输入localhost测试应用是否启动成功。
8. 新建HelloWorldV2,并使用@RestController注解。
package an.ru.ao;
import org.springframework.web.bind.annotation.RequestMapping;
import org.springframework.web.bind.annotation.RestController;
@RestController
public class HelloWorldV2 {
@RequestMapping("/v1")
public String sayHi() {
System.out.println("Hello World in HelloWorldV2 sayHi()!");
return "Hello World in HelloWorldV2 sayHi()!";
}
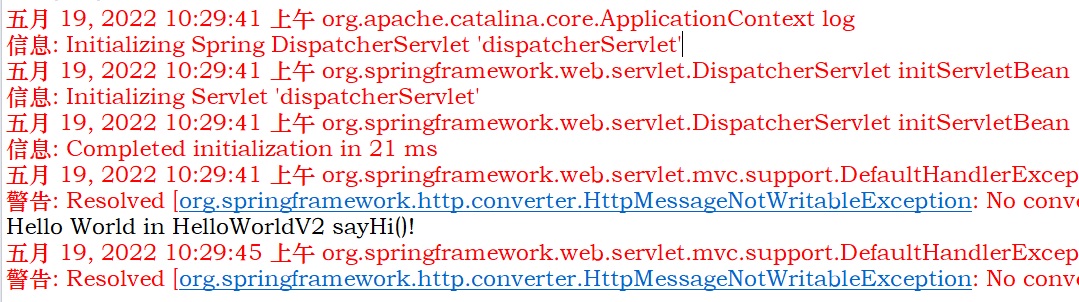
}9. 参考第6步,重新启动应用,在浏览器中输入http://localhost:8080/v1测试第8步中的程序是否正常工作。这里可以看到浏览器里显示了sayHi方法返回的字符串,并且控制台里也正确显示了输出的字符串。

总结一下:springboot里集成了内嵌的tomcat,需要与之相匹配的tomcat-embed版本(这里是9.0.62)的jar包,在应用的入口程序里需要加入@SpringBootApplication注解。


 532
532

 被折叠的 条评论
为什么被折叠?
被折叠的 条评论
为什么被折叠?
 到【灌水乐园】发言


