


 文章介绍了如何在QtCreator中管理多个Qt版本,包括安装、注册已安装的Qt版本,以及如何链接到Qt安装以自动检测和注册版本。同时提到了不能链接到由其他包管理器安装的Qt版本,需要手动添加的情况。
Qt系列文章目录
前言
link with a qt installation to automatically register qt versions and lits?to do this later,select options > Kits > Qt Versions > Link with Qt

一、分析原因
1.官网的解释
Adding Qt Versions
You can install multiple versions of Qt development PC and use them to build your projects. For example, device manufacturers provide special Qt versions for developing applications for their devices.
Registering Installed Qt Versions
The Qt Versions tab lists the installed Qt versions. To view detailed information about each Qt version, select it in the list and select Details in the Qt version for section.
翻译出来:
添加Qt版本
您可以安装多个版本的Qt开发PC,并使用它们来构建您的项目。例如,设备制造商提供特殊的Qt版本,用于为其设备开发应用程序。
注册已安装的Qt版本
Qt版本选项卡列出了已安装的Qt版本。要查看每个Qt版本的详细信息,请在列表中选择它,然后在Qt版本中选择Details作为部分。
二、解决
1.
Adding Qt Versions
You can install multiple versions of Qt development PC and use them to build your projects. For example, device manufacturers provide special Qt versions for developing applications for their devices.
Registering Installed Qt Versions
The Qt Versions tab lists the installed Qt versions. To view detailed information about each Qt version, select it in the list and select Details in the Qt version for section.
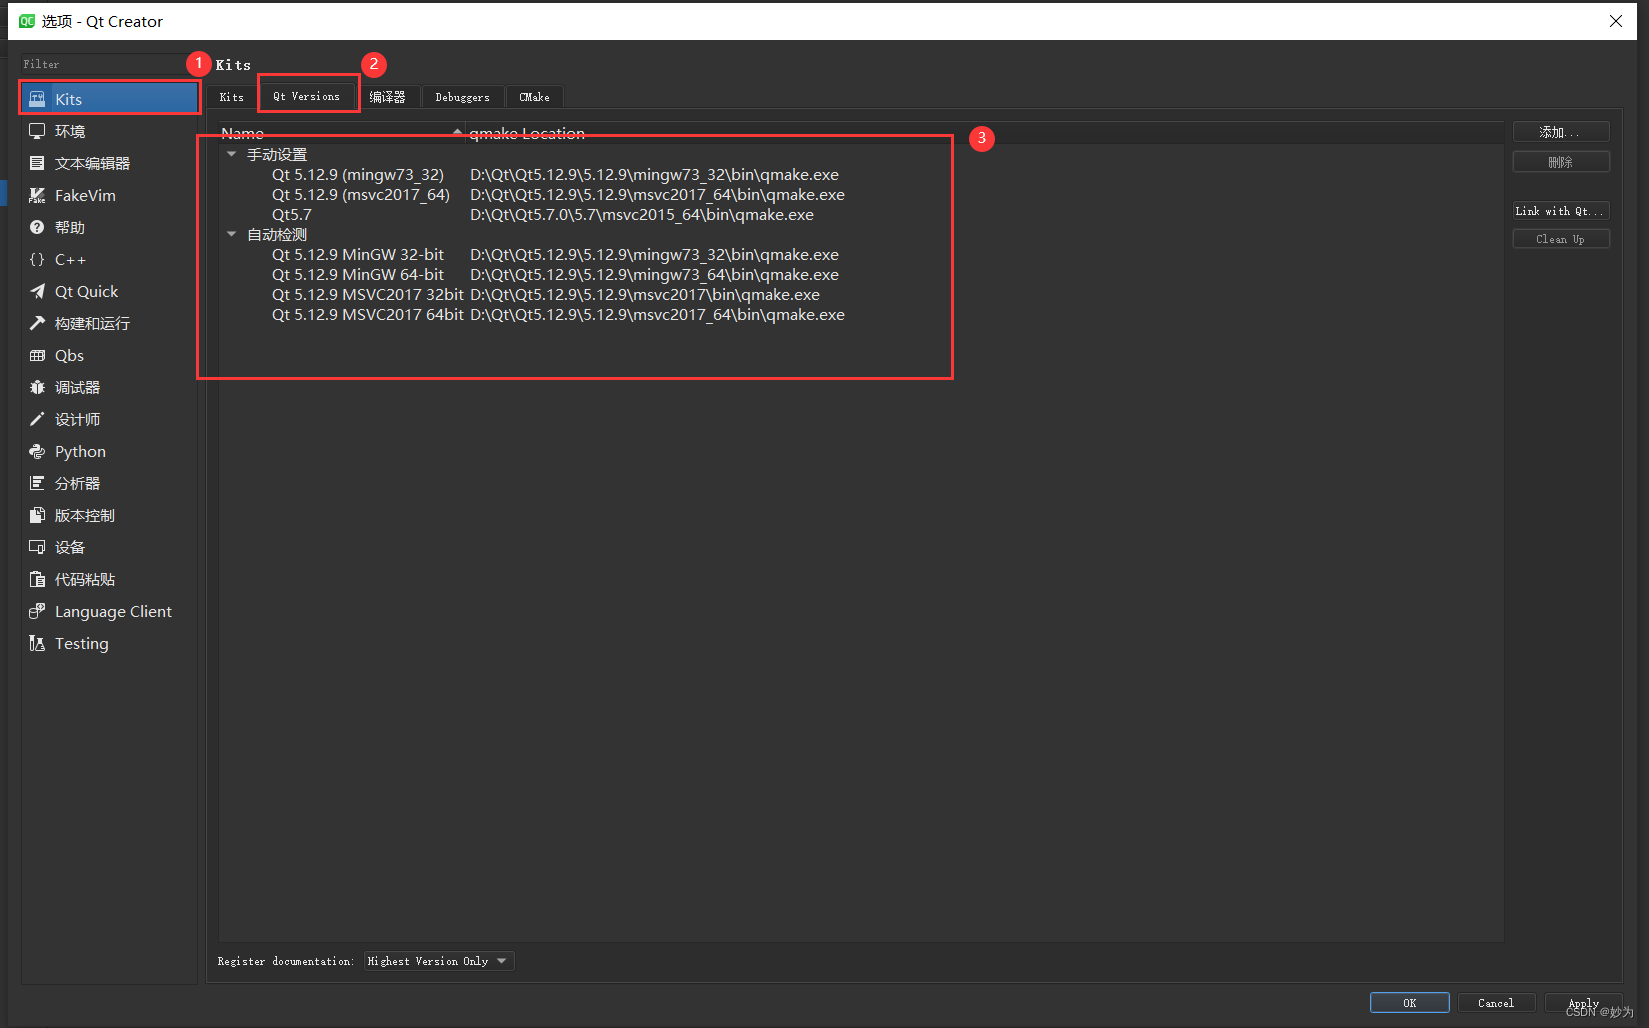
“Qt Versions tab in Kit preferences”
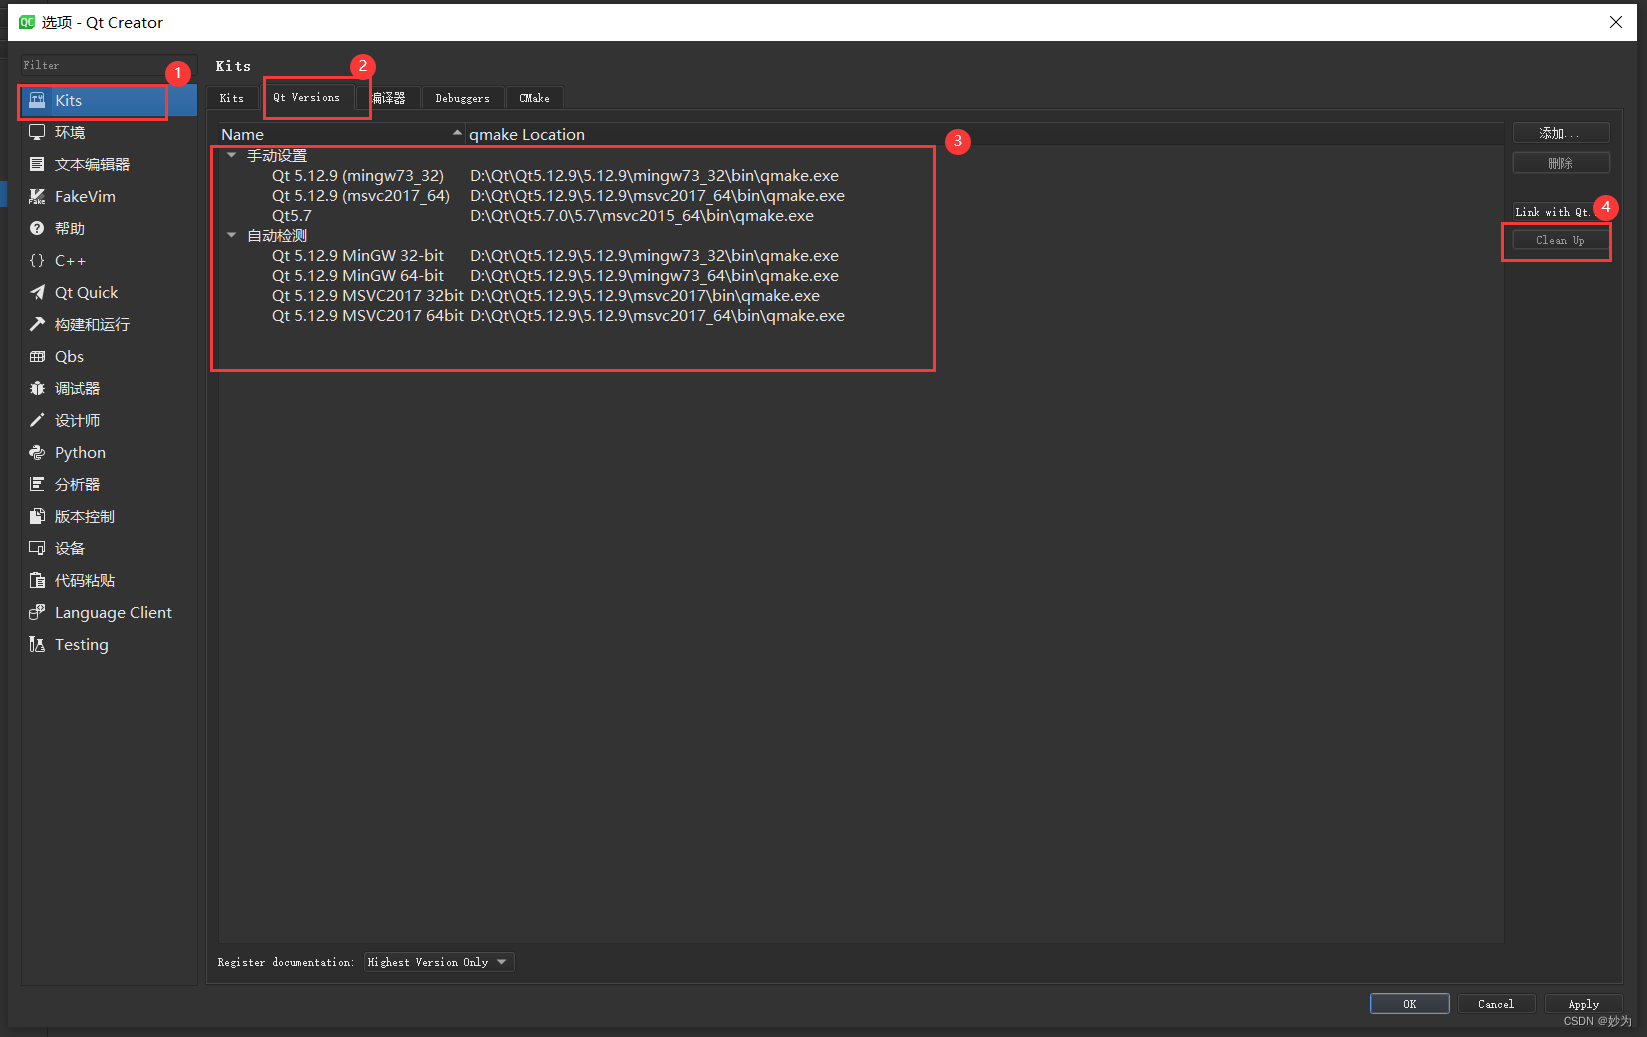
To remove invalid Qt versions, select Clean Up.
You can link to a Qt that the Qt Installer installed to automatically detect the installed Qt versions. However, you cannot link to a Qt that the system installed with some other package manager, such as your Linux distribution, brew on macOS, or Chocolatey on Windows, nor a self-built Qt. In those cases, select Add in the Qt Versions tab to add the Qt version manually, as instructed in Setting Up New Qt Versions.
To link to a Qt installation:
Select Edit > Preferences > (or Qt Creator > Preferences on macOS) > Kits > Qt Versions > Link with Qt.
In the Qt installation path field, enter the path to the directory where you installed Qt.
Select Link with Qt to automatically register Qt versions and kits in the Qt installation directory.
Select Restart Now to restart Qt Creator.
To remove the automatically detected Qt versions from the list, select Remove Link.
If the Qt Versions tab does not show a Qt version under Auto-detected, set it up manually, as described in the following section.
You specify the Qt version to use for each kit for building and running your projects in Edit > Preferences > Kits, as described in Specifying Kit Settings.
翻译:
添加Qt版本
您可以安装多个版本的Qt开发PC,并使用它们来构建您的项目。例如,设备制造商提供特殊的Qt版本,用于为其设备开发应用程序。
注册已安装的Qt版本
Qt版本选项卡列出了已安装的Qt版本。要查看每个Qt版本的详细信息,请在列表中选择它,然后在Qt版本中选择Details作为部分。
“套件首选项中的Qt版本选项卡”
要删除无效的Qt版本,请选择“清理”。
您可以链接到Qt安装程序安装的Qt,以自动检测已安装的Qt版本。但是,您不能链接到系统安装了其他软件包管理器的Qt,如Linux发行版、macOS上的brew或Windows上的Chocolatey,也不能链接到自建的Qt。在这些情况下,请在Qt版本选项卡中选择添加,以手动添加Qt版本,如设置新Qt版本中所述。
要链接到Qt安装:
选择编辑>首选项>(或在macOS上选择Qt Creator>首选项)>套件>Qt版本>与Qt链接。
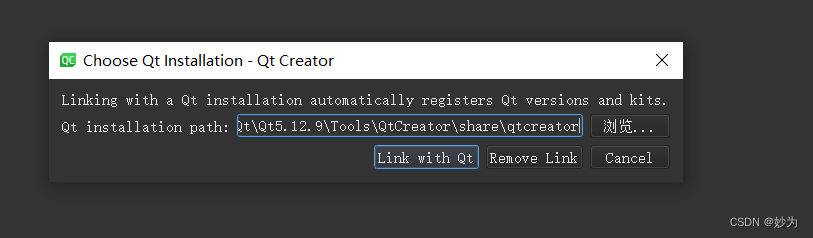
在Qt安装路径字段中,输入安装Qt的目录的路径。
选择Link with Qt可在Qt安装目录中自动注册Qt版本和套件。
选择“立即重新启动”以重新启动Qt Creator。
要从列表中删除自动检测到的Qt版本,请选择删除链接。
如果“Qt版本”选项卡在“自动检测”下未显示Qt版本,请手动设置,如下节所述。
您可以在“编辑”>“首选项”>“工具包”中为每个工具包指定要用于构建和运行项目的Qt版本,如指定工具包设置中所述。


 1237
1237

 被折叠的 条评论
为什么被折叠?
被折叠的 条评论
为什么被折叠?
 到【灌水乐园】发言


