


 本文详细介绍了JavaRMI(远程方法调用)的概念、框架组成部分、开发流程,以及如何通过JNDI进行远程对象访问,展示了从服务端创建到客户端调用的完整过程。
一、RMI概述
java RMI(remote method invocation)即远程方法调用,是允许运行在一个java虚拟机上的对象调用运行在另外一个java虚拟机上的对象的方法,JAVA RMI实现JAVA程序之间跨越JVM的远程通信。通过RMI可以让调用远程JVM上对象方法,仿佛调用本地JVM上对象方法一样简单、快捷。
二、RMI框架
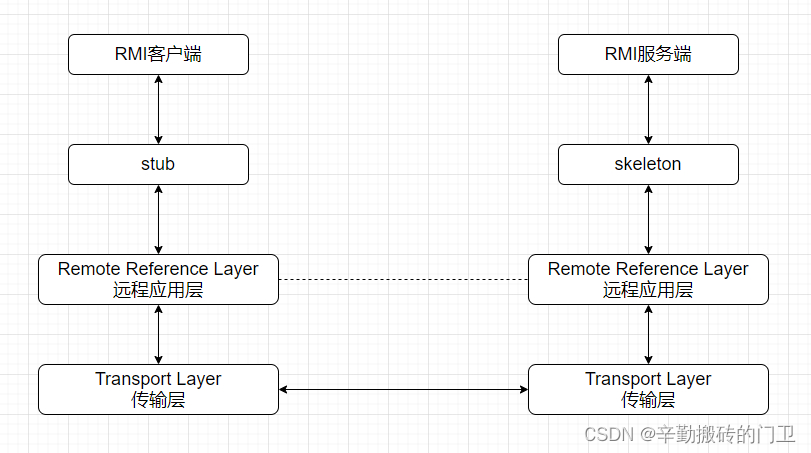
RMI主要有三个角色:RMI客户端、RMI服务端、注册表
RMI过程大体如下:
1.客户端从RMI注册表中查询并获取远程对应引用。客户端首先会与Stub进行交互,stub将远程方法所需的参数进行序列化后,传递给远程应用层RRL
2.stub和远程对象具有相同的接口和方法列表,当客户端调用远程对象时,实际是有stub对象代理的。RRL将stub本地引用转换为服务端上对象的远程引用后,再将调用传递给传输层,传输层执行TCP发送
3.RMI服务端传输层监听到请求后,将引用转发给服务端的RRL。
4.服务端RRL将客户端发送的远程应用转换为本地虚拟机引用后,传递给Skeleton。
5.Skeleton读取参数,最后由服务端进行实际方法调用。
6.如果RMI客户端调用存在返回值,则以此向下传递。
7.客户端接收到返回值后,再以此向上传递。然后由stub反序列化返回值,最终传递给RMI客端
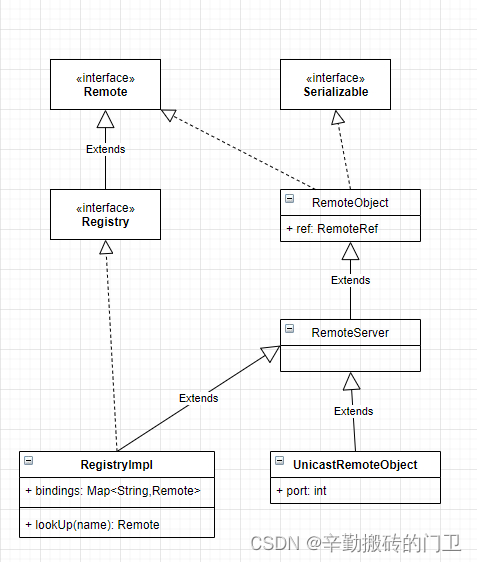
相关类关系如下:
三、RMI开发流程
1.RMI服务端
(1)远程调用对象类:
1.1 定义一个继承Remote接口的interface A,接口中的方法需要抛出RemoteException
1.2 远程调用对象类需继承UnicastRemoteObject类和interface A
(2)启动注册表并绑定对象
2.RMI客户端
(1)定义用于接收远程对象的Remote子接口,只需实现java.rmi.Remote接口即可。但要求必须与服务器端对等的Remote子接口保持一致,即有相同的接口名称、包路径和方法列表等
(2)通过注册表查询需要调用的对象,并强制转换成客户端定义的类
(3)进行方法调用
远程调用对象类
import java.rmi.Remote;
import java.rmi.RemoteException;

public interface Hello extends Remote {
    public String welcome(String name) throws RemoteException;
}
import java.rmi.RemoteException;
import java.rmi.server.UnicastRemoteObject;

public class HelloImpl extends UnicastRemoteObject implements Hello{

    public HelloImpl() throws RemoteException {

    }

    public String welcome(String name) throws RemoteException {
        return "Hello, " + name;
    }
}
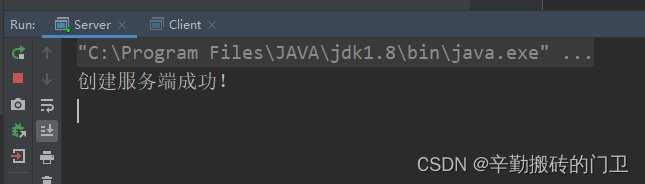
创建RMI服务端
import java.rmi.RemoteException;
import java.rmi.registry.LocateRegistry;
import java.rmi.registry.Registry;

public class Server {
    public static void main(String[] args) throws RemoteException {
        // 创建对象
        Hello hello = new HelloImpl();
        // 创建注册表
        Registry registry = LocateRegistry.createRegistry(10999);
        // 绑定对象到注册表,并给他取名为hello
        registry.rebind("hello",hello);
        System.out.println("创建服务端成功!");

    }
}
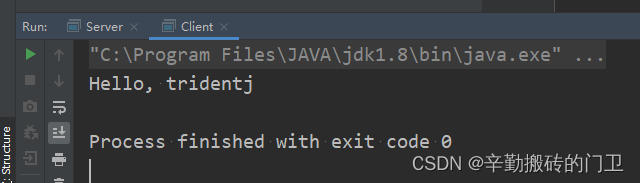
创建RMI客户端
import java.rmi.NotBoundException;
import java.rmi.RemoteException;
import java.rmi.registry.LocateRegistry;
import java.rmi.registry.Registry;

public class Client {

    public static void main(String[] args) throws RemoteException, NotBoundException {
        // 获取到注册表的代理
        Registry registry = LocateRegistry.getRegistry("localhost", 10999);
        // 利用注册表的代理去查询远程注册表中名为hello的对象
        Hello hello = (Hello) registry.lookup("hello");
        // 调用远程方法
        System.out.println(hello.welcome("tridentj"));
    }
}
简单本地运行的效果如下:
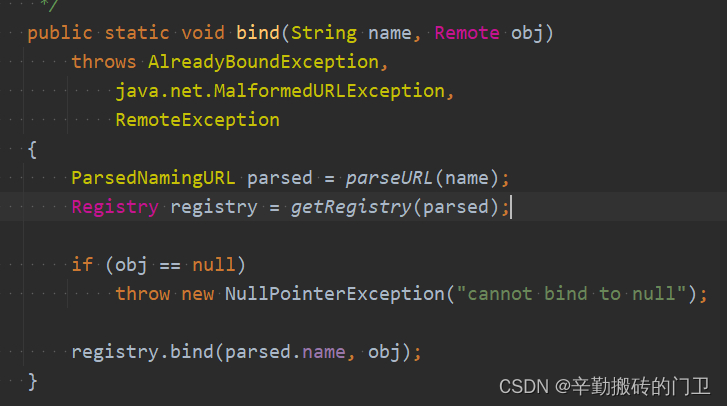
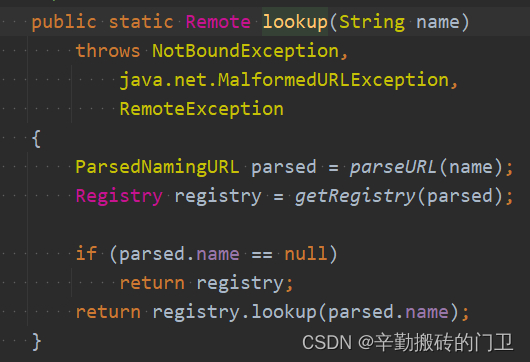
也可以通过Naming类创建,Naming相当于对Registry进行了封装,部分Naming源代码如下:
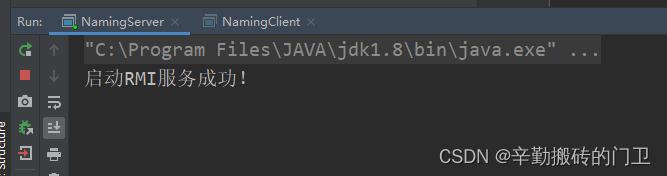
Naming封装简单示例:
import java.rmi.Naming;
import java.rmi.registry.LocateRegistry;

public class NamingServer {

    public static void main(String[] args) {
        try {
            HelloImpl hello = new HelloImpl();
            //注册RMI端口
            LocateRegistry.createRegistry(10999);
            //绑定对象
            Naming.bind("rmi://localhost:10999/hello",hello);
            System.out.println("启动RMI服务成功!");
        }catch (Exception e){
            e.printStackTrace();
        }

    }
}
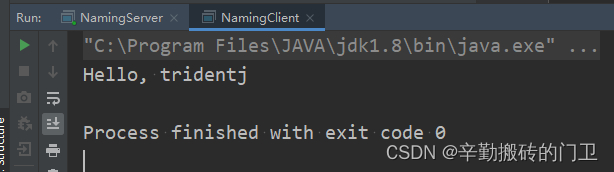
import java.rmi.Naming;

public class NamingClient {

    public static void main(String[] args){
        try {
            Hello hello = (Hello) Naming.lookup("rmi://localhost:10999/hello");
            System.out.println(hello.welcome("tridentj"));
        }catch (Exception e){
            e.printStackTrace();
        }
    }

}
四、JNDI
JNDI(JAVA Naming And Directory Interface)是JAVA命名和目录接口。应用程序可以通过JNDI API去调用其他资源,包括JDBC、LDAP、RMI、DNS、NIS、windows注册表等等。JNDI将不同的资源进行统一封装,形成一套API,通过这套API,应用程序可以不用关心需要交互的资源细节,方便快捷的与资源进行交互,从而降低开发难度,提高效率。
使用JNDI创建服务对象
//配置JNDI工厂和JNDI的url
Properties pro = new Properties();
pro.put(Context.INITIAL_CONTEXT_FACTORY,"com.sun.jndi.rmi.registry.RegistryContextFactory");
pro.put(Context.PROVIDER_URL,"rmi://localhost:10999");

//创建初始化环境
Context ctx = new InitialContext(pro);
Context.INITIAL_CONTEXT_FACTORY指定JNDI具体处理的类名称,例如RMI为com.sun.jndi.rmi.registry.RegistryContextFactory,LDAP为com.sun.jndi.ldap.LdapCtxFactory
4.1 JNDI-RMI远程方法调用
RMI的服务工厂类为com.sun.jndi.rmi.registry.RegistryContextFactory
4.2 RMI服务端
import java.rmi.registry.LocateRegistry;
import java.rmi.registry.Registry;
public class RMIService {
public static void main(String[] args)throws Exception{
//创建rmi映射表
Registry registry = LocateRegistry.createRegistry(10999);
Hello hello = new HelloImpl();
//对象板顶到注册表
registry.bind("hello", hello);
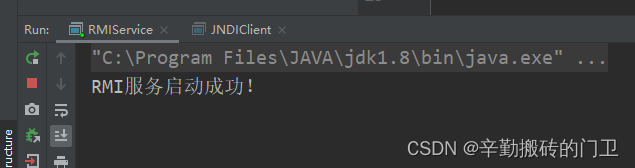
System.out.println("RMI服务启动成功!");
}
}
4.3 JNDI-RMI客户端
import javax.naming.Context;
import javax.naming.InitialContext;
import java.util.Properties;
public class JNDIRMIClient {
public static void main(String[] args) throws Exception{
//配置JNDI工厂和JNDI的url
Properties pro = new Properties();
pro.put(Context.INITIAL_CONTEXT_FACTORY,"com.sun.jndi.rmi.registry.RegistryContextFactory");
pro.put(Context.PROVIDER_URL,"rmi://localhost:10999");
//创建初始化环境
Context ctx = new InitialContext(pro);
//jndi方式获取远程对象
Hello rHello = (Hello) ctx.lookup("rmi://localhost:10999/hello");
/**
* 即便配置了context.PROVIDER_URL,当在lookup中修改成其他的url,程序以lookup中为准
* 相当于提前配置的PROVIDER_URL未起作用,故若lookup地址可控制,则存在风险点。
* */
//context.PROVIDER_URL已指定
//Hello rHello = (Hello) ctx.lookup("hello");
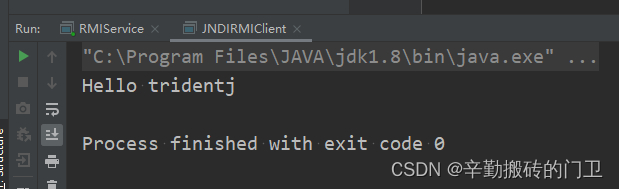
System.out.println(rHello.sayHello("tridentj"));
}
}
4.4 运行效果


 2922
2922

 被折叠的 条评论
为什么被折叠?
被折叠的 条评论
为什么被折叠?
 到【灌水乐园】发言


