


程序示例精选
Python+Qt指纹识别算法
如需安装运行环境或远程调试,见文章底部个人QQ名片,由专业技术人员远程协助!
前言
这篇博客针对《Python+Qt指纹识别算法》编写代码,代码整洁,规则,易读。 学习与应用推荐首选。
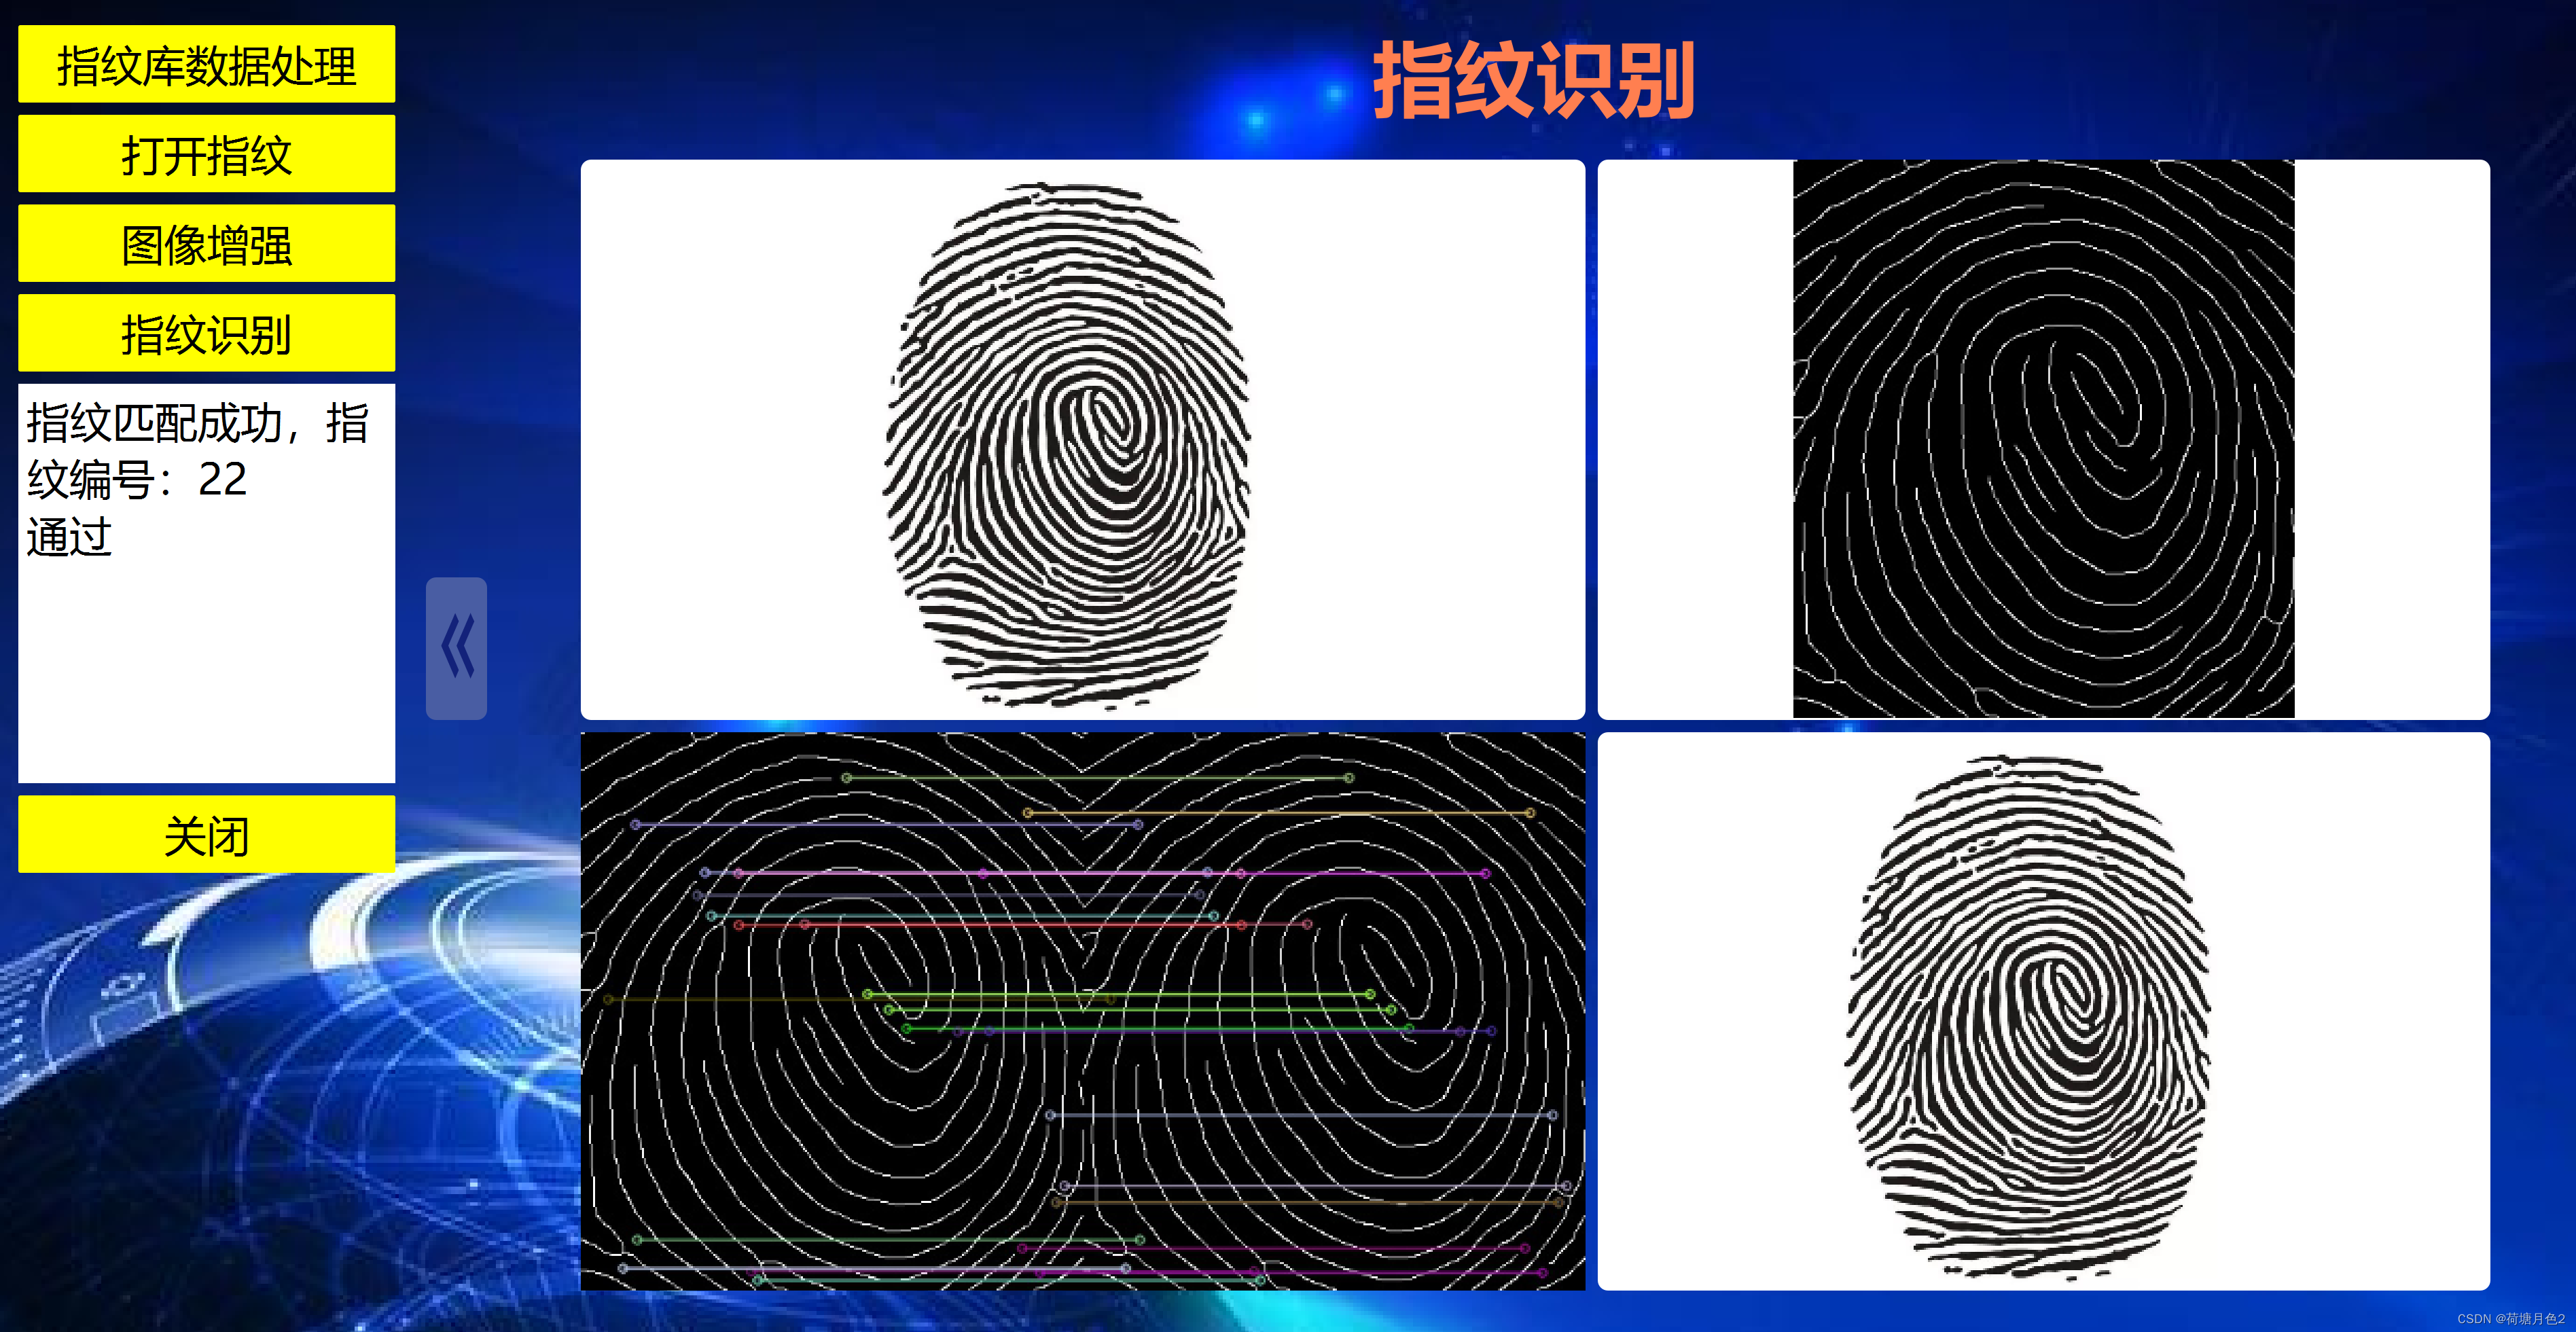
运行结果
文章目录
一、所需工具软件
二、使用步骤
1. 主要代码
2. 运行结果
三、在线协助
一、所需工具软件
1. Python
2. Pycharm
二、使用步骤
主要代码如下(示例):
# coding:utf-8
import sys
#从转换的.py文件内调用类
import cv2
from PyQt5 import QtWidgets
from PyQt5 import QtWidgets, QtCore, QtGui
from PyQt5.QtGui import *
from PyQt5.QtWidgets import *
from PyQt5.QtCore import *
from PyQt5.QtWidgets import QApplication, QWidget
from PyQt5.uic import loadUi
import os
import time,PIL
from PIL import ImageGrab
from PIL import Image
import numpy as np
from PIL import Image, ImageDraw, ImageFont
class myWin(QtWidgets.QMainWindow,Ui_MainWindow):

    def __init__(self):
        super(myWin, self).__init__()
        #self.ui = loadUi('untitled.ui')
        self.setupUi(self)
        self.pushButton.clicked.connect(self.openFileButton
       self.pushButton_3.setStyleSheet(open('style/style_pushButton_3_arrow_left.css').read())

        self.pushButton.setStyleSheet(open('style/style_pushButton1.css').read())

self.label.setStyleSheet(open('style/style_label_photo_window.css').read())
        self.label.setText("")
        self.label_2.setStyleSheet(open('style/style_label_photo_window.css').read())
        self.label_2.setText("")
        self.label_4.setStyleSheet(open('style/style_label_photo_window.css').read())
        self.label_4.setText("")
        self.label_5.setStyleSheet(open('style/style_label_photo_window.css').read())
        self.label_5.setText("")

        self.label_3.setStyleSheet(open('style/style_label_title.css').read())
        self.label_3.setText("指纹识别")

        # self.label_4.setStyleSheet('color:white')
        # self.label_5.setStyleSheet('color:white')

    def openFileButton(self):
        imgName, imgType  = QFileDialog.getOpenFileName(self,"打开文件","./waitRecognPhoto_pass","files(*.*)")
        global imgOpen
        global imgCommon

        imgOpen = cv2.imread(imgName)
        cv2.imwrite(r"temp/aa.jpg", imgOpen)
        imgCommon=imgOpen
        height, width, pixels = imgOpen.shape
        print("height",height)
        print("width",width )
        print("label_2.height()", self.label.height())
        print("label_2.width()",self.label.width())

        if width>(self.label.width()):
            rheight=self.label.height()
            rwidth=(self.label.height()*width)/height
            print("1")
        elif height>(self.label.height()):
            rwidth=(self.label.height()*width)/height
            rheight=self.label.height()
            print("2")
        elif ((self.label.height())-height)<((self.label.width())-width):
            rwidth=(self.label.height()*width)/height
            rheight=self.label.height()
            print("3")
        else:
            rheight = height
            rwidth = width

        print("rheight",rheight)
        print("rwidth",rwidth )

        frame = cv2.resize(imgOpen, (int(round(rwidth,0)), int(round(rheight,0))))
        imgOpen = cv2.cvtColor(frame, cv2.COLOR_BGR2RGB)  # opencv读取的bgr格式图片转换成rgb格式
        _image = QtGui.QImage(imgOpen[:], imgOpen.shape[1], imgOpen.shape[0], imgOpen.shape[1] * 3, QtGui.QImage.Format_RGB888)
        jpg_out = QtGui.QPixmap(_image).scaled(rwidth, rheight) #设置图片大小
        self.label.setPixmap(jpg_out) #设置图片显示

if __name__=="__main__":
    QApplication.setAttribute(Qt.AA_EnableHighDpiScaling)
    app=QtWidgets.QApplication(sys.argv)
    Widget=myWin()
    Widget.showMaximized();
    Widget.show()
    sys.exit(app.exec_())
运行结果
三、在线协助:
如需安装运行环境或远程调试,见文章底部个人 QQ 名片,由专业技术人员远程协助!
1)远程安装运行环境,代码调试
2)Visual Studio, Qt, C++, Python编程语言入门指导
3)界面美化
4)软件制作
5)云服务器申请
6)网站制作
当前文章连接:https://blog.youkuaiyun.com/alicema1111/article/details/132666851
个人博客主页:https://blog.youkuaiyun.com/alicema1111?type=blog
博主所有文章点这里:https://blog.youkuaiyun.com/alicema1111?type=blog
博主推荐:
Python人脸识别考勤打卡系统:
https://blog.youkuaiyun.com/alicema1111/article/details/133434445
Python果树水果识别:https://blog.youkuaiyun.com/alicema1111/article/details/130862842
Python+Yolov8+Deepsort入口人流量统计:https://blog.youkuaiyun.com/alicema1111/article/details/130454430
Python+Qt人脸识别门禁管理系统:https://blog.youkuaiyun.com/alicema1111/article/details/130353433
Python+Qt指纹录入识别考勤系统:https://blog.youkuaiyun.com/alicema1111/article/details/129338432
Python Yolov5火焰烟雾识别源码分享:https://blog.youkuaiyun.com/alicema1111/article/details/128420453
Python+Yolov8路面桥梁墙体裂缝识别:https://blog.youkuaiyun.com/alicema1111/article/details/133434445
Python+Yolov5道路障碍物识别:https://blog.youkuaiyun.com/alicema1111/article/details/129589741
Python+Yolov5跌倒检测 摔倒检测 人物目标行为 人体特征识别:https://blog.youkuaiyun.com/alicema1111/article/details/129272048


 被折叠的 条评论
为什么被折叠?
被折叠的 条评论
为什么被折叠?
 到【灌水乐园】发言


