


 本文详细介绍了Android中Intent的使用,包括如何使用Intent隐式启动应用程序,以及Intent在不同活动间的数据传递。讲解了通过putExtra()方法存储数据,并在目标活动中通过getExtra()获取数据。同时,还提到了使用Bundle进行大量数据传递的方式,以及如何通过startActivityForResult()实现数据的有响应发送与接收。内容涵盖了Intent的基本操作和在实际开发中的应用场景。
我们上一期讲了使用intent打开一些安卓自带的app,还记得吗?我们给intent配置哪一个方法就可以打开一个app呢?
回顾一下,intent打开自带app是使用的隐式打开,要配置动作(setAction())、环境(addCategory())、数据(sentData())和附加属性(putExtra());当然有一些是只需要配置两个,不过一般动作和环境是必须要配置的;
其实intent不仅仅可以打开一些app,还可以用于不同实例的数据传递:
1、普通数据传递:
                //1.5 发送
                Intent intent = new Intent(RequestActivity.this,ResultActivity.class);
                intent.putExtra("username",username);
                intent.putExtra("password",password);
                intent.putExtra("sex",sex);
                startActivity(intent);
我们可以使用intent的putExtra()方法来讲数据存入intent,括号里面放的是一个键值对,意思就是我们在另一个界面只需要获取键值就可以拿到value:
我们在被打开的实例上通过一个方法可以拿到放有我们数据的intent,这个intent其实就是打开这个实例的实例的intent
Intent intent = getIntent();
要注意,我们存放的数据类型是什么,拿的时候就要使用响应的方法,字符串用getStringExtra(),双精度使用getDoubleExtra();
username = intent.getStringExtra("username");
password = intent.getStringExtra("password");
sex = intent.getStringExtra("sex");
weight = intent.getDoubleExtra("weight",0)
这里也要注意数据的类型,而且在接收数字类型的时候我们需要添加一个默认值;
结果就是:
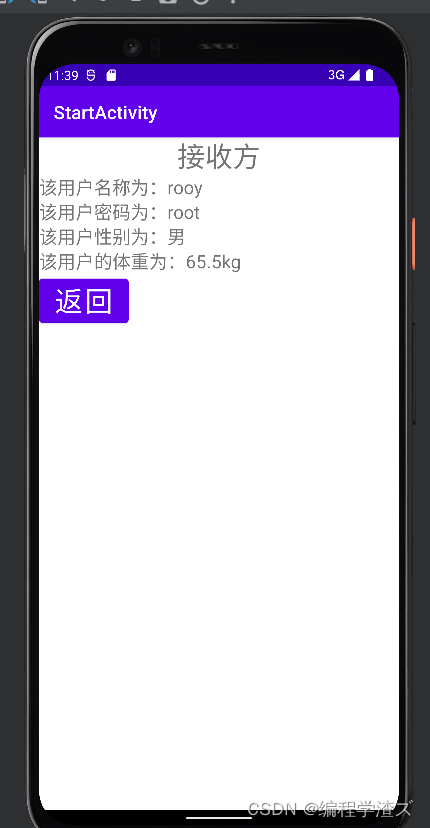
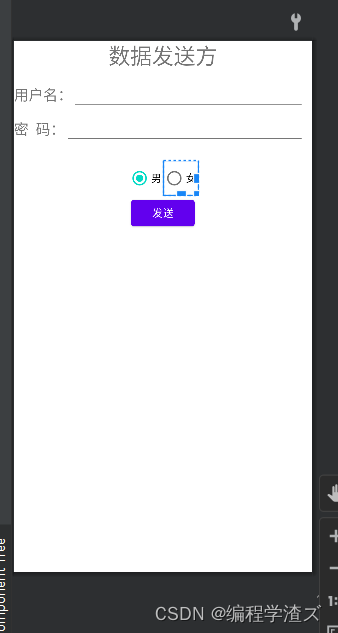
这是被打开的实例,当然我们是通过下面的实例打开的:
<?xml version="1.0" encoding="utf-8"?>
<androidx.constraintlayout.widget.ConstraintLayout xmlns:android="http://schemas.android.com/apk/res/android"
    xmlns:app="http://schemas.android.com/apk/res-auto"
    xmlns:tools="http://schemas.android.com/tools"
    android:layout_width="match_parent"
    android:layout_height="match_parent"
    tools:context=".RequestActivity">
    <TextView
        android:layout_width="wrap_content"
        android:layout_height="wrap_content"
        android:text="数据发送方"
        android:textSize="30sp"
        app:layout_constraintLeft_toLeftOf="parent"
        app:layout_constraintRight_toRightOf="parent"
        app:layout_constraintTop_toTopOf="parent"
        android:id="@+id/tv_title"
        />
    <TextView
        android:layout_width="wrap_content"
        android:layout_height="wrap_content"
        android:text="用户名:"
        android:textSize="20sp"
        android:layout_marginTop="20dp"
        app:layout_constraintLeft_toLeftOf="parent"
        app:layout_constraintRight_toLeftOf="@+id/et_username"
        app:layout_constraintTop_toBottomOf="@+id/tv_title"
        android:id="@+id/tv_username"/>
    <EditText
        android:layout_width="0dp"
        android:layout_height="wrap_content"
        app:layout_constraintLeft_toRightOf="@+id/tv_username"
        app:layout_constraintRight_toRightOf="parent"
        app:layout_constraintTop_toBottomOf="@id/tv_title"
        android:id="@+id/et_username"
        android:layout_marginTop="10dp"
        android:layout_marginRight="10dp"/>
    <TextView
        android:layout_width="wrap_content"
        android:layout_height="wrap_content"
        android:text="密  码:"
        android:textSize="20sp"
        android:layout_marginTop="20dp"
        app:layout_constraintLeft_toLeftOf="parent"
        app:layout_constraintRight_toLeftOf="@+id/et_password"
        app:layout_constraintTop_toBottomOf="@+id/tv_username"
        android:id="@+id/tv_password"/>
    <EditText
        android:layout_width="0dp"
        android:layout_height="wrap_content"
        app:layout_constraintLeft_toRightOf="@+id/tv_password"
        app:layout_constraintRight_toRightOf="parent"
        app:layout_constraintTop_toBottomOf="@id/tv_username"
        android:id="@+id/et_password"
        android:layout_marginTop="10dp"
        android:layout_marginRight="10dp"/>
    <RadioGroup
        android:layout_width="wrap_content"
        android:layout_height="wrap_content"
        android:orientation="horizontal"
        app:layout_constraintLeft_toLeftOf="parent"
        app:layout_constraintRight_toRightOf="parent"
        app:layout_constraintTop_toBottomOf="@id/tv_password"
        android:layout_marginTop="30dp"
        android:id="@+id/rg_sex">
        <RadioButton
            android:layout_width="wrap_content"
            android:layout_height="wrap_content"
            android:id="@+id/rb_boy"
            android:text="男"
            android:checked="true"
            />
        <RadioButton
            android:layout_width="wrap_content"
            android:layout_height="wrap_content"
            android:id="@+id/rb_girl"
            android:text="女"
            />
    </RadioGroup>
    <Button
        android:layout_width="wrap_content"
        android:layout_height="wrap_content"
        android:text="发送"
        app:layout_constraintLeft_toLeftOf="parent"
        app:layout_constraintRight_toRightOf="parent"
        app:layout_constraintTop_toBottomOf="@id/rg_sex"
        android:id="@+id/btn_submit"/>


</androidx.constraintlayout.widget.ConstraintLayout>
这个实例布局很简单,主要就是两个编辑框和两个单选按钮和一个提交按钮;
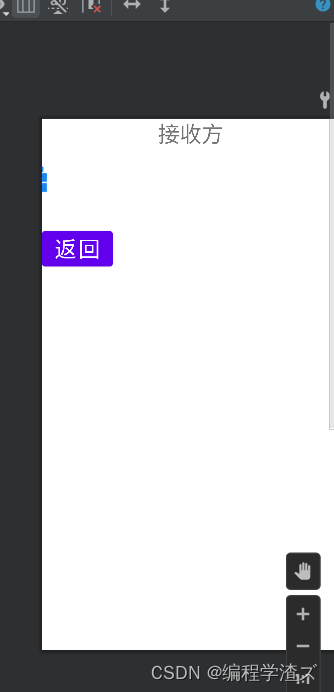
第二个实例就更简单,我们没有直接给Textview设置文本:
<?xml version="1.0" encoding="utf-8"?>
<LinearLayout xmlns:android="http://schemas.android.com/apk/res/android"
    xmlns:app="http://schemas.android.com/apk/res-auto"
    xmlns:tools="http://schemas.android.com/tools"
    android:layout_width="match_parent"
    android:layout_height="match_parent"
    android:orientation="vertical"
    tools:context=".ResultActivity">
    <TextView
        android:layout_width="wrap_content"
        android:layout_height="wrap_content"
        android:text="接收方"
        android:textSize="30sp"
        android:layout_gravity="center_horizontal"
        />
    <TextView
        android:layout_width="wrap_content"
        android:layout_height="wrap_content"
        android:textSize="20sp"
        android:id="@+id/tv_data_username"/>
    <TextView
        android:layout_width="wrap_content"
        android:layout_height="wrap_content"
        android:textSize="20sp"
        android:id="@+id/tv_data_password"/>
    <TextView
        android:layout_width="wrap_content"
        android:layout_height="wrap_content"
        android:textSize="20sp"
        android:id="@+id/tv_data_sex"/>
    <TextView
        android:layout_width="wrap_content"
        android:layout_height="wrap_content"
        android:textSize="20sp"
        android:id="@+id/tv_data_weight"/>
    <Button
        android:layout_width="wrap_content"
        android:layout_height="wrap_content"
        android:id="@+id/btn_back"
        android:text="返回"
        android:onClick="btn_cancle"
        android:textSize="30sp"/>
</LinearLayout>
使用Bundle发送和接收数据的时候都需要注意数据类型来使用响应的方法;
这里有一个返回按钮,有一个单击响应函数就只有一条代码:
    //5.1 当用户点击时销毁该实例
    public void btn_cancle(View view) {
        finish();
    }
目的就是销毁当前的实例;
2、当然我们数据少的时候可以直接使用intent.putExtra()存放数据传递,但是如果数据比较多的时候我们就需要借助一个对象Bundle(绑定)来传输数据,到时候我们将数据放在Bundle中,同样是存放键值对,然后将Bundle放入intent中进行传输,那么接收的时候也就要将Bundle拿出来,然后在从Bundle中拿数据就可以了:
//发送方
//3.1 使用绑定的数据传送
                Intent intent = new Intent(RequestActivity.this,ResultActivity.class);
                Bundle bundle = new Bundle();
                bundle.putString("username",username);
                bundle.putString("password",password);
                bundle.putString("sex",sex);
                bundle.putDouble("weight",weight);
                intent.putExtras(bundle);
                startActivity(intent);
//接收方
    //3.2 使用bundle的intent接收
        Intent intent = getIntent();
        Bundle bundle = intent.getExtras();
        username = bundle.getString("username");
        password = bundle.getString("password");
        sex = bundle.getString("sex");
        weight = bundle.getDouble("weight");
注意一个细节,这里的intent存放Bundle的方法和直接存放键值对的方法不一样,这里多了一个s;

3、如果单单只是传输数据而没有响应岂不是太不保险,对方是否真的收到数据是不是我们不知道,所以intent又有了一个响应是的数据发送方式,就是说发送数据必须要得到对方响应:
   //发送方更改发送方式
                   //4.1 需要接收应答的intent
   startActivityForResult(intent,2003);
    	    //4.2 如果需要应答必须要有一个处理应答的函数
    @Override
    protected void onActivityResult(int requestCode, int resultCode, @Nullable Intent data) {
        super.onActivityResult(requestCode, resultCode, data);
        //4.3 data里面就是给我们应答的数据,可以toast一下
        Toast.makeText(this, data.getStringExtra("message"), Toast.LENGTH_SHORT).show();
    }
    //接收方加上
        Intent intent1 = new Intent();
        intent1.putExtra("message","接收方已收到");
        setResult(2003,intent1);
不过要实现接收方的响应也很简单,只需要将startActivity(intent);改成startActivityForResult(intent,2003);就可以了,这个函数需要一个响应结果,第一个参数就有我们存放的数据,第二个参数是请求码,一个整型数据,我们自定义,但要注意不能存在相同的请求码,在接收方,也就是被启动的实例中,我们需要返回一个结果,新建一个intent,存放我们想要响应的数据,然后setResult()回去,这个函数第一个是响应码,可以和请求码一样,但是不能存在两个相同的响应码,第二个是数据;

可以看到,当我们点击返回的时候就会弹出这样的信息;
好了,这一期就到这,快去试试吧


 被折叠的 条评论
为什么被折叠?
被折叠的 条评论
为什么被折叠?
 到【灌水乐园】发言


