


 本文详细介绍如何在Spring Boot项目中整合MyBatis和H2数据库,包括配置依赖、YML配置、数据库初始化、XML映射文件、Mapper接口、DAO层、Service层及Controller层的实现,并提供接口调用测试。
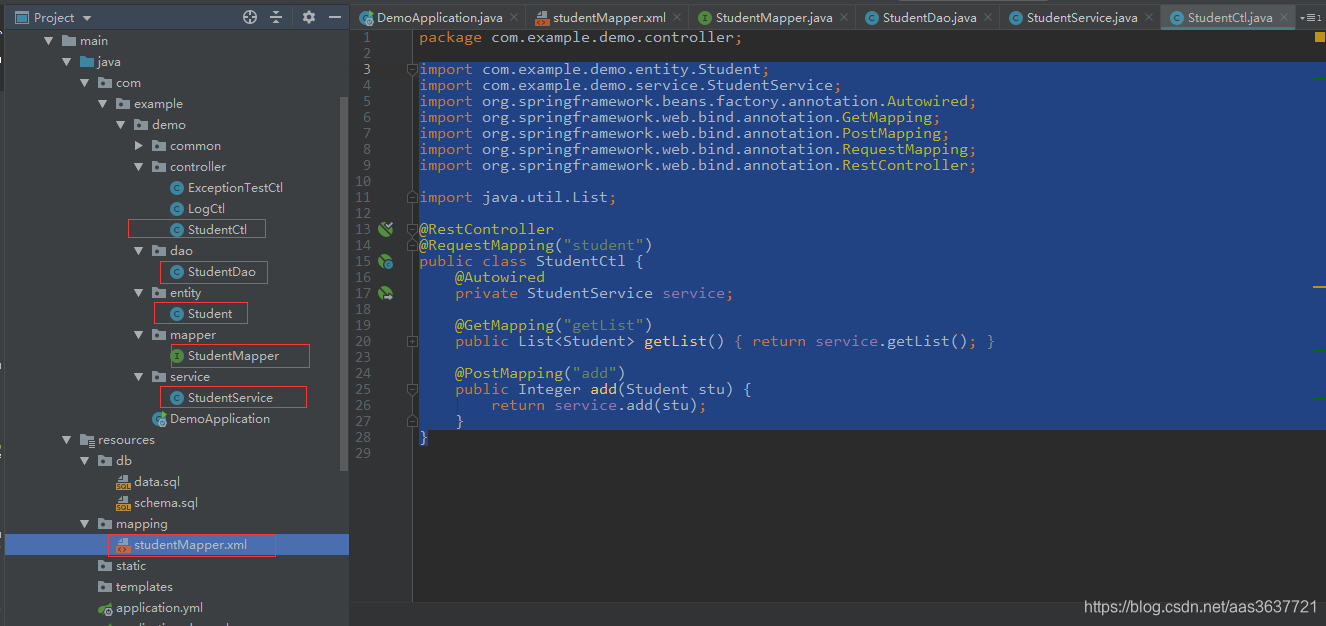
- 项目结构
- 加入依赖(mybatis和h2)
<dependency>
   <groupId>org.mybatis.spring.boot</groupId>
   <artifactId>mybatis-spring-boot-starter</artifactId>
   <version>1.3.2</version>
</dependency>
<dependency>
   <groupId>org.springframework.boot</groupId>
   <artifactId>spring-boot-starter-data-jpa</artifactId>
</dependency>
<dependency>
   <groupId>com.h2database</groupId>
   <artifactId>h2</artifactId>
   <scope>runtime</scope>
</dependency>
- yml文件配置
server:
  port: 8080
#************H2  Begin****************
spring:
  datasource:
    driver-class-name: org.h2.Driver
    url: jdbc:h2:mem:test
    username:
    password:
    schema: classpath:db/schema.sql
    data: classpath:db/data.sql
  h2:
    console:
      settings:
        web-allow-other: true
        trace: true
      path: /h2-console
      enabled: true
#************H2  End***************
#************mybatis Start***************
mybatis:
  mapper-locations: classpath:mapping/*Mapper.xml
  type-aliases-package: com.example.demo.entity
#************mybatis End***************
- 数据库初始化文件
schema.sql:
drop table if exists student;
create table student (id int primary key auto_increment, name varchar, addr varchar);

data.sql:
insert into student (name, addr) values ('张三', '山东');
insert into student (name, addr) values ('李四', '山西');
insert into student (name, addr) values ('王五', '河南');
insert into student (name, addr) values ('赵六', '河北');
- 启动类
import org.mybatis.spring.annotation.MapperScan;
import org.springframework.boot.SpringApplication;
import org.springframework.boot.autoconfigure.SpringBootApplication;

@SpringBootApplication
@MapperScan("com.example.demo.mapper")
public class DemoApplication {

    public static void main(String[] args) {
        SpringApplication.run(DemoApplication.class, args);
    }

}
- xml文件
<?xml version="1.0" encoding="UTF-8" ?>
<!DOCTYPE mapper
        PUBLIC "-//mybatis.org//DTD Mapper 3.0//EN"
        "http://mybatis.org/dtd/mybatis-3-mapper.dtd">
<mapper namespace="com.example.demo.mapper.StudentMapper">
    <select id="getList" resultType="student">
        select id, name, addr
        from student
    </select>
    <insert id="add" parameterType="student">
        INSERT INTO student (name, addr) VALUES (#{name}, #{addr})
    </insert>
</mapper>
- mapper
import com.example.demo.entity.Student;
import org.apache.ibatis.annotations.Mapper;
import org.springframework.stereotype.Component;

import java.util.List;

@Component
@Mapper
public interface StudentMapper {
    int add(Student stu);

    List<Student> getList();
}
- dao
import com.example.demo.entity.Student;
import com.example.demo.mapper.StudentMapper;
import org.springframework.beans.factory.annotation.Autowired;
import org.springframework.stereotype.Component;

import java.util.List;

@Component
public class StudentDao {
    @Autowired
    private StudentMapper mapper;

    public List<Student> getList() {
        return mapper.getList();
    }

    public Integer add(Student stu) {
        return mapper.add(stu);
    }
}
- service
import com.example.demo.dao.StudentDao;
import com.example.demo.entity.Student;
import org.springframework.beans.factory.annotation.Autowired;
import org.springframework.stereotype.Service;

import java.util.List;

@Service
public class StudentService {
    @Autowired
    private StudentDao dao;

    public List<Student> getList() {
        return dao.getList();
    }

    public Integer add(Student stu) {
        return dao.add(stu);
    }

}
- controller
import com.example.demo.entity.Student;
import com.example.demo.service.StudentService;
import org.springframework.beans.factory.annotation.Autowired;
import org.springframework.web.bind.annotation.GetMapping;
import org.springframework.web.bind.annotation.PostMapping;
import org.springframework.web.bind.annotation.RequestMapping;
import org.springframework.web.bind.annotation.RestController;

import java.util.List;

@RestController
@RequestMapping("student")
public class StudentCtl {
    @Autowired
    private StudentService service;

    @GetMapping("getList")
    public List<Student> getList() {
        return service.getList();
    }

    @PostMapping("add")
    public Integer add(Student stu) {
        return service.add(stu);
    }
}
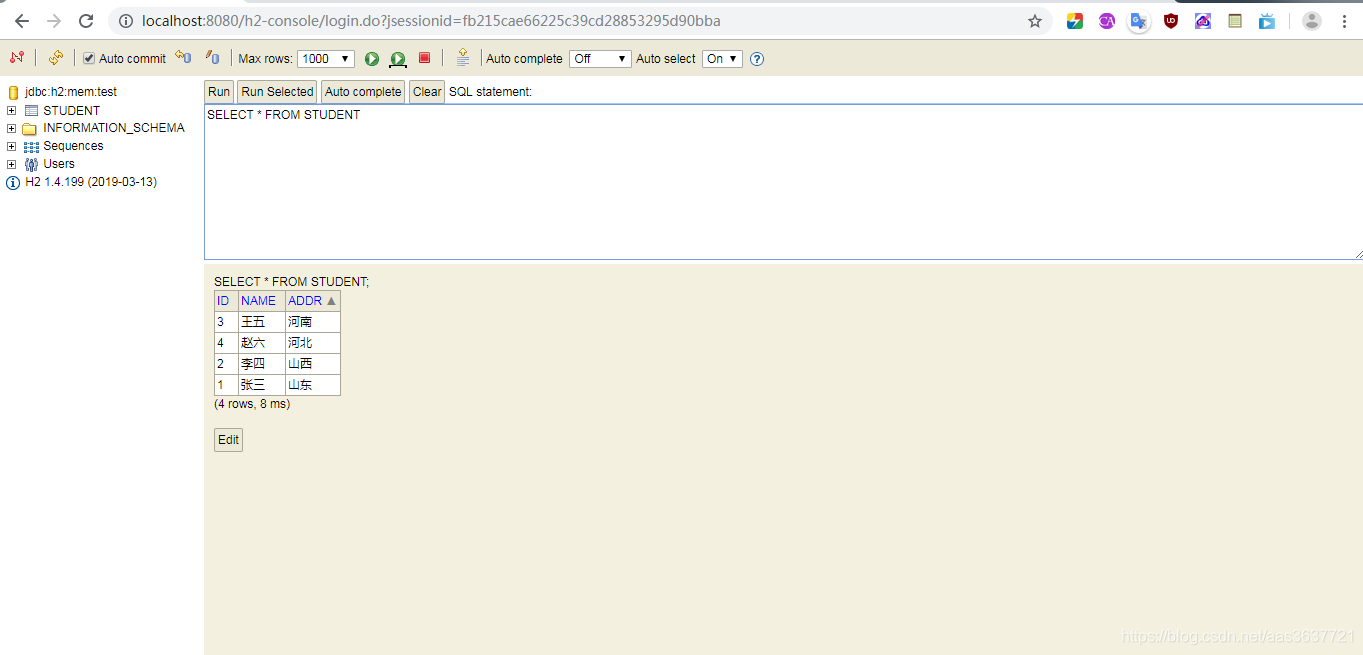
- db2数据库访问
http://localhost:8080/h2-console
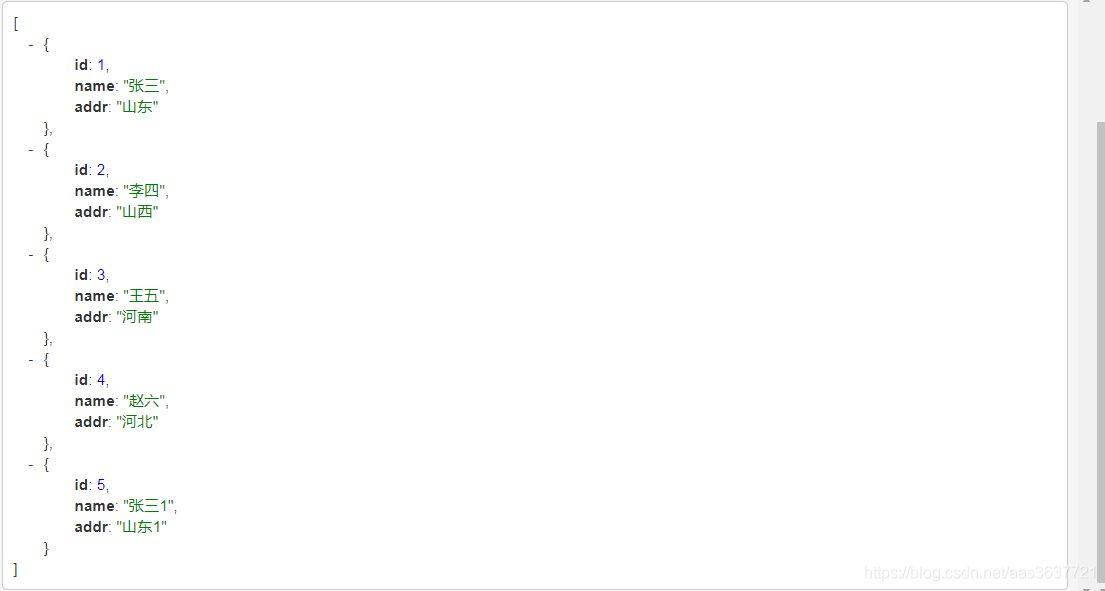
- 接口调用测试


 1231
1231

 被折叠的 条评论
为什么被折叠?
被折叠的 条评论
为什么被折叠?
 到【灌水乐园】发言


