


在本篇博客中,我们将通过构建一个简单的 RESTful API 来深入理解 Spring Boot 的基本使用。这个 API 将用于管理图书信息,包括创建、读取、更新和删除(CRUD)操作。
1. 什么是 Spring Boot?
Spring Boot 是一个用于简化 Spring 应用程序开发的框架,它通过约定优于配置的方式,让开发者更快速地构建独立的、生产级别的 Spring 应用。
2. 环境准备
2.1 开发工具
- Java JDK 11 或更高版本
- IDE:推荐使用 IntelliJ IDEA 或 Eclipse
- Maven:项目管理工具
2.2 创建项目
使用 Spring Initializr 创建项目。可以访问 Spring Initializr 并选择以下配置:
- Project: Maven Project
- Language: Java
- Spring Boot: 2.x.x (最新稳定版)
- Dependencies: Spring Web, Spring Data JPA, H2 Database
下载生成的项目并导入到你的 IDE 中。
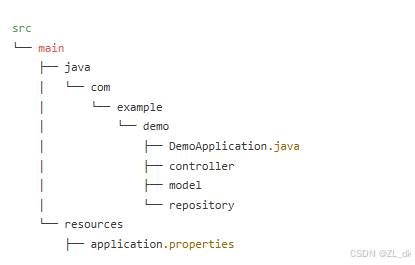
3. 项目结构
在导入的项目中,你会看到如下结构:
4. 实现功能
4.1 创建模型
在 model 包中创建 Book 类:
package com.example.demo.model;

import javax.persistence.Entity;
import javax.persistence.GeneratedValue;
import javax.persistence.GenerationType;
import javax.persistence.Id;

@Entity
public class Book {
    @Id
    @GeneratedValue(strategy = GenerationType.IDENTITY)
    private Long id;
    private String title;
    private String author;

    // Getters and Setters
}
4.2 创建数据访问层
在 repository 包中创建 BookRepository 接口:
package com.example.demo.repository;

import com.example.demo.model.Book;
import org.springframework.data.jpa.repository.JpaRepository;

public interface BookRepository extends JpaRepository<Book, Long> {
}
4.3 创建控制器
在 controller 包中创建 BookController 类:
package com.example.demo.controller;

import com.example.demo.model.Book;
import com.example.demo.repository.BookRepository;
import org.springframework.beans.factory.annotation.Autowired;
import org.springframework.http.ResponseEntity;
import org.springframework.web.bind.annotation.*;

import java.util.List;

@RestController
@RequestMapping("/api/books")
public class BookController {

    @Autowired
    private BookRepository bookRepository;

    @GetMapping
    public List<Book> getAllBooks() {
        return bookRepository.findAll();
    }

    @PostMapping
    public Book createBook(@RequestBody Book book) {
        return bookRepository.save(book);
    }

    @GetMapping("/{id}")
    public ResponseEntity<Book> getBookById(@PathVariable Long id) {
        return bookRepository.findById(id)
                .map(book -> ResponseEntity.ok().body(book))
                .orElse(ResponseEntity.notFound().build());
    }

    @PutMapping("/{id}")
    public ResponseEntity<Book> updateBook(@PathVariable Long id, @RequestBody Book bookDetails) {
        return bookRepository.findById(id)
                .map(book -> {
                    book.setTitle(bookDetails.getTitle());
                    book.setAuthor(bookDetails.getAuthor());
                    Book updatedBook = bookRepository.save(book);
                    return ResponseEntity.ok().body(updatedBook);
                })
                .orElse(ResponseEntity.notFound().build());
    }

    @DeleteMapping("/{id}")
    public ResponseEntity<Void> deleteBook(@PathVariable Long id) {
        return bookRepository.findById(id)
                .map(book -> {
                    bookRepository.delete(book);
                    return ResponseEntity.ok().<Void>build();
                })
                .orElse(ResponseEntity.notFound().build());
    }
}
4.4 配置 H2 数据库
在 src/main/resources/application.properties 文件中添加以下配置:
spring.h2.console.enabled=true
spring.datasource.url=jdbc:h2:mem:testdb
spring.datasource.driverClassName=org.h2.Driver
spring.datasource.username=sa
spring.datasource.password=
5. 启动应用
在 DemoApplication.java 文件中启动 Spring Boot 应用:
package com.example.demo;

import org.springframework.boot.SpringApplication;
import org.springframework.boot.autoconfigure.SpringBootApplication;

@SpringBootApplication
public class DemoApplication {
    public static void main(String[] args) {
        SpringApplication.run(DemoApplication.class, args);
    }
}
6. 测试 API
你已经可以使用 Postman 或 Curl 来测试我们的 API了。
6.1 获取所有的图书
使用GET方法来获取所有图书
http://localhost:8080/api/books
6.2 创建新图书
使用post方法来创建图书
http://localhost:8080/api/books
Content-Type: application/json{
"title": "Spring Boot in Action",
"author": "Craig Walls"
}
6.3 更新图书
使用put方法来更新图书
http://localhost:8080/api/books/1
Content-Type: application/json{
"title": "Spring Boot in Action - Updated",
"author": "Craig Walls"
}
6.4 删除图书
使用delete方法来删除图书
http://localhost:8080/api/books/1
7. 结论
通过这个简单的例子,我们成功地构建了一个使用 Spring Boot 的 RESTful API。Spring Boot 的简洁性和强大的功能让开发过程变得高效而愉快。希望这个教程能帮助你快速上手 Spring Boot,未来且可以探索更复杂的功能与特性。
如果你有任何问题或建议,欢迎在评论区交流!


 被折叠的 条评论
为什么被折叠?
被折叠的 条评论
为什么被折叠?
 到【灌水乐园】发言


