


UICollectionView 是 iOS 开发中非常灵活且强大的 UI 组件,广泛用于展示网格状布局或其他自定义布局的数据。与 UITableView 类似,UICollectionView 能展示多行多列的内容,并且可以高度自定义每个单元格的展示样式和布局。本文将详细介绍 UICollectionView 的基本用法,包括初始化、数据源设置、布局以及高级用法。
1. UICollectionView的简单用法
1.storyboard用法
使用Storyboard创建UICollectionView的时候,我们需要以下几个步骤:
1.storyboard中添加UICollectionView
1.打开你项目中的 Main.storyboard,或者根据需要新建一个 Storyboard 文件
2.拖拽一个UICollectionView到Storyboard中并且设置好约束
如下图1所示:
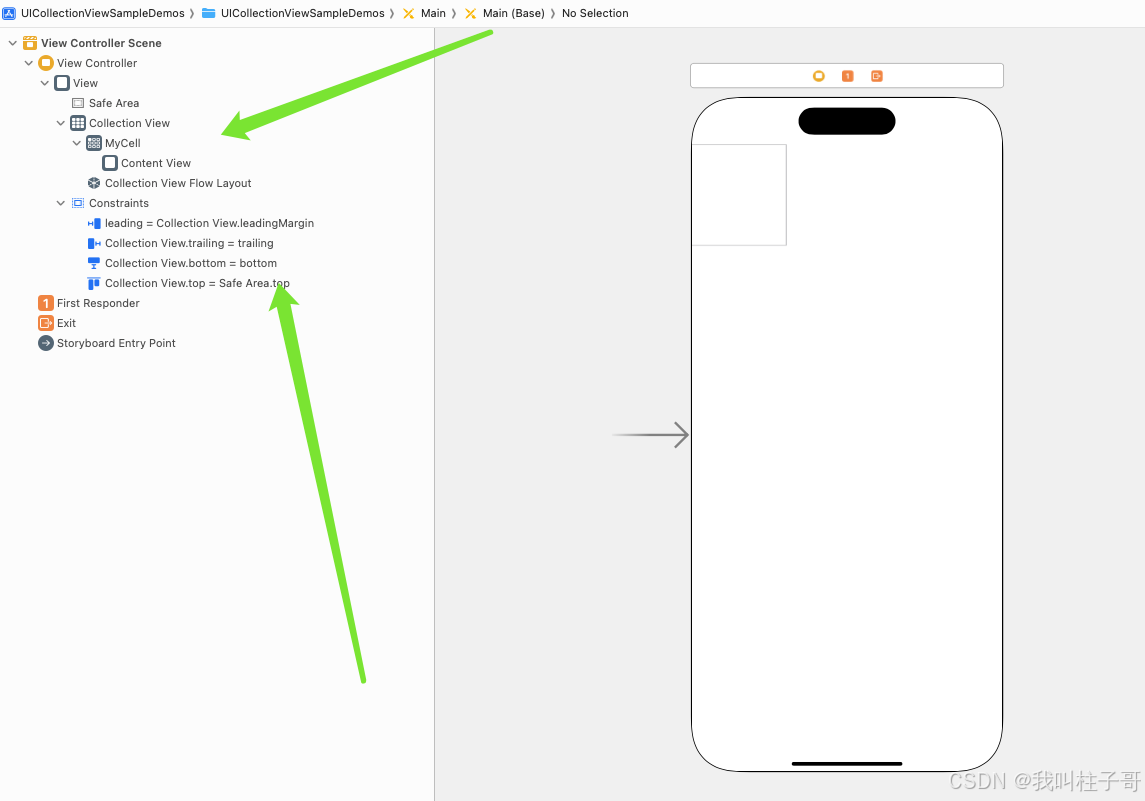
图1.storyboard
2.创建并关联自定义 UICollectionViewCell
1.添加自定义单元格:我这里使用的系统的UICollectionViewCell
2.设置Cell的Identifier:选择刚创建的 UICollectionViewCell,在 Attributes Inspector 中,设置一个 Identifier(如 MyCell),这个标识符稍后会用于代码中复用单元格。
3.配置ViewController中的UICollectionView
1.设置ViewController为UICollectionView的数据源和代理
@interface ViewController ()<UICollectionViewDelegate,UICollectionViewDataSource>

@property (weak, nonatomic) IBOutlet UICollectionView *collectionView;

@end
2. 在 Storyboard 中关联 UICollectionView:
打开 Storyboard,选择 UICollectionView,按住 control 键并拖动到 ViewController 文件中的 @property,完成 IBOutlet 连接。
如下所示:

图2.ViewController关联UICollectionView
然后实现数据源和代理方法即可。
完整代码如下:
#import "ViewController.h"

@interface ViewController ()<UICollectionViewDelegate,UICollectionViewDataSource>

@property (weak, nonatomic) IBOutlet UICollectionView *collectionView;

@end

@implementation ViewController

- (void)viewDidLoad {
    [super viewDidLoad];
    self.collectionView.dataSource = self;
    self.collectionView.delegate = self;
}
#pragma mark - UICollectionViewDataSource

- (NSInteger)collectionView:(UICollectionView *)collectionView numberOfItemsInSection:(NSInteger)section {
    return 20;  // 返回 item 数量
}

- (UICollectionViewCell *)collectionView:(UICollectionView *)collectionView cellForItemAtIndexPath:(NSIndexPath *)indexPath {
    UICollectionViewCell *cell = [collectionView dequeueReusableCellWithReuseIdentifier:@"MyCell" forIndexPath:indexPath];
    cell.contentView.backgroundColor = [self randomColor];
    // 配置 cell,比如设置 label 文本
    return cell;
}

#pragma mark - UICollectionViewDelegate

- (void)collectionView:(UICollectionView *)collectionView didSelectItemAtIndexPath:(NSIndexPath *)indexPath {
    NSLog(@"Selected item at index %ld", (long)indexPath.item);
}

- (UIColor *)randomColor {
    CGFloat red = (CGFloat)arc4random_uniform(256) / 255.0;
    CGFloat green = (CGFloat)arc4random_uniform(256) / 255.0;
    CGFloat blue = (CGFloat)arc4random_uniform(256) / 255.0;

    return [UIColor colorWithRed:red green:green blue:blue alpha:1.0];
}

@end
运行代码,效果如下:
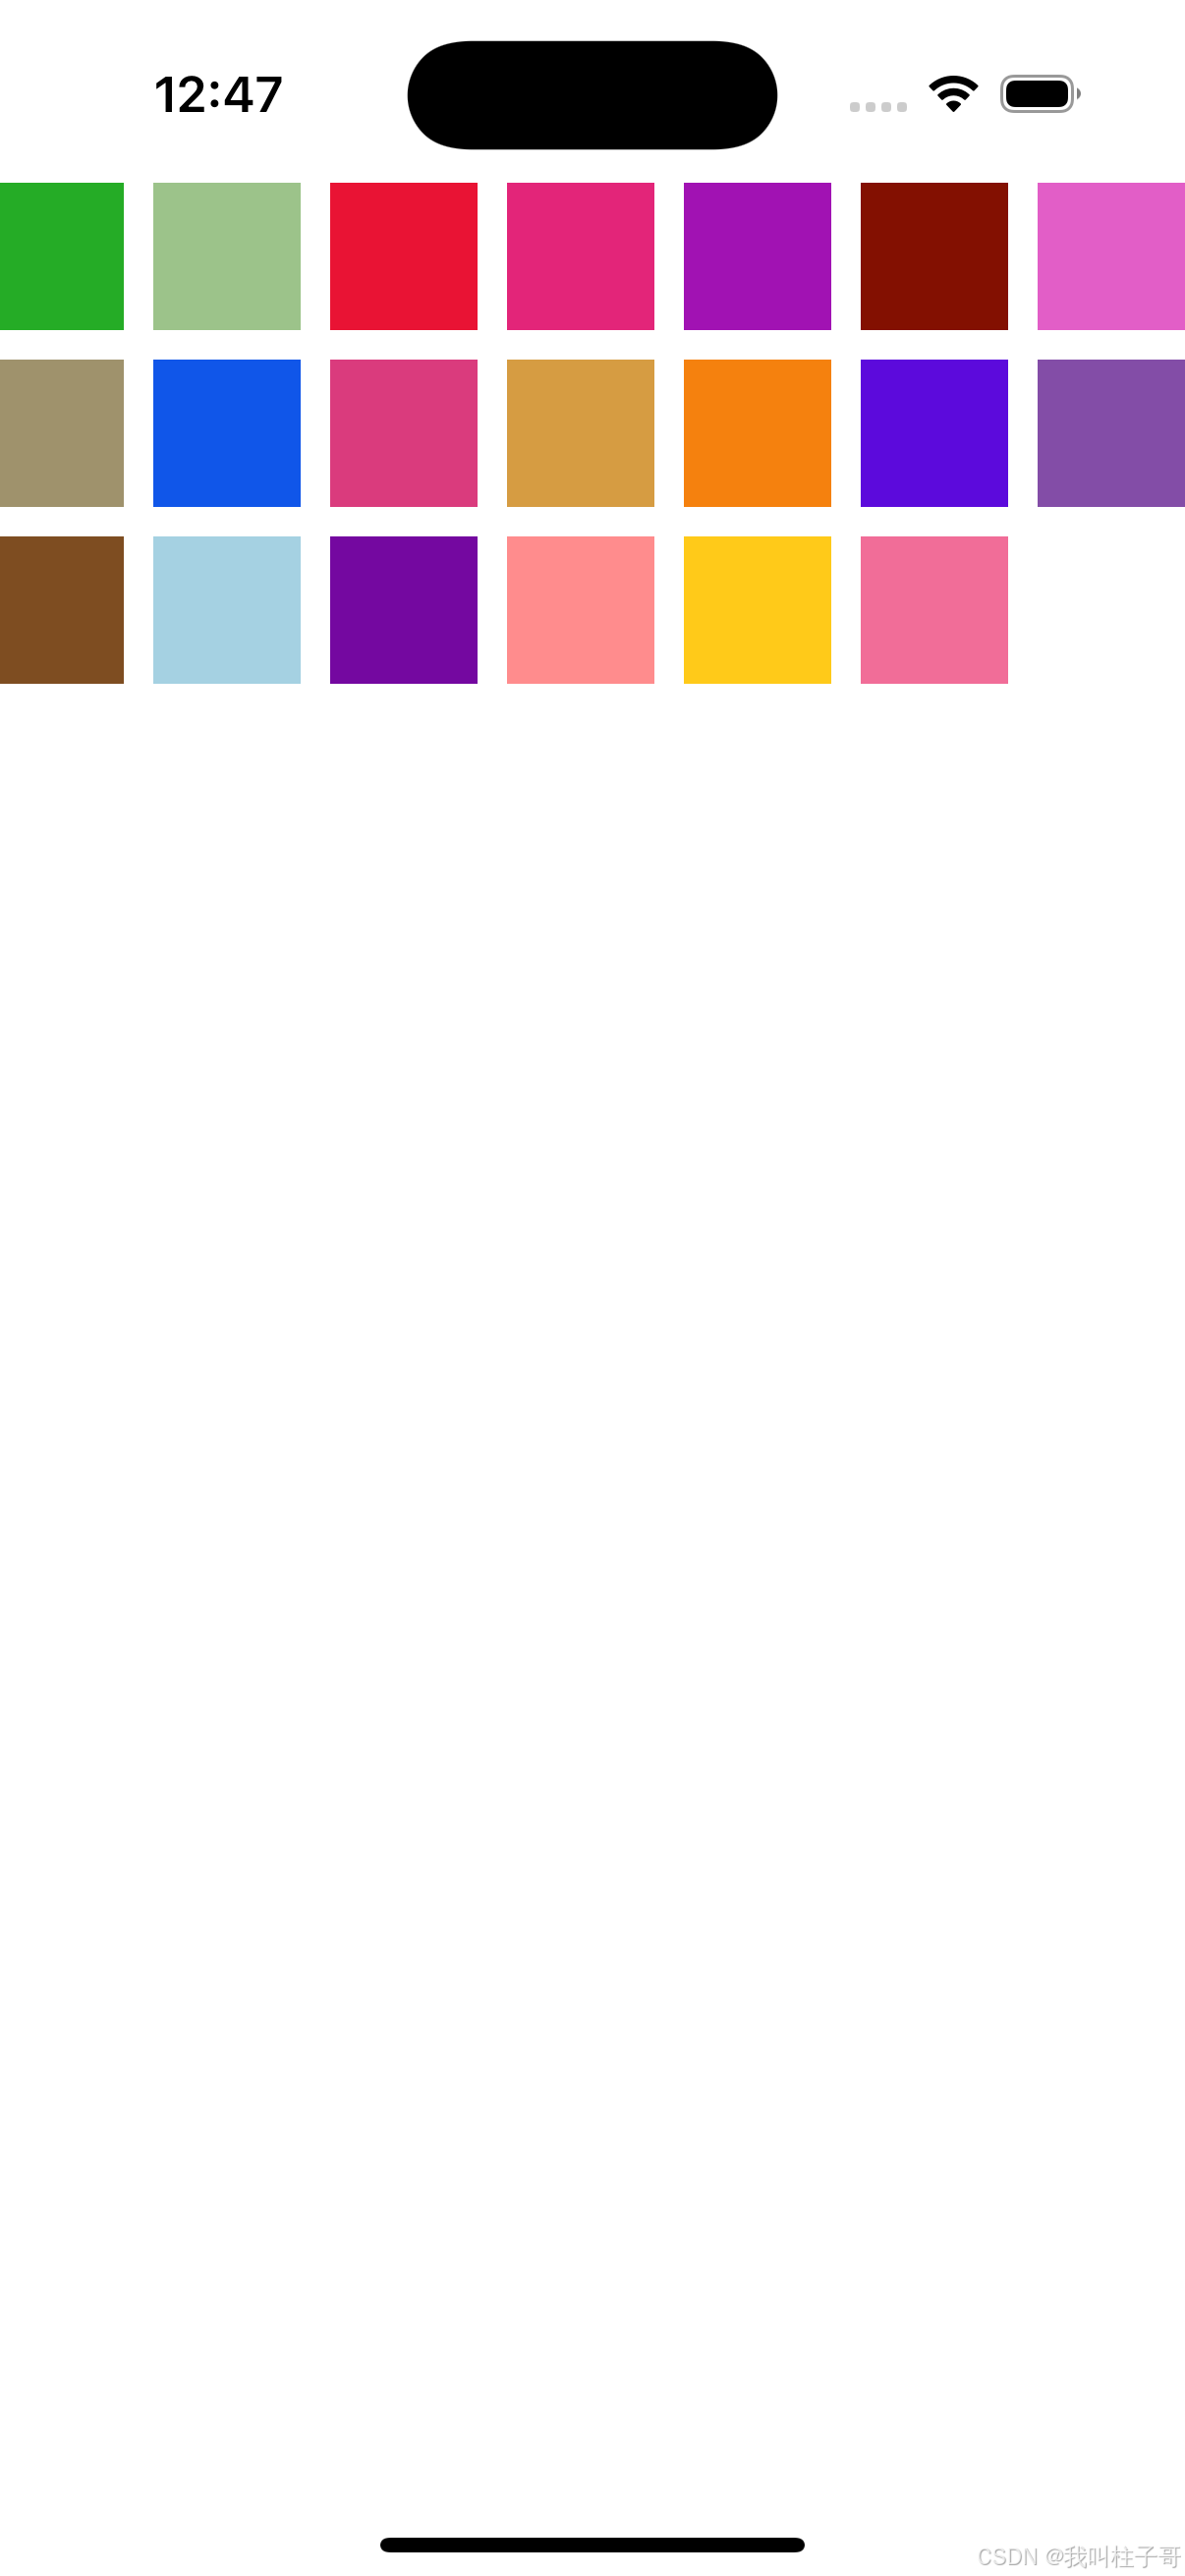
图3.简单的UICollectionView用法
2.纯代码布局
当然上述的功能,我们也可以使用纯代码实现:
#import "ViewController.h"

@interface ViewController ()<UICollectionViewDelegate,UICollectionViewDataSource>

@property (strong, nonatomic) UICollectionView *collectionView;

@end

@implementation ViewController

- (void)viewDidLoad {
    [super viewDidLoad];

    // 设置 UICollectionView 的布局
    UICollectionViewFlowLayout *layout = [[UICollectionViewFlowLayout alloc] init];

    // 初始化 UICollectionView
    self.collectionView = [[UICollectionView alloc] initWithFrame:self.view.bounds collectionViewLayout:layout];
    self.collectionView.backgroundColor = [UIColor whiteColor];  // 设置背景色
    self.collectionView.delegate = self;
    self.collectionView.dataSource = self;

    // 注册 UICollectionViewCell
    [self.collectionView registerClass:[UICollectionViewCell class] forCellWithReuseIdentifier:@"MyCell"];

    // 将 UICollectionView 添加到视图中
    [self.view addSubview:self.collectionView];
}
#pragma mark - UICollectionViewDataSource

- (NSInteger)collectionView:(UICollectionView *)collectionView numberOfItemsInSection:(NSInteger)section {
    return 20;  // 返回 item 数量
}

- (UICollectionViewCell *)collectionView:(UICollectionView *)collectionView cellForItemAtIndexPath:(NSIndexPath *)indexPath {
    UICollectionViewCell *cell = [collectionView dequeueReusableCellWithReuseIdentifier:@"MyCell" forIndexPath:indexPath];
    cell.contentView.backgroundColor = [self randomColor];
    // 配置 cell,比如设置 label 文本
    return cell;
}

#pragma mark - UICollectionViewDelegate

- (void)collectionView:(UICollectionView *)collectionView didSelectItemAtIndexPath:(NSIndexPath *)indexPath {
    NSLog(@"Selected item at index %ld", (long)indexPath.item);
}

- (UIColor *)randomColor {
    CGFloat red = (CGFloat)arc4random_uniform(256) / 255.0;
    CGFloat green = (CGFloat)arc4random_uniform(256) / 255.0;
    CGFloat blue = (CGFloat)arc4random_uniform(256) / 255.0;

    return [UIColor colorWithRed:red green:green blue:blue alpha:1.0];
}

@end
2.UICollectionViewLayout
通过上面的例子我们发现当我们初始化UICollectionView的时候,必须设置一个UICollectionViewLayout。
默认情况下,如果我们设置UICollectionViewLayout,系统会为UICollectionView设置一个UICollectionViewFlowLayout。我们先看看UICollectionViewFlowLayout的属性和方法。
1.UICollectionViewFlowLayout
1.UICollectionViewFlowLayout的属性
1.itemSize
这个属性用于设置每个单元格 (item) 的大小。
layout.itemSize = CGSizeMake(100, 100); // 设置每个 item 的大小为 100x100
2.minimumLineSpacing
这个属性用于控制行与行之间的最小间距(垂直滚动方向时,指每行之间的距离;水平滚动方向时,指每列之间的距离)。
layout.minimumLineSpacing = 20; // 设置行间距为 20
3.minimumInteritemSpacing
控制每一行或每一列中单元格之间的最小间距(垂直滚动时,指同一行内 item 之间的距离;水平滚动时,指同一列内 item 之间的距离)。
layout.minimumInteritemSpacing = 15; // 设置 item 之间的间距为 15
4.sectionInset
控制每个 section 的四边间距,即距离 UICollectionView 边缘的距离(上、左、下、右)。
layout.sectionInset = UIEdgeInsetsMake(10, 20, 10, 20); // 上、左、下、右分别为 10, 20, 10, 20
5.scrollDirection
这个属性用于控制 UICollectionView 的滚动方向。
默认为垂直滚动。
layout.scrollDirection = UICollectionViewScrollDirectionHorizontal; // 设置为水平滚动
6.headerReferenceSize
这个属性用于设置 section 头视图的宽度和高度。
layout.headerReferenceSize = CGSizeMake(self.view.frame.size.width, 50); // 头视图宽度与屏幕等宽,高度为 50
7.footerReferenceSize
这个属性用于设置 section 尾视图的宽度和高度。
layout.footerReferenceSize = CGSizeMake(self.view.frame.size.width, 30); // 尾视图宽度与屏幕等宽,高度为 30
8.estimatedItemSize
这个属性用于提供一个估计的 item 大小,实际大小会根据内容进行自动调整。适用于需要自适应高度的 cell。
当 cell 的大小不固定时,使用该属性可以启用自动布局。
layout.estimatedItemSize = CGSizeMake(100, 100); // 设置估计的 item 大小,系统将根据内容调整实际大小
9.sectionHeadersPinToVisibleBounds
这个属性用于控制 section 头视图是否固定在视图顶部(类似于 UITableView 的 section header 固定效果)。
设置为 YES,头视图在滚动时将固定在顶部。
layout.sectionHeadersPinToVisibleBounds = YES; // 设置头视图固定在顶部
10.sectionFootersPinToVisibleBounds
这个属性用于控制 section 尾视图是否固定在视图底部。
设置为 YES,尾视图在滚动时将固定在底部。
layout.sectionFootersPinToVisibleBounds = YES; // 设置尾视图固定在底部
2.简单的例子
理解了UICollectionViewFlow的一些属性,我们可以使用UICollectionViewFlowLayout写出一些漂亮的UI效果。
1.九宫格布局
我们设置下UICollectionView的itemSize便可以轻松的实现九宫格布局。
代码如下:
#import "ViewController.h"

@interface ViewController ()<UICollectionViewDelegate, UICollectionViewDataSource>

@property (strong, nonatomic) UICollectionView *collectionView;
@property (strong, nonatomic) NSArray *imagesArray;  // 保存图片的数组

@end

@implementation ViewController

- (void)viewDidLoad {
    [super viewDidLoad];
    self.title = @"123";
    // 初始化图片数组
    self.imagesArray = @[
        [UIImage imageNamed:@"random1"],
        [UIImage imageNamed:@"random2"],
        [UIImage imageNamed:@"random3"],
        [UIImage imageNamed:@"random4"],
        [UIImage imageNamed:@"random5"],
        [UIImage imageNamed:@"random6"],
        [UIImage imageNamed:@"random7"],
        [UIImage imageNamed:@"random8"],
        [UIImage imageNamed:@"random9"]
    ];

    // 设置 UICollectionView 的布局
    UICollectionViewFlowLayout *layout = [[UICollectionViewFlowLayout alloc] init];
    layout.minimumLineSpacing = 0;
    layout.minimumInteritemSpacing = 0;
    layout.itemSize = CGSizeMake(self.view.bounds.size.width / 3.0, self.view.bounds.size.width / 3.0);

    // 初始化 UICollectionView
    self.collectionView = [[UICollectionView alloc] initWithFrame:CGRectZero collectionViewLayout:layout];
    self.collectionView.backgroundColor = [UIColor whiteColor];
    self.collectionView.delegate = self;
    self.collectionView.dataSource = self;

    // 注册 UICollectionViewCell
    [self.collectionView registerClass:[UICollectionViewCell class] forCellWithReuseIdentifier:@"MyCell"];

    // 将 UICollectionView 添加到视图中
    [self.view addSubview:self.collectionView];

    // 设置 Auto Layout 约束
    self.collectionView.translatesAutoresizingMaskIntoConstraints = NO;
    [NSLayoutConstraint activateConstraints:@[
        [self.collectionView.topAnchor constraintEqualToAnchor:self.view.safeAreaLayoutGuide.topAnchor], // 顶部安全距离以下
        [self.collectionView.leadingAnchor constraintEqualToAnchor:self.view.leadingAnchor],             // 左边距为 0
        [self.collectionView.trailingAnchor constraintEqualToAnchor:self.view.trailingAnchor],           // 右边距为 0
        [self.collectionView.bottomAnchor constraintEqualToAnchor:self.view.bottomAnchor]                // 底部边距为 0
    ]];
}

#pragma mark - UICollectionViewDataSource

- (NSInteger)collectionView:(UICollectionView *)collectionView numberOfItemsInSection:(NSInteger)section {
    return self.imagesArray.count;  // 返回图片数组的数量
}

- (UICollectionViewCell *)collectionView:(UICollectionView *)collectionView cellForItemAtIndexPath:(NSIndexPath *)indexPath {
    UICollectionViewCell *cell = [collectionView dequeueReusableCellWithReuseIdentifier:@"MyCell" forIndexPath:indexPath];

    // 移除旧的 UIImageView 防止重用问题
    for (UIView *subview in cell.contentView.subviews) {
        [subview removeFromSuperview];
    }

    // 创建 UIImageView 并设置图片
    UIImageView *imageView = [[UIImageView alloc] initWithFrame:cell.contentView.bounds];
    imageView.contentMode = UIViewContentModeScaleAspectFit;
    imageView.image = self.imagesArray[indexPath.item];  // 设置图片

    // 将 UIImageView 添加到 cell 的 contentView 中
    [cell.contentView addSubview:imageView];

    return cell;
}

#pragma mark - UICollectionViewDelegate

- (void)collectionView:(UICollectionView *)collectionView didSelectItemAtIndexPath:(NSIndexPath *)indexPath {
    NSLog(@"Selected item at index %ld", (long)indexPath.item);
}

@end
运行之后,效果如下:
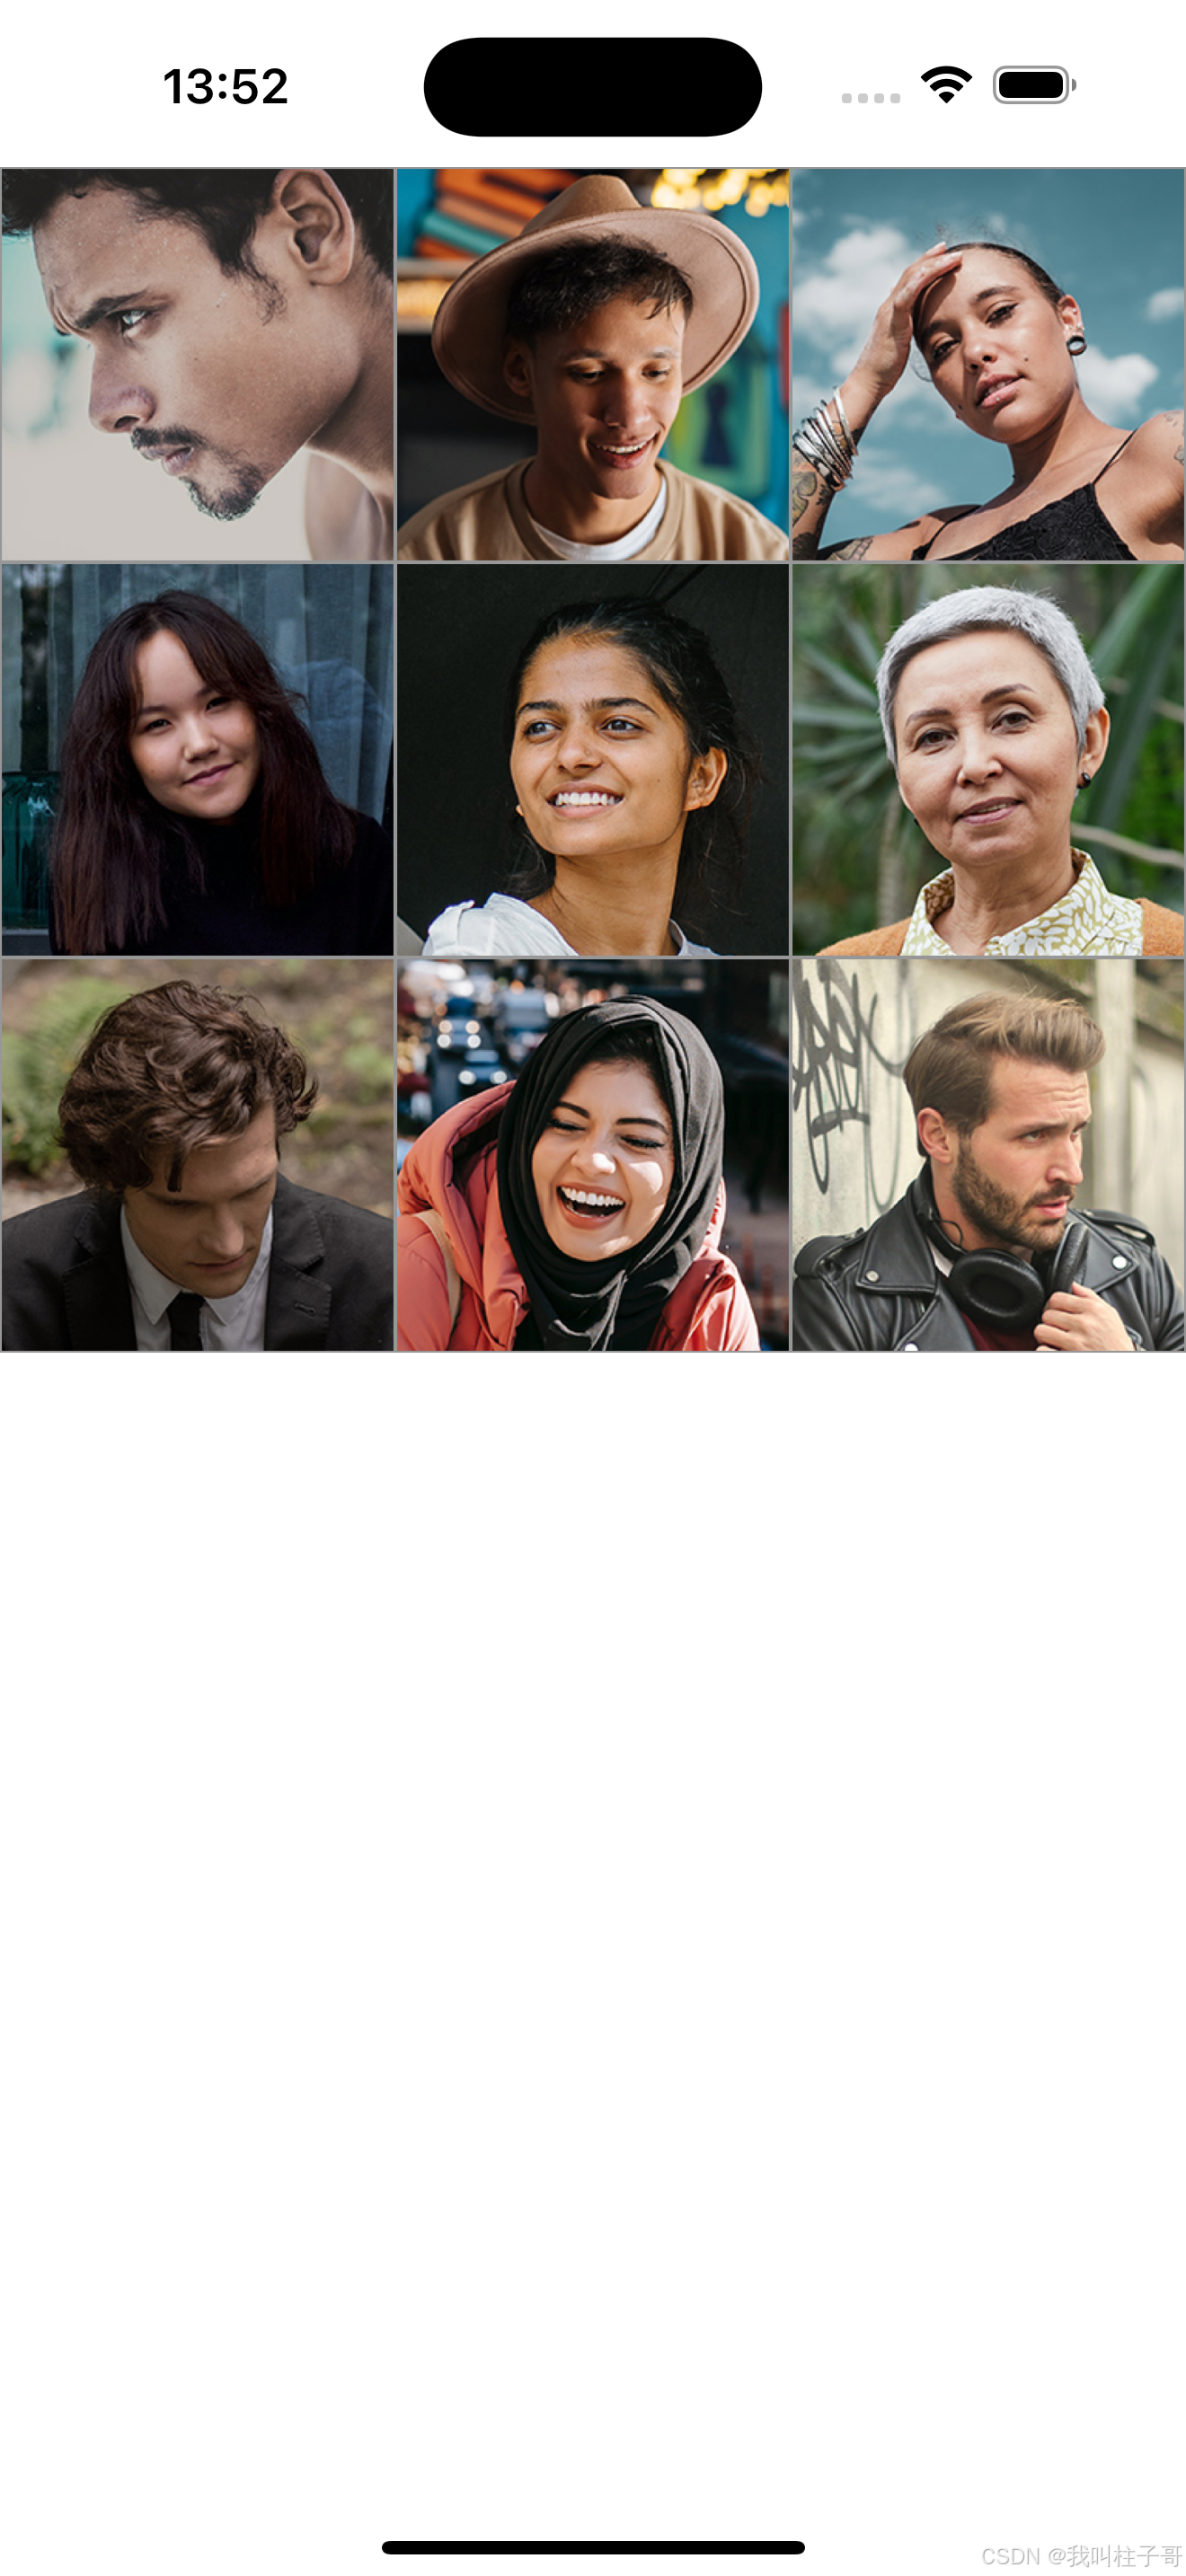
图4.九宫格布局
2.瀑布流效果
要使用 UICollectionViewFlowLayout 实现瀑布流效果,实际上可以通过一些简单的调整来实现多列的布局,但 UICollectionViewFlowLayout 本身并不支持瀑布流(即动态高度的多列布局)。不过,你可以自定义 UICollectionViewFlowLayout 或者使用开源的框架,比如 UICollectionViewWaterfallLayout。
如果你想通过 UICollectionViewFlowLayout 实现一个类似的效果,布局每个 cell 的宽度是固定的,而高度根据内容来动态调整,这里提供一个方法来实现两列的瀑布流效果:
1. 自定义 UICollectionViewFlowLayout:
通过继承 UICollectionViewFlowLayout,我们可以动态调整 cell 的高度,并保持列间距一致。
WaterfallFlowLayout.h代码如下:
#import <UIKit/UIKit.h>

@interface WaterfallFlowLayout : UICollectionViewFlowLayout

@property (nonatomic, assign) NSInteger numberOfColumns; // 列数
@property (nonatomic, assign) CGFloat itemSpacing;       // item 间距

@end
WaterfallFlowLayout.m代码如下:
#import "WaterfallFlowLayout.h"

@interface WaterfallFlowLayout()

@property (nonatomic, strong) NSMutableArray *attributesArray; // 存储布局属性
@property (nonatomic, strong) NSMutableArray *columnHeights;   // 每列的高度

@end

@implementation WaterfallFlowLayout

- (void)prepareLayout {
    [super prepareLayout];

    // 初始化数据
    self.attributesArray = [NSMutableArray array];
    self.columnHeights = [NSMutableArray array];

    for (NSInteger i = 0; i < self.numberOfColumns; i++) {
        [self.columnHeights addObject:@(self.sectionInset.top)];
    }

    // 计算每一个 item 的位置
    CGFloat totalWidth = self.collectionView.bounds.size.width;
    CGFloat availableWidth = totalWidth - self.sectionInset.left - self.sectionInset.right - (self.itemSpacing * (self.numberOfColumns - 1));
    CGFloat itemWidth = availableWidth / self.numberOfColumns;

    NSInteger itemCount = [self.collectionView numberOfItemsInSection:0];

    for (NSInteger i = 0; i < itemCount; i++) {
        NSIndexPath *indexPath = [NSIndexPath indexPathForItem:i inSection:0];
        UICollectionViewLayoutAttributes *attributes = [UICollectionViewLayoutAttributes layoutAttributesForCellWithIndexPath:indexPath];

        // 找到高度最短的那一列
        NSInteger shortestColumnIndex = [self shortestColumnIndex];
        CGFloat xOffset = self.sectionInset.left + (itemWidth + self.itemSpacing) * shortestColumnIndex;
        CGFloat yOffset = [self.columnHeights[shortestColumnIndex] floatValue];

        // 动态计算每个 item 的高度(可以基于内容或者随机高度)
        CGFloat itemHeight = 100 + arc4random_uniform(100); // 示例中随机高度

        attributes.frame = CGRectMake(xOffset, yOffset, itemWidth, itemHeight);
        [self.attributesArray addObject:attributes];

        // 更新该列的高度
        self.columnHeights[shortestColumnIndex] = @(yOffset + itemHeight + self.minimumLineSpacing);
    }
}

- (NSArray<UICollectionViewLayoutAttributes *> *)layoutAttributesForElementsInRect:(CGRect)rect {
    NSMutableArray *visibleAttributes = [NSMutableArray array];

    for (UICollectionViewLayoutAttributes *attributes in self.attributesArray) {
        if (CGRectIntersectsRect(attributes.frame, rect)) {
            [visibleAttributes addObject:attributes];
        }
    }

    return visibleAttributes;
}

- (CGSize)collectionViewContentSize {
    CGFloat contentHeight = [[self.columnHeights valueForKeyPath:@"@max.self"] floatValue];
    return CGSizeMake(self.collectionView.bounds.size.width, contentHeight + self.sectionInset.bottom);
}

// 找到高度最短的列
- (NSInteger)shortestColumnIndex {
    NSInteger shortestIndex = 0;
    CGFloat shortestHeight = [self.columnHeights[0] floatValue];

    for (NSInteger i = 1; i < self.columnHeights.count; i++) {
        CGFloat currentHeight = [self.columnHeights[i] floatValue];
        if (currentHeight < shortestHeight) {
            shortestHeight = currentHeight;
            shortestIndex = i;
        }
    }

    return shortestIndex;
}

@end
2. 在 ViewController 中使用这个自定义布局
#import "ViewController.h"
#import "WaterfallFlowLayout.h"

@interface ViewController () <UICollectionViewDelegate, UICollectionViewDataSource>

@property (nonatomic, strong) UICollectionView *collectionView;

@end

@implementation ViewController

- (void)viewDidLoad {
    [super viewDidLoad];

    // 创建自定义的瀑布流布局
    WaterfallFlowLayout *layout = [[WaterfallFlowLayout alloc] init];
    layout.numberOfColumns = 2;      // 设置为2列
    layout.itemSpacing = 10;         // 设置 item 之间的间距
    layout.sectionInset = UIEdgeInsetsMake(10, 10, 10, 10); // 设置 section 的内边距

    // 初始化 UICollectionView
    self.collectionView = [[UICollectionView alloc] initWithFrame:self.view.bounds collectionViewLayout:layout];
    self.collectionView.delegate = self;
    self.collectionView.dataSource = self;

    // 注册 UICollectionViewCell
    [self.collectionView registerClass:[UICollectionViewCell class] forCellWithReuseIdentifier:@"Cell"];
    self.collectionView.backgroundColor = [UIColor whiteColor];

    // 添加到视图
    [self.view addSubview:self.collectionView];
}

#pragma mark - UICollectionViewDataSource

- (NSInteger)collectionView:(UICollectionView *)collectionView numberOfItemsInSection:(NSInteger)section {
    return 50; // 示例中创建50个 item
}

- (UICollectionViewCell *)collectionView:(UICollectionView *)collectionView cellForItemAtIndexPath:(NSIndexPath *)indexPath {
    UICollectionViewCell *cell = [collectionView dequeueReusableCellWithReuseIdentifier:@"Cell" forIndexPath:indexPath];
    cell.backgroundColor = [self randomColor]; // 设置随机颜色
    return cell;
}

#pragma mark - Helper Methods

- (UIColor *)randomColor {
    CGFloat red = (CGFloat)arc4random_uniform(256) / 255.0;
    CGFloat green = (CGFloat)arc4random_uniform(256) / 255.0;
    CGFloat blue = (CGFloat)arc4random_uniform(256) / 255.0;
    return [UIColor colorWithRed:red green:green blue:blue alpha:1.0];
}

@end
效果如下:

图5.瀑布流效果图
2.UICollectionViewLayout
UICollectionViewLayout 是 UICollectionView 的核心部分,它定义了 UICollectionView 中所有 item(即 cell)的位置和尺寸。UICollectionViewFlowLayout 是 UICollectionViewLayout 的一个子类,它提供了线性布局、网格布局等常见的布局方式。然而,如果你想要实现自定义布局,则需要继承 UICollectionViewLayout。
1.UICollectionViewLayout 的主要职责
1.确定每个 item 的位置和大小
通过 layoutAttributesForElementsInRect: 和 layoutAttributesForItemAtIndexPath: 方法确定每个 cell、补充视图、装饰视图的 frame。
2.滚动范围
collectionViewContentSize 决定了 UICollectionView 可以滚动的区域大小。
3.动画和布局更新
当布局需要更新时,invalidateLayout 可以触发布局的重新计算,并通过 shouldInvalidateLayoutForBoundsChange: 决定在某些情况下是否需要重新布局。
2.UICollectionViewLayout 的几个关键方法
1.collectionViewContentSize:
这个方法负责返回 UICollectionView 的内容区域大小,该值控制了内容可以滚动的范围。
- (CGSize)collectionViewContentSize {
return CGSizeMake(self.collectionView.bounds.size.width, 2000); // 示例: 高度为2000,宽度和 collectionView 一致
}
2.layoutAttributesForElementsInRect:
这个方法返回当前 rect 区域中所有 item 的布局属性。你需要为给定的区域确定哪些 item 需要展示,并返回它们的 UICollectionViewLayoutAttributes。
- (NSArray<UICollectionViewLayoutAttributes *> *)layoutAttributesForElementsInRect:(CGRect)rect {
NSMutableArray *attributesArray = [NSMutableArray array];
for (NSInteger i = 0; i < 50; i++) {
NSIndexPath *indexPath = [NSIndexPath indexPathForItem:i inSection:0];
UICollectionViewLayoutAttributes *attributes = [self layoutAttributesForItemAtIndexPath:indexPath];
[attributesArray addObject:attributes];
}
return attributesArray;
}
3.layoutAttributesForItemAtIndexPath:
这个方法返回指定 indexPath 的 item 布局属性。你需要在这里计算每个 item 的位置和大小。
- (UICollectionViewLayoutAttributes *)layoutAttributesForItemAtIndexPath:(NSIndexPath *)indexPath {
    UICollectionViewLayoutAttributes *attributes = [UICollectionViewLayoutAttributes layoutAttributesForCellWithIndexPath:indexPath];
    CGFloat itemSize = 100.0; // 固定 item 尺寸
    CGFloat xPosition = (indexPath.item % 3) * (itemSize + 10);
    CGFloat yPosition = (indexPath.item / 3) * (itemSize + 10);
    attributes.frame = CGRectMake(xPosition, yPosition, itemSize, itemSize);
    return attributes;
}
4.invalidateLayout:
当某些条件改变时,你可以调用 invalidateLayout 来触发重新布局。比如视图的 bounds 发生变化时,可以通过该方法重新计算布局。
- (BOOL)shouldInvalidateLayoutForBoundsChange:(CGRect)newBounds {
return YES;
}
5. shouldInvalidateLayoutForBoundsChange:
返回 YES 表示当 UICollectionView 的 bounds 发生变化时(比如滚动或屏幕旋转)需要重新布局。
3.使用UICollectionViewLayout 实现一个圆形布局
实现一个圆形布局的步骤如下:
1. 继承 UICollectionViewLayout:自定义布局类。
2. 计算圆形布局的 item 位置和尺寸:每个 item 沿着圆周排列。
3. 提供布局属性:通过 layoutAttributesForElementsInRect: 和 layoutAttributesForItemAtIndexPath: 返回每个 item 的布局信息。
4. 支持滚动:计算内容大小。
布局代码如下:
#import "IFLYCircleLayout.h"

@implementation IFLYCircleLayout

// 准备布局
- (void)prepareLayout {
    [super prepareLayout];

    // 你可以在这里计算 item 的位置等布局信息
}

// 返回内容大小,决定了可以滚动的范围
- (CGSize)collectionViewContentSize {
    return self.collectionView.bounds.size;
}

// 返回给定区域的所有 item 的布局属性
- (NSArray<UICollectionViewLayoutAttributes *> *)layoutAttributesForElementsInRect:(CGRect)rect {
    NSMutableArray *attributesArray = [NSMutableArray array];

    NSInteger itemCount = [self.collectionView numberOfItemsInSection:0];

    for (NSInteger i = 0; i < itemCount; i++) {
        NSIndexPath *indexPath = [NSIndexPath indexPathForItem:i inSection:0];
        UICollectionViewLayoutAttributes *attributes = [self layoutAttributesForItemAtIndexPath:indexPath];
        [attributesArray addObject:attributes];
    }

    return attributesArray;
}

// 返回某个 item 的布局属性
- (UICollectionViewLayoutAttributes *)layoutAttributesForItemAtIndexPath:(NSIndexPath *)indexPath {
    UICollectionViewLayoutAttributes *attributes = [UICollectionViewLayoutAttributes layoutAttributesForCellWithIndexPath:indexPath];

    // 获取 collectionView 的中心和半径
    CGSize size = self.collectionView.bounds.size;
    CGPoint center = CGPointMake(size.width / 2.0, size.height / 2.0);
    CGFloat radius = MIN(size.width, size.height) / 2.5;

    // item 总数
    NSInteger itemCount = [self.collectionView numberOfItemsInSection:0];

    // 计算每个 item 的角度
    CGFloat angle = (2 * M_PI / itemCount) * indexPath.item;

    // 计算 item 的位置
    CGFloat x = center.x + radius * cos(angle);
    CGFloat y = center.y + radius * sin(angle);

    attributes.size = CGSizeMake(50, 50); // 设置 item 尺寸
    attributes.center = CGPointMake(x, y); // 设置 item 的中心位置

    return attributes;
}

@end
ViewController关键代码如下:
#import "ViewController.h"
#import "CircleLayout.h"

@interface ViewController () <UICollectionViewDelegate, UICollectionViewDataSource>

@property (strong, nonatomic) UICollectionView *collectionView;

@end

@implementation ViewController

- (void)viewDidLoad {
    [super viewDidLoad];

    // 初始化圆形布局
    CircleLayout *layout = [[CircleLayout alloc] init];

    // 初始化 UICollectionView
    self.collectionView = [[UICollectionView alloc] initWithFrame:self.view.bounds collectionViewLayout:layout];
    self.collectionView.backgroundColor = [UIColor whiteColor];
    self.collectionView.delegate = self;
    self.collectionView.dataSource = self;

    // 注册 UICollectionViewCell
    [self.collectionView registerClass:[UICollectionViewCell class] forCellWithReuseIdentifier:@"MyCell"];

    // 将 UICollectionView 添加到视图
    [self.view addSubview:self.collectionView];
}

#pragma mark - UICollectionViewDataSource

- (NSInteger)collectionView:(UICollectionView *)collectionView numberOfItemsInSection:(NSInteger)section {
    return 12; // 返回 item 数量
}

- (UICollectionViewCell *)collectionView:(UICollectionView *)collectionView cellForItemAtIndexPath:(NSIndexPath *)indexPath {
    UICollectionViewCell *cell = [collectionView dequeueReusableCellWithReuseIdentifier:@"MyCell" forIndexPath:indexPath];
    cell.backgroundColor = [UIColor colorWithHue:indexPath.item / 12.0 saturation:1 brightness:1 alpha:1]; // 随机颜色
    cell.layer.cornerRadius = 25; // 圆形
    return cell;
}

#pragma mark - UICollectionViewDelegate

- (void)collectionView:(UICollectionView *)collectionView didSelectItemAtIndexPath:(NSIndexPath *)indexPath {
    NSLog(@"Selected item at index %ld", (long)indexPath.item);
}

@end
效果图下:
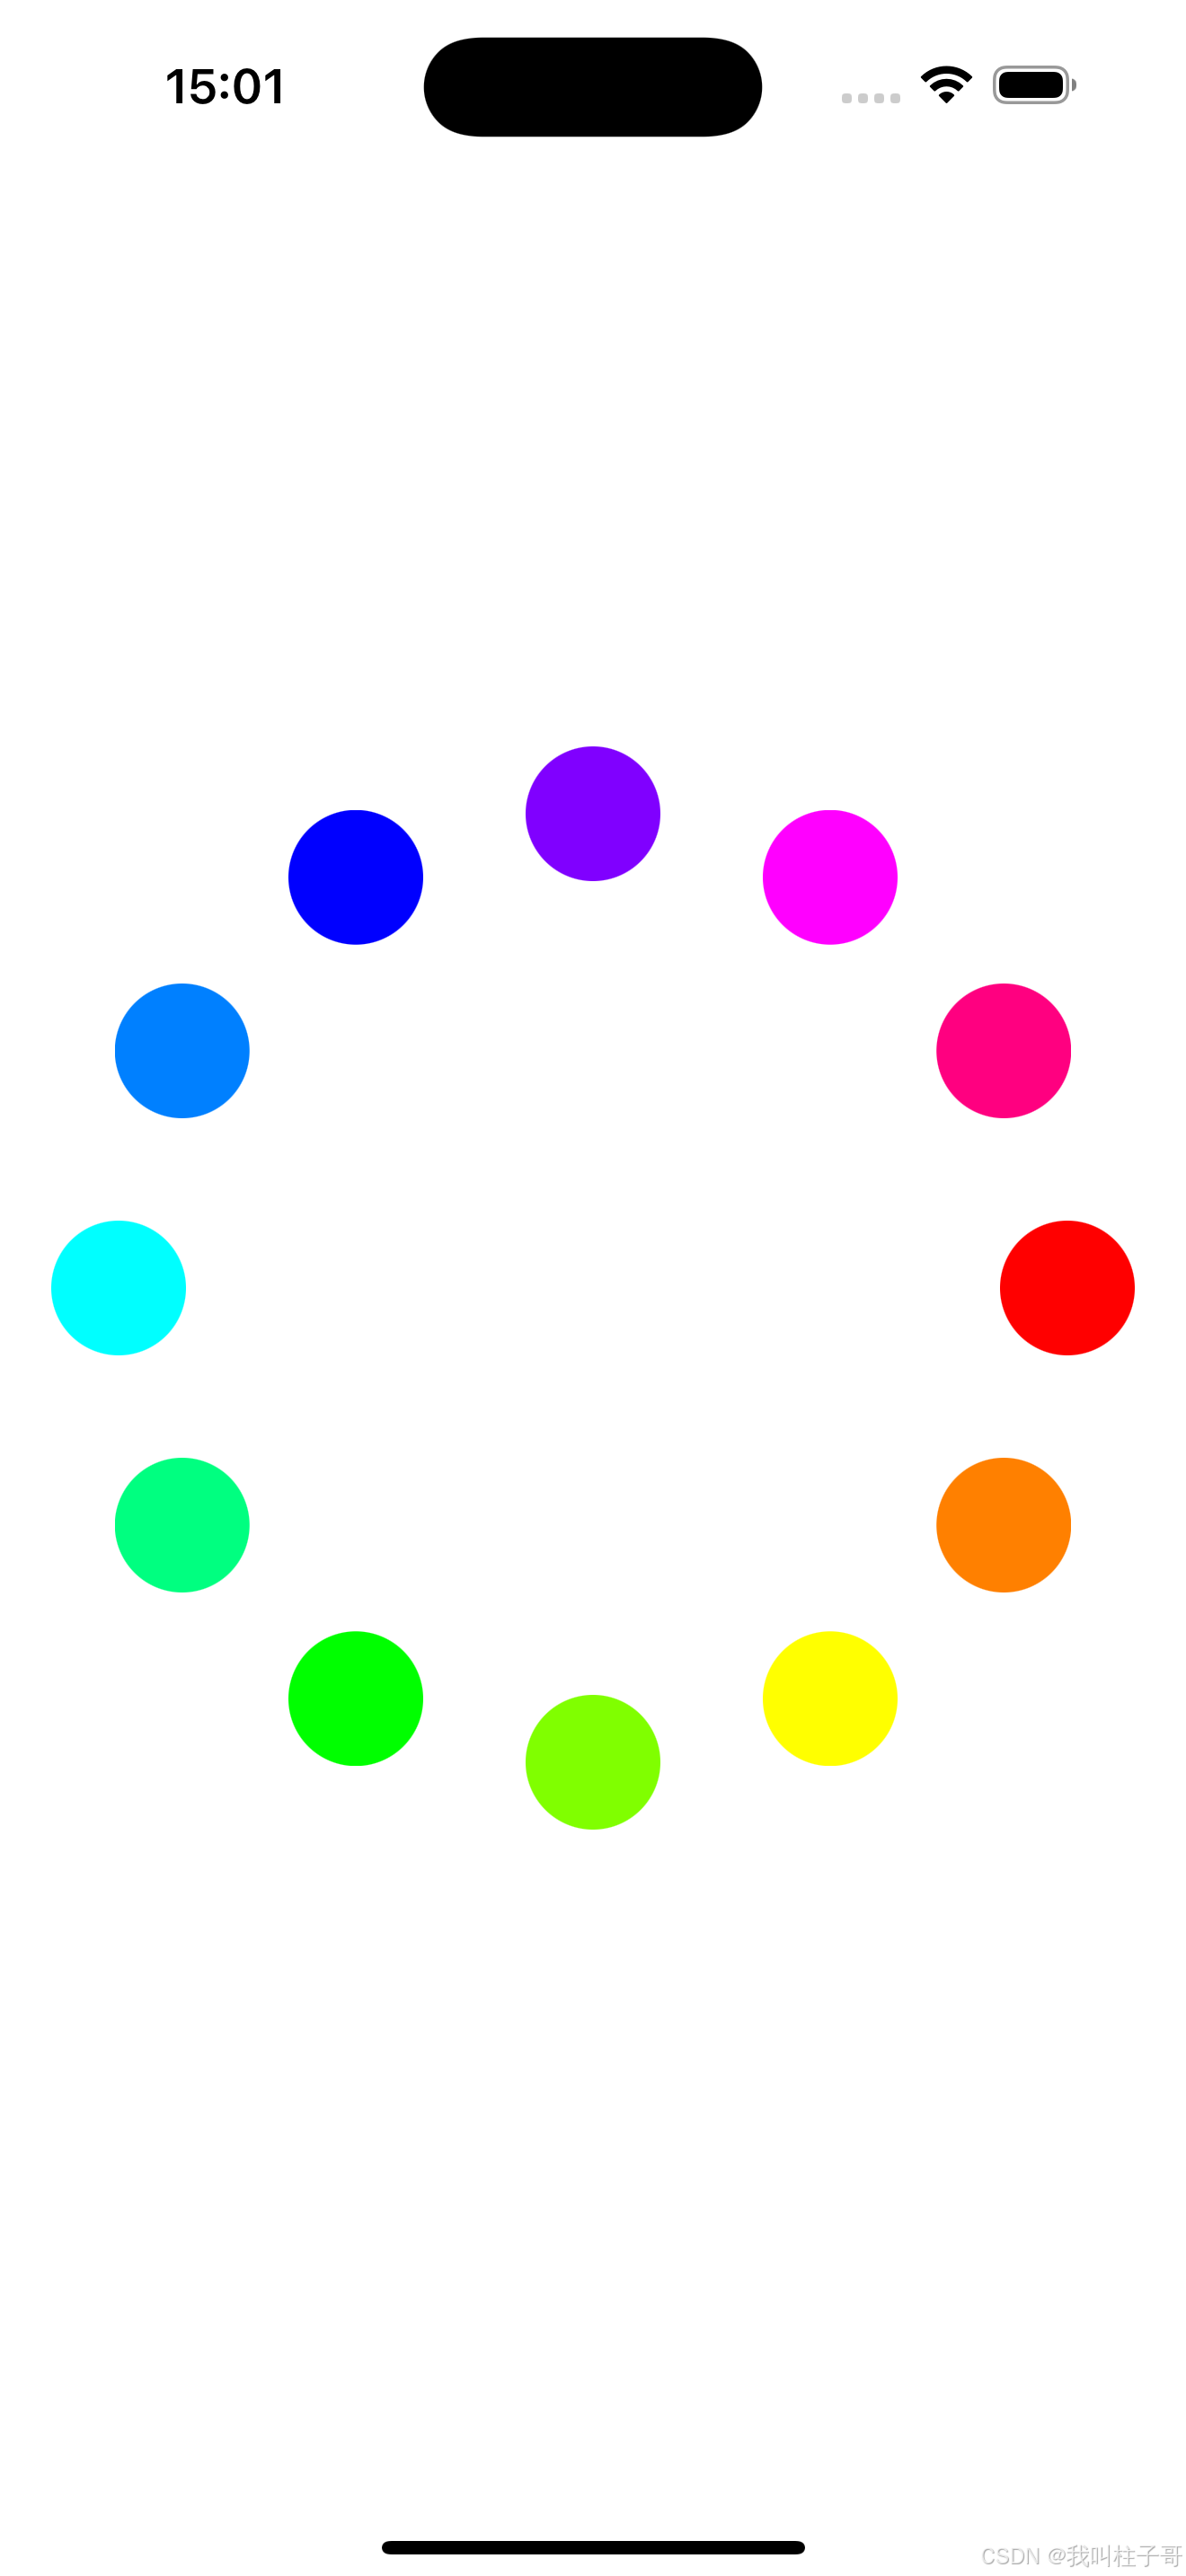
图6.UICollectionLayout实现圆形布局


 1413
1413

 被折叠的 条评论
为什么被折叠?
被折叠的 条评论
为什么被折叠?
 到【灌水乐园】发言


