


项目工程完整地址:https://github.com/YiyiCoding/Spring7Guides
IOC的3种注入,1种@Autowire的依赖查找
-
@Component 注入方式
默认以
类名首字母小写为容器Bean对象名。此注解有一个属性 value :可用来定义对象名。
-
@Bean 注入方式 :位于配置类
以
方法名作为容器Bean的对象名。 -
@Import 注入方式:即把类名导入进来。
位于在配置类的头部。若前两种注入方式已经存在,则这种方式将会忽略。
-
@Autowire 的依赖查找
以变量名为要查找 Bean的对象名。
另一几乎等同型注解 @Resource ,是 JSR-250规范(J2EE),不属于Spring。
说明:①. 若要注入多个对象,则不能注入同名对象,命名规则已标注。
②. 若只注入一个对象,则以类型方式查找(Type)总能获得对象。
③. 若注入了多个对象,则以命名方式(Name)获取对象,要遵循上述的命名规则,否则会查找不到报错。
【今天Spring7包含的知识点】:
-
implementation(“org.springframework:spring-context:7.0.1”)
-
AnnotationConfigApplicationContext
-
@Configuration
-
@ComponentScan
-
@Component 、@Service
-
@Autowired
-
@Bean
-
@Import
代码开始
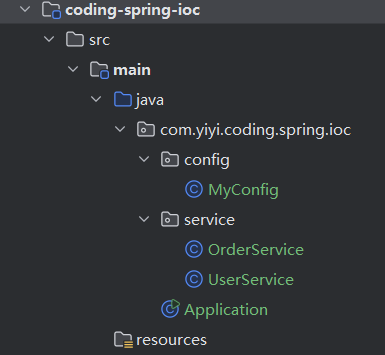
目录结构:
S1: 引入依赖
implementation("org.springframework:spring-context:7.0.1")
S2: 启动类,统一命名为 Application 类。
Spring IOC的上下文,采用注解配置的上下文(企业级项目几乎是这种,忽略 xml配置的上下文):AnnotationConfigApplicationContext
主要代码逻辑:
①. 创建一个 AnnotationConfigApplicationContext 的上下文;
②. 注册一个配置类 MyConfig.class;
③. 刷新容器 .refresh() ;
④. 从容器获取需要的 Bean 对象。
第一篇文章给出了所有的代码,如下(以后的文章代码部分一般只给出关键代码):
package com.yiyi.coding.spring.ioc;
import com.yiyi.coding.spring.ioc.config.MyConfig;
import com.yiyi.coding.spring.ioc.service.OrderService;
import com.yiyi.coding.spring.ioc.service.UserService;
import org.springframework.context.annotation.AnnotationConfigApplicationContext;
import java.util.Map;

public class Application {
    static void main() {
        AnnotationConfigApplicationContext applicationContext = new AnnotationConfigApplicationContext();
        applicationContext.register(MyConfig.class);
        applicationContext.refresh();
        UserService userService = applicationContext.getBean(UserService.class);
        userService.test();

        for( Map.Entry<String,OrderService> entry : applicationContext.getBeansOfType(OrderService.class).entrySet() ){
            System.out.println(entry.getKey() + " : " + entry.getValue());
        }
    }
}
S3: 创建配置类 MyConfig,并采用包扫描(@ComponentScan),即包扫描下的类会被按某种注解方式注入到Spring容器中。
package com.yiyi.coding.spring.ioc.config;

import com.yiyi.coding.spring.ioc.service.OrderService;
import com.yiyi.coding.spring.ioc.service.UserService;
import org.springframework.context.annotation.Bean;
import org.springframework.context.annotation.ComponentScan;
import org.springframework.context.annotation.Configuration;
import org.springframework.context.annotation.Import;

@ComponentScan("com.yiyi.coding.spring.ioc")
@Configuration
@Import(UserService.class)
public class MyConfig {

    @Bean
    public OrderService orderService2(){
        return new OrderService();
    }
}
S4:需要被Spring容器注入管理的类,要添加@Component的注解(@Component有很多别名,如@Service就是其中之一):
@Component @Service (从源码得知是@Component的别名,附上源码)
@Target(ElementType.TYPE)
@Retention(RetentionPolicy.RUNTIME)
@Documented
@Component
public @interface Service {

	/**
	 * Alias for {@link Component#value}.
	 */
	@AliasFor(annotation = Component.class)
	String value() default "";

}
我们以 UserService 为例,并且需要让容器给我们注入 OrderService
package com.yiyi.coding.spring.ioc.service;

import org.springframework.beans.factory.annotation.Autowired;
import org.springframework.stereotype.Service;

// @Component
@Service
public class UserService {

    @Autowired
    private OrderService orderService;

    public void test(){
        System.out.println(orderService.demo());
    }
}
package com.yiyi.coding.spring.ioc.service;
import org.springframework.stereotype.Service;

@Service
public class OrderService {
    public String demo(){
        return "My is OrderService" ;
    }
}


 634
634

 被折叠的 条评论
为什么被折叠?
被折叠的 条评论
为什么被折叠?
 到【灌水乐园】发言


