


 本文详细介绍如何在Linux环境下,交叉编译OpenCV-3.2.0及其所需依赖库的过程,包括zlib、libjpeg、libpng、yasm、libx264、libxvid和ffmpeg等。
借鉴网址为:https://blog.youkuaiyun.com/KayChanGEEK/article/details/78550141
首先,解压OpenCV源码,OpenCV源码版本为OpenCV-3.2.0,可以从官网下载,相关的依赖库和源码包我已经打包好上传到百度云盘,也可以直接从此处百度云盘下载,链接:https://pan.baidu.com/s/1BQUpT2AlO4JdhT45F7jB8Q 密码:5cf7
解压OpenCV源码和依赖库源码
1.解压源码,在/home目录下粘贴此源码,此时home目录下多出来opencv-3.2.0文件。
2.然后,在/home目录新增文件夹名字为opencv,在/home/opencv目录下再新建两个文件夹,名字为opencv-depend和opencv-install。
3.将OpenCV第三方依赖库放到opencv-install文件夹,然后进行解压。需要的依赖库有libz,libjpeg, libpng,libyas, libx264,libxvid,lffmpeg。解压后如图所示。(注:解压.tart.gz使用命令tar -zxvf xxx.tar.gz,解压.tar.bz2使用命令tar -jxvf xxx.tar.bz2,解压.tar.xz先用xz -d xxx.tar.xz,这时候会输出对应的.tar文件,再用tar -xvf xxx.tar解压即可。)
交叉编译依赖库:
1.交叉编译zlib依赖库。
1)进入依赖库解压路径
cd opencv-install/
2)新建脚本文件crosszlib.sh
touch crosszlib.sh
3)将脚本文件的权限设置为可写,可读,可执行
chmod 777 crosszlib.sh
4)vi编辑脚本,编译脚本:首先设置CC,AR,RANLIB并用命令生成Makefile文件(注:一定要用一行命令,不能添加换行符)。然后 make,make install.其中CC为gcc编译器的绝对路径,AR为ar编译器的绝对路径,RANLIB也为绝对路径。make,和make install 指令需要换行符。
脚本文件内容为:
CC=/home/zhy/gcc-4.6.2-glibc-2.13-linaro-multilib-2011.12/fsl-linaro-toolchain/bin/arm-none-linux-gnueabi-gcc AR=/home/zhy/gcc-4.6.2-glibc-2.13-linaro-multilib-2011.12/fsl-linaro-toolchain/bin/arm-none-linux-gnueabi-ar RANLIB=/home/zhy/gcc-4.6.2-glibc-2.13-linaro-multilib-2011.12/fsl-linaro-toolchain/bin/arm-none-linux-gnueabi-ranlib ./configure --prefix=/home/zhy/opencv/opencv-depend/ --shared
make
make install
脚本文件为:https://download.youkuaiyun.com/download/yybhahaha/11504193
5).运行脚本
./crosszlib.sh
2.交叉编译libjpeg依赖库。
1)进入libjpeg目录下面
cd jpeg-9b/
2)新建脚本crosslibjpeg.sh
touch crosslibjpeg.sh
3).权限修改为可读可写,可执行。
chmod 777 crosslibjpeg.sh
4).vi编辑脚本
CC=/home/zhy/gcc-4.6.2-glibc-2.13-linaro-multilib-2011.12/fsl-linaro-toolchain/bin/arm-none-linux-gnueabi-gcc AR=/home/zhy/gcc-4.6.2-glibc-2.13-linaro-multilib-2011.12/fsl-linaro-toolchain/bin/arm-none-linux-gnueabi-ar RANLIB=/home/zhy/gcc-4.6.2-glibc-2.13-linaro-multilib-2011.12/fsl-linaro-toolchain/bin/arm-none-linux-gnueabi-ranlib ./configure --host=arm-linux --prefix=/home/zhy/opencv/opencv-depend/ --enable-shared --enable-static
make
make install
脚本文件:https://download.youkuaiyun.com/download/yybhahaha/11504173
5).运行脚本
./crosslibjpeg.sh
3.交叉编译libpng
1)进入libpng目录下面
cd libpng-1.6.32/
2)新建脚本crosslibpng.sh
touch crosslibpng.sh
3)权限修改为可读可写,可执行。
chmod 777 crosslibpng.sh
4)vi编辑脚本
export LDFLAGS="-L/home/zhy/opencv/opencv-depend/lib"
export CPPFLAGS="-I /home/zhy/opencv/opencv-depend/include"
CC=/home/zhy/gcc-4.6.2-glibc-2.13-linaro-multilib-2011.12/fsl-linaro-toolchain/bin/arm-none-linux-gnueabi-gcc AR=/home/zhy/gcc-4.6.2-glibc-2.13-linaro-multilib-2011.12/fsl-linaro-toolchain/bin/arm-none-linux-gnueabi-ar RANLIB=/home/zhy/gcc-4.6.2-glibc-2.13-linaro-multilib-2011.12/fsl-linaro-toolchain/bin/arm-none-linux-gnueabi-ranlib ./configure --host=arm-linux --prefix=/home/zhy/opencv/opencv-depend --enable-shared --enable-static
make
make install
脚本文件:https://download.youkuaiyun.com/download/yybhahaha/11504175
5).运行脚本
./crosslibpng.sh
4.交叉编译yasm
1)进入libpng目录下面
cd yasm-1.3.0/
2)新建脚本crosslibpng.sh
touch crossyasm.sh
3)权限修改为可读可写,可执行。
chmod 777 crossyasm.sh
4)vi编辑脚本
CC=/home/zhy/gcc-4.6.2-glibc-2.13-linaro-multilib-2011.12/fsl-linaro-toolchain/bin/arm-none-linux-gnueabi-gcc AR=/home/zhy/gcc-4.6.2-glibc-2.13-linaro-multilib-2011.12/fsl-linaro-toolchain/bin/arm-none-linux-gnueabi-ar RANLIB=/home/zhy/gcc-4.6.2-glibc-2.13-linaro-multilib-2011.12/fsl-linaro-toolchain/bin/arm-none-linux-gnueabi-ranlib ./configure --host=arm-linux --prefix=/home/zhy/opencv/opencv-depend --enable-shared --enable-static
make
make install
脚本文件:https://download.youkuaiyun.com/download/yybhahaha/11504190
5).运行脚本
./crossyasm.sh
5.交叉编译libx264
1)进入libx264目录下面
cd x264-snapshot-20171114-2245/
2)新建脚本crosslibx264.sh
touch crosslibx264.sh
3)权限修改为可读可写,可执行。
chmod 777 crosslibx264.sh
4)vi编辑脚本
CC=/home/zhy/gcc-4.6.2-glibc-2.13-linaro-multilib-2011.12/fsl-linaro-toolchain/bin/arm-none-linux-gnueabi-gcc AR=/home/zhy/gcc-4.6.2-glibc-2.13-linaro-multilib-2011.12/fsl-linaro-toolchain/bin/arm-none-linux-gnueabi-ar RANLIB=/home/zhy/gcc-4.6.2-glibc-2.13-linaro-multilib-2011.12/fsl-linaro-toolchain/bin/arm-none-linux-gnueabi-ranlib ./configure --host=arm-linux --disable-asm --prefix=/home/zhy/opencv/opencv-depend --enable-shared --disable-asm
make
make install
脚本文件为:https://download.youkuaiyun.com/download/yybhahaha/11504179
5).运行脚本
./crosslibx264.sh
6.交叉编译libxvid
1)进入libxvid目录下,然后进入子目录build,然后进入其子目录下的generic目录
cd /xvidcore-1.3.3/build/generic
2)新建脚本crosslibxvid.sh
touch crosslibxvid.sh
3)权限修改为可读可写,可执行。
chmod 777 crosslibxvid.sh
4)vi编辑脚本
CC=/home/zhy/gcc-4.6.2-glibc-2.13-linaro-multilib-2011.12/fsl-linaro-toolchain/bin/arm-none-linux-gnueabi-gcc AR=/home/zhy/gcc-4.6.2-glibc-2.13-linaro-multilib-2011.12/fsl-linaro-toolchain/bin/arm-none-linux-gnueabi-ar RANLIB=/home/zhy/gcc-4.6.2-glibc-2.13-linaro-multilib-2011.12/fsl-linaro-toolchain/bin/arm-none-linux-gnueabi-ranlib ./configure --host=arm-linux --prefix=/home/zhy/opencv/opencv-depend --disable-assembly
make
make install
脚本文件为:https://download.youkuaiyun.com/download/yybhahaha/11504185
5).运行脚本
./crosslibxvid.sh
7.交叉编译ffmpeg
1)进入libxvid目录下,然后进入子目录build,然后进入其子目录下的generic目录
cd ffmpeg-3.4/
2)新建脚本crossffmpeg.sh
touch crossffmpeg.sh
3)权限修改为可读可写,可执行。
chmod 777 crossffmpeg.sh
4)vi编辑脚本
CC=/home/zhy/gcc-4.6.2-glibc-2.13-linaro-multilib-2011.12/fsl-linaro-toolchain/bin/arm-none-linux-gnueabi-gcc AR=/home/zhy/gcc-4.6.2-glibc-2.13-linaro-multilib-2011.12/fsl-linaro-toolchain/bin/arm-none-linux-gnueabi-ar RANLIB=/home/zhy/gcc-4.6.2-glibc-2.13-linaro-multilib-2011.12/fsl-linaro-toolchain/bin/arm-none-linux-gnueabi-ranlib
./configure --prefix=/home/zhy/opencv/opencv-depend --enable-shared --disable-static --enable-gpl --enable-cross-compile --arch=arm --disable-stripping --target-os=linux --enable-libx264 --enable-libxvid --cc=/home/zhy/gcc-4.6.2-glibc-2.13-linaro-multilib-2011.12/fsl-linaro-toolchain/bin/arm-none-linux-gnueabi-gcc --enable-swscale --extra-ldflags=-L/home/zhy/opencv/opencv-depend/lib --extra-cflags=-I/home/zhy/opencv/opencv-depend/include
make
make install
脚本文件为:https://download.youkuaiyun.com/download/yybhahaha/11504170
5).运行脚本
./crossffmpeg.sh
这样,所有的依赖库就安装完成了。安装完成后,在安装依赖库的路径下面会出现4个文件,

bin文件目录下
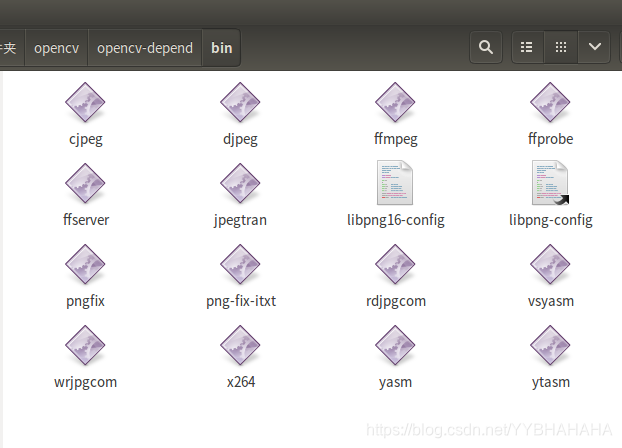
至此,依赖包就安装完成了。


 1354
1354

 被折叠的 条评论
为什么被折叠?
被折叠的 条评论
为什么被折叠?
 到【灌水乐园】发言


